Love this? Save it for later!
Share the inspiration with your friends
“You know that moment when a simple snack turns into a whole experience? That’s exactly what happened one rainy Saturday afternoon at my friend Leila’s place. She wasn’t trying to impress anyone—just casually spreading some creamy Lebanese hummus on warm pita while the rain tapped on the window. The kitchen smelled faintly of toasted za’atar and garlic, and honestly, I was hooked from the first bite. The hummus was unlike any I’d had before: silky smooth, rich with lemon and tahini, and topped with a vibrant drizzle of za’atar oil and whole chickpeas that added a surprising pop of texture.
Leila told me this wasn’t just any hummus; it was a family recipe passed down from her grandmother in Beirut. She laughed as she admitted she’d almost forgotten the details until I insisted she write it down. That cracked, slightly stained recipe card has since become a staple in my kitchen, especially on those lazy evenings when comfort food feels like a necessity. Maybe you’ve been there, craving something both familiar and a little exotic, something that feels like a warm hug on a plate. That’s exactly why this creamy Lebanese hummus with za’atar oil & chickpeas stayed with me—it’s simple, satisfying, and a little bit magical.”
Why You’ll Love This Recipe
This creamy Lebanese hummus recipe with za’atar oil and chickpeas isn’t just another dip; it’s a blend of tradition, bold flavors, and textures that work perfectly together. After testing and tweaking it several times in my kitchen, I can say it’s a winner for so many reasons:
- Quick & Easy: Ready in under 20 minutes, it’s perfect for spontaneous get-togethers or a quick snack fix.
- Simple Ingredients: You probably already have most of these in your pantry, no last-minute grocery runs needed.
- Perfect for Entertaining: Whether it’s a casual brunch or a dinner party appetizer, it always impresses without stress.
- Crowd-Pleaser: Kids, adults, and even hummus skeptics have given it rave reviews.
- Unbelievably Delicious: The creamy base combined with the herbaceous, slightly tangy za’atar oil is a combo you won’t forget.
What makes this recipe stand out is the za’atar oil drizzle—a simple mix of olive oil and the iconic Middle Eastern spice blend—that adds a fragrant earthiness and a touch of zing. Plus, tossing whole chickpeas on top adds a delightful contrast to the smooth hummus. Honestly, it’s those little touches that turn a basic dip into something memorable. This isn’t just hummus; it’s an invitation to savor tradition with every bite.
What Ingredients You Will Need
This recipe uses straightforward, wholesome ingredients to create a bold flavor profile and creamy texture without a fuss. Most are pantry staples with a few Middle Eastern essentials that you can find easily in international markets or online.
- For the Hummus Base:
- 1 ½ cups (250g) canned chickpeas, drained and rinsed (reserve a few whole for garnish)
- ¼ cup (60ml) tahini (I like the brand Al Wadi for its smoothness)
- 3 tablespoons (45ml) fresh lemon juice (about 1 large lemon)
- 2 cloves garlic, minced (adjust to taste)
- ½ teaspoon ground cumin (adds subtle warmth)
- ½ teaspoon fine sea salt
- 3 tablespoons (45ml) cold water (or more, for desired consistency)
- 2 tablespoons (30ml) extra virgin olive oil (plus more for serving)
- For the Za’atar Oil:
- 3 tablespoons (45ml) extra virgin olive oil
- 1 tablespoon (7g) za’atar spice blend (choose a fresh, fragrant mix from a trusted source)
- Garnish:
- Reserved whole chickpeas
- Fresh parsley leaves (optional, for color and freshness)
- Pinch of smoked paprika or sumac (optional, adds a pop of color and flavor)
If you don’t have tahini on hand, you can substitute with almond butter for a slightly different but delicious twist. Also, feel free to swap canned chickpeas for cooked dried ones if you prefer; just make sure they’re soft and creamy. Za’atar is the star here, so investing in a quality blend will make a big difference. If you want to make this gluten-free, check your za’atar blend for any wheat additives.
Equipment Needed
- Food processor or high-speed blender – essential for getting that ultra-smooth hummus texture. I’ve found a Vitamix or KitchenAid food processor works wonders, but a smaller, budget-friendly option like a NutriBullet can do the job too.
- Measuring cups and spoons – for accuracy in balancing flavors.
- Mixing bowls – for combining the za’atar oil and final garnishes.
- Spoon or spatula – to scrape down sides and to spread the hummus on the serving plate.
- Small saucepan or microwave-safe bowl – to warm the olive oil for the za’atar oil (warming helps release the spices’ aroma).
If you don’t have a food processor, a sturdy blender or even a hand masher can work, but you’ll lose some of the creaminess. I once tried mashing by hand after a power outage, and it was a workout, but edible! Keeping your equipment clean and dry makes a big difference in texture, especially for the tahini—it loves to stay smooth and lump-free.
Preparation Method
- Prepare the Chickpeas: Drain and rinse 1 ½ cups (250g) canned chickpeas under cold water. Set aside a small handful of whole chickpeas for garnish. This step ensures your hummus won’t taste too “canned” and will be fresh and bright. (5 minutes)
- Blend the Base: In your food processor, combine the rinsed chickpeas, ¼ cup (60ml) tahini, 3 tablespoons (45ml) fresh lemon juice, 2 minced garlic cloves, ½ teaspoon ground cumin, and ½ teaspoon sea salt. Pulse until the mixture begins to come together. Don’t worry if it looks chunky at this point. (3-4 minutes)
- Add Liquids: While blending on low speed, slowly drizzle in 3 tablespoons (45ml) cold water and 2 tablespoons (30ml) olive oil. This helps loosen the mixture and create that signature creamy texture. If your hummus seems too thick, add water one tablespoon at a time until it reaches your desired consistency. (2 minutes)
- Taste and Adjust: Stop the processor and taste the hummus. Add more lemon juice, garlic, or salt if needed. This is your chance to tailor it to your preference—maybe you want it tangier or with a stronger garlic punch. (1-2 minutes)
- Make the Za’atar Oil: In a small bowl, gently warm 3 tablespoons (45ml) olive oil (about 20 seconds in the microwave or over low heat). Stir in 1 tablespoon (7g) za’atar spice blend until fragrant. This aromatic oil will be drizzled over the finished hummus for that signature Middle Eastern flair. (3 minutes)
- Assemble and Garnish: Spread the creamy hummus on a shallow serving plate, creating a slight well in the center. Drizzle za’atar oil generously over the top. Scatter the reserved whole chickpeas and sprinkle fresh parsley leaves and a pinch of smoked paprika or sumac if using. (3 minutes)
- Serve: Pair with warm pita bread, fresh veggies, or use as a sandwich spread. This hummus tastes best fresh but can be chilled for up to 3 days. (Immediate)
Pro tip: If your hummus feels grainy, keep blending—it usually smooths out after a minute or two. Also, using cold water instead of warm helps keep the tahini from seizing up. I once got distracted mid-blend and ended up with a thicker dip, so watch that time!
Cooking Tips & Techniques
Getting hummus just right can feel tricky, but these tips will save you from common pitfalls:
- Use Cold Water: Adding cold water gradually while blending keeps the tahini smooth and lightens the texture without thinning it too much.
- Peel Chickpeas for Extra Creaminess: If you have time, gently pinch the skins off each chickpea before blending. It’s tedious but results in an ultra-silky hummus. I do this when making hummus for special occasions.
- Balance Flavors Carefully: Lemon juice and garlic can be overpowering; add them slowly and taste frequently. You want the brightness without biting acidity.
- Warm the Olive Oil: Heating the olive oil slightly before mixing it with za’atar amplifies the spices’ aroma and flavor.
- Don’t Over-Blending: Blend just enough to get smoothness but avoid overheating the mixture, which can cause bitterness from the tahini.
- Multitasking: While the hummus blends, prepare your garnishes or warm pita bread so everything comes together seamlessly for serving.
Once, I forgot to add lemon juice and ended up with a dull hummus that needed serious rescuing. Lesson learned: layering flavors is key. Also, using a sturdy food processor instead of a blender prevents overworking the mixture.
Variations & Adaptations
This creamy Lebanese hummus is versatile and easy to adapt based on your pantry, taste, or dietary needs:
- Spicy Za’atar Hummus: Add a pinch of cayenne or Aleppo pepper to the hummus base for a gentle heat that complements the za’atar oil.
- Roasted Garlic Version: Swap raw garlic for roasted garlic cloves to mellow the flavor and add sweetness.
- Vegan and Gluten-Free: This recipe is naturally vegan and gluten-free, but double-check your za’atar blend for any gluten-containing additives.
- Seasonal Twist: In summer, fold in chopped fresh mint or parsley to brighten the dip even more.
- Different Cooking Methods: If you prefer, you can cook dried chickpeas instead of canned, soaking them overnight and boiling until tender—a bit more time, but worth it for flavor.
Personally, I once added a little smoked paprika right into the hummus for a smoky undertone that really turned heads at a picnic. Feel free to experiment with toppings like toasted pine nuts or caramelized onions for a twist.
Serving & Storage Suggestions
Serve this creamy Lebanese hummus at room temperature for the best flavor and texture. Spread it on a beautiful plate, drizzle the za’atar oil just before serving, and scatter the whole chickpeas and herbs for a stunning presentation. It pairs wonderfully with warm pita, crunchy cucumber slices, or even as a sauce for grilled meats or vegetables.
Store leftovers in an airtight container in the refrigerator for up to 3 days. The flavors actually deepen after a day, and the hummus thickens slightly—just stir in a teaspoon of water or olive oil before serving again. To reheat, bring to room temperature or warm gently in a microwave, but avoid overheating to keep the texture intact.
If you want to freeze it (not my favorite), do so without the oil drizzle and garnish. Thaw overnight in the fridge and stir well before serving.
Nutritional Information & Benefits
This hummus recipe is not only delicious but also packed with nutrition. Chickpeas provide plant-based protein and fiber, making it a filling and healthy snack or side. Tahini adds heart-healthy fats and a dose of calcium, while olive oil contributes antioxidants and monounsaturated fats.
Per serving (about ¼ cup / 60g), you can expect roughly 150 calories, 7g fat, 8g carbs, and 4g protein. It’s naturally gluten-free and vegan, making it suitable for various dietary needs. The lemon juice offers a boost of vitamin C, and the za’atar spices bring their own antioxidant benefits, creating a nutrient-dense, wholesome dish that feels indulgent but is pretty guilt-free.
Conclusion
If you’re looking for a creamy, flavorful, and authentic Lebanese hummus recipe, this one delivers every time. The combination of silky smooth chickpeas, zesty tahini, and that unforgettable za’atar oil drizzle makes it stand out from the usual dips. Honestly, it’s become a go-to recipe for me when I want something quick but special.
Feel free to tweak the garlic, lemon, or spice levels to suit your taste. I love hearing how readers make it their own, so please share your versions or questions in the comments below. Let this hummus be a simple way to bring a touch of Middle Eastern warmth to your table.
Remember, good food is all about sharing and enjoying those little moments together—so spread this hummus generously and savor every bite!
FAQs
What is the best way to store leftover hummus?
Store hummus in an airtight container in the refrigerator for up to 3 days. Stir before serving, and add a little water or olive oil if it thickens.
Can I make this hummus without a food processor?
Yes, you can mash chickpeas by hand with a fork or potato masher, but expect a chunkier texture. A blender can also work but blend in short bursts to avoid overheating.
What can I substitute if I don’t have za’atar?
Try a mix of thyme, sumac, sesame seeds, and oregano as a homemade blend. While not identical, it captures similar herbal and tangy notes.
Is tahini necessary for authentic hummus?
Tahini adds a rich, nutty flavor and creamy texture essential to traditional hummus. You can substitute with almond or cashew butter if needed, but the flavor will vary.
Can I prepare this hummus ahead of time?
Absolutely! Make it a few hours or a day ahead to let the flavors meld. Just add the za’atar oil and garnishes right before serving for the best presentation.
Pin This Recipe!

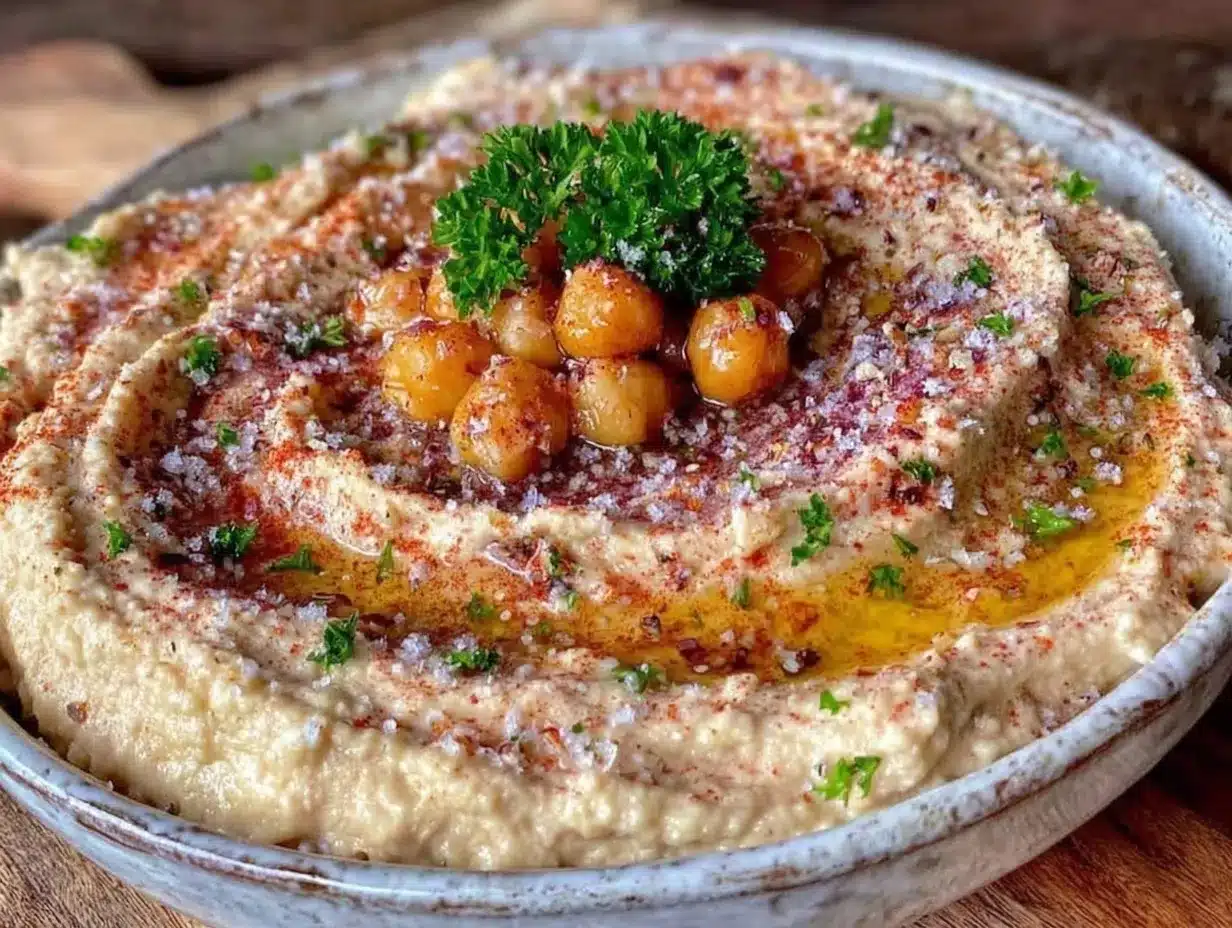
Creamy Lebanese Hummus Recipe with Zaatar Oil and Chickpeas Easy and Perfect

A silky smooth, creamy Lebanese hummus rich with lemon and tahini, topped with a vibrant drizzle of za’atar oil and whole chickpeas for a delightful texture. This traditional family recipe is quick, easy, and perfect for entertaining.
- Prep Time: 10 minutes
- Cook Time: 10 minutes
- Total Time: 20 minutes
- Yield: 6 servings 1x
- Category: Appetizer
- Cuisine: Lebanese, Middle Eastern
Ingredients
- 1 ½ cups (250g) canned chickpeas, drained and rinsed (reserve a few whole for garnish)
- ¼ cup (60ml) tahini
- 3 tablespoons (45ml) fresh lemon juice (about 1 large lemon)
- 2 cloves garlic, minced
- ½ teaspoon ground cumin
- ½ teaspoon fine sea salt
- 3 tablespoons (45ml) cold water (or more, for desired consistency)
- 2 tablespoons (30ml) extra virgin olive oil (plus more for serving)
- 3 tablespoons (45ml) extra virgin olive oil (for za’atar oil)
- 1 tablespoon (7g) za’atar spice blend
- Reserved whole chickpeas (for garnish)
- Fresh parsley leaves (optional, for garnish)
- Pinch of smoked paprika or sumac (optional, for garnish)
Instructions
- Drain and rinse 1 ½ cups (250g) canned chickpeas under cold water. Set aside a small handful of whole chickpeas for garnish. (5 minutes)
- In a food processor, combine rinsed chickpeas, ¼ cup (60ml) tahini, 3 tablespoons (45ml) fresh lemon juice, 2 minced garlic cloves, ½ teaspoon ground cumin, and ½ teaspoon sea salt. Pulse until mixture begins to come together. (3-4 minutes)
- While blending on low speed, slowly drizzle in 3 tablespoons (45ml) cold water and 2 tablespoons (30ml) olive oil. Add more water one tablespoon at a time if needed for desired consistency. (2 minutes)
- Stop the processor and taste the hummus. Adjust lemon juice, garlic, or salt as desired. (1-2 minutes)
- In a small bowl, gently warm 3 tablespoons (45ml) olive oil (about 20 seconds in microwave or over low heat). Stir in 1 tablespoon (7g) za’atar spice blend until fragrant. (3 minutes)
- Spread the creamy hummus on a shallow serving plate, creating a slight well in the center. Drizzle za’atar oil generously over the top. Scatter reserved whole chickpeas and sprinkle fresh parsley leaves and a pinch of smoked paprika or sumac if using. (3 minutes)
- Serve immediately with warm pita bread, fresh veggies, or as a sandwich spread. Can be chilled for up to 3 days.
Notes
Use cold water gradually while blending to keep tahini smooth. Peeling chickpeas before blending yields extra creaminess. Warm olive oil slightly before mixing with za’atar to release aroma. Avoid over-blending to prevent bitterness. If no food processor, mash by hand but expect chunkier texture.
Nutrition
- Serving Size: About 1/4 cup (60g)
- Calories: 150
- Fat: 7
- Carbohydrates: 8
- Protein: 4
Keywords: hummus, Lebanese hummus, zaatar oil, chickpeas, tahini, Middle Eastern dip, creamy hummus, vegan, gluten-free


