Love this? Save it for later!
Share the inspiration with your friends
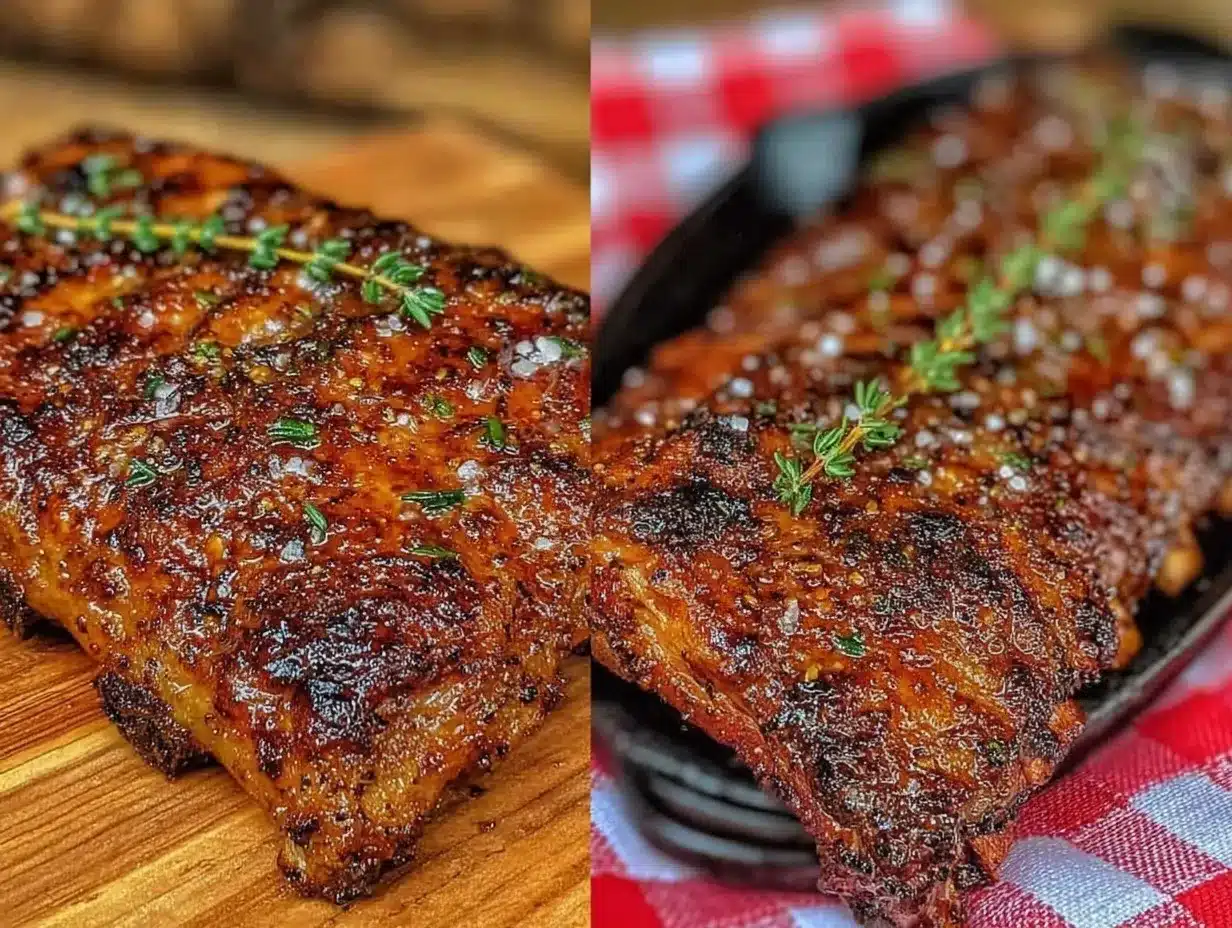
“You ever get that smell that just pulls you right to the backyard?” That was me one late summer afternoon, standing by my neighbor Joe’s fence while he tended a slow-smoke pit. Joe’s a quiet guy, not much for bragging, but when he cracked open that foil-wrapped slab of ribs after four hours of smoking, the aroma was like a magnet. Honestly, I wasn’t expecting much—just another BBQ attempt—but that first bite of his classic old-fashioned 4-hour dry rub spare ribs was something else. The meat was tender enough to fall off the bone, yet the dry rub packed a punch of smoky, sweet, and spicy flavors that stuck with me long after the day was done.
Joe shared his recipe with me that day, scribbled on an old, grease-stained index card he pulled from his grill box. I tried it myself, messing up the timing the first time (forgot to wrap the ribs!), but after a few tweaks, it became my go-to for weekend cookouts. Maybe you’ve been there—wanting that perfect BBQ rib that’s effortless but still makes you feel like you’ve got chef-level skills. Let me tell you, this recipe’s stayed with me because it hits that sweet spot: classic flavors, simple prep, and a slow-cooked tenderness that’s hard to beat. So whether you’re a backyard beginner or a seasoned pitmaster, these ribs are about to be your new favorite.
Why You’ll Love This Recipe
After countless cookouts and recipe trials, I can confidently say this classic old-fashioned 4-hour dry rub spare ribs recipe checks all the boxes. It’s not just my neighbor Joe’s secret—it’s a crowd-pleaser that’s easy enough for anyone to master. Here’s why it stands out:
- Slow and Simple: The 4-hour slow cook lets the ribs soak up flavor and become incredibly tender without constant babysitting.
- Minimal Ingredients: You likely have everything for the dry rub right in your pantry—no fancy spice hunts required.
- Perfect for Any Occasion: Whether it’s a casual family dinner or a weekend BBQ party, these ribs impress without stress.
- Rich, Layered Flavor: The blend of smoked paprika, brown sugar, and a hint of cayenne hits a perfect balance of sweet, smoky, and spicy.
- Proven Technique: Tested over multiple seasons, the low-and-slow method combined with a dry rub avoids the mess of sticky sauces but still delivers juicy ribs.
What makes this recipe truly different is the way the dry rub forms a flavorful bark that seals in juices and adds a subtle crunch. It’s not your typical saucy ribs, but honestly, that’s the magic—no sticky fingers required unless you want them! Plus, this is a recipe that invites creativity—you can tweak the rub to your liking or add a glaze at the end if you feel adventurous.
So, if you’re ready to savor ribs that taste like they’ve been smoked for hours but don’t need a full day’s commitment, this recipe’s got your back. It’s the kind of classic BBQ that makes you close your eyes and smile after the first bite.
What Ingredients You Will Need
This recipe focuses on simple, pantry-friendly ingredients that combine for a robust, old-fashioned flavor profile. The dry rub is the star here, designed to complement the natural richness of spare ribs without overpowering them.
- Spare Ribs: 2 racks (about 4-5 pounds / 1.8-2.3 kg) of pork spare ribs, trimmed of excess fat for even cooking
- Brown Sugar: 1/4 cup (50 g), packed – adds sweetness and helps create that caramelized crust
- Paprika: 2 tablespoons – I prefer smoked paprika for a deeper smoky flavor, but regular works fine too
- Salt: 1 tablespoon – kosher salt is ideal for even seasoning
- Black Pepper: 1 tablespoon, freshly ground for best aroma
- Garlic Powder: 1 tablespoon – gives a savory depth
- Onion Powder: 1 tablespoon – balances the garlic with a hint of sweetness
- Cayenne Pepper: 1/2 teaspoon – optional but adds a subtle kick (adjust to taste)
- Chili Powder: 1 teaspoon – enhances the smoky warmth
- Mustard Powder: 1 teaspoon – helps tenderize and adds mild tang
- Olive Oil or Neutral Oil: 1 tablespoon – to lightly coat ribs before applying rub, helps it stick
Substitution tip: For a gluten-free version, double-check your chili powder and paprika labels for cross-contamination. If you don’t have spare ribs, baby back ribs work but might require a shorter cook time. And if you want to try a different sweetness level, swapping brown sugar for coconut sugar adds an earthy note.
Equipment Needed
- Oven or Smoker: The recipe works beautifully in a conventional oven or a smoker if you’re feeling fancy. I’ve tried both; the smoker adds authentic flavor, but the oven nails it with less fuss.
- Baking Sheet: A rimmed sheet pan to catch drippings and hold the ribs during cooking.
- Aluminum Foil: Essential for wrapping the ribs partway through to lock in moisture.
- Mixing Bowl: To blend the dry rub spices evenly.
- Meat Thermometer: Optional but helpful to check for tenderness (target internal temp ~190°F / 88°C).
- Sharp Knife: For trimming excess fat or membrane from ribs.
- Tongs: To handle ribs without piercing the meat.
If you don’t have a smoker, a cast-iron skillet or a grill pan can add a nice sear before slow roasting, but it’s not necessary. For budget-friendly options, you can use disposable aluminum pans instead of a rimmed baking sheet—just watch cooking times closely.
Preparation Method
- Prep Your Ribs (15 minutes): Start by removing the membrane from the back of the ribs. This thin, tough layer can block seasoning absorption and make ribs less tender. Use a paper towel to grip and peel it off in one piece. Trim any large fat chunks if you like, but a little fat adds flavor.
- Mix the Dry Rub (5 minutes): In a mixing bowl, combine brown sugar, paprika, salt, black pepper, garlic powder, onion powder, cayenne, chili powder, and mustard powder. Stir until evenly blended. The dry rub should smell spicy and sweet—a preview of the magic to come.
- Coat the Ribs (10 minutes): Lightly brush both sides of the ribs with olive oil to help the rub stick better. Generously sprinkle the dry rub over the ribs, pressing gently into the meat with your hands. Don’t be shy—this is what builds flavor and that signature bark.
- Rest the Ribs (optional, 30 minutes): For deeper flavor, let the rubbed ribs rest uncovered in the fridge for up to 30 minutes. This step isn’t mandatory but does help the rub penetrate.
- Preheat Oven or Smoker (15 minutes): Set your oven to 250°F (120°C) or prepare your smoker to maintain a steady 225-250°F (107-120°C). Low and slow is the key here, so patience is your friend.
- Cook the Ribs (2 hours): Place the ribs bone-side down on a rimmed baking sheet or smoker rack. Let them cook uncovered for about 2 hours. You’ll notice the meat starting to pull back from the bones, and the color turning a rich mahogany.
- Wrap and Continue Cooking (2 hours): After 2 hours, wrap the ribs tightly in aluminum foil. This traps moisture and tenderizes the meat. Return them to the oven or smoker and cook for another 2 hours. If you like, add a splash of apple juice or cider vinegar inside the foil for extra juiciness.
- Final Unwrap and Rest (15 minutes): Carefully unwrap the ribs and return them to the heat for 15 minutes uncovered. This firms up the bark and lets any final caramelization happen. Remove and let rest for about 10 minutes before slicing.
- Serve and Enjoy! Slice between the bones and serve with your favorite sides. The ribs should be tender, flavorful, and just the right amount of smoky.
Pro tip: If you notice the rub burning during the last step, lower the heat or tent loosely with foil. Cooking times can vary based on your oven or smoker, so keep an eye on the ribs’ texture and appearance.
Cooking Tips & Techniques
One thing I learned the hard way is that rushing ribs never works. You have to commit to the low and slow approach. That four-hour window lets the connective tissues break down, making the ribs melt-in-your-mouth tender.
Don’t skip the membrane removal—that’s a game-changer for tenderness. Also, applying the rub generously (but evenly) helps the spices form a tasty crust, sometimes called “bark.” I like to pat it on with my fingers rather than sprinkling to avoid clumps.
Wrapping the ribs halfway through is crucial. It prevents drying out and steams the meat just enough. Use heavy-duty foil to avoid leaks, and if you want a slightly tangy twist, adding a tablespoon or two of apple juice inside the wrap works wonders.
Be mindful of heat fluctuations—especially with smokers. I’ve had ribs take 3+ hours when the temperature dips, so patience is key. A meat thermometer reading around 190°F (88°C) signals that the collagen has broken down nicely.
Finally, resting the ribs after cooking lets the juices redistribute. I usually tent them loosely with foil for 10 minutes before slicing. This little step makes a big difference in juiciness.
Variations & Adaptations
If you want to mix things up, there are several ways to customize this classic old-fashioned 4-hour dry rub spare ribs recipe:
- Sweet & Sticky Glaze: Brush the ribs with a honey BBQ sauce or a homemade glaze during the last 15 minutes of cooking for a sticky, sweet finish.
- Spicy Kick: Double the cayenne or add chipotle powder for a smoky heat that wakes up the palate.
- Herb-Infused Rub: Add dried rosemary, thyme, or oregano to the rub for an herbal twist that pairs well with grilled veggies.
- Low-Sodium Version: Reduce the salt by half and boost flavor with garlic powder and smoked paprika to keep it tasty but heart-friendly.
- Oven-Free Option: If you don’t have an oven or smoker, try cooking the ribs in a slow cooker with the dry rub, wrapped tightly, then finishing on a grill or under the broiler for 10 minutes to crisp the edges.
Personally, I once swapped in maple sugar for brown sugar on a crisp fall day—added a lovely depth and sweetness that paired perfectly with roasted root vegetables. Feel free to experiment and find your perfect spin on this classic.
Serving & Storage Suggestions
These ribs are best served warm, fresh off the heat, with sides like coleslaw, baked beans, or grilled corn. A cold beer or a tangy lemonade pairs beautifully, cutting through the richness.
Leftovers? No problem. Wrap ribs tightly in foil or airtight containers and store in the fridge for up to 3 days. Reheat gently in a low oven (around 275°F / 135°C) covered with foil to keep them moist. Avoid microwaving if you can—it tends to dry out the meat.
If you want to store longer, these ribs freeze well for up to 3 months. Thaw overnight in the fridge before reheating. Interestingly, the flavors often deepen after a day or two in the fridge, so sometimes I make them a day ahead to serve on the weekend.
Nutritional Information & Benefits
This classic old-fashioned 4-hour dry rub spare ribs recipe provides a satisfying source of protein and essential nutrients like zinc and B vitamins from pork. The dry rub ingredients add flavor without extra calories or sugars common in sticky sauces.
While ribs are naturally higher in fat, trimming excess fat and pairing with fresh vegetables balances the meal. For those watching sodium, adjusting the salt in the rub is easy and still yields great taste.
This recipe fits well within a balanced diet when portioned mindfully. Plus, it’s a great way to enjoy comfort food without relying on heavy marinades or sugary glazes.
Conclusion
So, there you have it—classic old-fashioned 4-hour dry rub spare ribs that deliver big flavor with straightforward prep. This recipe has a special place in my heart (and my grill) because it brings together simple ingredients, patient cooking, and unforgettable results.
Feel free to tweak the dry rub or cooking method to suit your taste or schedule. And if you decide to try this recipe, I’d love to hear how it turns out for you—comments and tips from fellow rib lovers always make my day.
Now, grab those ribs, fire up your oven or smoker, and get ready for a BBQ experience that tastes like a celebration every time. Happy cooking!
FAQs
- How do I know when the ribs are done? The meat should be tender and pulling back from the bones, with an internal temperature around 190°F (88°C). If you can easily twist a bone, you’re good to go.
- Can I use baby back ribs instead of spare ribs? Yes! Baby back ribs cook a bit faster—around 3 hours total—so adjust your timing and check for tenderness earlier.
- Do I need to baste the ribs during cooking? No, the dry rub and foil wrapping keep the ribs moist. Basting can be added if you want a glaze finish, but it’s not required.
- What if I don’t have a smoker? No worries. This recipe works great in a conventional oven at low temperature for the same tender effect.
- Can I prepare the ribs ahead of time? Absolutely. Apply the rub and refrigerate the ribs for up to 24 hours before cooking to deepen flavor.
Pin This Recipe!
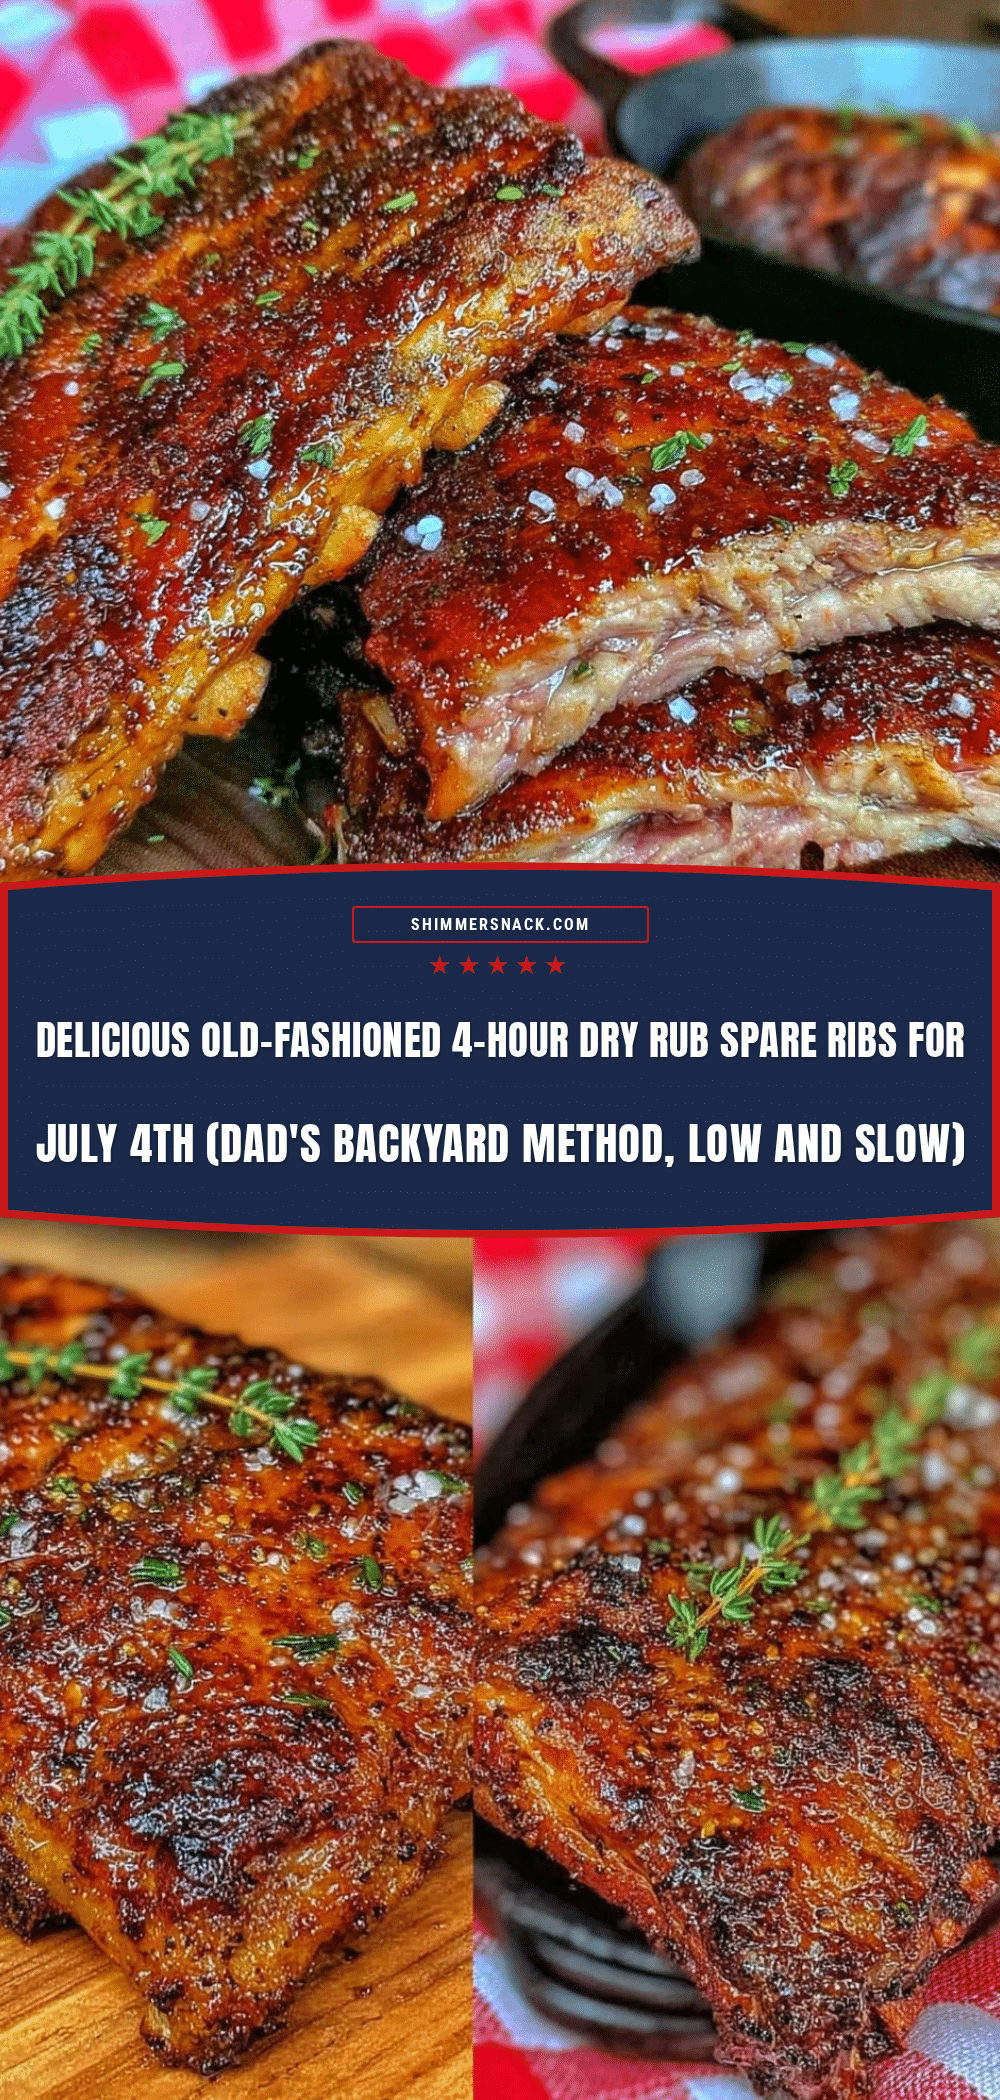
Classic Old-Fashioned 4-Hour Dry Rub Spare Ribs Recipe
A slow-cooked, tender spare ribs recipe featuring a smoky, sweet, and spicy dry rub that forms a flavorful bark without sticky sauces. Perfect for easy BBQ with minimal fuss.
- Prep Time: 30 minutes
- Cook Time: 4 hours 15 minutes
- Total Time: 4 hours 45 minutes
- Yield: 4-6 servings 1x
- Category: Main Course
- Cuisine: American
Ingredients
- 2 racks (about 4–5 pounds / 1.8-2.3 kg) pork spare ribs, trimmed of excess fat
- 1/4 cup (50 g) brown sugar, packed
- 2 tablespoons smoked paprika (or regular paprika)
- 1 tablespoon kosher salt
- 1 tablespoon freshly ground black pepper
- 1 tablespoon garlic powder
- 1 tablespoon onion powder
- 1/2 teaspoon cayenne pepper (optional)
- 1 teaspoon chili powder
- 1 teaspoon mustard powder
- 1 tablespoon olive oil or neutral oil
Instructions
- Prep Your Ribs (15 minutes): Remove the membrane from the back of the ribs using a paper towel to grip and peel it off in one piece. Trim any large fat chunks if desired.
- Mix the Dry Rub (5 minutes): In a mixing bowl, combine brown sugar, paprika, salt, black pepper, garlic powder, onion powder, cayenne, chili powder, and mustard powder. Stir until evenly blended.
- Coat the Ribs (10 minutes): Lightly brush both sides of the ribs with olive oil. Generously sprinkle the dry rub over the ribs, pressing gently into the meat.
- Rest the Ribs (optional, 30 minutes): Let the rubbed ribs rest uncovered in the fridge for up to 30 minutes for deeper flavor.
- Preheat Oven or Smoker (15 minutes): Set oven to 250°F (120°C) or smoker to 225-250°F (107-120°C).
- Cook the Ribs (2 hours): Place ribs bone-side down on a rimmed baking sheet or smoker rack and cook uncovered for about 2 hours.
- Wrap and Continue Cooking (2 hours): Wrap ribs tightly in aluminum foil, optionally adding a splash of apple juice or cider vinegar inside. Return to heat and cook for another 2 hours.
- Final Unwrap and Rest (15 minutes): Unwrap ribs and cook uncovered for 15 minutes to firm up the bark. Remove and let rest for 10 minutes before slicing.
- Serve and Enjoy: Slice between the bones and serve with your favorite sides.
Notes
Remove the membrane for tenderness. Wrap ribs halfway through cooking to lock in moisture. Use heavy-duty foil to avoid leaks. Optionally add apple juice or cider vinegar inside foil for juiciness. Rest ribs after cooking to redistribute juices. Adjust cayenne for spice level. Baby back ribs can be used but require shorter cook time (~3 hours total).
Nutrition
- Serving Size: About 1/2 rack per s
- Calories: 450
- Sugar: 12
- Sodium: 900
- Fat: 30
- Saturated Fat: 10
- Carbohydrates: 15
- Fiber: 1
- Protein: 35
Keywords: BBQ ribs, dry rub ribs, spare ribs recipe, slow cooked ribs, smoked ribs, easy BBQ, classic ribs, backyard BBQ


