Love this? Save it for later!
Share the inspiration with your friends
Introduction
“I wasn’t planning on making dessert that day,” I admit. It was one of those blazing July afternoons, and the last thing I wanted was to turn on the oven. But then my neighbor, June, popped over with a bowl of fresh strawberries she’d just picked from her garden. She casually mentioned, “You know, that old strawberry icebox cake recipe my grandma swore by? It’s perfect for a no-bake summer treat.” I’d heard of icebox cakes before, but honestly, I always thought they were a bit fussy or too sweet.
Well, let me tell you, watching June whip up that creamy classic strawberry icebox cake was nothing like my expectations. She layered those juicy strawberries with whipped cream and vanilla wafers like she’d done it a thousand times, chatting about how it was a potluck staple back in her hometown. I ended up helping her assemble it and—yes, I got a little messy with the whipped cream, because who can resist sneaking a bit?
That cake stayed in my mind for weeks. Maybe you’ve been there—craving something cool and creamy but easy enough to throw together without breaking a sweat. This recipe isn’t just a dessert; it’s a summer tradition in a bowl, perfect for potlucks where you want to impress without stress. And honestly, the best part is how it brings people together, sharing that sweet, nostalgic bite on a warm afternoon. So, here’s my take on June’s creamy classic strawberry icebox cake, just in time for your next summer gathering.
Why You’ll Love This Recipe
After giving this creamy classic strawberry icebox cake a whirl countless times, I’ve gathered plenty of reasons why it’s a summer must-have. It’s one of those recipes that feels fancy but really isn’t, which makes it a winner every time.
- Quick & Easy: You can have this dessert ready in under 20 minutes, then just let it chill while you enjoy the party.
- Simple Ingredients: No need for exotic or hard-to-find items. If you have strawberries, whipped cream, and vanilla wafers on hand, you’re good to go.
- Perfect for Summer Potlucks: It travels well and doesn’t melt into a sticky mess like some desserts under the sun.
- Crowd-Pleaser: Kids love it, adults adore it, and it’s always the first to disappear from the dessert table.
- Unbelievably Delicious: The creaminess mixed with fresh strawberries and the slight crunch of wafers is just next-level comfort food.
What makes this strawberry icebox cake stand out is the balance. I tweak the whipped cream just right—never too sweet, with a hint of vanilla—and slice the strawberries thin so every bite melts together. It’s not just another layered dessert; it’s the one that makes you pause, close your eyes, and savor that perfect summer sweetness. Whether you’re a potluck pro or just need a fuss-free dessert, this recipe’s got your back.
What Ingredients You Will Need
This creamy classic strawberry icebox cake uses straightforward ingredients that come together beautifully without any complicated prep. Most are pantry staples or fresh from your local market. Here’s what you’ll need:
- Fresh Strawberries: About 2 cups, hulled and thinly sliced. I prefer ripe but firm berries so they hold up well in the layers.
- Heavy Whipping Cream: 2 cups, cold. This is the base for the creamy filling—whip it fresh for the best texture.
- Granulated Sugar: 1/3 cup, to sweeten the whipped cream just right.
- Vanilla Extract: 1 teaspoon, pure vanilla extract is best for that warm, comforting flavor.
- Vanilla Wafers: Around 2 sleeves (about 90 wafers). I usually go with brands like Keebler for their crisp texture and perfect size.
- Lemon Zest (Optional): From 1 lemon, adds a bright pop that cuts through the richness.
If you want to make this recipe dairy-free, you can swap the heavy cream for full-fat coconut cream and use dairy-free vanilla wafers. For a gluten-free version, almond flour cookies or gluten-free vanilla wafers work well, though the texture changes a bit. Just keep in mind the fresh strawberries and whipped cream are the real stars here, so try to keep those as natural as possible.
Equipment Needed
Making this strawberry icebox cake doesn’t require a lot of fancy kitchen tools, which is part of its charm. Here’s what I usually pull out:
- Mixing Bowl: A large, chilled bowl for whipping the cream. I find metal bowls keep the cream cooler and whip better.
- Hand Mixer or Stand Mixer: To whip the cream to soft peaks quickly. You can use a whisk, but your arm might protest!
- Spatula: For folding in vanilla and sugar gently into the whipped cream.
- 9×13 Inch Baking Dish or Glass Pan: Perfect for layering the wafers, cream, and strawberries. Clear glass is great so you see those pretty layers.
- Knife and Cutting Board: For slicing strawberries thinly and evenly.
If you don’t have a mixer, I once whipped cream by hand with a balloon whisk while watching a neighbor’s dog outside (distracting, honestly). It took a bit longer but worked fine. Also, a serrated knife helps slice strawberries without squishing them—small tip from experience!
Preparation Method
- Prepare the Strawberries: Rinse, hull, and slice about 2 cups of fresh strawberries thinly. Set aside. (5 minutes)
- Chill Your Mixing Bowl and Whisk: Place your mixing bowl and whisk or beaters in the fridge for 10-15 minutes beforehand—cold tools help the cream whip faster.
- Make the Whipped Cream: Pour 2 cups of cold heavy whipping cream into the chilled bowl. Add 1/3 cup granulated sugar and 1 teaspoon vanilla extract. Beat on medium-high speed until soft to medium peaks form. (3-5 minutes)
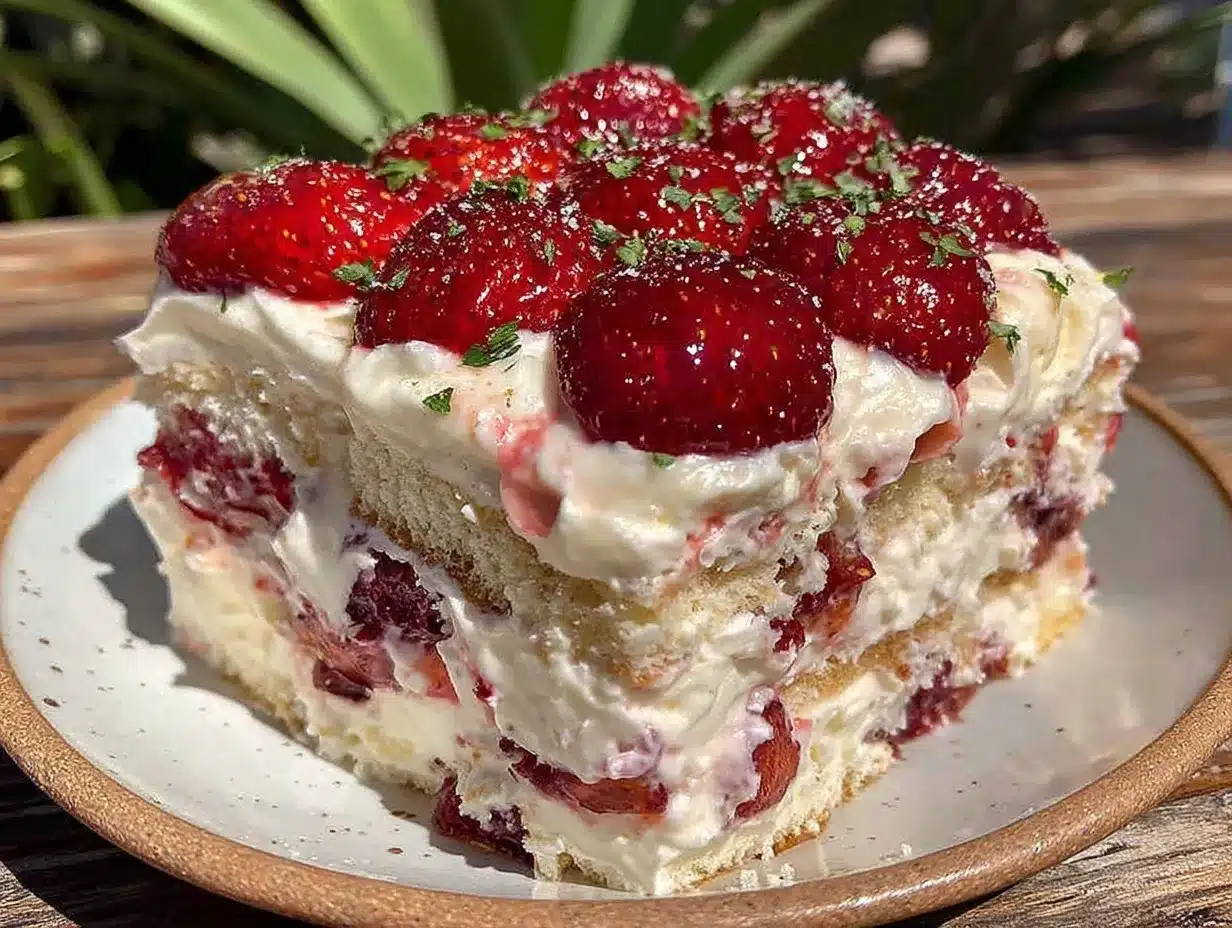
- Layer the Cake: In your 9×13 inch dish, start with a single layer of vanilla wafers covering the bottom. Spread a generous layer of whipped cream over the wafers, smoothing it out with a spatula.
- Add Strawberries: Distribute a layer of sliced strawberries evenly over the whipped cream. If you’re using lemon zest, sprinkle a little on top of the strawberries for brightness.
- Repeat Layers: Continue layering wafers, whipped cream, and strawberries until you run out of ingredients, finishing with a whipped cream layer on top. (Tip: Save a few strawberries to decorate the top.)
- Chill the Cake: Cover the cake tightly with plastic wrap and refrigerate for at least 4 hours, preferably overnight. This allows the wafers to soften into a cake-like texture by absorbing moisture from the cream and strawberries. (Patience is key!)
- Finish and Serve: Before serving, garnish the top with the reserved strawberries or a sprinkle of lemon zest. Cut into squares using a sharp knife, wiping between cuts to keep layers neat.
One time, I forgot to chill the bowl and ended up with a runny cream mess—lesson learned! Also, don’t be tempted to skip the chilling time; that’s when the magic happens and the wafers turn delightfully soft.
Cooking Tips & Techniques
Making the perfect creamy classic strawberry icebox cake is more about technique than complicated cooking. Here are some tips I swear by:
- Whip the Cream Properly: Aim for soft to medium peaks, not stiff peaks. Overwhipping can turn it grainy or butter-like, and underwhipping won’t hold the layers together well.
- Slice Strawberries Thinly: Thin slices distribute flavor evenly and keep the layers from being too soggy or heavy.
- Layer Evenly: Don’t pile too many wafers on one layer or too much cream on another. The balance is what gives that melt-in-your-mouth texture.
- Use Fresh Ingredients: Fresh strawberries and pure vanilla extract make all the difference compared to artificial flavors.
- Chill Long Enough: I usually make mine the night before. This resting time lets the wafers soften just right without getting mushy.
- Cut Cleanly: Use a sharp serrated knife and wipe it between cuts to keep the slices neat and pretty on the plate.
I once tried rushing the chilling and ended up with crunchy wafers and a sad cream mess—so don’t skip the fridge time! Also, if you want to speed things up, freeze the cake for 30 minutes before serving for a firmer slice.
Variations & Adaptations
This strawberry icebox cake is a versatile canvas for all sorts of tweaks. Here are a few of my favorite variations:
- Mixed Berry Version: Substitute or add blueberries, raspberries, or blackberries for a colorful, tangy twist.
- Chocolate Lovers’ Adaptation: Swap vanilla wafers with chocolate wafers or add a layer of chocolate ganache for richness.
- Dairy-Free Option: Use coconut cream whipped with a bit of powdered sugar and vanilla, paired with dairy-free cookies.
- Herbal Infusion: Add a teaspoon of finely chopped fresh mint or basil into the whipped cream for a refreshing note.
- Adult Version: Brush wafers lightly with a splash of liqueur like Grand Marnier or Amaretto before layering.
I tried the herbal infusion once during a summer garden party, and it was a hit—such a subtle but beautiful flavor lift. Feel free to experiment with what you love—you can’t go wrong!
Serving & Storage Suggestions
This creamy classic strawberry icebox cake is best served chilled, straight from the fridge. I like to plate it with a sprig of fresh mint or a few extra berries on the side for a pretty presentation. It pairs wonderfully with iced tea, lemonade, or a light sparkling wine for those summer potluck vibes.
For storage, keep the cake covered in the refrigerator and consume within 2-3 days for best freshness. The layers continue softening, so if you prefer a bit more texture, enjoy it sooner rather than later.
If you have leftovers, re-cut with a clean knife and re-chill. Avoid freezing the cake whole, as the texture changes dramatically; however, individual slices can be frozen in airtight containers for up to a month—just thaw in the fridge before serving.
Nutritional Information & Benefits
Each serving of this strawberry icebox cake offers a satisfying balance of indulgence and fresh fruit goodness. Strawberries bring vitamin C, antioxidants, and fiber, making this dessert a little more wholesome than your average cake. The heavy cream provides richness and fat, which helps keep you full and satisfied.
This recipe is naturally gluten-free if you choose gluten-free wafers, and can be dairy-free with the right substitutions. Just be mindful of the sugar content if you’re watching carbs or calories.
Personally, I see this dessert as a treat that still respects fresh, simple ingredients—perfect for those summer days when you want something light but creamy and sweet.
Conclusion
Honestly, this creamy classic strawberry icebox cake is one of those recipes that sticks with you—not just for its delicious taste but because it’s so easy and joyful to make. Whether you’re new to no-bake desserts or looking for a reliable crowd-pleaser, this cake fits the bill beautifully.
Feel free to customize it with your favorite berries or add a twist with herbs or chocolate. The best part? It brings that cool, creamy comfort that makes summer potlucks a little sweeter and more memorable.
I’d love to hear how you make it your own—drop a comment or share your version! Let’s keep this tradition going, one creamy slice at a time.
FAQs About Creamy Classic Strawberry Icebox Cake
Can I make this strawberry icebox cake ahead of time?
Absolutely! In fact, it’s best made the night before to allow the wafers to soften and flavors to meld perfectly.
What can I use instead of vanilla wafers?
Shortbread cookies, graham crackers, or gluten-free vanilla cookies all work well as substitutes. Just pick ones that aren’t too sweet or crumbly.
How do I prevent the whipped cream from becoming runny?
Make sure to whip the cream to soft or medium peaks and keep it chilled until assembly. Adding a small amount of powdered sugar can also help stabilize it.
Can I freeze leftover icebox cake?
You can freeze individual slices in airtight containers for up to a month. Thaw them in the fridge before serving to keep the texture intact.
Is this recipe suitable for kids?
Definitely! It’s naturally sweet, creamy, and fresh, making it a favorite with kids and adults alike at summer gatherings.
By the way, if you enjoy creamy desserts, you might appreciate the texture contrast in my crispy garlic chicken or the fresh fruit flavors in simple summer berry parfait. Both have that easy, crowd-pleasing appeal perfect for warm-weather meals.
Pin This Recipe!
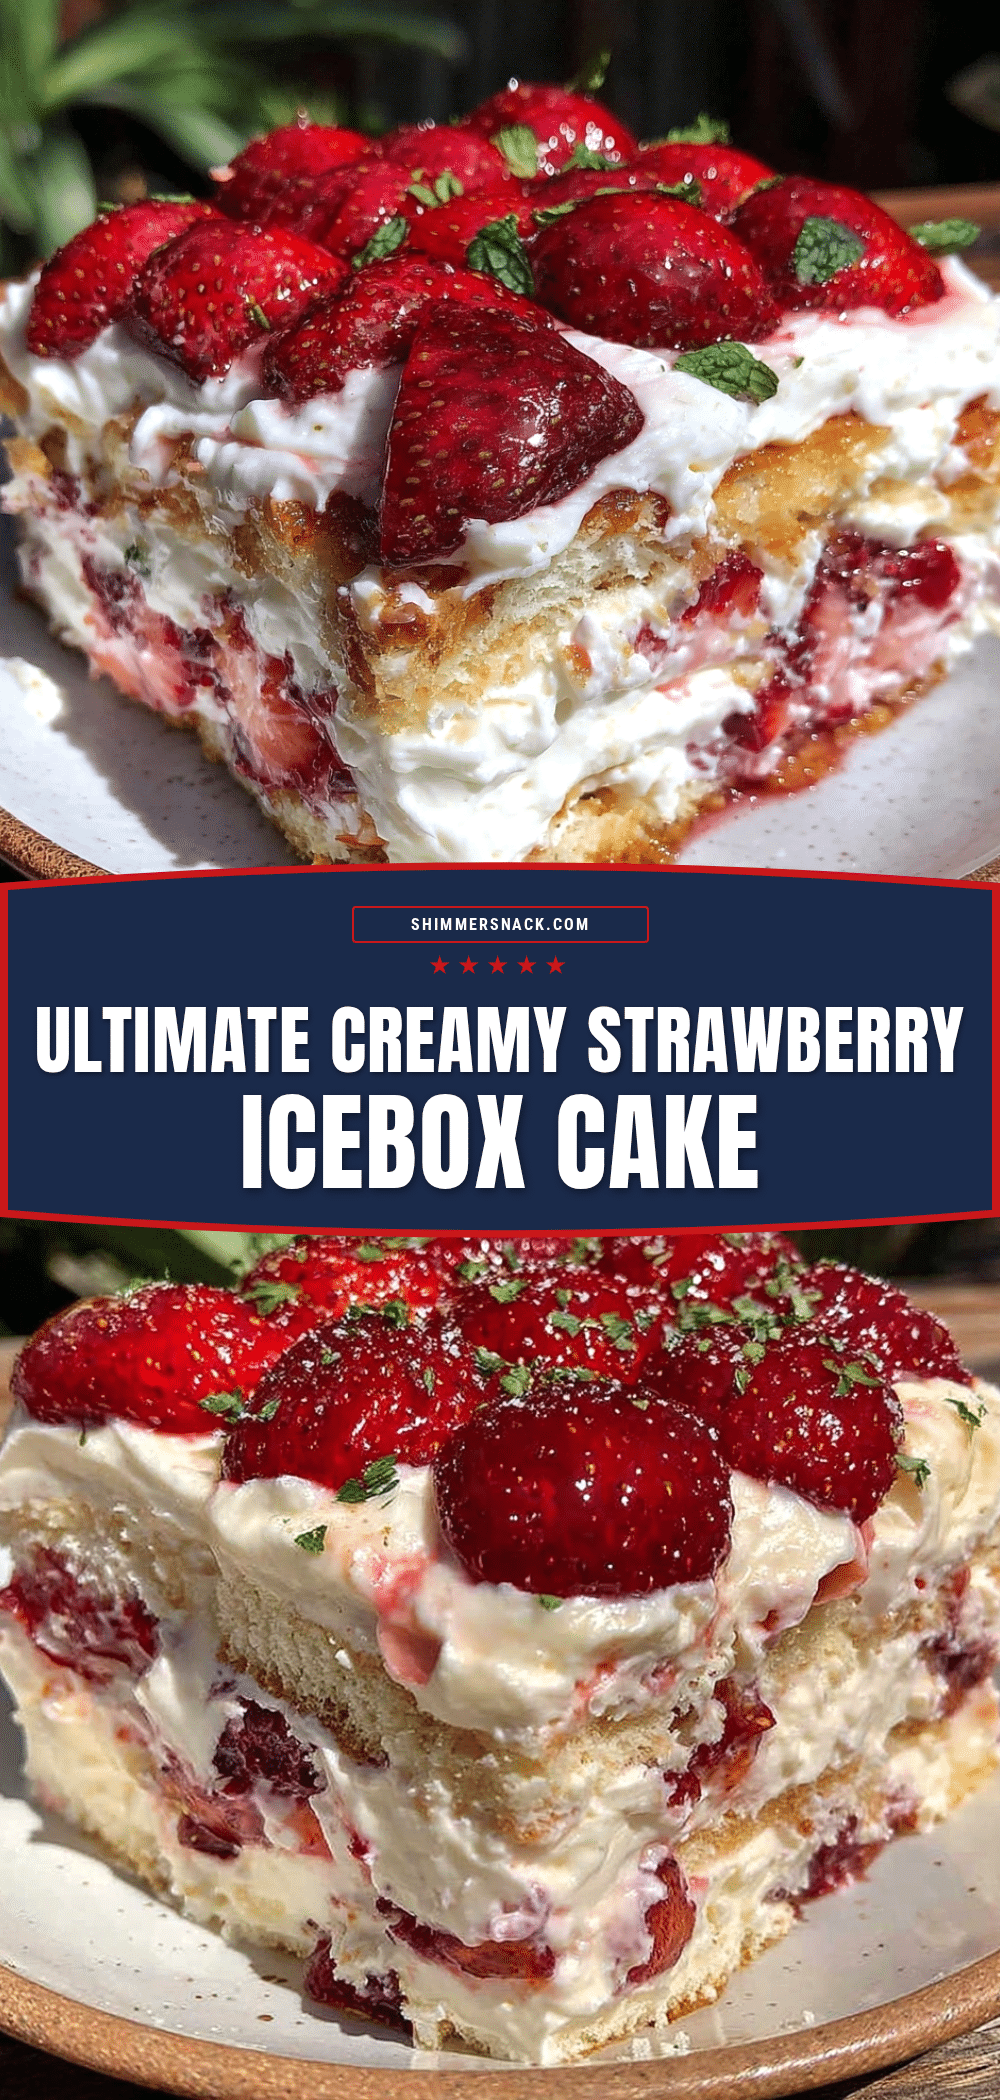
Creamy Classic Strawberry Icebox Cake

A no-bake, creamy strawberry icebox cake perfect for summer potlucks, featuring layers of fresh strawberries, whipped cream, and vanilla wafers that soften into a delightful cake-like texture.
- Prep Time: 15 minutes
- Cook Time: 0 minutes
- Total Time: 4 hours 15 minutes
- Yield: 12 servings 1x
- Category: Dessert
- Cuisine: American
Ingredients
- 2 cups fresh strawberries, hulled and thinly sliced
- 2 cups cold heavy whipping cream
- 1/3 cup granulated sugar
- 1 teaspoon pure vanilla extract
- Around 2 sleeves (about 90) vanilla wafers
- Lemon zest from 1 lemon (optional)
Instructions
- Rinse, hull, and slice about 2 cups of fresh strawberries thinly. Set aside.
- Chill your mixing bowl and whisk or beaters in the fridge for 10-15 minutes beforehand.
- Pour 2 cups of cold heavy whipping cream into the chilled bowl. Add 1/3 cup granulated sugar and 1 teaspoon vanilla extract. Beat on medium-high speed until soft to medium peaks form (3-5 minutes).
- In your 9×13 inch dish, start with a single layer of vanilla wafers covering the bottom. Spread a generous layer of whipped cream over the wafers, smoothing it out with a spatula.
- Distribute a layer of sliced strawberries evenly over the whipped cream. If using lemon zest, sprinkle a little on top of the strawberries.
- Continue layering wafers, whipped cream, and strawberries until ingredients are used, finishing with a whipped cream layer on top. Save a few strawberries to decorate the top.
- Cover the cake tightly with plastic wrap and refrigerate for at least 4 hours, preferably overnight, to allow wafers to soften.
- Before serving, garnish the top with reserved strawberries or a sprinkle of lemon zest. Cut into squares using a sharp knife, wiping between cuts to keep layers neat.
Notes
Chill the mixing bowl and whisk before whipping cream to achieve better texture. Whip cream to soft or medium peaks to avoid graininess. Thinly slice strawberries to prevent sogginess. Refrigerate at least 4 hours or overnight for best texture. Use a sharp serrated knife and wipe between cuts for neat slices. For dairy-free, substitute heavy cream with coconut cream and use dairy-free wafers. For gluten-free, use gluten-free vanilla wafers or almond flour cookies.
Nutrition
- Serving Size: 1 slice (1/12th of c
- Calories: 250
- Sugar: 15
- Sodium: 120
- Fat: 18
- Saturated Fat: 11
- Carbohydrates: 20
- Fiber: 1
- Protein: 2
Keywords: strawberry icebox cake, no-bake dessert, summer potluck dessert, creamy strawberry cake, vanilla wafer cake


