Love this? Save it for later!
Share the inspiration with your friends
“Why can’t we just simmer the elderberries with the cinnamon sticks instead of crushing them first?” my friend asked during our impromptu kitchen experiment. I started to explain why that wouldn’t work — then stopped. The truth is, she was onto something. Honestly, I’ve spent years fussing over every detail when making elderberry syrup, convinced that my precise methods were the only way to get it right. But watching her toss in whole cinnamon sticks and crushed cloves without any hesitation, and then tasting that syrup a few days later, I realized that sometimes the simplest way is actually better.
That afternoon, the kitchen was cluttered with measuring cups and sticky juice splatters, thanks to my distracted attempts to answer work emails. Maybe you’ve been there — trying to juggle life and homemade remedies all at once. Despite my skepticism, the syrup turned out beautifully balanced: rich with earthy elderberries, warmly spiced by cinnamon and cloves, and just sweet enough from a touch of raw honey.
Since that day, I keep coming back to this wholesome homemade elderberry syrup with cinnamon and cloves recipe. It’s become my go-to during cold seasons and whenever I want a comforting, natural boost. Let me tell you, it’s not only about the health benefits, but also the cozy ritual of making it that makes this syrup special. I thought I was teaching a lesson about precision, but really, I learned a lot about trusting simple instincts in the kitchen.
Why You’ll Love This Recipe
Making elderberry syrup at home can feel intimidating, but this recipe breaks it down so anyone can succeed — even without fancy equipment or exotic ingredients. I’ve tested this version countless times, and here’s why it stands out:
- Quick & Easy: You can have a batch ready in under 40 minutes, making it perfect for those unexpected sniffles or last-minute wellness boosts.
- Simple Ingredients: No need to hunt down rare herbs. Elderberries, cinnamon, cloves, water, and honey — all pantry staples or easy-to-find at local markets.
- Perfect for Gifting: This syrup makes an impressive, thoughtful gift during the holidays or cold months, showing you care with every drop.
- Crowd-Pleaser: Whether you’re sharing with family or friends, the warm spice notes make it enjoyable rather than medicinal-tasting.
- Unbelievably Delicious: The combination of cinnamon and cloves adds a comforting depth that complements the tartness of elderberries — it’s like a hug in a jar.
What really sets this elderberry syrup apart is its balance of flavor and ease. Unlike some recipes that can taste too sharp or syrupy sweet, this one walks the line perfectly. Plus, the method is forgiving — you don’t have to obsess over timings or crush every single berry perfectly. It’s my best version, the one I trust when I want a natural remedy without any fuss or fussiness.
What Ingredients You Will Need
This recipe uses simple, wholesome ingredients to deliver bold flavor and satisfying texture without the fuss. You likely have most of these in your kitchen, or they’re easy to source.
- Dried elderberries – 1 cup (approximately 100g). I recommend choosing organic for the purest flavor and potency.
- Water – 4 cups (950ml). Filtered water makes a difference in taste, especially if your tap water is heavily chlorinated.
- Cinnamon sticks – 2 sticks. Choose Ceylon cinnamon if you can find it; it’s milder and more fragrant than cassia.
- Whole cloves – 5-6. These add a subtle warmth and depth; don’t overdo it or the syrup can turn bitter.
- Raw honey – 1/2 cup (120ml). Look for local, unpasteurized honey to preserve natural enzymes and flavor. You can substitute with maple syrup for a vegan option.
- Fresh ginger – 1-inch piece, sliced (optional). Adds a zingy freshness, especially nice in colder months.
Seasonal tip: In summer, you might want to swap dried elderberries for fresh if you can find them at farmers’ markets, adjusting cooking time accordingly. If you have allergies or sensitivities, consider using a small amount of stevia instead of honey, but keep in mind it won’t have the same soothing texture.
Equipment Needed
- Medium saucepan (2-3 quart/liter capacity) – a sturdy pot with a lid helps control simmering.
- Fine mesh strainer or cheesecloth – for separating the elderberries and spices from the syrup.
- Measuring cups and spoons – for precise quantities, especially with spices and honey.
- Glass jar or bottle with a tight-fitting lid – for storing the syrup. I prefer amber glass bottles to keep light out and prolong shelf life.
- Wooden spoon or heat-resistant spatula – for stirring gently without damaging the pot.
If you don’t have cheesecloth, a clean cotton kitchen towel works fine for straining, though it might take a bit longer. I once used a coffee filter in a pinch, but it clogged quickly, so not my favorite method. Budget-wise, you can find all these tools at reasonable prices, and a good strainer is one of those kitchen investments that pays off repeatedly.
Preparation Method
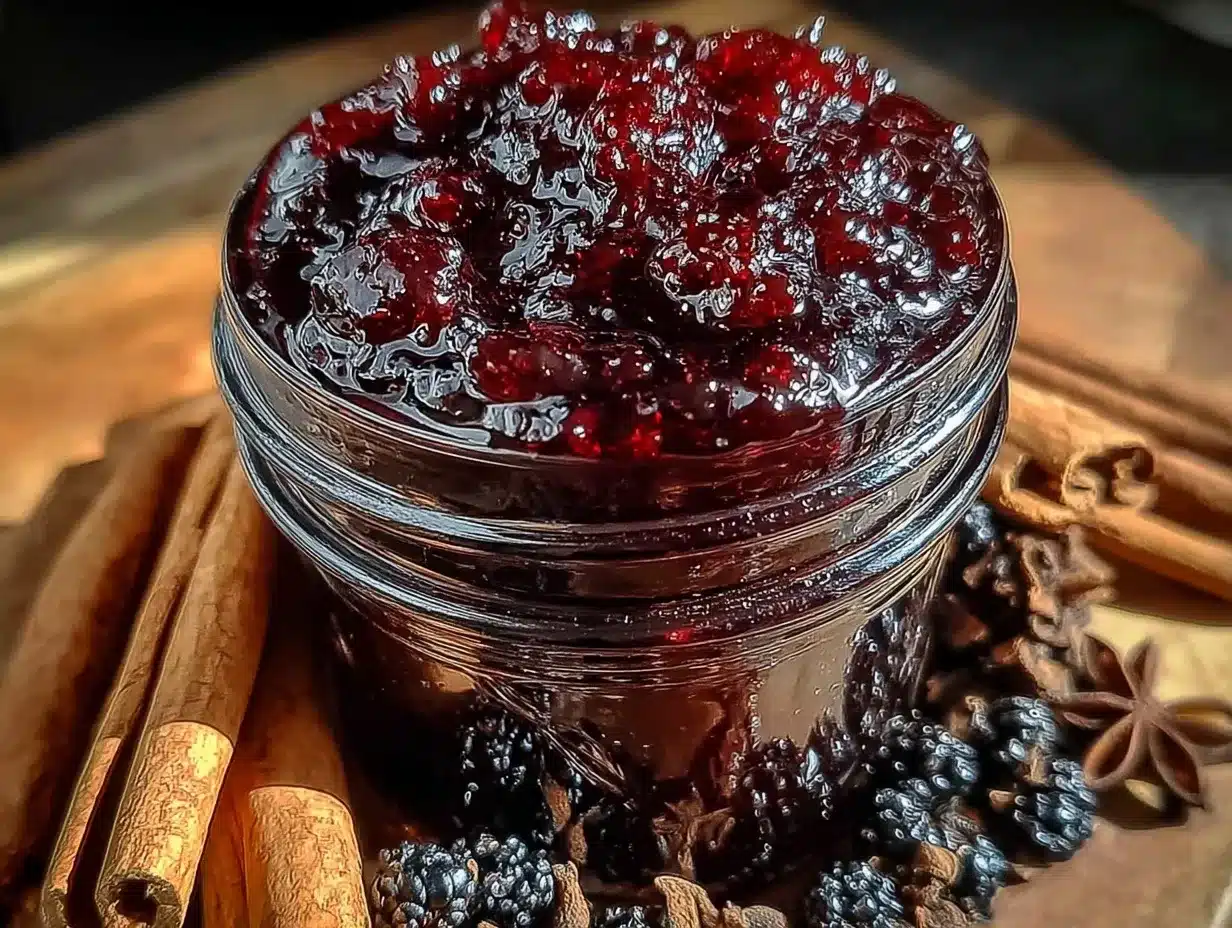
- Measure and rinse the elderberries. Use about 1 cup (100g) of dried elderberries and give them a quick rinse under cold water to remove any dust or debris. This step usually takes 2 minutes.
Pro tip: Dried elderberries look shriveled but will plump up during simmering. - Combine elderberries with water, cinnamon sticks, cloves, and optional ginger in the saucepan. Pour 4 cups (950ml) of filtered water over the ingredients. Bring the mixture to a boil over medium-high heat, which takes about 5-7 minutes.
Note: The smell as it heats up is wonderfully aromatic — the spices really start to sing. - Reduce heat and simmer gently for 45 minutes. Cover the pot loosely with a lid to prevent evaporation but allow steam to escape. Stir occasionally to prevent sticking.
Watch for the liquid reducing by about a third and turning a deep, ruby color. - Remove from heat and let it cool slightly, about 10 minutes. This resting period helps the flavors meld together even more.
- Strain the syrup through a fine mesh strainer lined with cheesecloth into a large bowl or measuring cup. Press gently on the solids with the back of a spoon to extract every last drop. Discard the elderberries and spices.
Warning: The mixture will still be hot, so be careful to avoid burns. - While the syrup is still warm, stir in 1/2 cup (120ml) of raw honey. Stir until fully dissolved; this usually takes 2-3 minutes.
Tip: Adding honey when too hot can destroy some of its beneficial properties, so let the syrup cool a bit first. - Pour the finished syrup into a sterilized glass jar or bottle. Seal tightly and store in the refrigerator. It should keep for up to 3 weeks.
I always label mine with the date, so I know when it’s best used by.
Cooking Tips & Techniques
From my experience, the key to a good elderberry syrup is gentle simmering. Too high a heat and the flavors can become harsh or bitter. I learned this the hard way after a rushed batch ended up tasting almost medicinal, which wasn’t the cozy, sweet remedy I was aiming for.
Crushing dried elderberries slightly before simmering can release more juice and color, but it’s not essential. I often skip this step when I’m short on time, with no noticeable difference in taste.
Don’t skip the straining step — elderberries contain seeds and skins that are not pleasant to swallow. Using a fine mesh strainer or cheesecloth ensures a smooth, palatable syrup.
When stirring in honey, make sure the syrup isn’t too hot, or it can lose its natural enzymes. I usually let the syrup cool for about 10 minutes after straining before adding honey.
Finally, patience is key. Letting the syrup chill overnight allows the flavors to deepen. I find it tastes best the next day, although it’s tempting to sample it warm.
Variations & Adaptations
- For a vegan option: Replace honey with maple syrup or agave nectar. The flavor will be slightly different but still delicious.
- Boost with additional herbs: Add a teaspoon of dried echinacea or a few slices of fresh turmeric during simmering for extra immune support.
- Spice it up: Increase cloves to 8 or add a pinch of ground black pepper for a warming kick. I tried this in a particularly chilly winter, and it was a hit.
- Make it kid-friendly: For little ones sensitive to strong spices, reduce cloves to 3 and cinnamon sticks to 1.
- Use fresh elderberries: If you find fresh elderberries in season, substitute 2 cups (300g) fresh for dried, and shorten simmer time to 30 minutes.
This versatility means you can tailor the syrup to your family’s tastes or dietary needs without losing the heart of what makes this elderberry syrup so comforting.
Serving & Storage Suggestions
This syrup is best served chilled or at room temperature. I often take it straight by the teaspoon during cold season or mix a tablespoon into warm water or herbal tea for a soothing drink. It also makes a lovely addition stirred into yogurt or drizzled over oatmeal for a flavorful boost.
Store your elderberry syrup in the refrigerator in a sealed glass container. It keeps well for about three weeks. For longer storage, you can freeze it in ice cube trays and thaw as needed.
When reheating, avoid boiling — just warm gently to preserve the honey’s benefits and the syrup’s delicate flavor. Over time, the flavors mellow and deepen, so if you let it sit for a week or two, it becomes even more rounded.
Nutritional Information & Benefits
One tablespoon (15ml) of this elderberry syrup roughly contains:
| Calories | Carbohydrates | Sugar | Vitamin C |
|---|---|---|---|
| 45 | 12g | 10g | 15% DV* |
*DV = Daily Value based on a 2,000 calorie diet.
Elderberries are rich in antioxidants and vitamins that support the immune system. Cinnamon and cloves add anti-inflammatory and antimicrobial properties, making this syrup a wholesome natural remedy. Using raw honey not only sweetens but also contributes antimicrobial benefits, adding to the syrup’s healing potential.
This recipe is naturally gluten-free and can be made vegan with substitutions, making it adaptable to many dietary needs.
Conclusion
Wholesome homemade elderberry syrup with cinnamon and cloves is more than just a kitchen project — it’s a comforting ritual that brings a little warmth and wellness into your day. Whether you’re new to elderberry syrup or have made it a dozen times, this recipe’s simplicity and balanced flavors make it a keeper.
Don’t be afraid to tweak the spices or sweetness to suit your taste. Trust me, the best syrup is one you enjoy taking regularly. I love this recipe because it’s straightforward, reliable, and reminds me that sometimes being wrong is just the start of something wonderful.
If you try this recipe, I’d love to hear how it turns out or what variations you come up with — sharing those little wins makes the kitchen feel even cozier. Here’s to your health and happy cooking!
Frequently Asked Questions
- Can I use fresh elderberries instead of dried? Yes, substitute about 2 cups (300g) fresh elderberries and reduce simmer time to 30 minutes.
- How long does homemade elderberry syrup last? Stored in the fridge, it keeps for up to 3 weeks. You can also freeze it for longer storage.
- Is this syrup safe for children? Yes, but reduce cloves and cinnamon to milder amounts for kids under 5 years old.
- Can I use a different sweetener? Raw honey is best for its health benefits, but maple syrup or agave nectar works well as vegan alternatives.
- What’s the best way to take elderberry syrup? Take 1 tablespoon daily during cold seasons, either straight or mixed into warm water or tea.
Pin This Recipe!
Wholesome Homemade Elderberry Syrup Recipe with Cinnamon Cloves
A simple and comforting elderberry syrup recipe infused with cinnamon and cloves, perfect for natural wellness boosts during cold seasons.
- Prep Time: 5 minutes
- Cook Time: 52 minutes
- Total Time: 57 minutes
- Yield: About 2 cups syrup (approximately 16 servings of 1 tablespoon each) 1x
- Category: Natural Remedy
- Cuisine: American
Ingredients
- 1 cup dried elderberries (approximately 100g)
- 4 cups water (950ml)
- 2 cinnamon sticks
- 5–6 whole cloves
- 1/2 cup raw honey (120ml)
- 1-inch piece fresh ginger, sliced (optional)
Instructions
- Measure and rinse the elderberries under cold water to remove any dust or debris (about 2 minutes).
- Combine elderberries, water, cinnamon sticks, cloves, and optional ginger in a medium saucepan.
- Bring the mixture to a boil over medium-high heat (5-7 minutes).
- Reduce heat and simmer gently for 45 minutes, covered loosely with a lid, stirring occasionally.
- Remove from heat and let cool slightly for about 10 minutes.
- Strain the syrup through a fine mesh strainer lined with cheesecloth into a large bowl or measuring cup, pressing gently to extract all liquid.
- While the syrup is still warm but not hot, stir in the raw honey until fully dissolved (2-3 minutes).
- Pour the finished syrup into a sterilized glass jar or bottle, seal tightly, and store in the refrigerator for up to 3 weeks.
Notes
Do not add honey when the syrup is too hot to preserve its beneficial enzymes. Let syrup cool about 10 minutes before adding honey. Crushing elderberries before simmering is optional. Store syrup in the refrigerator for up to 3 weeks or freeze for longer storage. For vegan option, substitute honey with maple syrup or agave nectar.
Nutrition
- Serving Size: 1 tablespoon (15ml)
- Calories: 45
- Sugar: 10
- Carbohydrates: 12
Keywords: elderberry syrup, homemade elderberry syrup, elderberry remedy, cinnamon elderberry syrup, natural cold remedy, elderberry recipe, immune booster syrup


