Love this? Save it for later!
Share the inspiration with your friends
It was 10:47 PM on a random Wednesday in October, and I had a sudden, undeniable urge to make something festive. The problem? I didn’t have the patience for rolling out individual cookies, cutting them into spider shapes, or dealing with royal icing. I had a box of sugar cookie mix in the pantry, a bag of regular chocolate chips, and this silly idea that maybe—just maybe—I could make a spiderweb design on a giant cookie bar instead of individual cookies. Honestly, I was tired. It had been a long day of work, and the last thing I wanted was a complicated baking project. But the craving for something sweet and Halloween-y was real, you know?
I grabbed a 9×13 pan, melted some butter, and just went for it. I pressed the dough into the pan, thinking, “Well, this is either going to be a brilliant shortcut or a total mess.” I drizzled on some melted chocolate, used a toothpick to drag it into a web pattern, and crossed my fingers. When I pulled those Easy Spiderweb Sugar Cookie Bars out of the oven, I honestly laughed out loud. They looked like something from a bakery—a slightly chaotic, very fun bakery. That late-night experiment became my go-to Halloween dessert. It’s the kind of recipe that proves you don’t need to be fancy to be impressive. Maybe you’ve been there, staring at a bag of candy corn and a Pinterest board full of impossible-looking desserts? This recipe is your answer. It’s the one that makes you look like you tried really hard, when really, you just had a great idea at 11 PM.
Why You’ll Love This Recipe
Let me tell you why these cookie bars have earned a permanent spot in my Halloween rotation. I’ve tested this recipe about five times now, tweaking the baking time and the chocolate-to-cookie ratio, and I can confidently say this is the best version. It’s not just another sugar cookie recipe—it’s a shortcut that tastes homemade, which is my favorite kind of baking.
- Quick & Easy: From start to finish, these bars are ready in about 35 minutes. No chilling, no rolling, no fuss. Perfect for a last-minute classroom party or a sudden craving.
- Simple Ingredients: You probably already have everything you need. Butter, sugar, eggs, flour—plus some chocolate for the web. No trips to a specialty baking store required.
- Perfect for Halloween: These bars are the star of any spooky gathering. They’re festive without being fussy, and kids absolutely love helping with the spiderweb design.
- Crowd-Pleaser: I’ve brought these to two different Halloween potlucks, and they disappeared faster than the store-bought cupcakes. Adults and kids alike grab them.
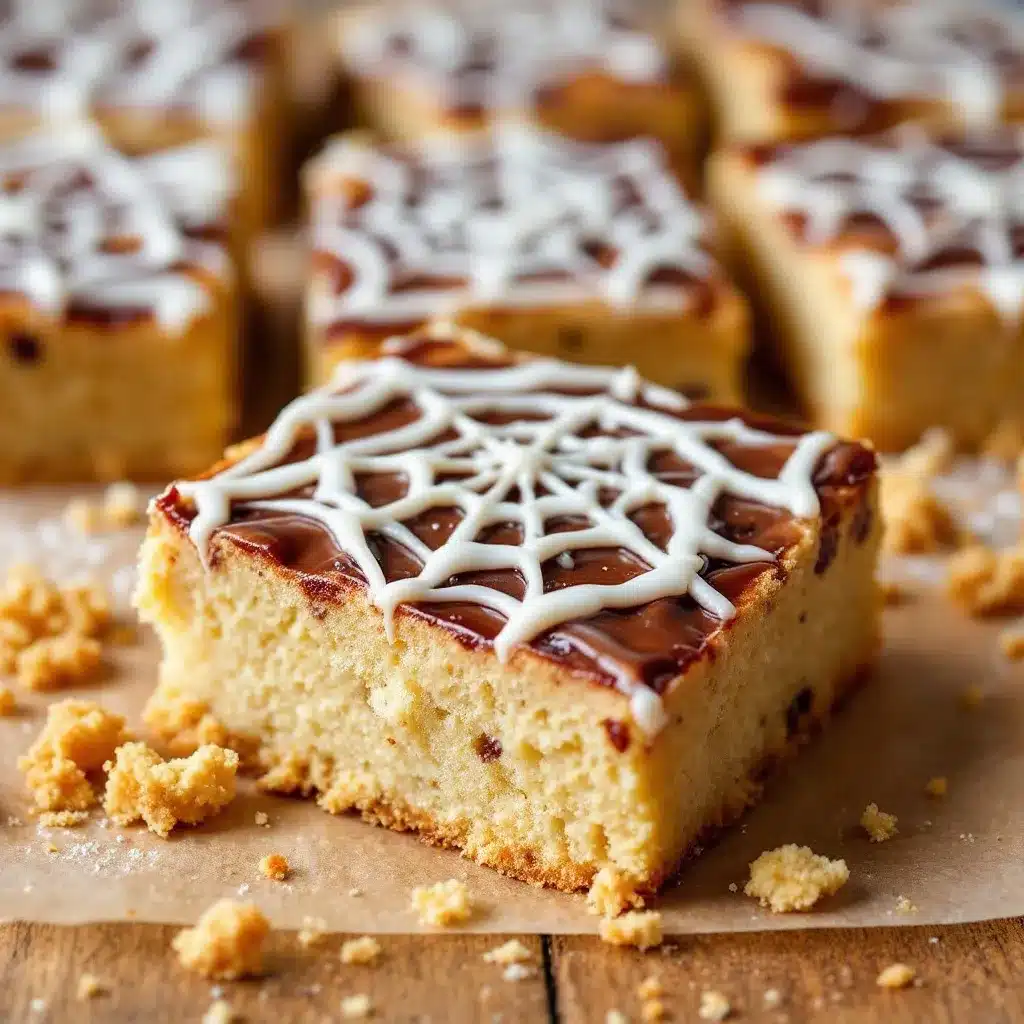
- Unbelievably Delicious: The texture is the real win here. You get a soft, chewy center with slightly crisp edges, topped with a glossy chocolate web. It’s comfort food with a spooky twist.
What makes this recipe different from the rest? It’s the method. By baking the dough as a single bar instead of individual cookies, you get a perfectly even bake every time. No more worrying about some cookies burning while others are still raw. Plus, the spiderweb design is foolproof. It looks complicated, but it’s literally just dragging a toothpick through melted chocolate. This recipe isn’t just good—it’s the kind that makes you close your eyes after the first bite. It’s Halloween baking, simplified.
What Ingredients You Will Need
This recipe uses simple, pantry-friendly ingredients to create a soft, buttery sugar cookie base. The magic is in the chocolate spiderweb topping, which turns an ordinary bar into a Halloween showstopper. Here is what you will need:
For the Cookie Base
- 1 cup (226g) unsalted butter, softened – Make sure it’s at room temperature for easy creaming. I prefer using unsalted so I can control the salt level.
- 1 ½ cups (300g) granulated sugar – This gives the cookies their classic sweet flavor and tender texture.
- 2 large eggs, room temperature – Room temperature eggs blend more smoothly into the batter, creating a uniform dough.
- 2 teaspoons vanilla extract – Pure vanilla extract makes a noticeable difference. I recommend using Nielsen-Massey or Simply Organic for the best flavor.
- 3 cups (375g) all-purpose flour – Spoon and level your flour for the most accurate measurement. Scooping directly from the bag can pack in too much flour, making the bars dry.
- 1 teaspoon baking powder – This helps the bars rise just enough to be soft and thick.
- ½ teaspoon baking soda – Works with the baking powder for the perfect chewy texture.
- ½ teaspoon salt – Balances the sweetness and enhances the buttery flavor.
For the Spiderweb Topping
- 1 cup (175g) semi-sweet chocolate chips – I like Ghirardelli or Guittard for a smooth melt. You can also use dark chocolate if you prefer a less sweet topping.
- 2 tablespoons (30g) unsalted butter – This helps the chocolate melt into a smooth, drizzle-able consistency.
- Optional: 2-3 tablespoons milk or cream – If your chocolate mixture is too thick to drizzle, add a splash of milk to thin it out.
For Decoration (Optional but Fun)
- ¼ cup candy eyeballs – These add a fun, spooky touch. Find them at any craft store or online.
- 2 tablespoons orange or black sprinkles – Adds a festive crunch. I use Wilton brand sprinkles for the best color payoff.
Equipment Needed
You don’t need a fancy pastry kitchen to make these bars. Here is the gear that makes the process smooth and easy:
- 9×13-inch baking pan – This is the perfect size for thick, chewy bars. If you only have an 8×8 pan, the bars will be much thicker and you’ll need to increase the baking time by 5-8 minutes.
- Electric hand mixer or stand mixer – A hand mixer works perfectly here. I have a KitchenAid stand mixer, but honestly, a $20 hand mixer does the job just fine.
- Parchment paper – Line your pan for easy removal. Trust me on this—it saves you from scraping stuck bars out of the pan.
- Mixing bowls – One large bowl for the dough and one small microwave-safe bowl for the chocolate.
- Toothpick or skewer – This is your spiderweb tool. A wooden skewer works better than a toothpick because it’s longer, but a toothpick is fine.
- Cooling rack – Allows air to circulate under the pan, preventing the bottom from getting soggy.
- Spatula – For spreading the dough evenly in the pan.
Preparation Method
Follow these steps carefully, and you will have perfect spiderweb bars every time. I’ve included my personal tips and sensory cues so you know exactly what to look for.
- Preheat and prepare the pan. Preheat your oven to 350°F (175°C). Line your 9×13-inch baking pan with parchment paper, leaving a 2-inch overhang on the long sides. This creates “handles” for lifting the bars out later. Lightly grease the parchment with non-stick spray.
- Cream the butter and sugar. In a large mixing bowl, beat the softened butter and granulated sugar together on medium speed for 2-3 minutes. You want the mixture to look light and fluffy, almost like a thick paste. It should smell sweet and buttery. Don’t rush this step—proper creaming creates air pockets that make the bars tender.
- Add the eggs and vanilla. Add the eggs one at a time, beating well after each addition. Scrape down the sides of the bowl with a spatula to make sure everything is combined. Then add the vanilla extract and beat for another 30 seconds. The mixture should look smooth and glossy.
- Combine the dry ingredients. In a separate bowl, whisk together the flour, baking powder, baking soda, and salt. Whisking ensures the leavening agents are evenly distributed. If you skip this step, you might end up with a pocket of baking powder that tastes bitter.
- Mix the dough. Gradually add the dry ingredients to the wet mixture, mixing on low speed. Stop as soon as the flour disappears. Overmixing at this stage develops gluten, which makes the bars tough. The dough should be soft but not sticky. If it sticks to your fingers, add one more tablespoon of flour.
- Press the dough into the pan. Transfer the dough to the prepared pan. Use a spatula or your hands to press it into an even layer. Wet your fingers slightly with water to prevent the dough from sticking to your hands. Make sure the dough reaches all four corners evenly.
- Bake the cookie base. Bake for 18-22 minutes, or until the edges are lightly golden and the center looks set. The top should spring back slightly when you touch it. A toothpick inserted into the center should come out clean or with a few moist crumbs. Don’t overbake—the bars will continue to cook in the hot pan as they cool.
- Cool completely. Let the bars cool in the pan on a wire rack for at least 30 minutes. This is crucial. If you try to add the chocolate web while the bars are still warm, the chocolate will melt and spread into a mess. Patience here pays off.
- Make the chocolate web. In a microwave-safe bowl, combine the chocolate chips and 2 tablespoons of butter. Microwave in 30-second intervals, stirring after each, until the mixture is smooth and fully melted. If it’s too thick to drizzle, stir in 1 tablespoon of milk or cream at a time until it reaches a drizzling consistency.
- Create the spiderweb design. Transfer the melted chocolate to a small piping bag or a zip-top bag with the corner snipped off. Pipe a large spiral on top of the cooled cookie bars, starting from the center and working outward. Space the lines about 1 inch apart. Then, starting from the center, drag a toothpick or skewer through the spiral toward the edge. Wipe the toothpick clean after each line. Repeat this 8-10 times around the circle to create the web effect.
- Add decorations. While the chocolate is still wet, press candy eyeballs and sprinkles into the web. Work quickly—the chocolate sets fast at room temperature.
- Let the chocolate set. Allow the chocolate to set completely at room temperature for about 30 minutes. If you’re in a hurry, place the pan in the refrigerator for 15 minutes. Once set, use the parchment paper overhang to lift the bars out of the pan. Cut into squares using a sharp knife.
Cooking Tips & Techniques
After making these bars several times, I’ve learned a few things the hard way. Here are my best tips to ensure your spiderweb turns out perfect every time.
- Don’t skip the parchment paper. I made this mistake once, thinking I could just grease the pan well. The bars stuck so badly that I had to eat them out of the pan with a spoon. Not my finest moment. Parchment paper with overhang is non-negotiable.
- Use a toothpick with a steady hand. The first time I made the spiderweb, I dragged the toothpick too fast and the lines were all wobbly. The trick is to start from the center and pull outward in one smooth, confident motion. Wipe the toothpick clean after each line to keep the design sharp.
- Room temperature ingredients matter. Cold eggs can seize the butter, creating a lumpy dough. Leave your eggs and butter on the counter for 30 minutes before you start. I forgot this once and ended up with a dough that was hard to press into the pan.
- Watch the baking time. Ovens vary wildly. My old oven would overbrown the edges by 20 minutes, while my new one needs the full 22. Start checking at 18 minutes. The edges should be just barely golden, not dark brown.
- Multitask efficiently. While the cookie base is baking, measure out your chocolate chips and butter. While the bars are cooling, prepare your decorations. This way, you’re not scrambling when the chocolate is ready to be drizzled.
- Use a piping bag for the chocolate. A zip-top bag works, but a small piping bag gives you more control. If the chocolate starts to harden in the bag, microwave it for 5 seconds to loosen it up again.
Variations & Adaptations
One of the best things about this recipe is how easy it is to customize. Here are some variations I have tried and loved.
- Gluten-Free Version: Substitute the all-purpose flour with a 1:1 gluten-free baking flour blend. I’ve used Bob’s Red Mill 1-to-1 Baking Flour, and the texture was almost identical. Add 1 teaspoon of xanthan gum if your blend doesn’t already include it.
- Vegan Adaptation: Use vegan butter (like Earth Balance) and replace the eggs with flax eggs (1 tablespoon ground flaxseed mixed with 3 tablespoons water per egg). For the chocolate, use dairy-free chocolate chips. The bars will be slightly denser but still delicious.
- Spiderweb Color Swap: Instead of chocolate, use white chocolate or colored candy melts. I made a version with orange candy melts for a brighter look. The technique is exactly the same—just melt and drizzle.
- Add-Ins: Fold in ½ cup of mini chocolate chips or chopped candy bars into the dough before pressing it into the pan. I tried it with chopped Reese’s Peanut Butter Cups once, and it was incredible.
- Different Cookie Base: Use a boxed sugar cookie mix for an even faster version. Follow the package instructions for bar cookies, then add the spiderweb topping. It’s not quite as buttery, but it works in a pinch.
- Spicy Spiderweb: Add ½ teaspoon of cinnamon and a pinch of cayenne pepper to the dough for a warm, spicy kick. It pairs surprisingly well with the sweet chocolate.
Serving & Storage Suggestions
These bars are best served at room temperature, which allows the cookie base to stay soft and the chocolate web to have a slight snap. Here is how to serve and store them for maximum enjoyment.
- Serving Temperature: Serve at room temperature. If you refrigerate them, let them sit out for 15 minutes before serving to soften slightly. Cold bars are still tasty, but the texture is firmer.
- Presentation: Cut the bars into 12-16 squares. Arrange them on a black or orange platter for a festive look. Add a few extra candy eyeballs scattered around the plate for a spooky touch.
- Complementary Dishes: These bars pair beautifully with a glass of cold milk or a pumpkin spice latte. For a Halloween party spread, serve them alongside spooky pumpkin dip or ghost-shaped brownies for a full dessert table.
- Storage: Store the bars in an airtight container at room temperature for up to 5 days. Layer them with parchment paper between each layer to prevent the chocolate webs from sticking to each other.
- Freezer Instructions: You can freeze the un-cut bars for up to 3 months. Wrap the entire block tightly in plastic wrap, then in aluminum foil. Thaw overnight in the refrigerator, then bring to room temperature before cutting and serving.
- Flavor Development: Honestly, these bars taste even better the next day. The flavors meld together, and the cookie base becomes even more tender. If you can resist eating them all on day one, you are in for a treat on day two.
Nutritional Information & Benefits
While these are definitely a treat, here is the estimated nutritional breakdown for one bar (based on 16 servings).
| Nutrient | Amount per Serving |
|---|---|
| Calories | 285 |
| Total Fat | 14g |
| Saturated Fat | 8g |
| Cholesterol | 45mg |
| Sodium | 180mg |
| Total Carbohydrates | 38g |
| Dietary Fiber | 2g |
| Sugars | 22g |
| Protein | 4g |
- Health Benefits: The dark chocolate in the topping contains antioxidants called flavonoids, which can support heart health. The butter provides vitamin A, and the eggs offer protein and choline. Of course, this is still a dessert, so enjoy it in moderation.
- Dietary Considerations: This recipe contains gluten, dairy, and eggs. For a gluten-free or vegan version, see the variations section above. It is not suitable for those with celiac disease unless using certified gluten-free flour.
- Personal Wellness Perspective: I believe in balance. These bars are a celebration treat, not an everyday snack. Making them from scratch with real ingredients feels better than reaching for a packaged dessert. Plus, the joy of pulling off that spiderweb design is a mental health win in itself.
Conclusion
These Easy Spiderweb Sugar Cookie Bars are proof that Halloween baking doesn’t have to be stressful or time-consuming. With a soft, buttery cookie base and a stunning chocolate web, they deliver all the festive fun without the fuss. Whether you are making them for a classroom party, a work potluck, or just a cozy night in, they are guaranteed to impress. I love this recipe because it reminds me that the best ideas often come from a place of tired improvisation. That late-night experiment turned into a tradition I look forward to every October.
Now, I want to see your spiderwebs! If you make these bars, leave a comment below and tell me how they turned out. Did you add any fun decorations? Did your kids help with the toothpick design? Share your photos on Pinterest and tag me—I love seeing your creations. And if you have a favorite Halloween dessert, let me know in the comments. I am always looking for new ideas to try. Happy Halloween baking, friends!
Frequently Asked Questions
Can I use a different type of chocolate for the web?
Absolutely! White chocolate, milk chocolate, or even colored candy melts work perfectly. Just adjust the amount of butter or milk to achieve a drizzling consistency.
Why did my chocolate web turn out messy?
This usually happens if the cookie bars are still warm when you add the chocolate. Make sure they are completely cool to the touch. Also, wipe your toothpick clean after each drag to keep the lines sharp.
Can I make these bars ahead of time?
Yes! You can bake the cookie base a day in advance and store it in the pan, covered, at room temperature. Add the chocolate web and decorations on the day you plan to serve them for the freshest look.
How do I cut the bars without cracking the chocolate web?
Use a sharp, thin-bladed knife and cut straight down in one smooth motion. Avoid sawing back and forth, which can crack the chocolate. For cleanest cuts, wipe the knife clean between each slice.
Can I freeze these bars with the chocolate web already on top?
Yes, but the chocolate may develop a slight white bloom (fat migration) after thawing. It is still safe to eat and tastes fine. For best results, freeze the bars without the web, then add the chocolate after thawing.
Pin This Recipe!
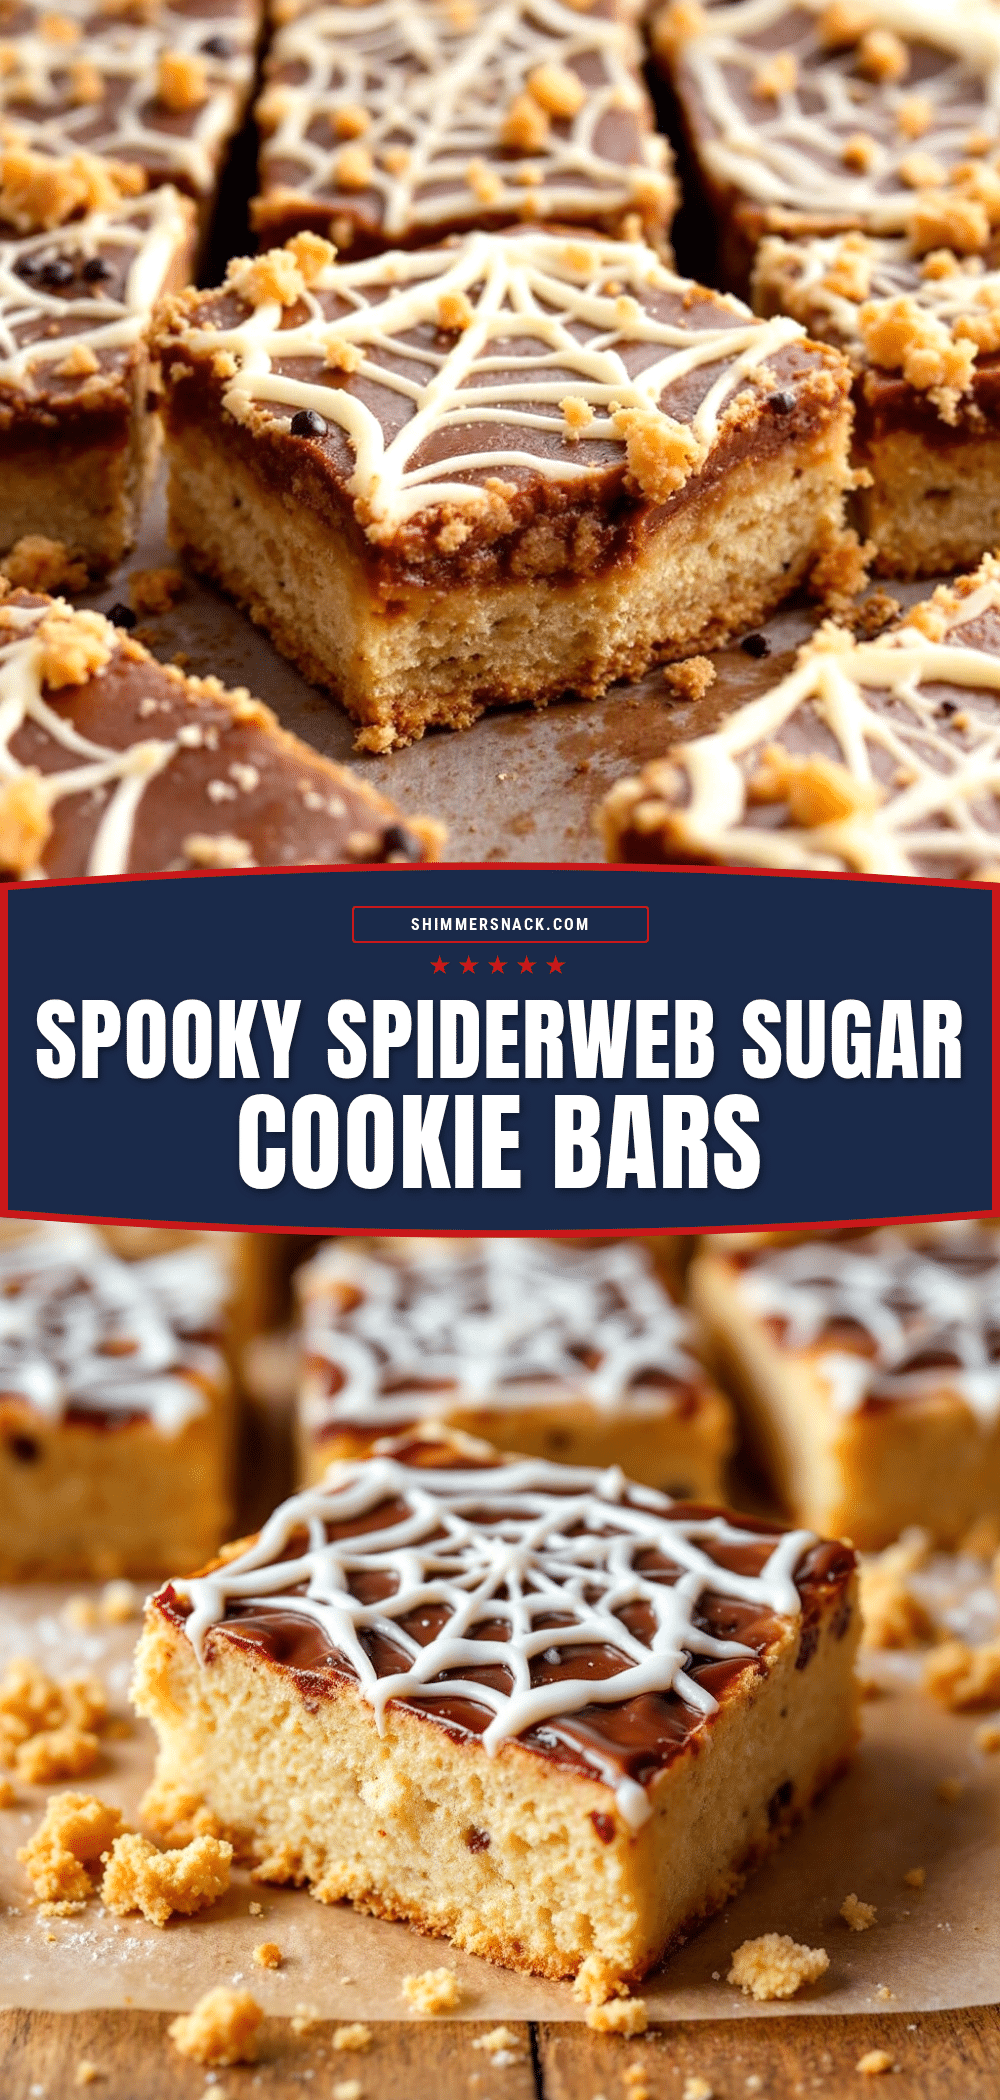
Easy Spiderweb Sugar Cookie Bars: Best Halloween Dessert
These Easy Spiderweb Sugar Cookie Bars are a quick and festive Halloween dessert. With a soft, buttery sugar cookie base and a stunning chocolate spiderweb topping, they deliver all the spooky fun without the fuss.
- Prep Time: 15 minutes
- Cook Time: 20 minutes
- Total Time: 35 minutes
- Yield: 16 servings 1x
- Category: Dessert
- Cuisine: American
Ingredients
- 1 cup (226g) unsalted butter, softened
- 1 ½ cups (300g) granulated sugar
- 2 large eggs, room temperature
- 2 teaspoons vanilla extract
- 3 cups (375g) all-purpose flour
- 1 teaspoon baking powder
- ½ teaspoon baking soda
- ½ teaspoon salt
- 1 cup (175g) semi-sweet chocolate chips
- 2 tablespoons (30g) unsalted butter
- 2–3 tablespoons milk or cream (optional, to thin chocolate)
- ¼ cup candy eyeballs (optional)
- 2 tablespoons orange or black sprinkles (optional)
Instructions
- Preheat oven to 350°F (175°C). Line a 9×13-inch baking pan with parchment paper, leaving a 2-inch overhang on the long sides. Lightly grease the parchment with non-stick spray.
- In a large mixing bowl, beat the softened butter and granulated sugar together on medium speed for 2-3 minutes until light and fluffy.
- Add the eggs one at a time, beating well after each addition. Scrape down the sides of the bowl. Add the vanilla extract and beat for another 30 seconds until smooth and glossy.
- In a separate bowl, whisk together the flour, baking powder, baking soda, and salt.
- Gradually add the dry ingredients to the wet mixture, mixing on low speed until just combined. Do not overmix. The dough should be soft but not sticky.
- Transfer the dough to the prepared pan. Use a spatula or your hands (slightly wet to prevent sticking) to press it into an even layer.
- Bake for 18-22 minutes, until the edges are lightly golden and the center looks set. A toothpick inserted into the center should come out clean or with a few moist crumbs.
- Let the bars cool completely in the pan on a wire rack for at least 30 minutes.
- In a microwave-safe bowl, combine the chocolate chips and 2 tablespoons of butter. Microwave in 30-second intervals, stirring after each, until smooth and fully melted. If too thick, stir in milk or cream 1 tablespoon at a time until drizzling consistency.
- Transfer the melted chocolate to a small piping bag or zip-top bag with the corner snipped off. Pipe a large spiral on top of the cooled cookie bars, starting from the center and working outward, spacing lines about 1 inch apart.
- Starting from the center, drag a toothpick or skewer through the spiral toward the edge. Wipe the toothpick clean after each line. Repeat 8-10 times around the circle to create the web effect.
- While the chocolate is still wet, press candy eyeballs and sprinkles into the web if desired.
- Allow the chocolate to set completely at room temperature for about 30 minutes (or 15 minutes in the refrigerator). Use the parchment paper overhang to lift the bars out of the pan. Cut into squares using a sharp knife.
Notes
Don’t skip the parchment paper for easy removal. Make sure the cookie bars are completely cool before adding the chocolate web to prevent messiness. For a gluten-free version, use a 1:1 gluten-free baking flour blend. For a vegan version, use vegan butter and flax eggs. The bars taste even better the next day.
Nutrition
- Serving Size: 1 bar
- Calories: 285
- Sugar: 22
- Sodium: 180
- Fat: 14
- Saturated Fat: 8
- Carbohydrates: 38
- Fiber: 2
- Protein: 4
Keywords: Halloween dessert, sugar cookie bars, spiderweb cookies, easy Halloween recipe, cookie bars, chocolate spiderweb


