Love this? Save it for later!
Share the inspiration with your friends
I was standing in line at the hardware store—not exactly where you expect culinary inspiration to strike. The man in front of me, covered in what looked like sawdust and holding a broken pipe, started talking to the cashier about Thanksgiving desserts. “My wife makes this pumpkin pie,” he said, “but she doesn’t even turn on the oven. Crushed cookies, cream cheese, canned pumpkin, done.” I honestly thought he was joking. A pumpkin pie without baking? It sounded like one of those internet recipes that looks beautiful in photos but tastes like sad compromise. But he was so matter-of-fact about it, like he was describing how to change a tire. I grabbed my bag of screws and left, but his words stuck with me. Maybe you’ve been there—you hear about a recipe in the most random place and can’t shake it. That night, I googled “no-bake pumpkin pie” and found a dozen versions, all claiming to be the best. I tried three. The first was too runny. The second tasted more like cheesecake than pumpkin pie. The third? Perfect. But I knew I could make it even better by swapping the boring graham cracker crust for a gingersnap one. That little change turned a good no-bake pumpkin pie into something truly special. Now, I make this Easy No-Bake Pumpkin Pie with Gingersnap Crust every fall, and it never lasts more than a day in my house. It’s the kind of recipe that makes you wonder why you ever bothered with the oven.
Why You’ll Love This Recipe
Let me be real with you—I’ve tested this easy no-bake pumpkin pie more times than I care to count. The first version collapsed when I tried to slice it. The second was so sweet it made my teeth hurt. But this version? It’s the Goldilocks of pumpkin pies. Here’s why you’ll fall for it:
- No Oven Required: This is a true no-bake pumpkin pie. No blind baking the crust, no worrying about cracks on top. Your oven stays off, which is a lifesaver during the holidays when every burner and rack is already in use.
- Simple Ingredients: You likely have most of these in your pantry right now. Cream cheese, canned pumpkin, pumpkin pie spice, and a box of gingersnaps. No fancy grocery store trips needed.
- Perfect for Thanksgiving (or Any Day): This easy no-bake pumpkin pie with gingersnap crust is ideal for Friendsgiving, potlucks, or those random Tuesday nights when you crave fall flavors without the fuss.
- Crowd-Pleaser: I brought this to a family dinner last month, and my aunt—who is notoriously picky about desserts—asked for the recipe before she finished her first slice.
- Unbelievably Delicious: The spicy, crunchy gingersnap crust against the silky, creamy pumpkin filling is a texture combo that will make you close your eyes after the first bite.
What makes this recipe different from the rest? It’s the technique. I blend cottage cheese into the filling for extra creaminess without making it too heavy. Trust me, you won’t taste it, but you’ll notice the difference in texture. This isn’t just another no-bake pumpkin pie—it’s the best version I’ve ever made.
What Ingredients You Will Need
This easy no-bake pumpkin pie uses simple, wholesome ingredients to deliver bold flavor and satisfying texture without the fuss. Most are pantry staples, which makes this recipe perfect for last-minute dessert emergencies.
- Gingersnap cookies: 2 cups finely crushed (about 8 ounces or 225g). I prefer using Nabisco brand gingersnaps for their consistent spice level, but any brand works. For a gluten-free option, use gluten-free gingersnaps.
- Unsalted butter: 6 tablespoons (85g), melted. This binds the crust together. If you only have salted butter, reduce the added salt in the filling by a pinch.
- Granulated sugar: 2 tablespoons (25g), for the crust. Adds a touch of sweetness to balance the spicy cookies.
- Cream cheese: 8 ounces (226g), softened to room temperature. Full-fat is best for a rich, stable filling. Neufchâtel (reduced-fat) works too, but the texture will be slightly less firm.
- Cottage cheese: ½ cup (120g), small curd. This is my secret ingredient for extra creaminess without heaviness. I recommend Good Culture brand for its clean taste and smooth texture when blended.
- Canned pumpkin puree: 1 can (15 ounces or 425g). Make sure it’s 100% pumpkin, not pumpkin pie filling. Libby’s is my go-to for consistent moisture content.
- Powdered sugar: ½ cup (60g). Dissolves easily into the filling, giving it a silky smoothness without grittiness.
- Pumpkin pie spice: 2 teaspoons. Store-bought is fine, but I often make my own with 1 teaspoon cinnamon, ½ teaspoon ginger, ¼ teaspoon nutmeg, ¼ teaspoon cloves, and a pinch of allspice.
- Vanilla extract: 1 teaspoon. Pure vanilla adds warmth and depth. Imitation works in a pinch, but use a little less.
- Heavy cream: 1 cup (240ml), cold. Whipped into stiff peaks for folding into the filling. This gives the pie its light, mousse-like texture.
- Optional garnish: Whipped cream, extra crushed gingersnaps, and a sprinkle of cinnamon for serving.
Equipment Needed
You don’t need a fancy kitchen to make this easy no-bake pumpkin pie. Here’s what you’ll need:
- 9-inch pie dish: A standard glass or ceramic pie plate works perfectly. I’ve used a metal tart pan too, but the crust sticks less in glass.
- Food processor or rolling pin: For crushing the gingersnaps. A food processor makes quick work of it, but a zip-top bag and a rolling pin (or a heavy skillet) works just as well—and is oddly satisfying.
- Electric mixer: Handheld or stand mixer with a whisk attachment. You’ll need this to whip the cream and beat the cream cheese filling until smooth. A whisk and strong arm can work, but be prepared for a workout.
- Mixing bowls: At least two medium-sized bowls. One for the crust mixture, one for the filling.
- Rubber spatula: For folding the whipped cream into the pumpkin mixture gently. A metal spoon can deflate the air you’ve worked so hard to create.
- Measuring cups and spoons: For accuracy. I’ve eyeballed ingredients before and ended up with a filling that was too loose. Trust the measurements.
Preparation Method
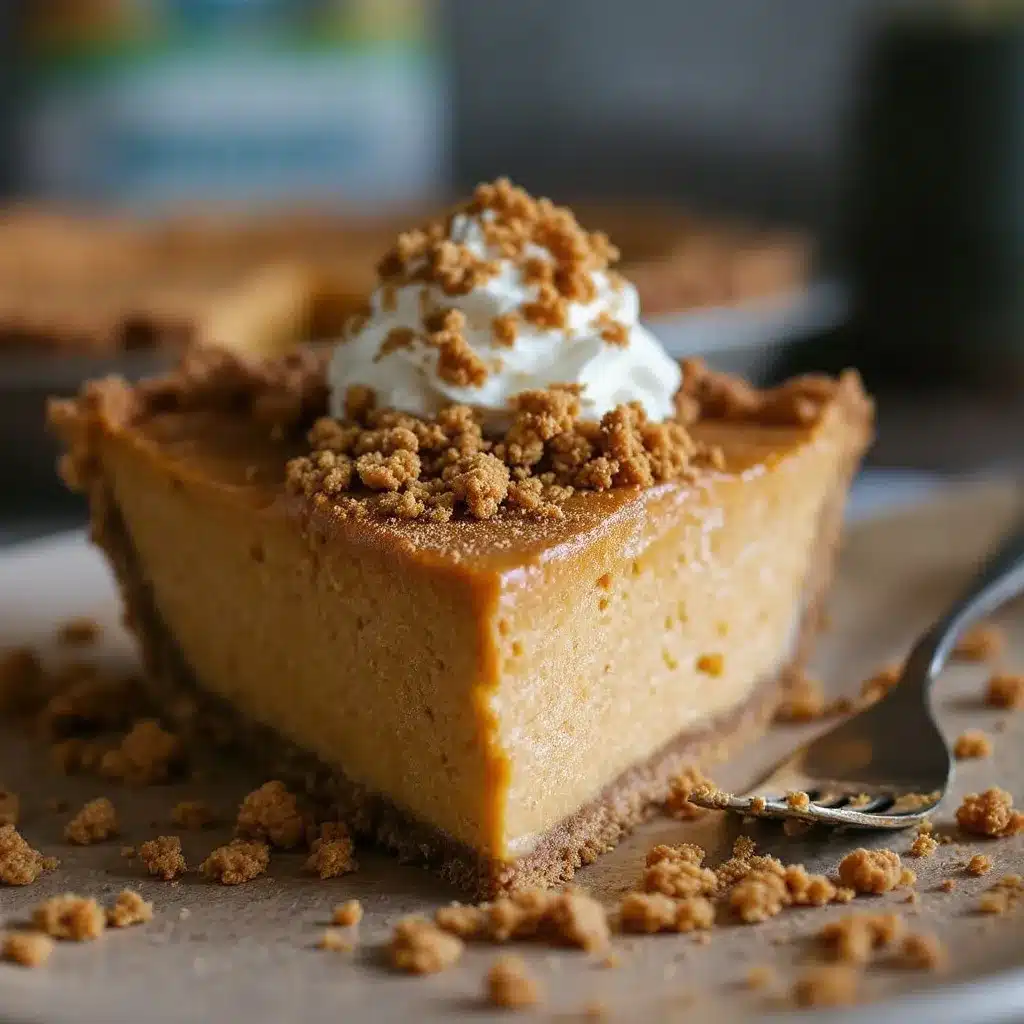
This easy no-bake pumpkin pie with gingersnap crust comes together in about 30 minutes of active work, plus at least 4 hours of chilling time. Plan ahead, and you’ll have a stunning dessert ready when you need it.
- Make the crust: Place the gingersnap cookies in a food processor and pulse until they become fine crumbs. You should have about 2 cups. If using a bag and rolling pin, seal the cookies in a zip-top bag and crush them until no large pieces remain. Transfer the crumbs to a medium bowl. Add the melted butter and granulated sugar. Stir with a fork until the mixture looks like wet sand and holds together when pressed.
- Press the crust: Transfer the crumb mixture to your 9-inch pie dish. Use the bottom of a flat measuring cup or a glass to press the crumbs firmly into an even layer on the bottom and up the sides. Don’t skip this—a loosely packed crust will crumble when you slice the pie. Place the crust in the refrigerator to set while you prepare the filling, at least 15 minutes.
- Soften the cream cheese: Take your cream cheese out of the fridge about 30 minutes before you start. If you forgot (I do this all the time), cut it into cubes and microwave it for 10-15 seconds until softened but not melted. Cold cream cheese will leave lumps in your filling.
- Blend the cottage cheese: In a small food processor or blender, puree the cottage cheese until completely smooth. This takes about 30 seconds. Scrape down the sides once. You’re looking for a yogurt-like consistency with no lumps. Set aside.
- Beat the cream cheese: In a large mixing bowl, beat the softened cream cheese with an electric mixer on medium speed until smooth and fluffy, about 2 minutes. Scrape down the bowl. Add the powdered sugar and beat again until combined.
- Add the pumpkin and spices: Add the canned pumpkin puree, pureed cottage cheese, pumpkin pie spice, and vanilla extract to the cream cheese mixture. Beat on medium speed until everything is fully incorporated and the mixture is smooth. The color should be a uniform, deep orange. Taste it here—adjust the spices if you want more warmth.
- Whip the cream: In a separate clean bowl, pour the cold heavy cream. Using clean beaters, whip the cream on medium-high speed until stiff peaks form. You’ll know it’s ready when you lift the beaters and the cream stands up without drooping. Be careful not to over-whip, or you’ll end up with butter. (Ask me how I know.)
- Fold everything together: Take about one-third of the whipped cream and stir it into the pumpkin mixture to lighten it. This is called tempering, and it makes folding the rest easier. Then, add the remaining whipped cream and gently fold it in using a rubber spatula. Use a cutting motion down the center, then sweep around the bowl. Repeat until no white streaks remain. The filling should look airy and mousse-like.
- Fill the crust: Remove the chilled crust from the refrigerator. Spoon the pumpkin filling into the crust and spread it into an even layer. Give the pie dish a gentle tap on the counter to release any air bubbles.
- Chill: Cover the pie loosely with plastic wrap and refrigerate for at least 4 hours, but overnight is better. The filling needs time to set properly. If you slice it too early, you’ll get a runny mess. Patience, my friend.
- Serve: Just before serving, garnish with a dollop of whipped cream, a sprinkle of crushed gingersnaps, and a dusting of cinnamon. Slice with a sharp knife, wiping it clean between cuts for neat slices.
Cooking Tips & Techniques
After making this easy no-bake pumpkin pie more times than I can count, I’ve collected a few hard-earned lessons. Here are my best tips:
- Don’t skip the cottage cheese step: I know it sounds weird, but blending it until completely smooth is non-negotiable. The first time I made this, I got lazy and just stirred it in. The texture was grainy and unpleasant. Puree it, and the filling becomes velvety smooth.
- Use full-fat ingredients: Low-fat cream cheese and light cream won’t set up the same way. The fat is what gives this pie its stable, sliceable texture. Trust me, saving 50 calories isn’t worth a sad, runny pie.
- Chill the bowl for whipping cream: Pop your mixing bowl and beaters in the freezer for 10 minutes before whipping the cream. Cold equipment helps the cream whip faster and hold its shape longer.
- Watch your folding technique: Overmixing the whipped cream into the pumpkin base will deflate it, resulting in a dense, flat pie. Fold gently, and stop as soon as the mixture looks uniform. A few streaks are better than a deflated mess.
- Patience is key: I once tried to rush the chilling process by sticking the pie in the freezer for an hour. The edges froze while the center stayed soft. Give it the full 4 hours minimum. Overnight is truly best.
Variations & Adaptations
One of the best things about this easy no-bake pumpkin pie with gingersnap crust is how adaptable it is. Here are some variations I’ve tried and loved:
- Dairy-Free Version: Use dairy-free cream cheese (like Kite Hill or Violife), a dairy-free cream cheese alternative, and coconut cream instead of heavy cream. Chill the can of coconut cream overnight, then scoop out the solid part and whip it. The texture will be slightly different but still delicious.
- Spice It Up: Add ¼ teaspoon of cayenne pepper or chipotle powder to the filling for a smoky, spicy kick. It sounds wild, but that heat against the sweet gingersnap crust is incredible. I made this for a Friendsgiving once, and it was the first pie to disappear.
- Chocolate Twist: Swap the gingersnap crust for a chocolate cookie crust (like Oreos, without the filling). The chocolate and pumpkin combo is surprisingly good—like a pumpkin truffle in pie form.
- Pumpkin Free Option: Substitute the canned pumpkin with an equal amount of sweet potato puree (canned or homemade). The flavor is slightly earthier, but the texture works perfectly. Add an extra teaspoon of pumpkin pie spice to compensate.
- Mini Pies: Press the crust into a 12-cup muffin tin lined with parchment strips (for easy removal) instead of a pie dish. Fill each cup with the pumpkin mixture and chill. These mini no-bake pumpkin pies are perfect for parties or portion control.
Serving & Storage Suggestions
This easy no-bake pumpkin pie is best served cold, straight from the refrigerator. The filling should be firm but silky, and the crust should hold together when sliced. Here’s how to serve and store it:
- Serving Temperature: Cold or cool room temperature. If it’s been sitting out for more than 30 minutes, pop it back in the fridge to firm up before serving.
- Presentation: I like to pile on a generous swirl of whipped cream, then sprinkle crushed gingersnaps and a light dusting of cinnamon over the top. It looks impressive with minimal effort.
- Complementary Dishes: This pie pairs beautifully with a cup of hot coffee, spiced chai, or a glass of cold milk. For a full fall spread, serve it alongside roasted turkey, mashed potatoes, and green bean casserole.
- Storage: Cover the pie tightly with plastic wrap or aluminum foil and store it in the refrigerator for up to 5 days. The flavors actually deepen after a day or two, so don’t worry if you make it ahead.
- Freezing: You can freeze this pie for up to 2 months. Wrap it tightly in plastic wrap, then a layer of foil. Thaw it overnight in the refrigerator before serving. Note that the texture may be slightly softer after freezing, but it’s still delicious.
- Reheating: This is a no-bake pie, so reheating isn’t necessary. But if you want a warm crust, you can microwave individual slices for 10-15 seconds. The filling will soften, so don’t overdo it.
Nutritional Information & Benefits
While this easy no-bake pumpkin pie with gingersnap crust is a treat, it does offer some surprising nutritional perks. Here’s an estimated breakdown per slice (based on 10 slices):
- Calories: Approximately 320-350 per slice
- Fat: 22g (14g saturated)
- Carbohydrates: 30g (18g sugar)
- Protein: 6g
- Fiber: 2g
- Sodium: 280mg
Key health benefits: Pumpkin is packed with vitamin A (over 200% of your daily needs per serving), which supports eye health and immune function. It’s also a good source of fiber and potassium. The cottage cheese adds protein and calcium, while the gingersnaps provide a small amount of iron from molasses. This isn’t health food, but it’s a dessert you can feel a little better about enjoying.
Dietary considerations: This recipe contains gluten (from the gingersnaps), dairy (from the cream cheese, cottage cheese, butter, and cream), and eggs (if you use them in the whipped cream—though I don’t). It is not suitable for vegans or those with lactose intolerance without modifications.
Conclusion
This easy no-bake pumpkin pie with gingersnap crust has become my go-to fall dessert for a reason. It’s simple enough for a Tuesday night craving, yet impressive enough for Thanksgiving dinner. The spicy, crunchy crust paired with the silky, creamy pumpkin filling is a combination that never gets old. I love that I can make it ahead of time, freeing up my oven for the main event. Honestly, I think you’re going to love it too. Don’t be afraid to play around with the spices or try one of the variations—recipes are meant to be adapted to your taste. If you make this pie, I’d love to hear about it. Drop a comment below and let me know how it turned out, or share your own twist on this recipe. Happy fall, and happy baking (or, you know, not baking)!
Frequently Asked Questions
Can I use fresh pumpkin instead of canned?
Yes, you can substitute fresh pumpkin puree for canned. However, fresh pumpkin has a higher water content, which can make the filling looser. To fix this, cook the puree in a pan over medium heat for 10-15 minutes to reduce the liquid, then let it cool completely before using. You’ll need about 1¾ cups of reduced puree to replace one 15-ounce can.
How do I know when the pie is fully set?
The pie is ready when the filling is firm to the touch and doesn’t jiggle when you gently shake the pie dish. If the center still wobbles like Jell-O, it needs more chilling time. Give it at least another hour and check again. Overnight chilling is the most reliable method.
Can I make this pie gluten-free?
Absolutely! Use gluten-free gingersnap cookies for the crust. Many brands, like Annie’s or Partake, make gluten-free versions that work perfectly. Just make sure to check the label on your pumpkin pie spice as well, as some blends may contain gluten as a filler.
Why did my crust fall apart when I sliced the pie?
This usually happens when the crust isn’t pressed firmly enough into the pie dish, or there isn’t enough butter to bind the crumbs. Make sure you’re packing the crust down with a flat-bottomed glass or measuring cup. If the mixture feels dry, add another tablespoon of melted butter. Chilling the crust for at least 30 minutes before adding the filling also helps it hold together.
Can I use a different type of cookie for the crust?
Yes, this recipe is very flexible. Graham crackers, shortbread cookies, vanilla wafers, or even chocolate wafer cookies all work well. If you use a sweeter cookie, reduce the granulated sugar in the crust to 1 tablespoon. For a less sweet option, try using digestive biscuits or plain tea biscuits.
Pin This Recipe!
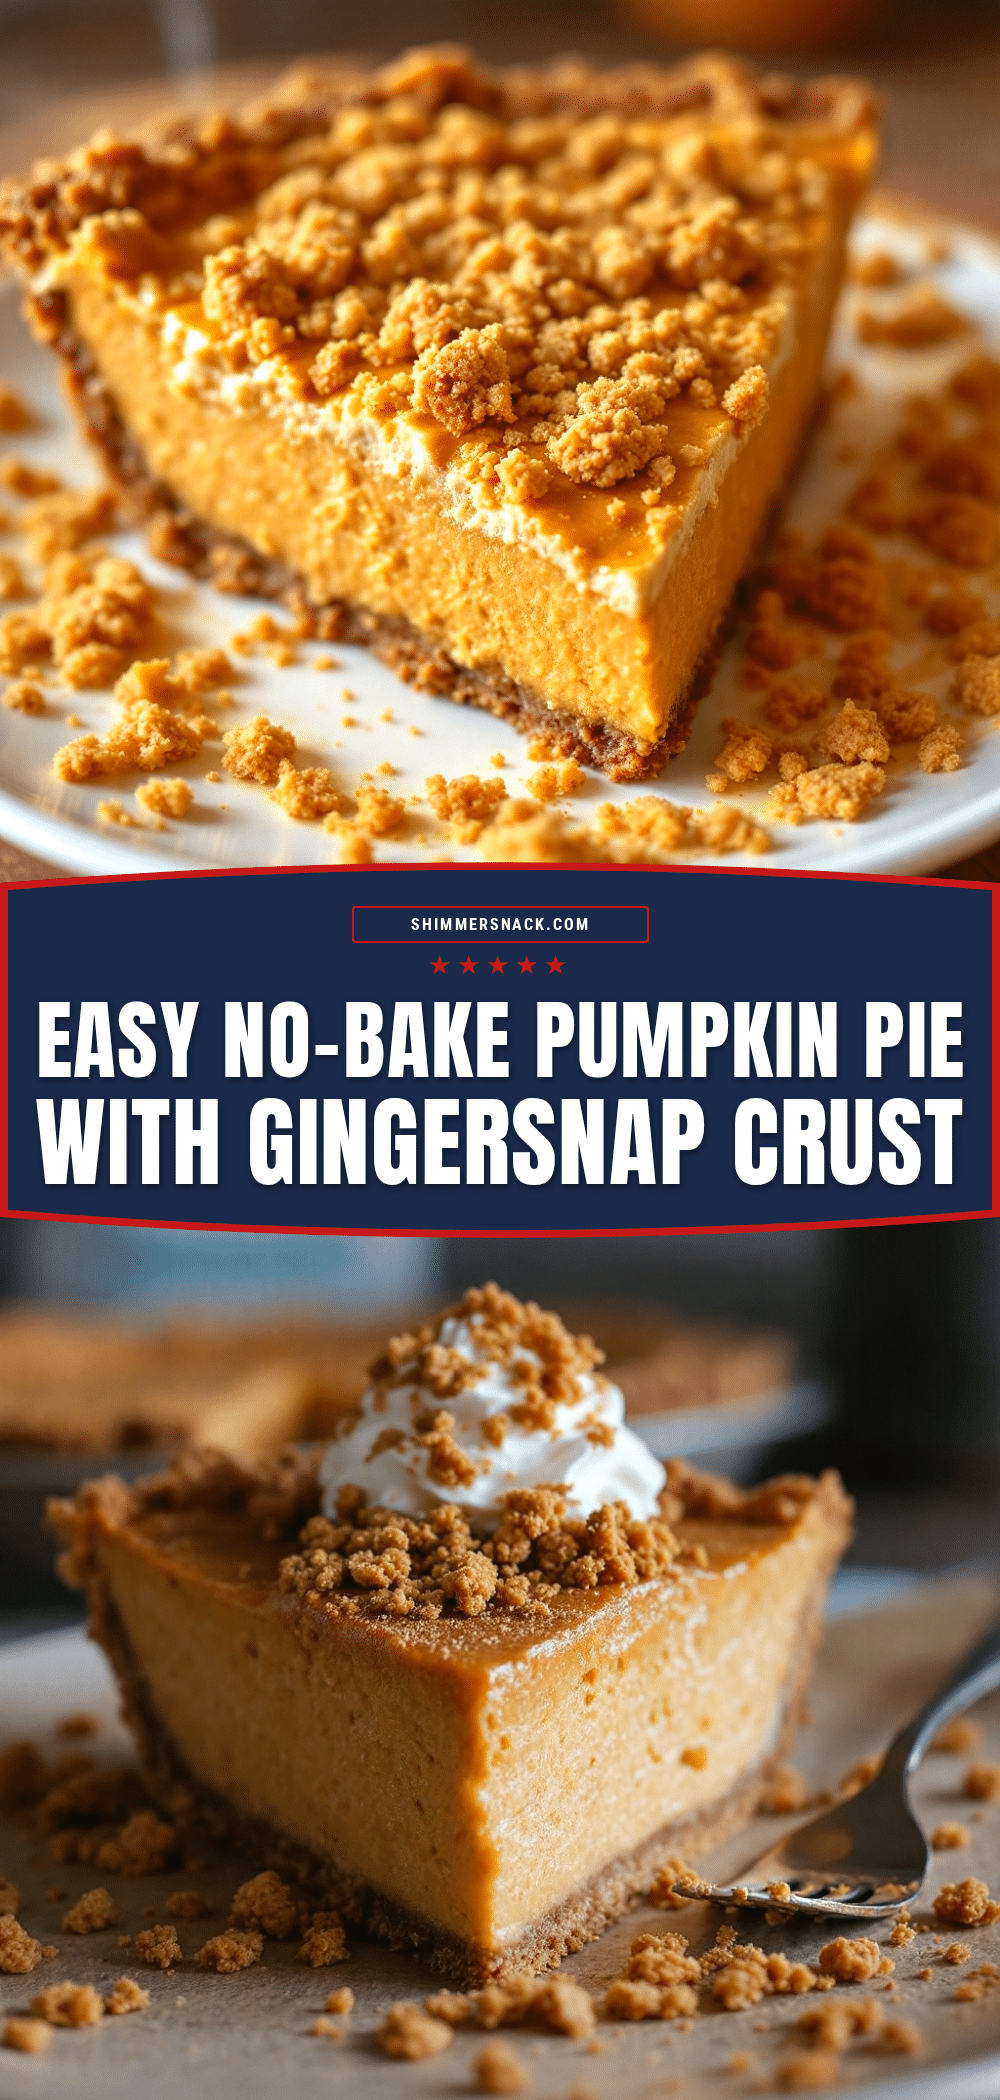
Easy No-Bake Pumpkin Pie with Gingersnap Crust
A creamy, no-bake pumpkin pie with a spicy gingersnap crust that’s perfect for Thanksgiving or any fall occasion. This easy recipe uses a secret ingredient—cottage cheese—for extra creaminess without the heaviness.
- Prep Time: 30 minutes
- Cook Time: 0 minutes
- Total Time: 4 hours 30 minutes (includes chilling)
- Yield: 10 servings 1x
- Category: Dessert
- Cuisine: American
Ingredients
- 2 cups finely crushed gingersnap cookies (about 8 ounces or 225g)
- 6 tablespoons unsalted butter, melted (85g)
- 2 tablespoons granulated sugar (25g)
- 8 ounces cream cheese, softened to room temperature (226g)
- ½ cup small curd cottage cheese (120g)
- 1 can (15 ounces or 425g) canned pumpkin puree (100% pumpkin, not pie filling)
- ½ cup powdered sugar (60g)
- 2 teaspoons pumpkin pie spice
- 1 teaspoon vanilla extract
- 1 cup cold heavy cream (240ml)
- Optional garnish: whipped cream, extra crushed gingersnaps, cinnamon
Instructions
- Make the crust: Place the gingersnap cookies in a food processor and pulse until fine crumbs (about 2 cups). Alternatively, crush in a zip-top bag with a rolling pin. Transfer to a medium bowl, add melted butter and granulated sugar, and stir with a fork until the mixture looks like wet sand and holds together when pressed.
- Press the crust: Transfer the crumb mixture to a 9-inch pie dish. Use the bottom of a flat measuring cup or glass to press firmly into an even layer on the bottom and up the sides. Refrigerate for at least 15 minutes to set.
- Soften the cream cheese: Take cream cheese out of the fridge 30 minutes before starting. If forgotten, cut into cubes and microwave for 10-15 seconds until softened but not melted.
- Blend the cottage cheese: In a small food processor or blender, puree the cottage cheese until completely smooth (about 30 seconds). Scrape down sides once. Set aside.
- Beat the cream cheese: In a large mixing bowl, beat softened cream cheese with an electric mixer on medium speed until smooth and fluffy (about 2 minutes). Scrape down bowl. Add powdered sugar and beat again until combined.
- Add the pumpkin and spices: Add canned pumpkin puree, pureed cottage cheese, pumpkin pie spice, and vanilla extract. Beat on medium speed until fully incorporated and smooth. Adjust spices to taste.
- Whip the cream: In a separate clean bowl, pour cold heavy cream. Using clean beaters, whip on medium-high speed until stiff peaks form. Be careful not to over-whip.
- Fold everything together: Take about one-third of the whipped cream and stir it into the pumpkin mixture to lighten. Then add the remaining whipped cream and gently fold with a rubber spatula until no white streaks remain. The filling should look airy and mousse-like.
- Fill the crust: Remove chilled crust from refrigerator. Spoon pumpkin filling into crust and spread evenly. Tap the pie dish gently on the counter to release air bubbles.
- Chill: Cover pie loosely with plastic wrap and refrigerate for at least 4 hours, preferably overnight, until set.
- Serve: Just before serving, garnish with whipped cream, crushed gingersnaps, and a dusting of cinnamon. Slice with a sharp knife, wiping clean between cuts.
Notes
For best results, use full-fat cream cheese and heavy cream. Chill the bowl and beaters for whipping cream. Do not skip blending the cottage cheese until smooth. The pie needs at least 4 hours to set; overnight is ideal. For a gluten-free version, use gluten-free gingersnaps. For a dairy-free version, use dairy-free cream cheese and coconut cream.
Nutrition
- Serving Size: 1 slice (1/10 of pie
- Calories: 335
- Sugar: 18
- Sodium: 280
- Fat: 22
- Saturated Fat: 14
- Carbohydrates: 30
- Fiber: 2
- Protein: 6
Keywords: no-bake pumpkin pie, gingersnap crust, easy pumpkin pie, Thanksgiving dessert, no-bake dessert, fall dessert


