Love this? Save it for later!
Share the inspiration with your friends
The last tortilla chip was fished out of the pan about ten minutes before the fourth quarter ended. My cousin, who had been standing near the cooler all night, walked over with an empty plate and just looked at me. He didn’t say anything—just pointed at the sheet pan like I had hidden the rest somewhere. That’s when I knew this sheet pan nacho bar had officially won the tailgate.
I didn’t plan for it to become the main event. Honestly, I threw it together because I was tired of standing over a grill flipping burgers while everyone else was actually watching the game. I wanted something that could sit out, stay warm, and let people build their own plates without me playing short-order cook. So I grabbed a half sheet pan, lined it with foil, and started layering.
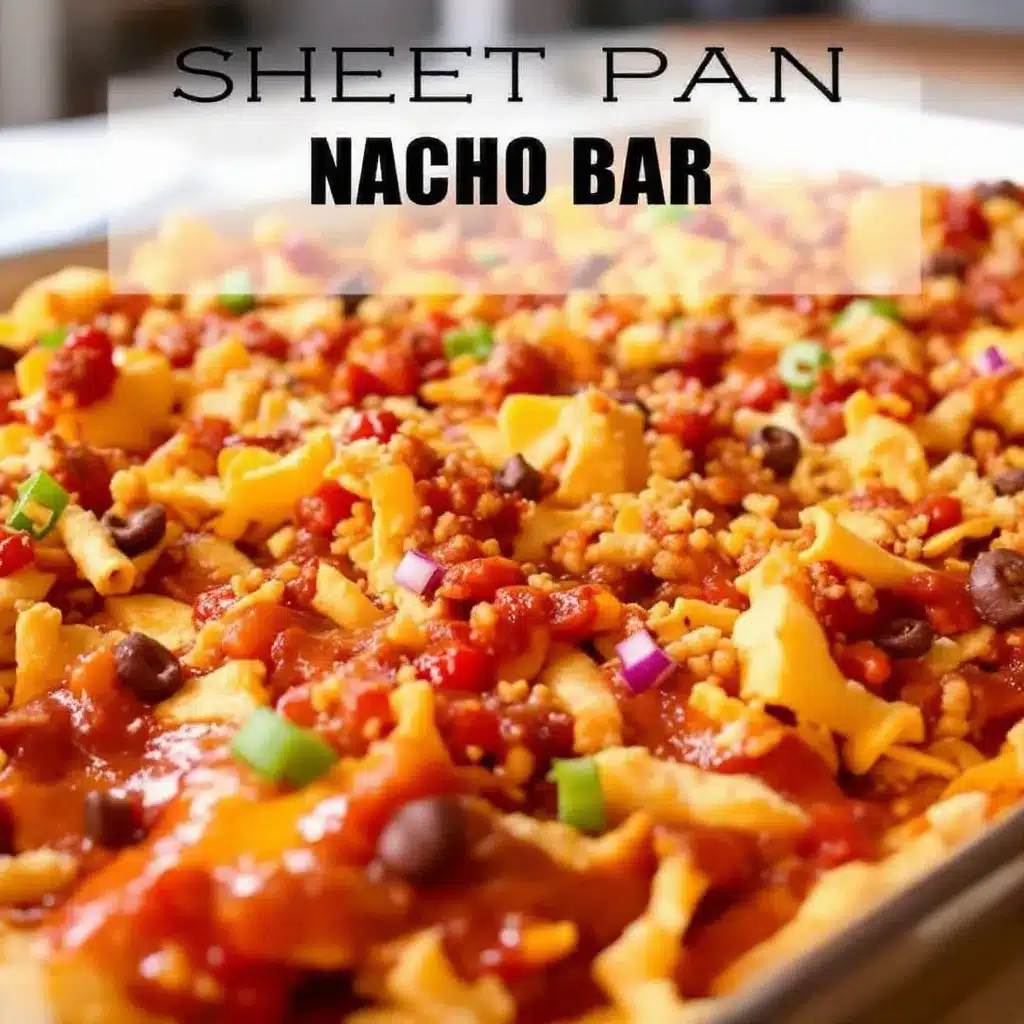
What came out of that oven was a chaotic, beautiful mess of melted cheese, seasoned beef, and toppings that made people forget about the hot dogs entirely. The sheet pan nacho bar became the thing people texted me about the next morning. Not the score. Not the halftime show. The nachos.
That first attempt had its flaws—some chips got soggy, the cheese didn’t spread evenly, and I ran out of jalapeños way too fast. But I learned from every mistake. After a few rounds of testing (and a lot of willing taste-testers), I landed on the version I’m sharing today. It’s built for crowds, built for chaos, and built to disappear before the game ends.
This isn’t fussy food. It’s the kind of recipe that lets you walk away and trust the oven to do the work. And honestly? That’s exactly what a good tailgate needs.
Why You’ll Love This Recipe
I’ve tested this sheet pan nacho bar at four different tailgates, two birthday parties, and one very rowdy fantasy football draft. Every single time, the pan came back empty. That’s not luck—it’s a recipe built on real trial and error.
- Completely customizable : Everyone builds their own plate. No more picking onions off someone else’s nachos.
- Stays warm for over an hour : The sheet pan holds heat surprisingly well. No sad cold cheese here.
- Minimal active cooking time : About 15 minutes of prep, then the oven does the rest. You can actually hang out with your guests.
- Uses simple ingredients : Nothing fancy. Ground beef, cheese, beans, chips—all stuff you probably already grab for game day.
- Perfect for feeding a crowd : One sheet pan feeds 8-10 people easily. No need for multiple dishes cluttering up the table.
What makes this different from every other nacho recipe out there? It’s the layering method. Most people just dump everything on top of chips and hope for the best. I figured out that a middle layer of cheese and beans keeps the chips from getting soggy while the top layer gets all bubbly and golden. It’s a small change, but it makes a huge difference in texture.
This is the kind of recipe that makes you look like you planned everything perfectly—even when you’re just trying to survive a busy game day. It’s comfort food at its most practical, and it always gets the same reaction: quiet chewing and happy nods.
What Ingredients You Will Need
This recipe uses straightforward ingredients that come together to create something way bigger than the sum of its parts. Here’s what you’ll need to build the ultimate sheet pan nacho bar.
For the Base
- 1 (13-ounce) bag restaurant-style tortilla chips — Look for sturdy chips that can hold up to toppings. I prefer Juanita’s or Tostitos Scoops for maximum structural integrity. Skip the thin, flimsy brands—they’ll break under the weight.
- 1 pound ground beef (80/20) — The fat content matters here. Leaner beef dries out during the oven time. 80/20 keeps everything moist and flavorful.
- 1 tablespoon chili powder — Adds warmth without overwhelming heat.
- 1 teaspoon cumin — Earthy and essential for that taco-adjacent flavor profile.
- 1 teaspoon smoked paprika — This is my secret weapon. It adds a subtle smokiness that makes the beef taste like it came off a grill.
- 1/2 teaspoon garlic powder
- 1/2 teaspoon onion powder
- Salt and black pepper to taste
- 1 (15-ounce) can black beans, drained and rinsed — Rinsing removes the excess sodium and that weird can liquid. Don’t skip this step.
- 3 cups shredded Mexican blend cheese — Pre-shredded is fine here since it’s going to melt anyway. If you want to go the extra mile, shred your own from a block of cheddar and Monterey Jack.
For the Toppings Bar
- 1 cup sour cream
- 1 cup pico de gallo or fresh salsa — Store-bought is totally fine. Just drain off excess liquid so it doesn’t make the chips soggy.
- 1/2 cup pickled jalapeños — I use the jarred ones. They’re consistent and always available.
- 1 avocado, diced — Toss with a squeeze of lime juice to prevent browning.
- 1/4 cup fresh cilantro, chopped
- 1 lime, cut into wedges
- Optional: sliced black olives, diced red onion, hot sauce
You can swap the ground beef for shredded chicken, carnitas, or even a plant-based crumble if that’s more your style. The technique stays the same—just adjust the cooking time for whatever protein you choose. For a vegetarian version, double up on the black beans and add a can of pinto beans or corn.
Equipment Needed
You don’t need a professional kitchen to pull this off. Here’s what you’ll actually use:
- Half sheet pan (18×13 inches) — This is non-negotiable. A smaller pan will crowd the chips and lead to sogginess. I’ve tried using a 9×13 baking dish and it was a disaster—too deep, not enough surface area for crispy edges.
- Large skillet — For browning the beef. Cast iron works great, but any non-stick skillet will do.
- Aluminum foil — Line the sheet pan for easy cleanup. Trust me on this one.
- Cutting board and sharp knife
- Small bowls — For setting up the toppings bar. I use little ramekins or even paper cups in a pinch.
- Spatula or tongs — For serving.
If you don’t have a half sheet pan, you can use two smaller baking sheets. Just divide the ingredients evenly and rotate them in the oven halfway through. Budget-friendly tip: dollar stores often carry half sheet pans for under five bucks, and they work just as well as the expensive ones.
Preparation Method
This comes together faster than you’d think. Here’s the step-by-step breakdown.
Step 1: Preheat and Prep
Preheat your oven to 400°F (200°C). Line your half sheet pan with aluminum foil, making sure it goes up the sides a bit. This isn’t just for easy cleanup—it also helps reflect heat and crisp up the bottom chips.
Step 2: Season and Brown the Beef
Heat your large skillet over medium-high heat. Add the ground beef and break it apart with a wooden spoon. Cook for 5-6 minutes, stirring occasionally, until no pink remains. Drain off excess grease (leave about a tablespoon for flavor).
Add the chili powder, cumin, smoked paprika, garlic powder, onion powder, and a pinch of salt and pepper. Stir everything together and cook for another minute until the spices are fragrant. Remove from heat and set aside.
Step 3: Layer the Chips
Spread about half the tortilla chips evenly across the sheet pan. Don’t worry about making it perfect—you want some overlap but not a thick pile. Think one to two chips deep max.
Step 4: Build the Middle Layer
Sprinkle half the black beans evenly over the chips. Follow with half the seasoned ground beef. Then scatter about 1 cup of the shredded cheese over everything. This middle layer is what prevents sogginess—the cheese melts and creates a barrier between the chips and the toppings above.
Step 5: Add the Top Layer
Spread the remaining chips over the middle layer. Add the rest of the black beans and ground beef. Top with the remaining 2 cups of shredded cheese. Make sure the cheese covers as much surface area as possible—exposed chips will burn.
Step 6: Bake to Perfection
Place the sheet pan in the preheated oven and bake for 12-15 minutes. You’re looking for the cheese to be fully melted and starting to brown around the edges. The bottom chips should be crispy, not soggy.
If you want extra browning on top, switch the oven to broil for the last 1-2 minutes. Watch it closely—broil can go from perfect to burnt in seconds.
Step 7: Add Fresh Toppings
Remove the pan from the oven and let it rest for 2-3 minutes. This lets the cheese set slightly so it doesn’t slide off when you grab a chip.
Drizzle sour cream in zigzag lines over the top. Add spoonfuls of pico de gallo, scattered pickled jalapeños, diced avocado, and a generous sprinkle of fresh cilantro. Finish with lime wedges on the side for squeezing.
Step 8: Serve Immediately
Place the sheet pan in the center of your table with small bowls of extra toppings nearby. Let everyone grab what they want. The pan will stay warm for about 30-40 minutes if you keep it away from drafts.
Cooking Tips & Techniques
I’ve made this recipe more times than I can count, and I’ve learned a few things the hard way. Here’s what I wish someone had told me.
Don’t overload the chips. It’s tempting to pile everything on, but too many toppings will steam the chips instead of crisping them. Stick to one layer of chips per layer. Trust the process.
Drain your wet ingredients. Salsa, pico de gallo, even canned beans—if it has excess liquid, get rid of it. Wet ingredients are the number one cause of soggy nachos. I learned this after a particularly sad batch that turned into chip soup.
Use room temperature cheese. Cold cheese takes longer to melt, which means the chips spend more time in the oven. Let the shredded cheese sit out for 15 minutes before you start assembling.
Multitask smartly. While the beef is browning, drain and rinse the beans, chop the cilantro, and set up your toppings bowls. By the time the beef is done, everything else should be ready to go. The actual hands-on time is about 15 minutes total.
Watch the broiler like a hawk. I once walked away for “just a second” and came back to a pan of burnt cheese and smoking chips. Set a timer for 1 minute if you’re broiling, and check it constantly.
If you’re feeding a particularly hungry crowd, consider making a second sheet pan with different protein options. I’ve done one with seasoned beef and another with shredded chicken—both disappeared at the same speed.
Variations & Adaptations
This recipe is built to be flexible. Here are some ways to make it your own.
Protein Swaps
Try shredded carnitas, grilled chicken, or chorizo instead of ground beef. For a plant-based option, use crumbled tofu seasoned with taco seasoning or store-bought plant-based crumbles. Each protein brings its own personality to the dish.
Vegetarian Nacho Bar
Skip the meat entirely and load up on beans, roasted corn, sautéed bell peppers, and onions. Add a can of pinto beans alongside the black beans for more texture. My vegetarian friends always request this version, and honestly, I sometimes prefer it.
Spicy Upgrade
Add diced fresh jalapeños to the beef while it cooks. Drizzle with chipotle crema (mix sour cream with adobo sauce from a can of chipotles) before serving. For extra heat, offer habanero hot sauce on the side.
Breakfast Nachos
Swap the beef for crispy bacon or breakfast sausage. Add scrambled eggs to the toppings bar. Drizzle with queso instead of sour cream. This is dangerous and wonderful, and I’ve served it at more than one brunch tailgate.
Seafood Twist
Use seasoned shrimp or flaked grilled fish instead of beef. Add a creamy cilantro-lime sauce and fresh mango salsa. This version feels lighter and works great for summer tailgates or outdoor parties.
I once tried a “dessert nacho” version with cinnamon sugar chips, melted white chocolate, and fresh berries. It was chaotic and messy and honestly? Kind of amazing. But that’s a recipe for another day.
Serving & Storage Suggestions
This sheet pan nacho bar is best served hot, straight from the oven. Set the pan on a trivet or cooling rack in the center of your table. Surround it with small bowls of extra toppings so people can customize their plates.
For drinks, I love pairing this with ice-cold Mexican lagers like Modelo or Corona. A spicy margarita or michelada works beautifully too. If you’re keeping it non-alcoholic, try a tart limeade or horchata.
For a full tailgate spread, serve these nachos alongside buffalo chicken stuffed jalapeño poppers or a grazing board with honey brie and prosciutto for a little variety. If you’re planning ahead, these also pair well with smoky pulled pork sliders with apple cider slaw for a heartier menu.
Storage: If you somehow have leftovers (rare, but it happens), let the nachos cool completely. Transfer to an airtight container and refrigerate for up to 2 days. The chips will soften, but the flavor will still be there.
Reheating: Spread leftovers on a sheet pan and reheat in a 350°F oven for 5-7 minutes. Skip the microwave—it turns everything into a sad, soggy mess. If the chips are too soft, you can crisp them up under the broiler for a minute or two.
Make-ahead tip: Prep all the components separately the night before. Brown the beef, shred the cheese, chop the toppings, and store everything in the fridge. Assemble and bake right before serving. The flavors actually get better after the beef sits overnight.
Nutritional Information & Benefits
Let’s be real—this is tailgate food, not health food. But it’s not as bad as you might think, especially if you load up on the fresh toppings.
Per serving (based on 8 servings):
- Calories: Approximately 450-500
- Protein: 22g
- Fat: 28g
- Carbohydrates: 35g
- Fiber: 8g
- Sodium: 680mg
The black beans add fiber and plant-based protein, which helps balance out the cheese and chips. Avocado brings healthy monounsaturated fats and a dose of potassium. If you use Greek yogurt instead of sour cream, you’ll cut some fat and add protein.
This recipe is naturally gluten-free as long as your tortilla chips are certified gluten-free. It’s also nut-free and egg-free. For a dairy-free version, use vegan cheese shreds and dairy-free sour cream—they melt surprisingly well.
Conclusion
This sheet pan nacho bar has become my go-to for every tailgate, game night, and casual get-together. It’s the kind of recipe that makes people hover around the kitchen island, grabbing chips straight from the pan before you’ve even set it down. There’s something about that communal eating experience that brings people together in a way individual plates just can’t match.
I love how forgiving this recipe is. You can swap ingredients, adjust the spice level, or double it for a bigger crowd without stressing about precision. It’s designed to work with whatever you have on hand and whatever your crowd craves.
Give it a try at your next tailgate. Customize it until it feels like yours. Add extra jalapeños if that’s your thing, or go light on the cheese if you prefer. The beauty of a nacho bar is that everyone gets exactly what they want.
When you make it, come back and let me know how it went. Did you add something wild? Did your friends fight over the last crispy edge piece? I want to hear about it. Drop a comment below or tag me in your photos—I love seeing these pans in action.
Now go preheat that oven. Game day isn’t going to wait.
Frequently Asked Questions
Can I make this sheet pan nacho bar ahead of time?
You can prep all the components ahead of time, but I recommend assembling and baking right before serving. The chips will get soggy if they sit with the toppings for too long. Prep the beef, shred the cheese, and chop your toppings the night before, then bake fresh when your guests arrive.
What’s the best way to keep nachos warm for a party?
The sheet pan itself holds heat pretty well. Set it on a cooling rack or trivet to keep air circulating underneath. If you’re serving outdoors, you can place the pan on a preheated griddle set to low or use a food warming tray. Just don’t cover it with foil—the trapped steam will make everything soggy.
Can I use a different protein instead of ground beef?
Absolutely. Shredded chicken, carnitas, chorizo, or even grilled shrimp all work great. For a vegetarian option, use extra beans or plant-based crumbles. Just make sure whatever protein you use is fully cooked before it goes on the chips, since the oven time is mainly for melting the cheese.
How do I prevent the bottom chips from getting soggy?
The middle layer of cheese and beans is the key. That melted cheese creates a barrier that protects the bottom chips from moisture. Also, make sure you drain your beans and any wet toppings like salsa before adding them. And don’t pile the chips too thick—one to two layers max per layer.
What if I don’t have a half sheet pan?
You can use two smaller baking sheets or even a large cast iron skillet. Just divide the ingredients evenly between the pans and bake them at the same time, rotating halfway through. If you’re using a deeper dish like a 9×13, reduce the chip layers and watch the cooking time—deeper pans take longer to melt the cheese evenly.
Pin This Recipe!
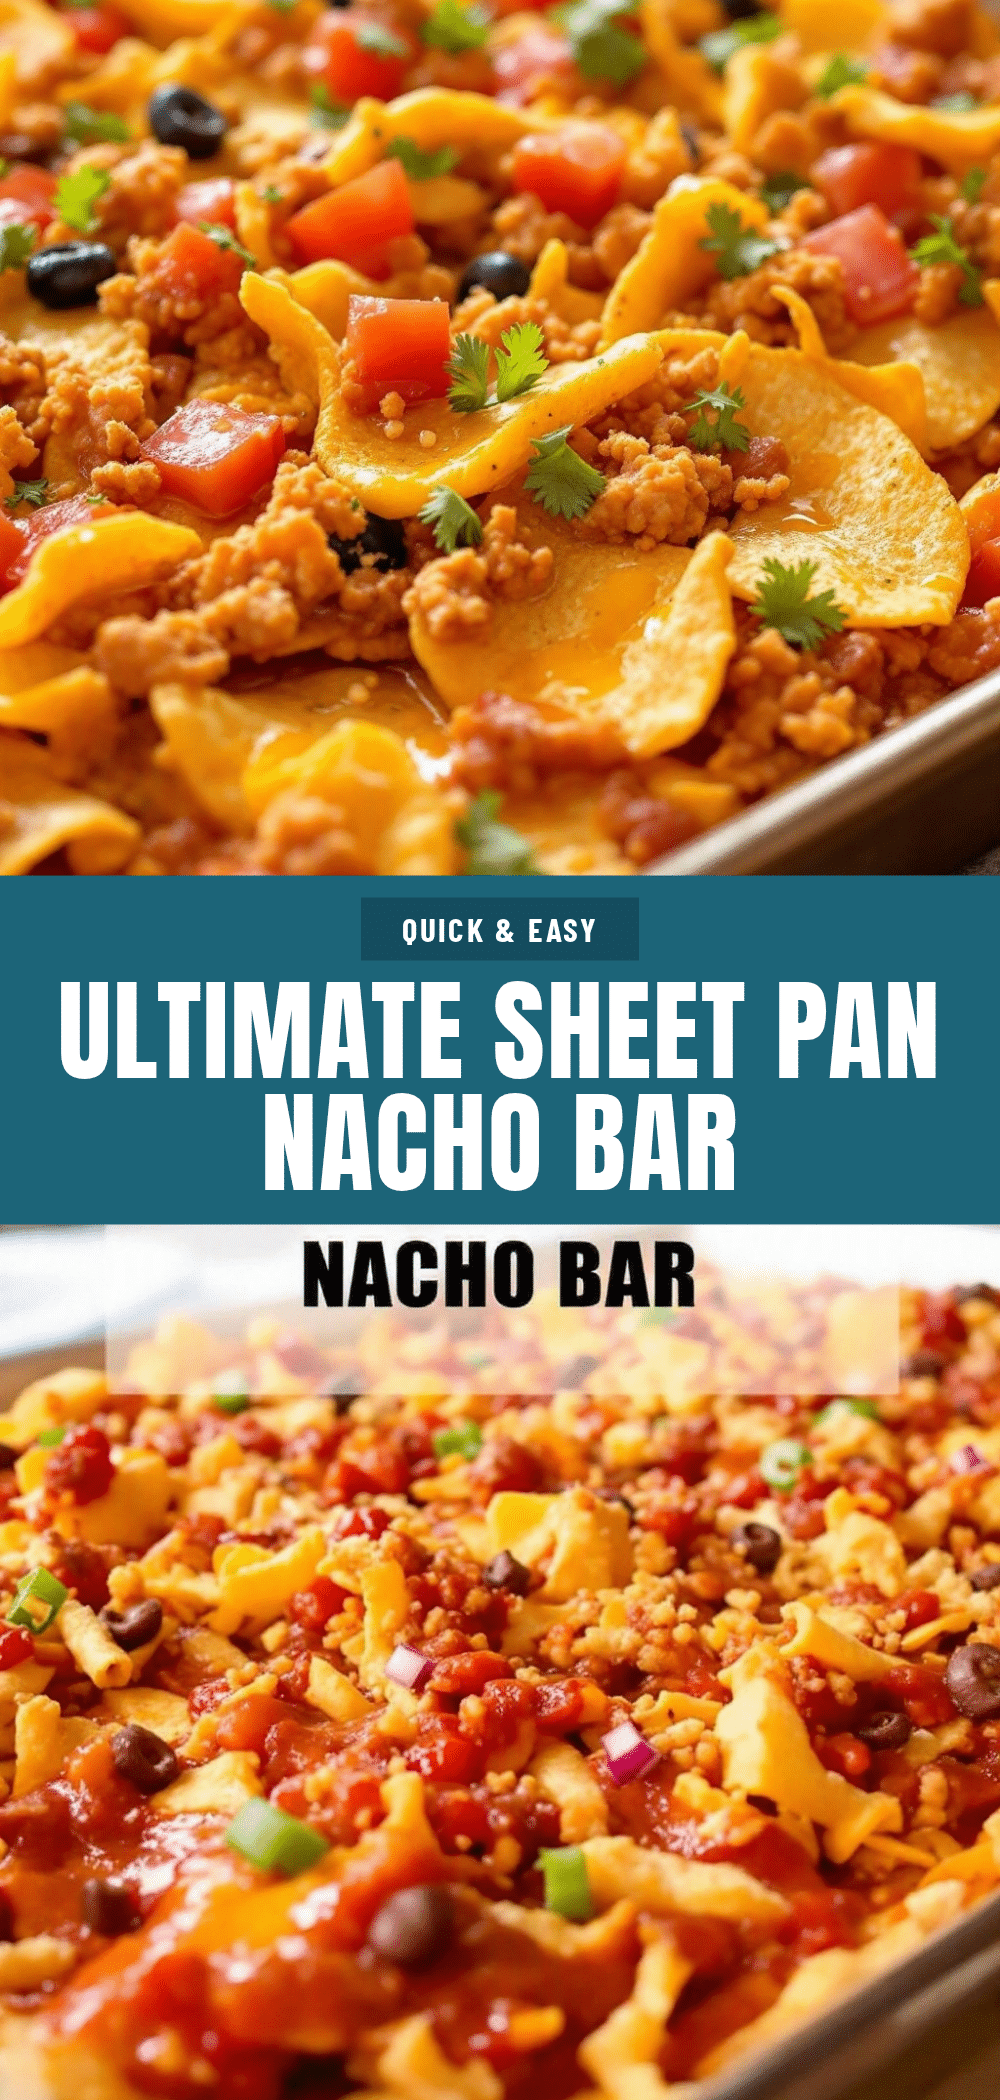
Ultimate Sheet Pan Nacho Bar: Easy Tailgate Party Idea
This sheet pan nacho bar is the ultimate crowd-pleaser for game day, featuring layers of crispy tortilla chips, seasoned ground beef, black beans, and melted cheese, all baked on a single pan and topped with fresh ingredients for a customizable, communal eating experience.
- Prep Time: 15 minutes
- Cook Time: 15 minutes
- Total Time: 30 minutes
- Yield: 8 servings 1x
- Category: Main Course
- Cuisine: Mexican
Ingredients
- 1 (13-ounce) bag restaurant-style tortilla chips
- 1 pound ground beef (80/20)
- 1 tablespoon chili powder
- 1 teaspoon cumin
- 1 teaspoon smoked paprika
- 1/2 teaspoon garlic powder
- 1/2 teaspoon onion powder
- Salt and black pepper to taste
- 1 (15-ounce) can black beans, drained and rinsed
- 3 cups shredded Mexican blend cheese
- 1 cup sour cream
- 1 cup pico de gallo or fresh salsa
- 1/2 cup pickled jalapeños
- 1 avocado, diced
- 1/4 cup fresh cilantro, chopped
- 1 lime, cut into wedges
- Optional: sliced black olives, diced red onion, hot sauce
Instructions
- Preheat your oven to 400°F (200°C). Line a half sheet pan (18×13 inches) with aluminum foil, making sure it goes up the sides a bit.
- Heat a large skillet over medium-high heat. Add the ground beef and break it apart with a wooden spoon. Cook for 5-6 minutes, stirring occasionally, until no pink remains. Drain off excess grease (leave about a tablespoon for flavor).
- Add the chili powder, cumin, smoked paprika, garlic powder, onion powder, and a pinch of salt and pepper. Stir together and cook for another minute until the spices are fragrant. Remove from heat and set aside.
- Spread about half the tortilla chips evenly across the sheet pan. You want some overlap but not a thick pile—think one to two chips deep max.
- Sprinkle half the black beans evenly over the chips. Follow with half the seasoned ground beef. Then scatter about 1 cup of the shredded cheese over everything.
- Spread the remaining chips over the middle layer. Add the rest of the black beans and ground beef. Top with the remaining 2 cups of shredded cheese, covering as much surface area as possible.
- Place the sheet pan in the preheated oven and bake for 12-15 minutes, until the cheese is fully melted and starting to brown around the edges. If you want extra browning, switch to broil for the last 1-2 minutes, watching closely.
- Remove the pan from the oven and let it rest for 2-3 minutes. Drizzle sour cream in zigzag lines over the top. Add spoonfuls of pico de gallo, scattered pickled jalapeños, diced avocado, and a generous sprinkle of fresh cilantro. Finish with lime wedges on the side.
- Place the sheet pan in the center of your table with small bowls of extra toppings nearby. Serve immediately.
Notes
Don’t overload the chips—too many toppings will steam them. Drain wet ingredients like salsa and beans to prevent sogginess. Use room temperature cheese for even melting. Watch the broiler closely to avoid burning. For a vegetarian version, double the black beans and add pinto beans or corn.
Nutrition
- Serving Size: 1 serving (based on
- Calories: 475
- Sugar: 3
- Sodium: 680
- Fat: 28
- Saturated Fat: 10
- Carbohydrates: 35
- Fiber: 8
- Protein: 22
Keywords: sheet pan nachos, tailgate nachos, game day nachos, easy nacho bar, crowd-pleasing nachos


