Love this? Save it for later!
Share the inspiration with your friends
My husband took one bite of these pumpkin pie cheesecake bars, stopped chewing, and just looked at me. That look—the one that says “you’ve done something dangerous here”—told me everything I needed to know before he even swallowed. He asked for them three days in a row without being prompted, which for a man who usually says “they’re good” about anything I bake, felt like winning a small but very satisfying award.
I wasn’t trying to reinvent the wheel, honestly. I just wanted pumpkin pie and cheesecake at the same time without dealing with a water bath—you know, that fussy step where you wrap your springform pan in foil and pray the water doesn’t seep in and ruin your crust? I’ve had that happen more times than I care to admit. So I set out to make something that tasted like the holidays but didn’t require a culinary degree or a prayer session.
The first batch came out of the oven looking a little too rustic—cracked on top, slightly uneven edges. But the flavor? That was something else. The tangy cream cheese layer cuts through the sweet pumpkin spice in a way that makes each bite feel balanced, not heavy. By the third attempt, I had the texture nailed down: creamy, firm, and sliceable without being dense. No water bath, no stress, just a pan of layered goodness that tastes like fall in bar form.
These Best No-Water-Bath Pumpkin Pie Cheesecake Bars have become my go-to for fall gatherings, and honestly, I think they’re even better than traditional pumpkin pie. They’re easier to serve, they travel well, and nobody misses the water bath. Not even a little bit.
Why You’ll Love This Recipe
Let me tell you why these bars have earned a permanent spot in my fall baking rotation. I’ve tested this recipe six times (yes, six) to make sure every layer works perfectly together, and here’s what makes them special:
- No Water Bath Required: This is the big one. No wrapping pans in foil, no worrying about leaks, no steamed crust. Just mix, layer, and bake.
- Simple Ingredients: You probably have most of these in your pantry right now. No fancy extracts or hard-to-find spices.
- Perfect for Fall Gatherings: These bars slice cleanly and hold their shape at room temperature, making them ideal for potlucks, Thanksgiving, or just a cozy weekend treat.
- Crowd-Pleaser: My kids devour these, my neighbors text me for the recipe, and even my father-in-law—who “doesn’t like cheesecake”—asked for seconds.
- Unbelievably Creamy: The texture is this perfect middle ground between silky cheesecake and classic pumpkin pie. It’s firm enough to hold a clean slice but melts on your tongue.
What makes these different from every other pumpkin cheesecake bar recipe? It’s the technique. Instead of a water bath, I use a low-and-slow baking method with a brief rest in the oven after turning it off. This gentle cooling process prevents cracking without the hassle. And that buttery shortbread crust? It stays crisp even after a few days in the fridge—no soggy bottoms here.
These bars are the kind of dessert that makes you close your eyes after the first bite. They’re comfort food reimagined: easier, faster, but with the same soul-soothing satisfaction of your favorite holiday pie. Perfect for impressing guests without the stress, or turning an ordinary Tuesday into something worth celebrating.
What Ingredients You Will Need
This recipe uses simple, wholesome ingredients to deliver bold flavor and satisfying texture without the fuss. Most of these are pantry staples, especially if you do any fall baking at all.
For the Shortbread Crust
- 1 ½ cups all-purpose flour (I use King Arthur for consistent results)
- ½ cup granulated sugar
- ½ cup unsalted butter, cold and cubed (this is key for a flaky crust)
- ¼ teaspoon salt
For the Cheesecake Layer
- 16 ounces cream cheese, softened (full-fat works best for creamy texture)
- ½ cup granulated sugar
- 2 large eggs, room temperature (cold eggs can make the batter lumpy)
- 1 teaspoon vanilla extract
- 1 tablespoon all-purpose flour (helps stabilize the cheesecake layer)
For the Pumpkin Layer
- 1 cup pumpkin puree (not pumpkin pie filling—make sure it’s 100% pure pumpkin)
- ½ cup brown sugar, packed (light or dark both work; dark gives deeper flavor)
- 2 large eggs, room temperature
- ½ cup heavy cream (adds richness and silky texture)
- 1 teaspoon vanilla extract
- 1 ½ teaspoons pumpkin pie spice (or make your own: ½ tsp cinnamon, ¼ tsp ginger, ¼ tsp nutmeg, ⅛ tsp cloves)
- ¼ teaspoon salt
I recommend using Libby’s pumpkin puree for consistent results—it’s thicker and less watery than some store brands. If you’re using a different brand, you might want to pat the pumpkin puree dry with paper towels to remove excess moisture. Trust me, this little step makes a big difference in preventing a soggy layer.
For the cream cheese, Philadelphia is my go-to. The texture is consistently smooth, and it blends beautifully without lumps. Let it sit on the counter for about 30 minutes before you start baking—properly softened cream cheese is non-negotiable for a silky cheesecake layer.
If you’re dairy-sensitive, you can substitute the heavy cream with full-fat coconut cream (the thick part from a can of coconut milk). The flavor will be slightly different, but still delicious. For a gluten-free version, use a 1:1 gluten-free flour blend in both the crust and the cheesecake layer.
Equipment Needed
You don’t need fancy equipment for these bars, which is part of what makes them so approachable. Here’s what you’ll need:
- 9×13-inch baking pan (metal or glass both work; metal gives a crisper crust)
- Parchment paper (for easy lifting—don’t skip this!)
- Electric mixer (handheld or stand mixer both work fine)
- Large mixing bowls (at least two)
- Measuring cups and spoons
- Spatula (for scraping down the bowl)
- Knife or offset spatula (for spreading layers evenly)
- Cooling rack
If you don’t have a 9×13 pan, you can use a 9-inch square pan—just adjust the baking time by about 10 minutes and expect thicker bars. I’ve also made these in an 8×8 pan, but the layers end up quite tall and need closer to 50 minutes of baking time.
I prefer metal pans for this recipe because they conduct heat more evenly and help the crust get golden and crisp. Glass pans work too, but the crust might be slightly less crunchy on the bottom. Either way, lining the pan with parchment paper with some overhang on the sides makes lifting the whole slab out a breeze—no awkward scooping or broken bars.
Preparation Method
Let’s walk through this step by step. I promise it’s simpler than it looks, and I’ve included all the little details I wish someone had told me the first time.
Step 1: Prep Your Pan and Preheat
Preheat your oven to 350°F (175°C). Line your 9×13-inch baking pan with parchment paper, leaving about 2 inches of overhang on the long sides. This creates “handles” for lifting the bars out later. Lightly grease the parchment with butter or cooking spray.
Step 2: Make the Shortbread Crust
In a medium bowl, whisk together the flour, sugar, and salt. Add the cold, cubed butter and use a pastry cutter or your fingertips to work it into the flour mixture until it resembles coarse crumbs with some pea-sized butter pieces remaining. Don’t overwork it—you want those little butter pockets for a flaky texture.
Press the mixture evenly into the bottom of your prepared pan. I use the bottom of a measuring cup to get it flat and compact. Bake for 15-18 minutes, until the edges are just starting to turn golden. The center will still look pale—that’s perfect. Set aside to cool slightly while you make the fillings.
Step 3: Make the Cheesecake Layer
In a large bowl, beat the softened cream cheese with an electric mixer on medium speed until smooth and creamy—about 2 minutes. Scrape down the sides and bottom of the bowl with a spatula. Add the sugar and beat for another minute until fluffy. Add the eggs one at a time, beating on low after each addition until just combined. Overmixing at this stage can incorporate too much air, which leads to cracks later. Stir in the vanilla and flour until just combined. Set aside.
Step 4: Make the Pumpkin Layer
In a separate bowl, whisk together the pumpkin puree, brown sugar, eggs, heavy cream, vanilla, pumpkin pie spice, and salt. Whisk until smooth and well combined. The mixture should be thick but pourable. If it looks watery, your pumpkin puree might have too much moisture—you can stir in an extra tablespoon of flour to help thicken it.
Step 5: Layer the Fillings
Pour the cheesecake mixture over the pre-baked crust and spread it evenly with a spatula. Gently spoon the pumpkin mixture over the cheesecake layer, spreading it carefully to cover completely. Here’s where the magic happens: use a knife or skewer to gently swirl the two layers together—just 4 or 5 figure-eight motions. Don’t over-swirl or you’ll lose the distinct layers. You want a marbled effect, not a muddy one.
Step 6: Bake Low and Slow
Reduce your oven temperature to 325°F (160°C). Bake the bars for 35-40 minutes, until the edges are set and the center jiggles slightly when you gently shake the pan. It should look like firm Jell-O, not liquid. The surface might have a few tiny cracks around the edges—that’s normal and won’t affect the taste.
Step 7: The Gentle Cool-Down
Turn off the oven and crack the door open. Let the bars rest in the oven for 30 minutes. This gradual cooling is what prevents major cracking without a water bath. After 30 minutes, remove the pan from the oven and let it cool completely on a wire rack—about 1 hour. Then refrigerate for at least 4 hours, preferably overnight. This is crucial for clean slices and the best texture.
Step 8: Slice and Serve
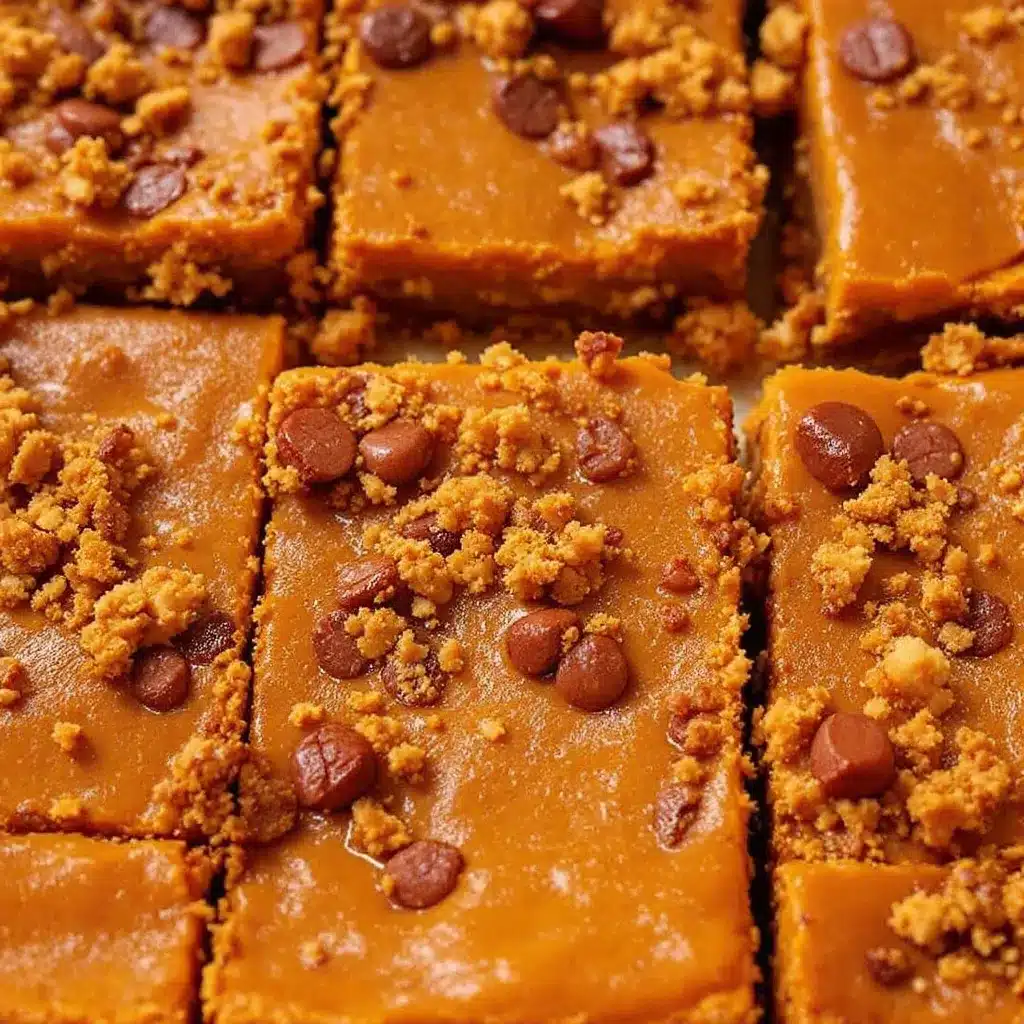
Once fully chilled, use the parchment handles to lift the entire slab out of the pan. Place it on a cutting board and use a sharp knife to slice into bars. For clean cuts, wipe the knife clean between each slice. I like to cut them into 12-16 bars, depending on how generous you’re feeling.
Cooking Tips & Techniques
I learned most of these tips the hard way—through cracked tops, soggy crusts, and bars that fell apart when I tried to slice them. Let me save you the trouble.
Room temperature ingredients are non-negotiable. Cold cream cheese creates lumps that won’t smooth out no matter how long you beat it. Cold eggs can seize up the batter. Take everything out of the fridge 30-45 minutes before you start. I set a timer on my phone so I don’t forget.
Don’t overmix the cheesecake layer. I know it’s tempting to keep beating until it’s perfectly smooth, but too much air creates bubbles that expand during baking and cause cracks. Mix just until the ingredients come together, then stop.
The water bath substitute works. Baking at a slightly lower temperature and letting the bars cool in the turned-off oven mimics the gentle, even heat of a water bath without the mess. I’ve tested this side by side with a traditional water bath recipe, and honestly, the texture is nearly identical.
Patience is a virtue. I know you want to dig in as soon as they come out of the oven, but these bars need time to set. The 4-hour chill is the minimum—overnight is better. I once cut into them after only 2 hours, and they were a delicious but messy puddle. Worth it? Maybe. But the clean slices the next day were definitely worth the wait.
Use a sharp knife. A dull knife will drag through the layers and smear the beautiful swirl pattern. Run the knife under hot water, wipe it dry, then slice. Repeat between each cut for pristine bars.
Variations & Adaptations
One of the best things about this recipe is how adaptable it is. Here are some variations I’ve tried and loved:
Gluten-Free Version
Swap the all-purpose flour in the crust and cheesecake layer with a 1:1 gluten-free baking flour blend. I’ve used Bob’s Red Mill with great results. The crust will be slightly more crumbly but still delicious.
Dairy-Free Version
Use dairy-free cream cheese (Kite Hill or Violife work well) and substitute the heavy cream with full-fat coconut cream. The texture will be slightly less firm, but the flavor is still fantastic. I made this version for a friend with dairy allergies and she couldn’t tell the difference.
Gingerbread Spice Variation
Replace the pumpkin pie spice with 1 teaspoon cinnamon, ½ teaspoon ginger, ½ teaspoon molasses, and ¼ teaspoon cloves. The molasses adds a deep, warm flavor that pairs beautifully with the cream cheese. This is my personal favorite for Christmas gatherings.
Pecan Praline Topping
After the bars have chilled and been sliced, drizzle with a simple praline sauce: melt ¼ cup butter with ½ cup brown sugar and ¼ cup heavy cream, then stir in ½ cup chopped pecans. Let it cool slightly before drizzling over the bars. It adds a lovely crunch and extra sweetness.
Mini Bar Version
Make these in a muffin tin for individual servings. Line 12 muffin cups with paper liners, press about 2 tablespoons of crust mixture into each, then layer the fillings. Bake at 325°F for 18-22 minutes. These are perfect for parties or lunchbox treats.
Serving & Storage Suggestions
These bars are incredibly versatile when it comes to serving. Here’s how I like to enjoy them:
At Room Temperature: Let the bars sit out for 15-20 minutes before serving. This takes the chill off and allows the flavors to open up. The texture becomes creamier and more indulgent.
With Whipped Cream: A dollop of lightly sweetened whipped cream is the classic pairing. For a twist, add a pinch of cinnamon or a splash of bourbon to the cream.
With Coffee: These bars are absolutely divine alongside a hot cup of coffee or a pumpkin spice latte. The bitterness of the coffee balances the sweetness perfectly.
Drizzled with Caramel: A warm caramel sauce takes these bars over the top. I’ve used store-bought in a pinch, but homemade is worth the extra few minutes.
Storage: Keep the bars in an airtight container in the refrigerator for up to 5 days. They actually taste better on day 2 or 3 as the flavors meld together. To freeze, wrap individual bars tightly in plastic wrap, then place them in a freezer-safe bag. They’ll keep for up to 3 months. Thaw in the refrigerator overnight before serving.
Reheating: If you prefer warm bars, microwave individual portions for 15-20 seconds. The cheesecake layer will soften slightly, and the pumpkin flavor becomes even more pronounced.
Nutritional Information & Benefits
While these bars are definitely a treat, they do offer some nutritional benefits worth noting:
Estimated per bar (based on 12 servings):
- Calories: 380
- Fat: 24g
- Saturated Fat: 14g
- Carbohydrates: 36g
- Fiber: 2g
- Sugar: 24g
- Protein: 7g
- Vitamin A: 120% DV
- Calcium: 6% DV
- Iron: 8% DV
Health Highlights: Pumpkin is packed with Vitamin A (great for eye health and immune function), fiber, and antioxidants. Cream cheese provides calcium and protein. The eggs add additional protein and healthy fats. While this isn’t a health food by any means, it’s a more nutrient-dense dessert option than many alternatives.
Dietary Considerations: This recipe contains gluten, dairy, and eggs. For gluten-free and dairy-free options, see the variations section above. These bars are naturally nut-free (unless you add the pecan praline topping) and can be made without refined sugar by using coconut sugar in place of granulated and brown sugar.
Frequently Asked Questions
Can I use canned pumpkin pie filling instead of pure pumpkin?
I don’t recommend it. Pumpkin pie filling already has sugar and spices added, which will throw off the balance of this recipe. The texture will also be different—pumpkin pie filling is thicker and more gelatinous. Stick with 100% pure pumpkin puree for the best results.
Why did my cheesecake layer crack?
Cracks usually happen from overmixing (too much air in the batter), overbaking, or drastic temperature changes. Make sure your ingredients are at room temperature, mix on low speed, and don’t overbake. The gentle cool-down in the turned-off oven is your best defense against cracks.
Can I make these bars ahead of time?
Absolutely! In fact, they’re better made a day ahead. The flavors develop and meld together overnight, and the texture becomes even creamier. You can make them up to 3 days in advance and store them in the refrigerator.
How do I get clean, neat slices?
Chill the bars thoroughly (at least 4 hours, preferably overnight). Use a sharp knife and wipe it clean between each slice. For extra-clean cuts, run the knife under hot water, dry it off, then slice. The warmth helps the knife glide through the layers without dragging.
Can I freeze these bars?
Yes! Wrap individual bars tightly in plastic wrap, then place them in a freezer-safe bag or container. They’ll keep for up to 3 months. Thaw in the refrigerator overnight before serving. I like to keep a few in the freezer for unexpected guests or late-night cravings.
Conclusion
These Best No-Water-Bath Pumpkin Pie Cheesecake Bars have become my most-requested fall dessert, and I think they’ll become yours too. They combine everything we love about pumpkin pie and cheesecake into one easy, no-fuss bar that slices beautifully and tastes like a warm hug on a cool autumn day.
What I love most about this recipe is how forgiving it is. You don’t need to be a pastry chef or own fancy equipment. You just need a few simple ingredients, a little patience, and the willingness to let them chill overnight. The result is a dessert that looks impressive enough for Thanksgiving but is simple enough for a random Tuesday night.
I’d love to hear how these turn out for you! Did you try any variations? Did your family love them as much as mine does? Drop a comment below and let me know. And if you’re looking for more fall desserts, check out my pumpkin cream cheese swirl muffins or these fluffy pumpkin cinnamon rolls for more seasonal inspiration. Happy baking, friends!
Pin This Recipe!
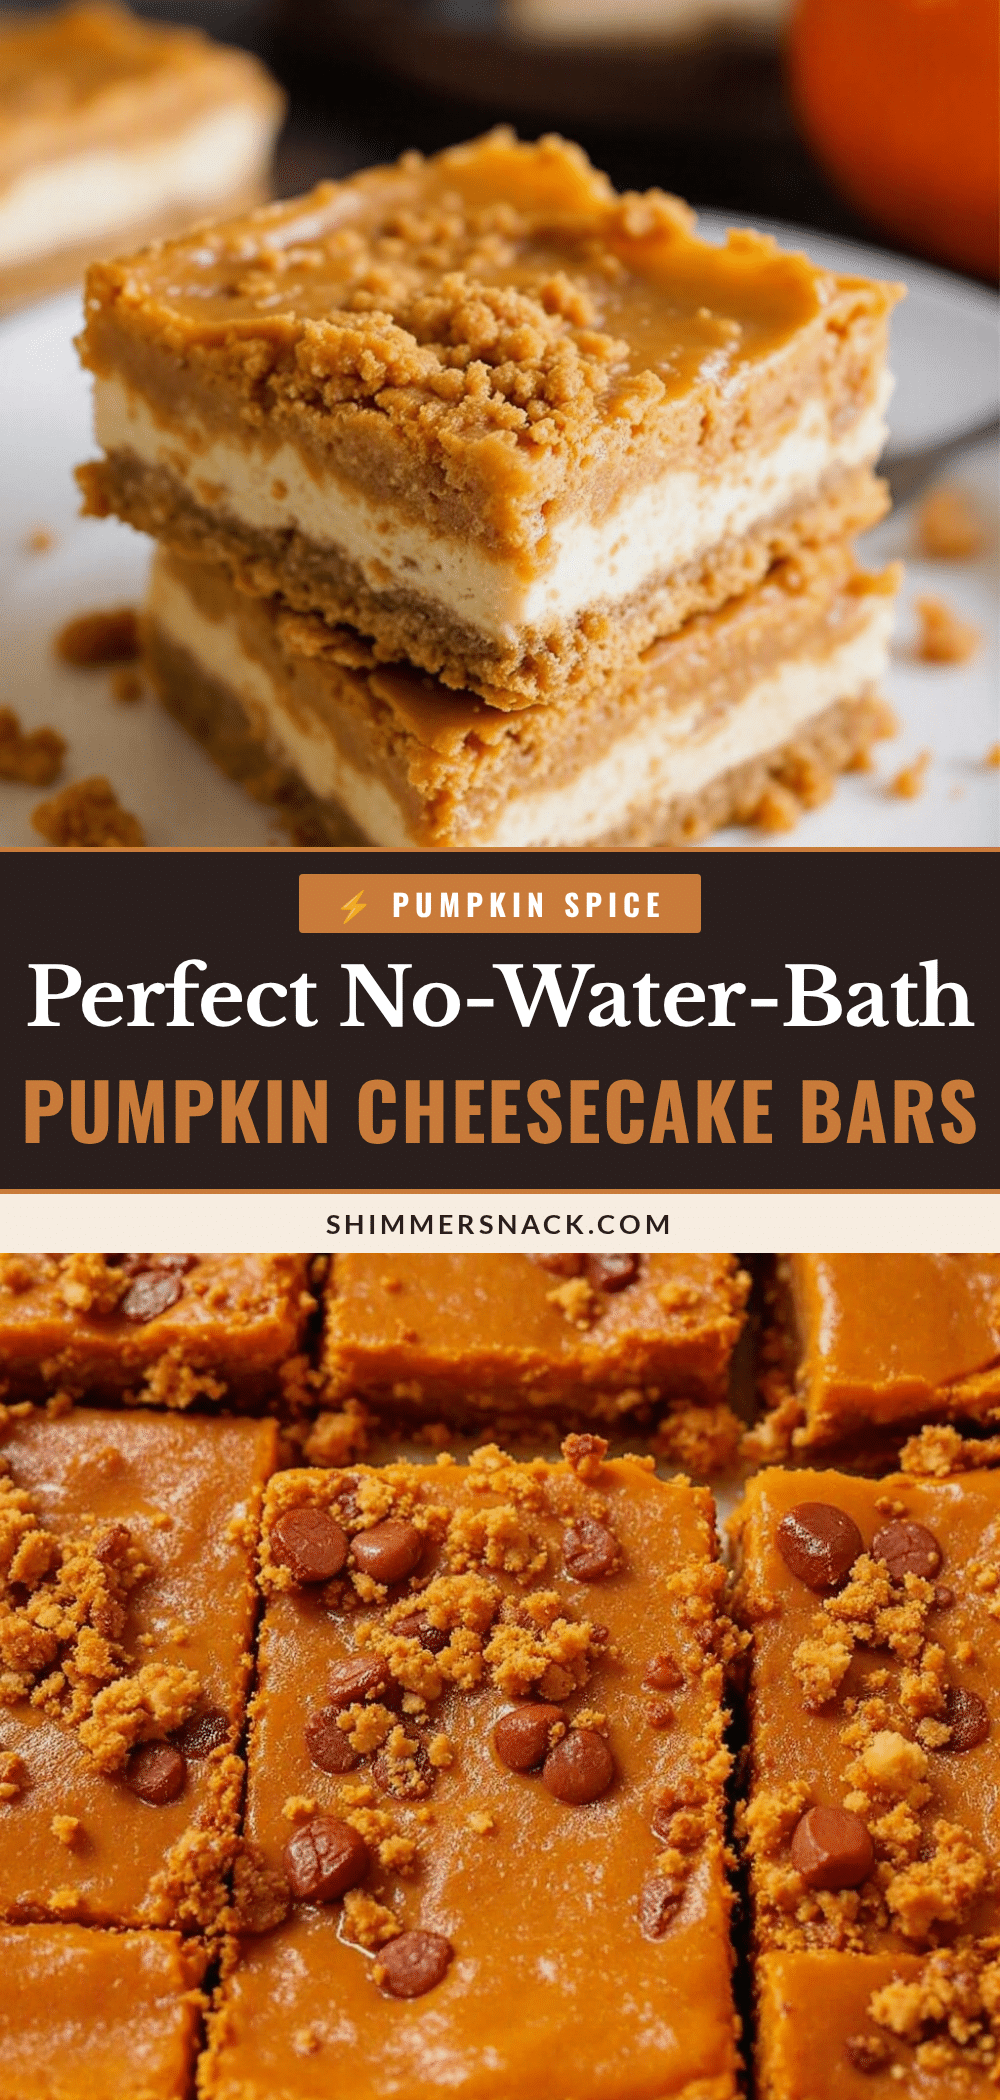
Best No-Water-Bath Pumpkin Pie Cheesecake Bars (Easy Fall Dessert)
These pumpkin pie cheesecake bars combine the best of pumpkin pie and cheesecake into one easy, no-fuss bar that slices beautifully and tastes like a warm hug on a cool autumn day. No water bath required, just simple ingredients and a low-and-slow baking method for a creamy, crack-free dessert.
- Prep Time: 30 minutes
- Cook Time: 40 minutes
- Total Time: 5 hours 10 minutes (includes cooling and chilling)
- Yield: 12 servings 1x
- Category: Dessert
- Cuisine: American
Ingredients
- 1 ½ cups all-purpose flour
- ½ cup granulated sugar
- ½ cup unsalted butter, cold and cubed
- ¼ teaspoon salt
- 16 ounces cream cheese, softened
- ½ cup granulated sugar
- 2 large eggs, room temperature
- 1 teaspoon vanilla extract
- 1 tablespoon all-purpose flour
- 1 cup pumpkin puree (100% pure pumpkin)
- ½ cup brown sugar, packed
- 2 large eggs, room temperature
- ½ cup heavy cream
- 1 teaspoon vanilla extract
- 1 ½ teaspoons pumpkin pie spice
- ¼ teaspoon salt
Instructions
- Preheat oven to 350°F (175°C). Line a 9×13-inch baking pan with parchment paper, leaving overhang on the long sides. Lightly grease the parchment.
- Make the shortbread crust: In a medium bowl, whisk together flour, sugar, and salt. Cut in cold cubed butter using a pastry cutter or fingertips until mixture resembles coarse crumbs with pea-sized butter pieces. Press evenly into prepared pan. Bake for 15-18 minutes until edges are golden. Set aside to cool slightly.
- Make the cheesecake layer: In a large bowl, beat softened cream cheese with an electric mixer on medium speed until smooth (about 2 minutes). Add sugar and beat until fluffy. Add eggs one at a time, beating on low after each addition. Stir in vanilla and flour until just combined. Set aside.
- Make the pumpkin layer: In a separate bowl, whisk together pumpkin puree, brown sugar, eggs, heavy cream, vanilla, pumpkin pie spice, and salt until smooth.
- Pour cheesecake mixture over pre-baked crust and spread evenly. Gently spoon pumpkin mixture over cheesecake layer and spread carefully. Use a knife or skewer to gently swirl the layers together with 4-5 figure-eight motions.
- Reduce oven temperature to 325°F (160°C). Bake for 35-40 minutes until edges are set and center jiggles slightly like firm Jell-O.
- Turn off oven and crack the door open. Let bars rest in oven for 30 minutes. Remove from oven and cool completely on a wire rack (about 1 hour). Refrigerate for at least 4 hours, preferably overnight.
- Use parchment handles to lift slab out of pan. Place on cutting board and slice into bars using a sharp knife, wiping clean between cuts.
Notes
Room temperature ingredients are crucial for a smooth texture. Do not overmix the cheesecake layer to avoid cracks. The gentle cool-down in the turned-off oven prevents cracking without a water bath. Chill for at least 4 hours (preferably overnight) for clean slices. For gluten-free, use a 1:1 gluten-free flour blend. For dairy-free, use dairy-free cream cheese and full-fat coconut cream.
Nutrition
- Serving Size: 1 bar
- Calories: 380
- Sugar: 24
- Fat: 24
- Saturated Fat: 14
- Carbohydrates: 36
- Fiber: 2
- Protein: 7
Keywords: pumpkin cheesecake bars, no water bath cheesecake, fall dessert, pumpkin pie bars, easy cheesecake bars


