Love this? Save it for later!
Share the inspiration with your friends
“Wait, you’re making what?” My husband peered over my shoulder, flour already dusting my counter. I was elbow-deep in pie dough, a can of pumpkin puree sitting on the counter like a tiny orange promise. “Mini pumpkin hand pies,” I said, not looking up. “Just enough for us.” And that was it. I wasn’t trying to feed a crowd or win a bake-off. I just wanted that specific, cozy taste of fall—warm pumpkin, cinnamon, flaky crust—without a massive pie taunting me from the fridge for a week. These little guys were born from a very real, very specific Tuesday night craving.
You know how sometimes you want a holiday dessert, but you don’t want to commit to a whole pie? Or maybe it’s just the two of you, and a 9-inch pie feels like overkill (and a little sad to eat alone). That’s exactly where this recipe comes in. It’s the perfect little dessert for a quiet Halloween night, a date night in, or just because you deserve a hand-held pumpkin treat without the leftovers. Honestly, these easy mini pumpkin hand pies are the answer to a question I didn’t know I was asking.
I’ve made a lot of pumpkin desserts over the years, from a cozy slow cooker pumpkin chili for game day to chewy pumpkin snickerdoodle cookies, but these little pies feel different. They’re personal. They’re for you (and maybe one other person). They’re the kind of dessert you make when you want something special, but you don’t want to make a big production out of it. And trust me, after that first bite of flaky, buttery crust and spiced pumpkin filling, you’ll wonder why you ever bothered with a full-sized pie in the first place.
Why You’ll Love This Recipe
Let’s be real—there are a million pumpkin pie recipes out there. But these easy mini pumpkin hand pies are different. They’re not just a smaller version of a big pie. They’re a whole different experience. Here’s why they’ll become your new go-to fall dessert.
- Quick & Easy: From start to finish, you’re looking at about 35 minutes. No chilling dough for hours, no blind baking. Just mix, fill, bake, and eat. Perfect for a last-minute Halloween treat or a weeknight craving.
- Simple Ingredients: You probably have most of this stuff in your pantry right now. Canned pumpkin, pie spice, butter, flour—nothing fancy. No trips to a specialty store required.
- Perfect for Two: This recipe makes exactly four hand pies. That’s two for you and two for your person. Or, you know, four for you. No judgment here. It’s the ideal Halloween dessert for two.
- Crowd-Pleaser: I’ve served these to friends, family, and even picky kids. They disappear fast. The flaky crust and creamy filling are a combo that everyone loves.
- Unbelievably Delicious: The secret is in the filling. I use a little cream cheese to make it extra smooth and tangy, which balances the sweet pumpkin perfectly. It’s next-level comfort food in a hand-held package.
What makes this recipe different from the rest? It’s the texture. Most hand pies end up with a dry, crumbly filling. Not these. By blending the pumpkin with a touch of cream cheese and an egg yolk, you get a filling that’s rich, creamy, and almost custard-like. It’s the kind of dessert that makes you close your eyes after the first bite. It’s comfort food reimagined—faster, easier, but with the same soul-soothing satisfaction. Perfect for a quiet Halloween night without the stress of a big production.
What Ingredients You Will Need
This recipe uses simple, wholesome ingredients to deliver that classic pumpkin pie flavor without the fuss. Most of these are pantry staples, especially if you’re already in a fall baking mood. Here’s what you’ll need:
For the Pie Crust
- 1 sheet refrigerated pie crust (from a 14.1-ounce box, like Pillsbury) — I know, I know, homemade is great. But for a quick dessert for two, the store-bought stuff works perfectly and saves so much time. Just make sure it’s the kind that comes rolled up in a box, not the frozen deep-dish kind.
- 1 tablespoon all-purpose flour (for dusting your work surface)
For the Pumpkin Filling
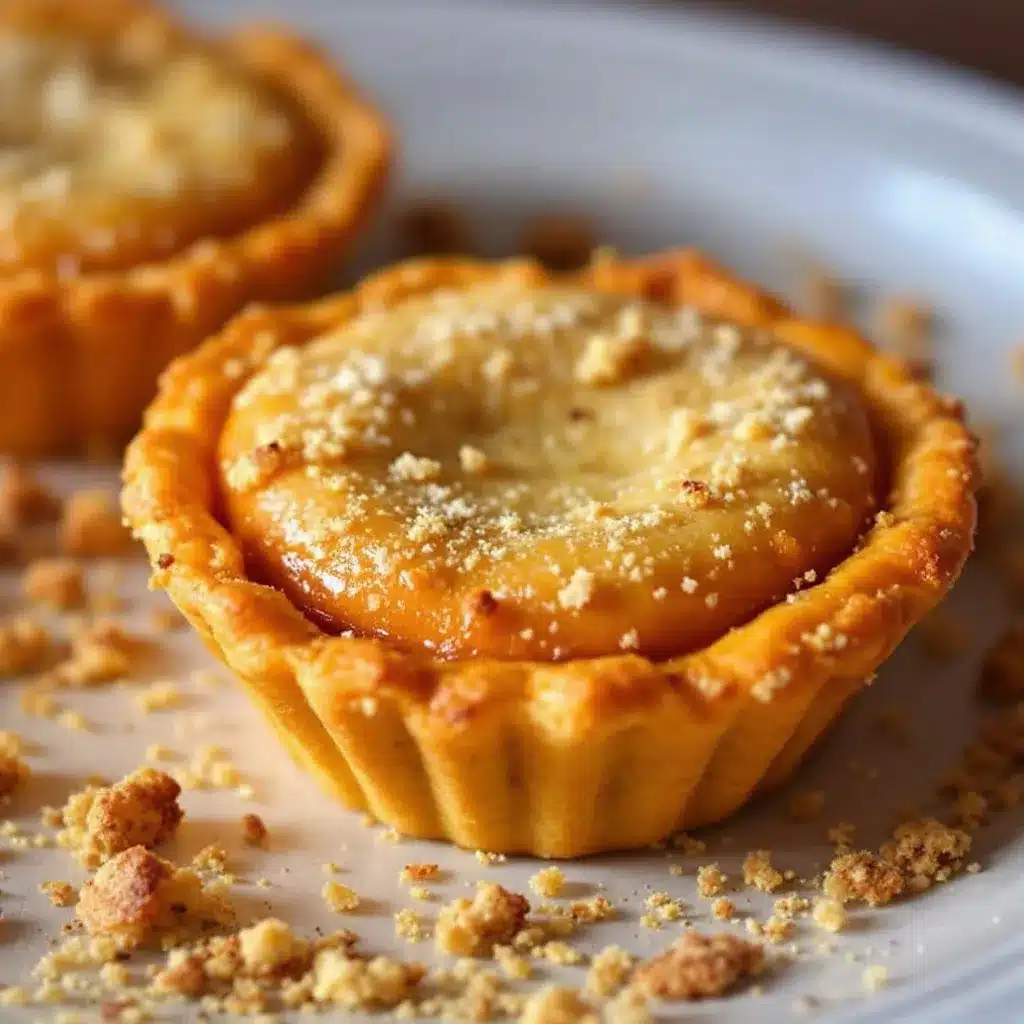
- 1/2 cup canned pumpkin puree (not pumpkin pie filling) — I prefer Libby’s for its consistent texture and deep flavor. It’s not too watery, which is key for a hand pie filling.
- 2 ounces cream cheese, softened to room temperature — This is my secret ingredient. It adds a subtle tang and makes the filling unbelievably creamy. Use full-fat for the best texture.
- 3 tablespoons packed light brown sugar — Adds moisture and a deeper, almost caramel-like sweetness compared to white sugar.
- 1 large egg yolk — The yolk adds richness and helps bind the filling. Save the white for the egg wash.
- 1 teaspoon pumpkin pie spice — You can use store-bought or make your own with 1/2 teaspoon cinnamon, 1/4 teaspoon ginger, 1/8 teaspoon nutmeg, and a pinch of cloves.
- 1/4 teaspoon vanilla extract — Just a splash to round out the flavors.
- Pinch of salt — Don’t skip this! It balances the sweetness and makes the pumpkin flavor pop.
For the Egg Wash & Topping
- 1 large egg white (leftover from the yolk above) mixed with 1 tablespoon water — This gives the crust that beautiful golden-brown shine.
- 1 tablespoon coarse sugar (like turbinado or demerara) — For that delightful crunchy top. Regular granulated sugar works in a pinch, but coarse sugar is better for texture.
Substitution Guidance: If you’re dairy-free, you can use a vegan cream cheese (like Kite Hill) and a vegan pie crust. The texture will be slightly different, but still delicious. For a gluten-free option, use a gluten-free pie crust sheet—just handle it gently as it can be more delicate. And if you don’t have pumpkin pie spice, just use cinnamon and a tiny pinch of nutmeg. It won’t be exactly the same, but it’ll still taste like fall.
Equipment Needed
You don’t need a fancy bakery setup for these easy mini pumpkin hand pies. Just a few basic tools you probably already have. Here’s what you’ll need:
- Baking sheet — A standard half-sheet pan works great. Line it with parchment paper for easy cleanup.
- Parchment paper — Trust me on this one. It prevents sticking and makes transferring the pies a breeze.
- Rolling pin — Even though we’re using a pre-made crust, you’ll need to roll it out just a little to get it to the right thickness. A wine bottle works in a pinch.
- 3-inch round cookie cutter — This is the perfect size for hand pies. If you don’t have one, use a wide-mouth drinking glass or a mason jar lid. Just make sure it’s about 3 inches in diameter.
- Small bowl — For mixing the filling and the egg wash.
- Fork — For crimping the edges of the pies. A fork is classic and gives that perfect pie crust edge.
- Pastry brush — For brushing on the egg wash. A silicone brush is best, but a paper towel works in a pinch (just be gentle).
- Sharp knife or pizza cutter — For cutting small vents in the top of the pies to let steam escape.
I’ve made these with a $2 cookie cutter from the grocery store and they turned out perfectly. Don’t overthink the equipment. If you have a baking sheet and a fork, you’re basically ready to go.
Preparation Method
Alright, let’s get to the fun part. These easy mini pumpkin hand pies come together in about 35 minutes, and most of that is hands-off baking time. Follow these steps, and you’ll have a warm, flaky, pumpkin-spiced treat in no time.
- Preheat your oven to 400°F (200°C). Line a baking sheet with parchment paper. This is non-negotiable for easy cleanup and preventing sticking.
- Make the filling. In a small bowl, combine the softened cream cheese and brown sugar. Mash them together with a fork until smooth and creamy. Yes, you can use a mixer, but a fork works just fine and means less cleanup. Add the pumpkin puree, egg yolk, pumpkin pie spice, vanilla extract, and a pinch of salt. Stir until everything is well combined and smooth. Give it a taste—it should be sweet, spiced, and a little tangy from the cream cheese. Set it aside.
- Prepare the crust. Unroll your pie crust onto a lightly floured surface. If it’s cracked at the edges (this happens sometimes), just press it back together with your fingers. Use your rolling pin to gently roll the crust out to about 1/8-inch thickness. You don’t need to go crazy—just make it a little bigger and thinner so you can get more circles out of it.
- Cut out the circles. Using your 3-inch round cookie cutter (or a glass), cut out as many circles as you can. You should get about 8 circles from one crust. If you need to, gather the scraps and re-roll them once to get that last circle. Don’t overwork the dough, or it’ll get tough.
- Assemble the pies. Place 4 of the circles on your prepared baking sheet, spacing them about 2 inches apart. Spoon about 1 heaping tablespoon of the pumpkin filling into the center of each circle. Don’t overfill—leave a little border around the edge so you can seal them.
- Top and seal. Place the remaining 4 circles on top of the filling. Gently press the edges together with your fingers to seal. Then, take a fork and crimp the edges all the way around. This not only looks pretty but also helps seal the pies so the filling doesn’t leak out during baking.
- Cut vents. Use a sharp knife or a small paring knife to cut 2 or 3 small slits on the top of each pie. This lets the steam escape and prevents the pies from bursting open in the oven. Don’t skip this step—I learned the hard way when one of my pies exploded and left a pumpkin puddle on the baking sheet.
- Add the egg wash and sugar. In a small bowl, whisk the egg white with 1 tablespoon of water until frothy. Using your pastry brush, brush a thin layer of the egg wash over the top of each pie. Sprinkle a generous pinch of coarse sugar over each one. The egg wash gives them that gorgeous golden-brown color, and the sugar adds a lovely crunch.
- Bake. Place the baking sheet in the preheated oven and bake for 18-22 minutes, or until the crust is golden brown and the filling is bubbly. Keep an eye on them—ovens vary, and you want them golden, not burnt. The filling will be very hot, so let them cool on the baking sheet for at least 5-10 minutes before serving.
And that’s it! See? No complicated steps, no fancy techniques. Just pure, delicious, hand-held pumpkin pie goodness.
Cooking Tips & Techniques
I’ve made these easy mini pumpkin hand pies about a dozen times now, and I’ve picked up a few tricks along the way. Here are my best tips to make sure yours turn out perfect every time.
Don’t overfill the pies. I know it’s tempting to add extra filling—it’s so good! But if you overfill, the pies will burst open in the oven, and you’ll end up with a mess instead of a neat little hand pie. Stick to about 1 heaping tablespoon per pie. It’s the perfect amount.
Make sure the cream cheese is really soft. Cold cream cheese will leave lumps in your filling, and nobody wants a lumpy pumpkin pie. Let it sit on the counter for at least 30 minutes before you start. If you’re in a hurry, microwave it for about 10 seconds. Just don’t melt it.
Chill the assembled pies if you have time. If your kitchen is warm, the dough can get soft and sticky. Pop the assembled pies on the baking sheet into the fridge for 10-15 minutes before baking. This helps the crust hold its shape and gives you a flakier result. I don’t always do this, but when I do, I notice a difference.
Watch the edges. The edges of the pies can brown faster than the centers because they’re thinner. If you notice the edges getting too dark, tent the whole baking sheet loosely with aluminum foil for the last 5 minutes of baking.
Let them cool. I know it’s hard to wait, but the filling is like molten lava straight out of the oven. Let them cool for at least 5-10 minutes on the baking sheet. The filling will set up a little as it cools, making the pies easier to handle and more enjoyable to eat.
One time, I forgot to cut vents in the tops. Big mistake. One of the pies literally exploded in the oven, sending pumpkin filling all over the place. Lesson learned. Always cut those little slits!
Variations & Adaptations
One of the best things about this recipe is how easy it is to adapt. Here are a few of my favorite variations:
- Spiced Apple Hand Pies: Swap the pumpkin puree for 1/2 cup of finely diced apple (like Granny Smith or Honeycrisp) mixed with 1 tablespoon of brown sugar and 1/2 teaspoon of cinnamon. Cook the apple mixture in a small pan for 3-4 minutes until softened before filling the pies. It’s a whole different vibe, but just as delicious.
- Chocolate Pumpkin Swirl: Before filling the pies, stir 1 tablespoon of melted dark chocolate into the pumpkin filling. Don’t mix it completely—leave a few swirls of chocolate. It adds a rich, slightly bitter note that pairs beautifully with the sweet pumpkin.
- Vegan Version: Use a vegan pie crust (like Wholly Wholesome or homemade) and substitute the cream cheese with a vegan cream cheese. For the egg wash, brush the pies with a little plant-based milk (like oat or almond) instead of the egg white. The crust won’t be as shiny, but it’ll still be golden and delicious.
- Savory Twist: Skip the sugar and add a pinch of black pepper, a dash of cayenne, and a sprinkle of grated Parmesan cheese to the filling. These savory pumpkin hand pies are amazing as an appetizer or alongside a bowl of homemade tomato basil soup.
- Gluten-Free Option: Use a gluten-free pie crust. I’ve had good luck with Wholly Gluten Free pie crusts. Just handle the dough gently, as gluten-free crusts can be more fragile and prone to cracking.
My personal favorite variation? The chocolate pumpkin swirl. I made it one rainy Sunday afternoon, and it was the perfect cozy treat. The combination of rich dark chocolate and warm pumpkin spice is just unbeatable.
Serving & Storage Suggestions
These easy mini pumpkin hand pies are best served warm, but they’re also delicious at room temperature. Here’s how to make the most of them:
Serving: Serve them warm with a dollop of whipped cream or a scoop of vanilla ice cream. The contrast between the warm, spiced filling and the cold, creamy topping is heavenly. For an extra touch, drizzle a little caramel sauce over the top. They’re also perfect on their own as a grab-and-go treat.
What to Serve With Them: These hand pies pair beautifully with a hot cup of coffee or tea. Try them with a homemade pumpkin chai latte for the ultimate fall pairing. Or, for a fun Halloween treat, serve them alongside a glass of cold milk or a spooky-themed cocktail.
Storage: Store any leftover hand pies in an airtight container at room temperature for up to 2 days. After that, the crust can start to get a little soft. If you need to keep them longer, store them in the refrigerator for up to 4 days. Just note that the crust won’t be as flaky after refrigeration.
Reheating: The best way to reheat these pies is in the oven or toaster oven. Pop them in a 350°F (175°C) oven for 5-7 minutes until warmed through and the crust is crispy again. You can also microwave them for about 15-20 seconds, but the crust will be soft, not crispy. If you’re in a rush, the microwave works fine.
Freezing: You can freeze the unbaked hand pies. Assemble them completely (including the egg wash and sugar), then place them on a baking sheet and freeze until solid. Transfer the frozen pies to a freezer-safe bag or container. When you’re ready to bake, add a few extra minutes to the baking time (about 22-25 minutes) and bake directly from frozen. No need to thaw! This is a great way to have a last-minute dessert ready to go.
The flavors actually develop a little more after a day in the fridge. The spices meld together, and the filling gets even creamier. So don’t be afraid to make them a day ahead!
Nutritional Information & Benefits
Let’s be honest—these are a treat, not a health food. But they’re not as bad as you might think! Here’s the estimated nutritional breakdown for one hand pie (based on the recipe making 4 pies):
- Calories: ~220
- Fat: ~12g
- Carbohydrates: ~26g
- Fiber: ~2g
- Sugar: ~12g
- Protein: ~4g
Health Benefits of Key Ingredients: Pumpkin is packed with vitamin A (great for eye health and immunity) and fiber, which helps keep you full. Cream cheese adds a little calcium and protein. And the spices—cinnamon, ginger, nutmeg—are all known for their anti-inflammatory properties. So while these aren’t a health food, they’re certainly not empty calories either.
Dietary Considerations: This recipe is vegetarian. For a vegan option, see the variations section above. It is not gluten-free or dairy-free as written, but substitutions are easy to make. The main allergens here are wheat (in the crust) and dairy (in the cream cheese and butter in the crust).
I personally love that these hand pies are a smaller portion. It’s easier to enjoy one (or two!) without overdoing it. It’s all about balance, right?
Conclusion
These easy mini pumpkin hand pies are everything I want in a fall dessert—warm, spiced, flaky, and just the right size. They’re proof that you don’t need a big occasion or a complicated recipe to make something special. Whether you’re making them for a quiet Halloween night, a cozy date night in, or just because you’re craving a little taste of autumn, they never disappoint.
I love that this recipe is so adaptable. You can make them your own—add chocolate, swap in apples, or go savory. That’s the beauty of a simple recipe like this. It’s a starting point, not a rigid set of rules. So go ahead, get creative, and make these pies your own.
If you try these Halloween dessert for two hand pies, I’d love to hear about it! Leave a comment below and let me know how they turned out. Did you add any fun variations? Did you serve them with ice cream or eat them straight off the baking sheet (no judgment!)? Share your creations and tag a friend who needs a little pumpkin pie in their life. Happy baking, and happy Halloween!
Frequently Asked Questions
Can I use homemade pie crust instead of store-bought?
Absolutely! If you have a favorite homemade pie crust recipe, go for it. Just make sure to roll it out to about 1/8-inch thickness and cut out your circles. Homemade crust will be even flakier and more buttery, but it does take more time.
Can I make these ahead of time for a party?
Yes! You can assemble the hand pies up to 24 hours in advance and keep them covered in the refrigerator. Bake them just before serving for the best texture. You can also freeze the unbaked pies for up to 3 months (see the storage section above for details).
Why did my hand pies burst open in the oven?
This usually happens for one of two reasons: either you overfilled the pies, or you forgot to cut vents in the top. Make sure to leave a little border around the filling and cut 2-3 small slits in the top of each pie before baking. This lets the steam escape and prevents explosions.
Can I use fresh pumpkin instead of canned?
You can, but you’ll need to cook and puree it first, and then strain it to remove excess water. Canned pumpkin is much more consistent in texture and moisture content, which is why I recommend it for this recipe. Fresh pumpkin can be watery and make your filling too runny.
How do I prevent the bottom crust from getting soggy?
The best way to prevent a soggy bottom is to make sure your filling isn’t too wet. Don’t add any extra liquid to the filling, and make sure your cream cheese is softened but not melted. Baking the pies on a preheated baking sheet can also help—just place the baking sheet in the oven while it preheats, then carefully place the pies on the hot sheet. This gives the bottom crust a head start on cooking.
Pin This Recipe!
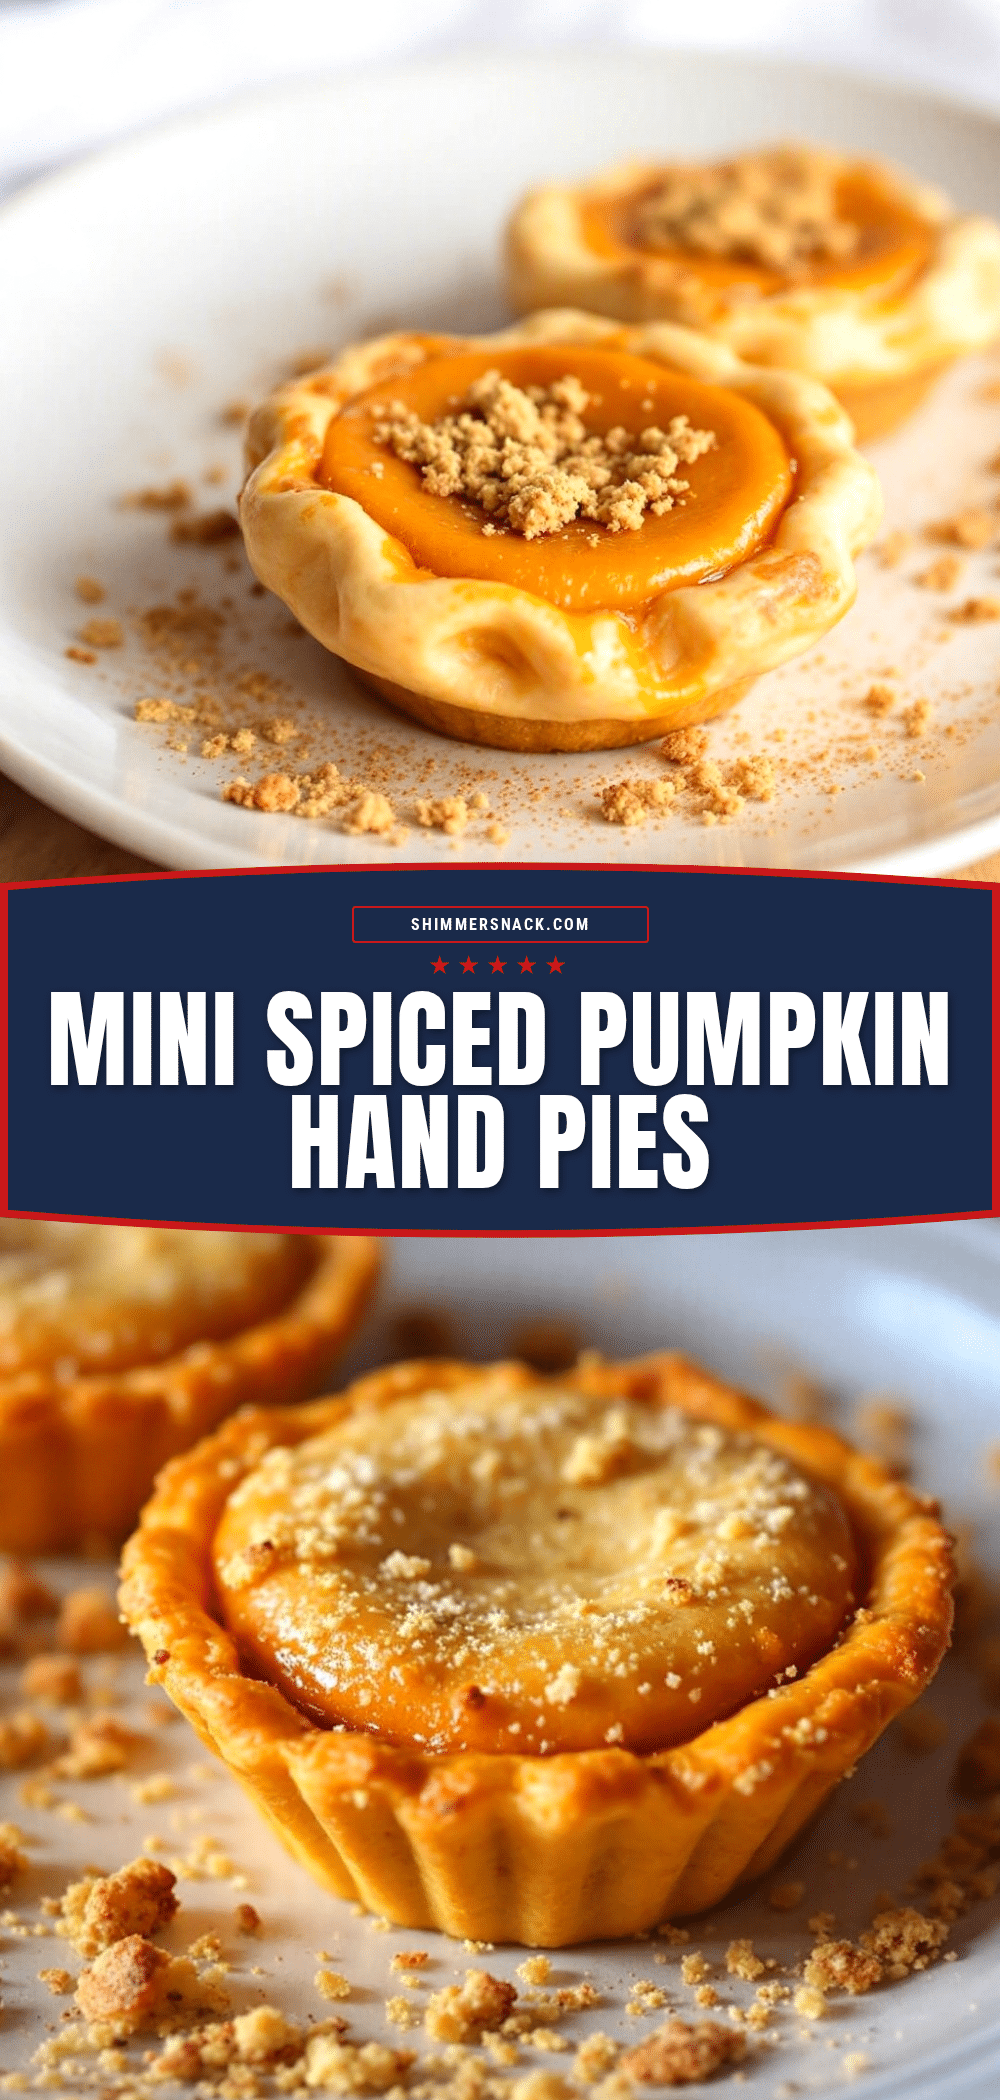
Easy Mini Pumpkin Hand Pies: The Best 2-Serving Halloween Dessert
These easy mini pumpkin hand pies are the perfect fall dessert for two. With a flaky crust and creamy, spiced pumpkin filling, they come together in about 35 minutes and are ideal for a quiet Halloween night or a cozy date night in.
- Prep Time: 15 minutes
- Cook Time: 20 minutes
- Total Time: 35 minutes
- Yield: 4 servings 1x
- Category: Dessert
- Cuisine: American
Ingredients
- 1 sheet refrigerated pie crust (from a 14.1-ounce box, like Pillsbury)
- 1 tablespoon all-purpose flour (for dusting)
- 1/2 cup canned pumpkin puree (not pumpkin pie filling)
- 2 ounces cream cheese, softened to room temperature
- 3 tablespoons packed light brown sugar
- 1 large egg yolk
- 1 teaspoon pumpkin pie spice
- 1/4 teaspoon vanilla extract
- Pinch of salt
- 1 large egg white (mixed with 1 tablespoon water for egg wash)
- 1 tablespoon coarse sugar (like turbinado or demerara)
Instructions
- Preheat your oven to 400°F (200°C). Line a baking sheet with parchment paper.
- Make the filling: In a small bowl, combine the softened cream cheese and brown sugar. Mash together with a fork until smooth and creamy. Add the pumpkin puree, egg yolk, pumpkin pie spice, vanilla extract, and a pinch of salt. Stir until well combined and smooth. Set aside.
- Prepare the crust: Unroll the pie crust onto a lightly floured surface. Gently roll it out to about 1/8-inch thickness.
- Cut out circles: Using a 3-inch round cookie cutter (or a glass), cut out as many circles as possible (about 8). Gather scraps and re-roll once if needed.
- Assemble the pies: Place 4 circles on the prepared baking sheet, spacing them about 2 inches apart. Spoon about 1 heaping tablespoon of filling into the center of each circle.
- Top and seal: Place the remaining 4 circles on top of the filling. Gently press edges together with fingers, then crimp with a fork all around.
- Cut vents: Use a sharp knife to cut 2-3 small slits on top of each pie to let steam escape.
- Add egg wash and sugar: Whisk the egg white with 1 tablespoon of water until frothy. Brush a thin layer over each pie. Sprinkle generously with coarse sugar.
- Bake: Place the baking sheet in the preheated oven and bake for 18-22 minutes, until the crust is golden brown and the filling is bubbly. Let cool on the baking sheet for at least 5-10 minutes before serving.
Notes
Don’t overfill the pies to prevent bursting. Make sure cream cheese is really soft for a smooth filling. Chilling assembled pies for 10-15 minutes before baking helps the crust hold its shape. Watch the edges; if they brown too fast, tent with foil. Let cool at least 5-10 minutes before serving as filling is very hot.
Nutrition
- Serving Size: 1 hand pie
- Calories: 220
- Sugar: 12
- Sodium: 200
- Fat: 12
- Saturated Fat: 6
- Carbohydrates: 26
- Fiber: 2
- Protein: 4
Keywords: mini pumpkin hand pies, Halloween dessert for two, easy pumpkin hand pies, fall dessert for two, hand pies


