Love this? Save it for later!
Share the inspiration with your friends
My sister-in-law texted at 4:30 on a Saturday. She and her boyfriend were “in the neighborhood” and wanted to stop by. The fridge held leftover takeout, half a block of cheddar, and some wilting grapes. I had maybe forty minutes, zero desire to turn on the oven, and a sudden, desperate need to look like I had my life together. This is how the Easy No-Bake Charcuterie Board for Beginners was born—not from a fancy dinner party plan, but from pure, last-minute panic.
I grabbed a cutting board (the biggest thing I owned), raided the pantry for nuts and crackers, and started slicing anything that wasn’t moving. Honestly, I was just throwing things together, hoping it would look intentional. And you know what? It worked. It looked gorgeous, it took almost no actual skill, and everyone felt impressed. That’s the magic of this thing—it makes you look like a hostess with the mostest when you’re really just a person who didn’t want to cook.
This isn’t about rigid rules or fancy ingredients. It’s about building something beautiful with what you have, in the time you’ve got, without breaking a sweat (or turning on the stove). It’s the kind of no-bake recipe that saves your sanity and your Saturday night.
Why You’ll Love This Recipe
Let’s be real—most charcuterie tutorials online make you feel like you need a culinary degree and a second mortgage to pull one off. This Easy No-Bake Charcuterie Board for Beginners is the exact opposite. It’s built for real people with real kitchens and real time crunches.
- No Oven, No Stove, No Sweat: This is a true no-bake recipe. You don’t even need to toast the nuts unless you want to. It’s all about assembly, not cooking.
- Beginner-Proof Method: I’ve tested this with friends who swear they can’t even boil water. The step-by-step process is designed to make you look like a pro, even if you’re just starting out.
- Flexible & Forgiving: Don’t have prosciutto? Use salami. Out of brie? Grab some cheddar. This board works with whatever you have on hand—no special grocery trip required.
- Perfect for Any Occasion: Game day? Date night? Holiday party? A random Tuesday? This board fits. It’s the ultimate crowd-pleaser that adapts to the vibe.
- Visually Stunning: The trick is in the arrangement, not the ingredients. You’ll get that “wow” factor without any fancy tools or plating skills.
I’ve made this board for everything from a game day gathering to a quiet movie night. It always delivers. After the first bite, people stop talking about how pretty it looks and just start eating. That’s the sign of a winner.
What Ingredients You Will Need
This recipe is built on a simple formula: three types of cheese, two types of meat, something crunchy, something sweet, something pickled, and something to spread. You don’t need to follow it like a science experiment—think of it as a friendly guide.
- Cheese #1: Soft Cheese (The Spreadable One)
Brie or camembert is my go-to. It’s elegant, requires zero slicing, and people love scooping it onto crackers. If you want a tangier option, goat cheese (chèvre) works beautifully. For a crowd that loves cream cheese, a whipped herb cream cheese is a surprisingly good budget-friendly swap. - Cheese #2: Firm Cheese (The Sliced One)
Aged cheddar, gouda, or manchego. I love a sharp white cheddar for its bold flavor. Slice it into thin triangles or small cubes. Pro tip: Let it sit out for 15 minutes before serving for the best flavor and texture. - Cheese #3: Blue Cheese or Funky Option (The Bold One)
Gorgonzola, Roquefort, or a creamy blue. This is for the adventurous eaters. If you’re serving a crowd that’s not into strong cheese, swap it for a second firm cheese like havarti or provolone. - Meat #1: Cured Salami or Pepperoni
Sliced genoa salami is a classic. It’s salty, fatty, and pairs with everything. For a spicier kick, use pepperoni. Fold the slices into little tents or roll them into ribbons—it looks fancy but takes two seconds. - Meat #2: Prosciutto or Soppressata
Prosciutto is thin, delicate, and feels luxurious. Soppressata is thicker and more rustic. Either works. I like to drape prosciutto in loose folds so it looks airy and effortless. - Crunchy Element: Crackers & Bread
Go for a mix of textures. Water crackers are neutral and safe. A seeded cracker adds visual interest. A sliced baguette (if you have it) is always a hit. You can also add breadsticks or pretzel crisps for variety. - Sweet Element: Fresh & Dried Fruit
Red grapes are a must—they add color and a pop of sweetness. Sliced apple or pear works too, but toss them in a little lemon juice to prevent browning. Dried figs, apricots, or dates bring concentrated sweetness and chewiness. - Pickled Element: Cornichons or Olives
Cornichons (tiny pickles) cut through the richness of the cheese and meat. A small bowl of mixed olives adds briny flavor. If you’re feeling extra, try quick pickled cherry tomatoes with garlic and dill for a tangy, fresh pop. - Spread: Honey or Fig Jam
A drizzle of honey over the brie is a classic move. Fig jam is sweeter and pairs beautifully with the sharp cheese. You can also use a spicy mustard or a fruit chutney for a different flavor profile. - Nuts (Optional but Recommended)
A small handful of almonds, walnuts, or pecans adds crunch and fills empty spaces. Toasting them brings out their flavor, but it’s not necessary.
I always grab a jar of easy small batch fig honey jam when I make this board. It’s the secret weapon that everyone asks about.
Equipment Needed
You don’t need a fancy cheese board or a marble slab. I’ve made this on a wooden cutting board, a baking sheet, and even a large dinner plate. Here’s what you’ll actually need:
- A Large Board or Platter: Wood, slate, marble, or even a clean cookie sheet. The only rule is it needs to be big enough to hold everything without piling too high.
- A Sharp Knife: For slicing the firm cheese and fruit. A serrated knife works well for bread.
- Small Bowls or Ramekins: For the jam, honey, olives, or pickles. This keeps wet ingredients from making the crackers soggy.
- Cheese Knives or Spreaders (Optional): If you have them, great. If not, a butter knife works fine.
- Parchment Paper (Optional): If you’re worried about staining your board, line it with parchment for easy cleanup.
Honestly, I’ve used a pizza stone in a pinch. It worked perfectly. Don’t overthink the equipment—use what you’ve got.
Preparation Method
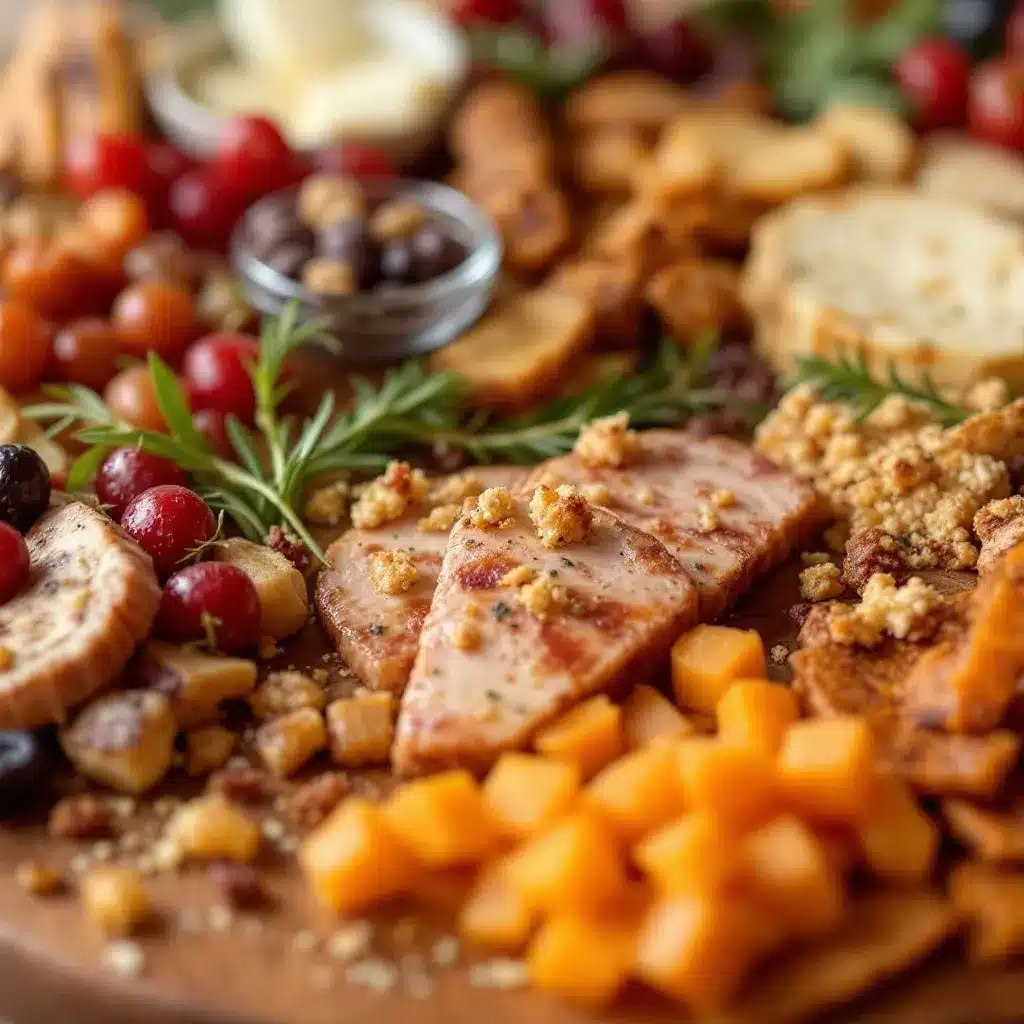
This is the fun part. The whole process takes about 15-20 minutes, and there’s zero cooking involved. Here’s how to build the perfect Easy No-Bake Charcuterie Board for Beginners.
- Set the Stage (2 minutes): Place your board on a flat surface. If using parchment, lay it down now. Put your small bowls or ramekins on the board first. This anchors the layout and gives you a visual guide for the rest of the ingredients.
- Place the Soft Cheese (1 minute): Put the brie or camembert on the board. If it’s a whole wheel, leave it whole. If it’s a wedge, place it with the rind facing up. This is the star of the show, so give it a prominent spot.
- Add the Firm Cheese (2 minutes): Slice the cheddar or gouda into thin triangles or small cubes. Arrange them in a fan shape or a small pile next to the soft cheese. Leave a little space between the cheeses so they don’t touch—it looks cleaner.
- Place the Blue Cheese (1 minute): If using blue cheese, crumble a small portion into a little mound or place a wedge near the edge of the board. It’s strong, so a little goes a long way.
- Arrange the Meats (3 minutes): Fold the salami slices into quarters or roll them into little cylinders. Drape the prosciutto in loose, wavy folds. Place the meats in separate clusters, not touching the cheeses directly. This gives the board structure and visual variety.
- Add the Crackers and Bread (2 minutes): Fill in the gaps with crackers. Fan them out in small groups, or stack them in a neat pile. If using baguette slices, arrange them in a row or a fan.
- Scatter the Fruit (2 minutes): Tuck clusters of grapes into empty spaces. Place dried figs or apricots near the cheeses. If using sliced apple or pear, arrange them in a small fan and squeeze a little lemon juice over them to prevent browning.
- Fill the Bowls (1 minute): Spoon the fig jam or honey into one ramekin. Fill another with cornichons or olives. Place these bowls back on the board in the spots you reserved earlier.
- Add the Nuts and Fillers (2 minutes): Sprinkle almonds or walnuts into any remaining gaps. This is the step that makes the board look full and abundant. Don’t overthink it—just scatter them around.
- Final Touches (1 minute): Drizzle a little honey over the brie. Add a small sprig of rosemary or a few edible flowers if you have them (totally optional, but pretty). Step back, admire your work, and serve immediately.
If you’re making this for a party, you can prep all the ingredients an hour ahead and assemble the board right before guests arrive. The cheese actually tastes better at room temperature, so letting it sit out for 20-30 minutes is a bonus.
Cooking Tips & Techniques
I’ve learned a few things the hard way so you don’t have to. Here are my best tips for nailing this board every single time.
- Don’t Overcrowd the Board: It’s tempting to pile everything on, but a crowded board looks messy. Leave a little breathing room between clusters. You can always add more later if needed.
- Think in Triangles and Curves: The eye is drawn to shapes. Use triangles for the cheese, curves for the meat folds, and circles for the crackers. This visual variety makes the board look professional.
- Keep Wet and Dry Separate: Never put jam or olives directly on the board without a bowl. The liquid will make the crackers soggy and stain the cheese. Small ramekins are your best friend here.
- Use the “Odd Number” Rule: Group things in odd numbers—three types of cheese, five clusters of crackers, seven pieces of fruit. It sounds weird, but it creates a more natural, balanced look.
- Let the Cheese Breathe: Take the cheese out of the fridge 20-30 minutes before serving. Cold cheese is bland and hard. Room temperature cheese is creamy and flavorful.
- Prep Ahead for Stress-Free Hosting: Slice the cheese and fruit, portion the nuts, and fill the ramekins a few hours ahead. Keep everything covered in the fridge. Assemble the board 15 minutes before serving.
I once made a board for a grazing board recipe with honey brie prosciutto and fruits and forgot to take the cheese out of the fridge. It was cold and rubbery. Now I set a timer on my phone—it’s a small thing that makes a big difference.
Variations & Adaptations
This board is endlessly customizable. Here are some of my favorite variations.
- Vegetarian Board: Skip the meat and double up on cheese. Add marinated artichoke hearts, roasted red peppers, and hummus for extra flavor. Roasted nuts and dried fruit add texture.
- Vegan Board: Use cashew cheese, vegan cream cheese, or a store-bought vegan brie. Add roasted chickpeas, olives, and fresh vegetables like cucumber and bell pepper strips. A date syrup drizzle works instead of honey.
- Sweet Board (Dessert Charcuterie): Swap the cheese for chocolate (dark, milk, and white). Add fresh berries, marshmallows, pretzels, and cookies. A small bowl of caramel or chocolate sauce for dipping is a must.
- Brunch Board: Add hard-boiled eggs, smoked salmon, cream cheese, and bagel chips. A small bowl of capers and red onion slices takes it over the top. Fresh dill or chives make a pretty garnish.
- Spicy Board: Use pepperoni, spicy soppressata, and jalapeño-stuffed olives. Add a spicy honey drizzle (mix honey with red pepper flakes) for a sweet-heat kick. Pepper jack cheese works great here.
For a fall twist, I love adding easy no bake pumpkin protein balls to the board. They add a seasonal flavor and a healthy snack option that balances out all the cheese.
Serving & Storage Suggestions
This board is best served at room temperature. I like to set it out about 15 minutes before guests arrive so everything is at its peak flavor.
- Serving Temperature: Cheese should be soft and spreadable, not cold. Crackers should be crisp. Fruit should be fresh and cool, not warm.
- Presentation: Place the board in the center of the table. Provide small plates, napkins, and individual cheese knives for each cheese. A small spoon for the jam is helpful.
- Pairing Suggestions: A crisp white wine like Sauvignon Blanc or a light red like Pinot Noir pairs beautifully. For non-alcoholic options, sparkling water with lemon or a best easy homemade pumpkin chai latte is a cozy fall pairing.
- Storage: This board doesn’t store well once assembled. The crackers get soft, and the fruit can dry out. If you have leftovers, separate the components and store them in airtight containers in the fridge. Cheese keeps for 3-5 days, meat for 5-7 days, and crackers in a sealed bag for weeks.
- Reheating: You don’t need to reheat anything. Just let the cheese come back to room temperature before serving again. If the crackers have gone soft, you can crisp them in a 300°F oven for 3-5 minutes.
I’ve found that the flavors actually meld together nicely after a few hours. The cheese absorbs a little bit of the honey and fruit, and it’s even better the next day—if it lasts that long.
Nutritional Information & Benefits
This board is indulgent, but it also offers some surprisingly good nutritional benefits. Here’s a rough estimate for a standard serving (about 4 ounces of cheese, 2 ounces of meat, and a handful of crackers and fruit).
- Calories: Approximately 450-550 per serving
- Protein: 20-25 grams (from cheese and meat)
- Fat: 30-35 grams (mostly from cheese and nuts)
- Carbohydrates: 25-30 grams (from crackers, fruit, and jam)
- Fiber: 3-5 grams (from fruit and nuts)
Cheese is a great source of calcium and protein. Nuts provide healthy fats and vitamin E. Grapes and dried fruit offer antioxidants and natural sweetness. The key is portion control—this is a treat, not a daily meal.
For a lighter option, use low-fat cheese and skip the cured meats in favor of roasted vegetables. You can also swap crackers for cucumber slices or bell pepper strips for a low-carb version.
Conclusion
This Easy No-Bake Charcuterie Board for Beginners is the recipe that saves dinner parties, impromptu gatherings, and quiet nights in. It’s proof that you don’t need to be a chef or spend hours in the kitchen to create something beautiful and delicious. All you need is a board, some good ingredients, and a little bit of confidence.
I love this recipe because it’s never the same twice. Every time I make it, I discover a new combination that works—a different cheese, a new fruit, a random jar of jam from the back of the pantry. It’s a recipe that grows with you.
Now I want to hear from you. What’s your favorite cheese to put on a board? Have you tried any fun variations? Drop a comment below and tell me about your charcuterie adventures. And if you make this board, tag me in your photos—I’d love to see how it turns out. Happy snacking!
FAQs
How far in advance can I make a charcuterie board?
You can prep the ingredients up to 24 hours ahead. Slice the cheese, wash the fruit, and portion the nuts. Store everything in separate containers in the fridge. Assemble the board no more than 1-2 hours before serving for the best texture and appearance.
What if I don’t have a wooden board?
No problem! Use a large plate, a baking sheet, a cutting board, or even a clean pizza stone. You can also use a piece of parchment paper on a countertop for a casual, rustic look. The board is just a canvas—it doesn’t have to be fancy.
How do I keep the crackers from getting soggy?
Keep wet ingredients like jam, honey, and olives in separate small bowls. Place these bowls on the board away from the crackers. If you’re adding sliced apples or pears, toss them in a little lemon juice to prevent them from releasing too much moisture.
Can I make this board dairy-free?
Absolutely. Use vegan cheese, cashew cheese, or a dairy-free cream cheese. Add roasted chickpeas, olives, and fresh vegetables for texture. A date syrup or agave drizzle works instead of honey. The board will still be beautiful and delicious.
What’s the best way to arrange the ingredients?
Start with the bowls and soft cheese as anchors. Then add the firm cheese and meat in clusters. Fill in the gaps with crackers, fruit, and nuts. Leave a little space between each group for a clean, professional look. Use the “odd number” rule for visual balance.
Pin This Recipe!
Easy No-Bake Charcuterie Board for Beginners

A beginner-friendly, no-cook charcuterie board that comes together in minutes with simple ingredients. Perfect for last-minute gatherings, this recipe makes you look like a pro host without any stress or oven time.
- Prep Time: 15 minutes
- Cook Time: 0 minutes
- Total Time: 15 minutes
- Yield: 4-6 servings 1x
- Category: Appetizer
- Cuisine: American
Ingredients
- 1 wheel brie or camembert (soft cheese)
- 8 oz aged cheddar, gouda, or manchego (firm cheese)
- 4 oz gorgonzola, Roquefort, or creamy blue cheese (optional)
- 4 oz sliced genoa salami or pepperoni
- 4 oz prosciutto or soppressata
- 1 cup mixed crackers (water crackers, seeded crackers)
- 1 cup sliced baguette (optional)
- 1 cup red grapes
- 1/2 cup dried figs, apricots, or dates
- 1/2 cup cornichons or mixed olives
- 1/4 cup honey or fig jam
- 1/4 cup almonds, walnuts, or pecans
- Fresh rosemary or edible flowers for garnish (optional)
Instructions
- Place your board on a flat surface. If using parchment, lay it down now. Put small bowls or ramekins on the board first to anchor the layout.
- Place the brie or camembert on the board in a prominent spot, leaving it whole or as a wedge with rind facing up.
- Slice the firm cheese into thin triangles or small cubes and arrange in a fan shape or small pile next to the soft cheese, leaving space between cheeses.
- If using blue cheese, crumble a small portion into a mound or place a wedge near the edge of the board.
- Fold salami slices into quarters or roll into cylinders. Drape prosciutto in loose, wavy folds. Place meats in separate clusters, not touching cheeses directly.
- Fill gaps with crackers, fanning them out in small groups or stacking neatly. Arrange baguette slices in a row or fan if using.
- Tuck clusters of grapes into empty spaces. Place dried figs or apricots near cheeses. If using sliced apple or pear, arrange in a small fan and squeeze lemon juice over them.
- Spoon fig jam or honey into one ramekin and fill another with cornichons or olives. Place bowls back on the board in reserved spots.
- Sprinkle almonds or walnuts into remaining gaps to fill the board and make it look abundant.
- Drizzle honey over the brie. Add fresh rosemary or edible flowers if desired. Serve immediately.
Notes
Let cheese sit at room temperature for 20-30 minutes before serving for best flavor. Prep ingredients up to 24 hours ahead and assemble just before serving. Use the ‘odd number’ rule for visual balance. Keep wet ingredients in separate bowls to prevent soggy crackers.
Nutrition
- Serving Size: 1 serving (about 4 o
- Calories: 450550
- Sugar: 1215
- Sodium: 8001000
- Fat: 3035
- Saturated Fat: 1518
- Carbohydrates: 2530
- Fiber: 35
- Protein: 2025
Keywords: charcuterie board, no-bake appetizer, easy entertaining, cheese board, party snack, beginner charcuterie, grazing board


