Love this? Save it for later!
Share the inspiration with your friends
The power went out at 6:15 PM. Just like that. The hum of the refrigerator died, the stove lights flickered and vanished, and the house plunged into a heavy, unexpected silence. I stood there for a solid minute, holding a bag of frozen peas I’d meant to thaw for dinner, staring at the dark kitchen island. My partner wandered in, rubbing sleep from his eyes, asking if the Wi-Fi was down too. It wasn’t the internet that was gone; it was the grid.
We didn’t have candles, and honestly, the idea of cooking on a gas stove with pilot lights felt risky in the dark. But we had the fridge, and we had a weirdly specific stash of leftovers. The only thing that mattered was that acorn squash sitting in the crisper drawer, looking a bit too tough to cut, and a bottle of maple syrup that had been sitting there since last Thanksgiving. I didn’t plan this. I didn’t have a recipe in my head. I just needed calories before bed.
So, I dragged out a cast-iron skillet from the back of the cabinet, grabbed a stick of butter, and started throwing things together. It was chaotic. I was cutting by feel, pouring maple syrup by eye, and praying the butter wouldn’t burn since I couldn’t see the color changes well. But that limitation forced me to pay attention. I had to listen for the sizzle, smell the nuttiness of the browning butter, and trust my hands to judge the tenderness of the squash.
When we finally sat down on the floor with our plates, eating by the light of my phone’s flashlight, it was actually the best meal I’ve had in months. It wasn’t fancy. It was just hot, sweet, salty, and crispy. That night, the Crispy Maple Acorn Squash with Brown Butter wasn’t a recipe I intended to share. It was just survival food. But now that I’ve made it a dozen times under normal lighting, I realize it’s one of the most comforting things you can put on a table. It’s humble, it’s fast, and it tastes like a hug on a cold night.
Why You’ll Love This Recipe
Let’s be honest for a second. Squash can be a polarizing vegetable. Some people see it as a side dish they’re forced to eat, while others see it as a canvas for flavor. This version? It’s the canvas that paints itself. The magic here isn’t just in the ingredients; it’s in the transformation. You take something that looks like a hard, uninviting rock in the produce section and turn it into something golden, caramelized, and utterly addictive.
Here is why this dish has earned a permanent spot in my weekly rotation:
- Quick & Easy: You know how some recipes say “easy” but require three hours of prep? This one doesn’t. From the moment you pick up the knife to the moment you take that first bite, you’re looking at about 30 minutes. It’s perfect for those weeknights when you’re tired, hungry, and have zero energy to fuss.
- Simple Ingredients: You don’t need a trip to a specialty market. You likely have everything in your kitchen right now. Acorn squash, butter, maple syrup, salt, and pepper. That’s it. No obscure spices or fancy oils. It’s pantry-friendly cooking at its finest.
- Perfect for Fall Entertaining: Whether you’re hosting a small dinner party or just having a cozy night in, this dish looks impressive without the stress. It’s golden and glossy, and it smells incredible as it cooks, filling the house with that warm, nutty aroma that makes everyone hungry.
- Crowd-Pleaser: I’ve served this to picky eaters and veggie-lovers alike, and the result is the same: empty plates. The sweet maple balances the savory brown butter perfectly. It’s a flavor combo that just works.
- Unbelievably Delicious Texture: This is the game-changer. By roasting the squash pieces in the skillet, you get these crispy, caramelized edges that contrast with the soft, creamy interior. It’s not mushy. It’s not bland. It’s textural heaven.
What makes this recipe different from the rest? It’s the brown butter. Most people just melt butter and call it a day. But browning it adds a layer of nutty depth that regular melted butter just can’t match. It’s a small step that makes a huge difference. And unlike savory stuffed acorn squash, which requires stuffing and more complex prep, this recipe lets the squash shine on its own. It’s pure, simple, and soul-soothing. It’s the kind of dish that makes you close your eyes after the first bite and just smile.
What Ingredients You Will Need
This recipe relies on the quality of a few key components because there are so few of them. When you strip away the extras, the flavor of the main ingredients has to do all the heavy lifting. You don’t need fancy gourmet products, but you do need to pay attention to freshness.
Here is what you’ll need to gather:
- Acorn Squash (1 large): Look for a squash that feels heavy for its size. That’s a sign of moisture and sweetness inside. The skin should be deep green with some orange patches, and it should be hard to puncture with your fingernail. Avoid ones with soft spots or cracks. I usually buy these from the local farmers’ market in the fall, but the grocery store works fine too. Just make sure it’s firm.
- Unsalted Butter (4 tablespoons): I recommend using a high-quality European-style butter if you can find it, like Plugrá or Kerrygold. These have a higher fat content, which helps the butter brown faster and gives a richer, nuttier flavor. If you’re using salted butter, you’ll need to reduce the added salt in the recipe significantly.
- Pure Maple Syrup (3 tablespoons): Please, for the love of all things holy, avoid the pancake syrup that comes in the bear bottle. That’s corn syrup with flavoring. You want 100% pure maple syrup. Look for the label that says “Grade A” or “Grade B.” Grade B is darker and has a stronger flavor, which I actually prefer for this recipe because it stands up to the butter. But Grade A Dark Amber works too.
- Extra Virgin Olive Oil (1 tablespoon): You need a little bit of oil to help conduct the heat and get that initial crisp going. Use a decent olive oil, not the cheapest stuff you have. It adds a subtle fruitiness that complements the maple.
- Kosher Salt (1 teaspoon): Kosher salt is preferred because it’s easier to control. If you use table salt, use half the amount, or you’ll end up with a very salty dish. Flaky sea salt for finishing is a nice touch if you have it.
- Black Pepper (1/2 teaspoon): Freshly cracked black pepper adds a little heat and bitterness to balance the sweetness. Pre-ground pepper is okay in a pinch, but fresh cracked is better.
- Optional Garnish: Fresh thyme leaves, chopped pecans, or a drizzle of extra maple syrup for serving. I usually keep it simple, but a few thyme leaves add a lovely herbal note.
If you can’t find acorn squash, you can substitute with butternut squash, though you’ll need to adjust the cooking time slightly as butternut is denser. For a dairy-free version, you can swap the butter for a high-heat plant-based butter or coconut oil, but the nutty flavor profile will change.
Equipment Needed
You don’t need a fancy kitchen to make this. In fact, I find that the simpler the tools, the better the result. Here is what you’ll need:
- Cast-Iron Skillet (10-inch or larger): This is non-negotiable for the best crispiness. Cast iron holds heat incredibly well, which helps caramelize the edges of the squash. If you don’t have cast iron, a heavy-bottomed stainless steel skillet works well too. Avoid non-stick pans if you want that crispy texture, as the squash might just steam instead of sear.
- Sharp Chef’s Knife: Acorn squash can be tough to cut. A sharp, sturdy knife is essential. If your knife is dull, you’re going to struggle. I always let my knife get sharpened regularly because a dull knife is dangerous.
- Sturdy Spoon or Spatula: You’ll need something to stir the squash and toss it in the brown butter. A silicone spatula is good for scraping the browned bits (the fond) from the pan, which is where a lot of the flavor lives.
- Baking Sheet (Optional): If you’re cooking for a crowd and your skillet is too small, you can roast the squash on a baking sheet in the oven first, then finish it in the skillet. But for 1-2 servings, the skillet is all you need.
- Measuring Spoons: For the maple syrup and spices. Precision helps here, especially with the salt.
If you’re new to using cast iron, don’t worry. It’s low maintenance. Just wash it with warm water, dry it thoroughly, and maybe rub a tiny bit of oil on it after drying. It gets better with age.
Preparation Method
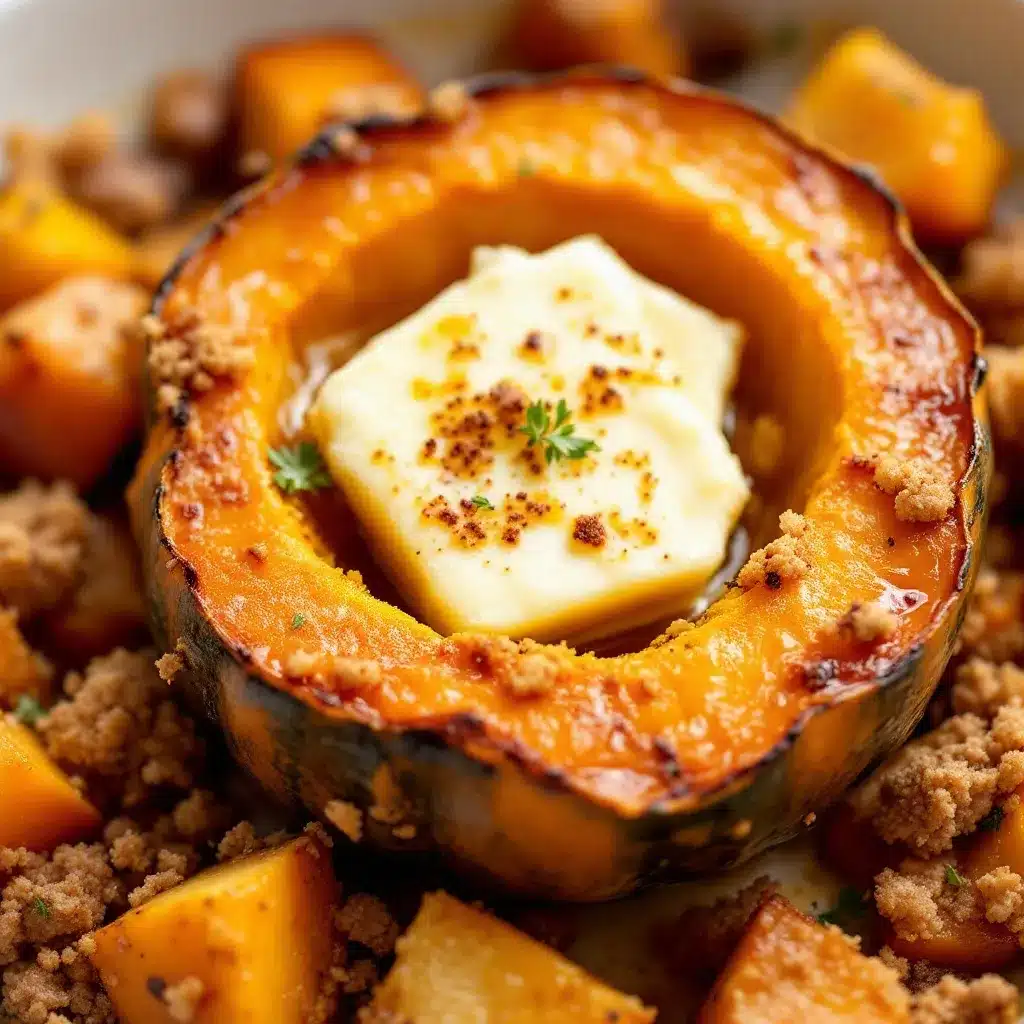
Ready to get cooking? Let’s break this down step-by-step. It’s straightforward, but attention to detail makes the difference between good and great.
Step 1: Prep the Squash
Start by washing your acorn squash under cold water. Dry it off. Now, here’s the tricky part: cutting it. Acorn squash is hard. Place the squash on a stable cutting board. Cut it in half lengthwise, from stem to base. Use a rocking motion with your chef’s knife, letting the weight of the blade do the work. Once it’s halved, use a spoon to scoop out the seeds and stringy pulp. Discard the seeds or roast them separately if you’re feeling fancy (they’re delicious with salt!).
Now, cut each half into quarters. Then, slice those quarters into bite-sized chunks. Aim for pieces that are about 1 to 1.5 inches thick. Uniformity helps them cook evenly. If some pieces are tiny and others are huge, the small ones will burn before the big ones are tender.
Step 2: Brown the Butter
Place your cast-iron skillet over medium heat. Add the 4 tablespoons of butter. Let it melt. Once it’s fully melted, it will start to foam and crackle. This is when you need to pay attention. Swirl the pan occasionally. The butter will turn from yellow to a light golden color, then to a deeper amber. You’ll smell a nutty aroma, like hazelnuts or toasted bread. This usually takes about 3-5 minutes.
If the butter turns dark brown or black, it’s burnt, and it will taste bitter. If that happens, toss it out and start over. It’s better to under-brown slightly than to burn it. Once it’s the color of peanut butter, remove the pan from the heat immediately to stop the cooking process.
Step 3: Sear the Squash
While the butter was browning, you can prep the squash. Toss the squash chunks in the 1 tablespoon of olive oil, salt, and pepper. Once the butter is done browning, return the pan to medium-low heat. Carefully add the squash chunks to the brown butter. They should sizzle when they hit the pan.
Let them sit undisturbed for about 2-3 minutes. You want a nice crust to form on one side. Don’t touch them! Resist the urge to stir. Let the Maillard reaction happen. Then, flip the pieces. They should be golden brown and crispy on the side that was down.
Step 4: Cook Through and Glaze
Once the squash is browned on both sides, reduce the heat to low. Pour in the 3 tablespoons of maple syrup. Toss the squash gently to coat it in the syrup and the remaining brown butter. The syrup will bubble and thicken quickly.
Cover the pan with a lid (or a piece of foil if you don’t have a lid that fits). This traps the steam and helps the squash cook through. Let it cook for another 5-7 minutes. Check the squash by piercing it with a fork. It should be tender but not mushy. If it’s still hard in the center, cover it again and cook for another 2 minutes.
Step 5: Finish and Serve
Remove the lid. If there’s excess syrup left in the pan, let it reduce for another minute until it’s thick and glossy, coating the squash. Taste a piece. If you need more salt, add a pinch. If you want more sweetness, add a drizzle of syrup.
Transfer to a serving dish. Garnish with fresh thyme or chopped pecans if you’re feeling fancy. Serve immediately while hot and crispy.
Cooking Tips & Techniques
Let me share a few things I’ve learned the hard way so you don’t have to.
First, don’t overcrowd the pan. If you’re cooking for more than two people, you might need to do this in batches. If you pile the squash on top of each other, it will steam instead of sear. You want that crispy edge, and you can’t get it if the pieces are touching too much.
Second, watch the heat closely when browning butter. Butter goes from perfect to burnt in about 10 seconds. If you walk away to answer the door, you’re coming back to a pan of bitter, black sludge. It’s not worth it. Stay there. Smell it. Watch it.
Third, use a heavy skillet. Thin pans heat up and cool down too quickly, which makes it hard to get an even sear. Cast iron or heavy stainless steel is best. If you’re using a thin non-stick pan, you might need to cook it longer on lower heat, but you’ll lose some of that crispiness.
Fourth, don’t skip the salt. Maple syrup is sweet, and brown butter is rich. Salt is the bridge that connects them. Without enough salt, the dish will taste flat. Taste as you go.
Finally, be patient with the squash. It takes time to soften. If you try to rush it by cranking the heat, the outside will burn before the inside is cooked. Low and slow is the way to go after the initial sear.
Variations & Adaptations
This recipe is a great base, but you can tweak it to fit your taste or what you have on hand.
- Spicy Twist: Add a pinch of cayenne pepper or red pepper flakes when you toss the squash in the oil. The heat cuts through the sweetness of the maple and the richness of the butter. It’s a game-changer if you like a little kick.
- Herbal Garden: Toss in some fresh sage leaves or rosemary sprigs when you add the maple syrup. The herbs will crisp up in the hot butter and add a savory, piney note. Sage pairs especially well with squash.
- Gluten-Free & Vegan: This recipe is naturally gluten-free. For a vegan version, use a plant-based butter that browns well (some brands don’t brown as nicely as dairy butter). Use agave nectar or a vegan maple syrup if needed. The result is still delicious, though the nutty flavor will be slightly different.
- Protein Boost: Add crispy bacon bits or crumbled sausage to the pan at the end. Bacon and maple are a classic combo. Just sprinkle them on top before serving.
- Nutty Crunch: Toasted pecans or walnuts add a great crunch. Add them right before serving so they don’t get soggy from the syrup.
I’ve tried adding a splash of balsamic vinegar at the end, and while it was good, I think it competes with the maple. I prefer to keep it simple. But feel free to experiment. Cooking is about playing around.
Serving & Storage Suggestions
This dish is best served immediately while the squash is still warm and the butter is glossy. It pairs well with roasted chicken, grilled fish, or even a simple green salad. If you’re making a larger meal, it’s a great side dish for holiday dinners or weeknight roasts.
For storage, let the squash cool to room temperature. Transfer it to an airtight container and refrigerate for up to 3 days. The squash will soften a bit in the fridge, which is normal.
To reheat, use a skillet over medium heat with a splash of water to create steam. This helps revive the crispiness better than the microwave. If you use the microwave, the squash might get a bit mushy, so the skillet is preferred.
You can also freeze the cooked squash, though the texture will change significantly. It’s best enjoyed fresh. The flavors meld and deepen over the first day, so leftovers are still good, but nothing beats the first bite.
Nutritional Information & Benefits
Acorn squash is a nutritional powerhouse. It’s low in calories but high in fiber, which helps keep you full. It’s also rich in vitamins A and C, which are great for your immune system and skin health. The brown butter adds fat, which helps your body absorb these fat-soluble vitamins.
One serving of this recipe (about 1/4 of the batch) contains approximately:
- Calories: 180-220 (depending on squash size)
- Carbs: 20-25g
- Fat: 10-12g
- Protein: 2-3g
- Fiber: 3-4g
It’s not a low-carb dish due to the maple syrup, but it’s a balanced side dish. The fiber in the squash helps regulate blood sugar, balancing out the natural sugars in the syrup. It’s a comfort food that’s actually good for you.
Conclusion
This Crispy Maple Acorn Squash with Brown Butter is proof that simple ingredients can create something extraordinary. It’s quick, it’s delicious, and it’s perfect for any time of year, but especially in the fall. I hope you try it and find it as comforting as I do.
Don’t be afraid to make it your own. Add some spice, some herbs, or some nuts. The base is solid, but your taste buds are the boss.
If you make this recipe, I’d love to hear how it turns out. Leave a comment below with your thoughts, or tag me on social media. Share your creations, your tweaks, and your stories. Cooking is better when we share it.
And if you’re looking for more easy fall recipes, check out my roasted delicata squash with maple glaze for another sweet and savory option. Happy cooking!
Frequently Asked Questions
Can I use butternut squash instead of acorn squash?
Yes, you can. Butternut squash is denser and sweeter, so you might need to cook it for a few minutes longer to get it tender. Cut it into similar-sized chunks to ensure even cooking.
How do I know when the butter is browned?
Look for a golden-amber color and smell a nutty aroma. The milk solids at the bottom of the pan will turn brown. Be careful not to let it burn, as it will taste bitter.
Can I make this ahead of time?
It’s best made fresh, but you can prep the squash and brown the butter ahead of time. Just reheat the squash in the skillet with the maple syrup right before serving to get that crispiness back.
Is this recipe gluten-free?
Yes, this recipe is naturally gluten-free. Just make sure your maple syrup and other ingredients are certified gluten-free if you have celiac disease or a severe allergy.
Why is my squash still hard after cooking?
It might need more time. Cover the pan and cook on low heat for a few more minutes to steam it through. Also, make sure your squash pieces are uniform in size so they cook evenly.
Pin This Recipe!
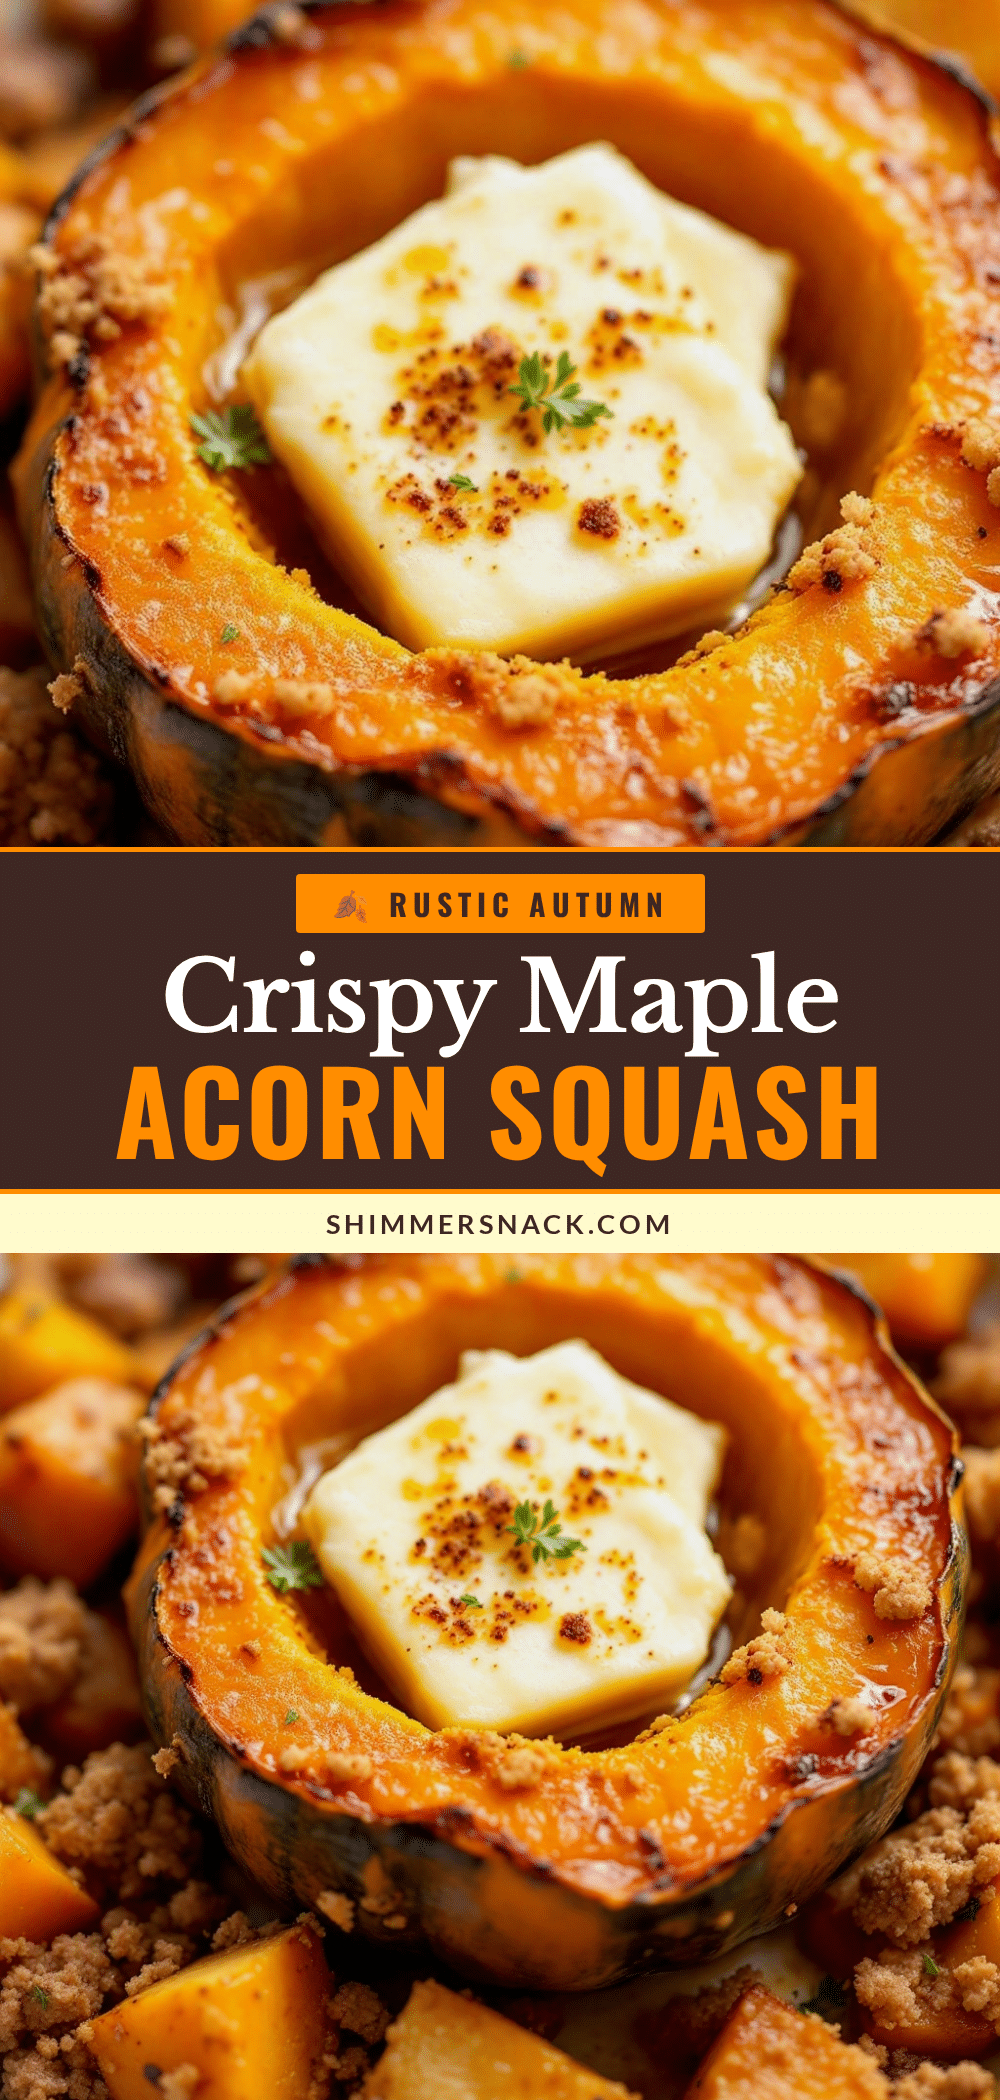
Crispy Maple Acorn Squash with Brown Butter

A quick and comforting 30-minute side dish featuring acorn squash seared in a cast-iron skillet with nutty brown butter and sweet maple syrup for crispy, caramelized edges.
- Prep Time: 15 minutes
- Cook Time: 15 minutes
- Total Time: 30 minutes
- Yield: 4 servings 1x
- Category: Side Dish
- Cuisine: American
Ingredients
- 1 large acorn squash
- 4 tablespoons unsalted butter
- 3 tablespoons pure maple syrup
- 1 tablespoon extra virgin olive oil
- 1 teaspoon kosher salt
- 1/2 teaspoon black pepper
- Optional garnish: fresh thyme leaves, chopped pecans
Instructions
- Wash and dry the acorn squash. Cut it in half lengthwise, scoop out seeds, and cut into 1 to 1.5-inch chunks.
- Place a cast-iron skillet over medium heat and add the butter. Melt and swirl until it turns amber and smells nutty (3-5 minutes). Remove from heat immediately to prevent burning.
- Toss squash chunks with olive oil, salt, and pepper. Return the pan with brown butter to medium-low heat.
- Add squash to the pan and let sit undisturbed for 2-3 minutes to form a crust. Flip pieces until golden brown on both sides.
- Reduce heat to low, pour in maple syrup, and toss to coat. Cover the pan and cook for 5-7 minutes until squash is tender.
- Remove lid and let excess syrup reduce until glossy. Taste and adjust seasoning if needed.
- Serve immediately, garnished with fresh thyme or pecans if desired.
Notes
Do not overcrowd the pan to ensure crispiness rather than steaming. Watch the butter closely as it burns quickly. If using salted butter, reduce added salt. For a vegan version, substitute butter with plant-based butter and maple syrup with agave.
Nutrition
- Serving Size: Approximately 1/4 of
- Calories: 200
- Sugar: 14
- Sodium: 350
- Fat: 11
- Saturated Fat: 6
- Carbohydrates: 22
- Fiber: 3.5
- Protein: 2.5
Keywords: acorn squash, maple syrup, brown butter, cast iron, fall recipes, vegetarian side dish, easy dinner, crispy squash


