Love this? Save it for later!
Share the inspiration with your friends
I walked into the kitchen to grab a glass of water and nearly slipped on the pile of empty plastic cups stacked by the sink. It wasn’t just one or two. There were at least eight of them, all looking like little graveyards of chocolate crumbs and crushed cookies. My niece had found them. That was the only explanation. She had raided the counter before I even finished plating them for the photo shoot. Honestly, I should have been annoyed, but instead, I felt this quiet, smug pride. This is the best kind of validation.
It’s strange how a dessert that looks like actual garden dirt can bring so much joy. I remember making these for a friend’s kid’s birthday party last year. I wasn’t sure if the kids would get it. You know how it is with modern snacks; they are used to bright colors and artificial flavors. But the second I handed them a plastic spoon and watched them dig into the “mud,” the skepticism vanished. They were digging for worms. They were laughing. The parents were asking me for the recipe before the party was even over.
That moment stuck with me. It wasn’t about the food science or the perfect layering. It was about the sheer fun of it. We spend so much time trying to make dessert look elegant and complicated. Sometimes, you just need a cup, some crushed cookies, and something that looks creepy but tastes like heaven. I started making these again recently because life gets busy. I needed something that felt festive but required zero oven time. Let’s face it, who wants to turn on the oven in late October when the weather is still warm? These dirt cups are the answer. They are messy, they are sweet, and they are incredibly easy to pull together when you have nothing else.
Why You’ll Love This Recipe
I have tested a lot of no-bake desserts over the years. Some fall flat because the filling is too runny, or the cookies don’t crunch right. This specific combination of ingredients has survived my family’s picky eating habits and my own demanding palate. It works because it hits every note you want in a Halloween treat without the stress of baking. Here is why this recipe is a staple in my house during October:
- Quick & Easy: You can have these assembled in under 15 minutes. There is no baking, no cooling racks, and no waiting for dough to rise. It is perfect for last-minute party prep or when the kids demand a snack right now.
- Simple Ingredients: You likely have everything you need in your pantry already. Crushed Oreos, chocolate pudding, whipped topping, and gummy worms. No fancy grocery trips or obscure spices needed.
- Perfect for Halloween: It is the ultimate spooky theme dessert. It looks creepy on the surface but tastes like a classic chocolate dessert. It is great for classroom parties, trick-or-treat drop-offs, or just a Tuesday night treat.
- Crowd-Pleaser: Kids love the interactive aspect of digging for worms. Adults love that it tastes like an Oreo cheesecake in a cup. It bridges the gap between “fun” and “delicious” better than most fancy cakes.
- Unbelievably Delicious: The texture contrast is key here. You get the creamy, rich pudding, the fluffy lightness of the whipped topping, and the satisfying crunch of the cookie crumbs. It is next-level comfort food that feels indulgent but is surprisingly light.
What makes this recipe different from the rest is the balance. A lot of dirt cup recipes are just pudding and cookies. This one adds the whipped topping to lighten it up, making it less heavy than a traditional cheesecake. It’s the kind of recipe that makes you close your eyes after the first bite because the flavors just work together so well. It’s comfort food reimagined for a spooky season. Perfect for impressing guests without stressing over a complicated bake.
What Ingredients You Will Need
This recipe relies on the power of simple, wholesome ingredients to deliver bold flavor and satisfying texture without the fuss. The beauty of no-bake desserts is that the quality of your ingredients matters more than ever since there is no baking to mask imperfections. Here is what you need to make the perfect dirt cups:
- Oreo Cookies (or similar chocolate sandwich cookies): You will need about 24 cookies for the base and topping. I recommend using the classic Original Oreos for that authentic chocolate cookie flavor. If you want a gluten-free option, you can use gluten-free chocolate sandwich cookies, though the texture might be slightly softer. Make sure they are fresh so they crush easily.
- Unsalted Butter: You need 4 tablespoons (about 57 grams) of unsalted butter, melted. This helps bind the cookie crumbs together so they stick to the sides of the cup and provide that “muddy” texture. Using unsalted butter allows you to control the salt level, especially if your cookies are already salty.
- Instant Chocolate Pudding Mix: One 3.4-ounce box (about 96 grams) of instant chocolate pudding mix is standard. I personally prefer the brand Jell-O for its consistent texture and rich chocolate flavor. Make sure you get the “instant” variety, not the cook-and-serve kind, as it sets faster and smoother.
- Milk: You will need 2 cups (480 ml) of cold whole milk. Whole milk gives the pudding the richest, creamiest consistency. If you need a dairy-free option, you can use a high-quality unsweetened almond milk or oat milk, but the pudding will be slightly less rich.
- Whipped Topping: One 8-ounce tub (about 227 grams) of thawed whipped topping, like Cool Whip. This is the secret ingredient that makes the filling light and airy. It cuts the density of the chocolate pudding. You can use homemade whipped cream if you prefer, but you will need to fold it in gently to keep the air bubbles intact.
- Gummy Worms: About 1 cup of gummy worms. This is the fun part. You can buy them pre-made or make your own. Look for bright red or orange worms for that classic Halloween look. They add a chewy contrast to the soft pudding and crunchy cookies.
- Plastic Cups: Small clear plastic cups or small mason jars. Clear cups are essential because you want to see the layers. If you use opaque containers, you lose the visual appeal of the “dirt” effect.
For the best texture, ensure your cookies are crushed to varying sizes. Some fine crumbs for the “dirt” and some larger chunks for texture. If you find the pudding too sweet, you can reduce the milk slightly, but do not go below the package instructions or it won’t set properly.
Equipment Needed
You do not need a lot of fancy gear for this recipe. In fact, the less equipment you use, the easier the cleanup. Here is what you need to get started:
- Food Processor or Ziplock Bag: You need a way to crush the cookies. A food processor is the fastest method and gives you the most control over the crumb size. If you don’t have one, a heavy-duty Ziplock bag and a rolling pin work perfectly. Just be careful not to over-process if you want some chunky bits.
- Mixing Bowls: You will need two medium-sized mixing bowls. One for mixing the pudding and milk, and another for folding in the whipped topping. A large bowl is better for folding to prevent spills.
- Whisk: A standard wire whisk is all you need to mix the pudding and milk. Make sure to whisk vigorously for the full time recommended on the box to ensure there are no lumps.
- Rubber Spatula: This is crucial for folding the whipped topping into the pudding. You want to keep the mixture light and airy, so a gentle folding motion is key. A silicone spatula is best because it scrapes the bowl clean.
- Measuring Cups and Spoons: Standard measuring tools for the butter, milk, and cookie counts. Precision helps with the pudding setting, but the cookie amounts are flexible.
- Plastic Serving Spoons: Small plastic spoons are great for serving. They look like little gardening tools, which fits the theme perfectly. You can also use regular teaspoons if you are short on plasticware.
If you are making a large batch, consider having multiple bowls ready so you can assemble the cups quickly before the pudding starts to set. Also, keep your whipped topping cold until the last minute to ensure it holds its structure.
Preparation Method

Making these dirt cups is straightforward, but there is a specific order that ensures the best texture and presentation. Follow these steps carefully for the perfect result.
- Prepare the Cookie Crumbs: Start by taking your 24 Oreo cookies. If you are using a food processor, pulse them until they are finely crushed. You want a texture similar to wet sand. If you are using a Ziplock bag, place the cookies inside, seal it tight, and smash them with a rolling pin or a heavy pan. Aim for a mix of fine crumbs and small chunks. This variety adds interest to the “dirt” layer. (Time: 5 minutes)
- Melt the Butter: Measure out 4 tablespoons of unsalted butter and melt it in the microwave. Heat it in 30-second intervals, stirring in between, until it is fully liquid. Be careful not to burn it. Let it cool for a minute so it doesn’t melt the cookies when you mix them. (Time: 2 minutes)
- Make the Cookie “Dirt”: Pour the melted butter over the crushed cookies in a medium bowl. Stir well with a spoon until all the crumbs are evenly coated. The mixture should look like wet sand and hold together when you squeeze it in your hand. This is your dirt layer. Set it aside. (Time: 1 minute)
- Mix the Pudding: In a large mixing bowl, combine the instant chocolate pudding mix with 2 cups of cold milk. Whisk vigorously for about 2 minutes, or until the mixture is smooth and thick. Scrape the sides of the bowl to ensure no dry pockets of powder remain. This step is critical for the texture. (Time: 2 minutes)
- Fold in the Whipped Topping: Open your tub of thawed whipped topping. Add it to the pudding mixture. Using your rubber spatula, gently fold the whipped topping into the pudding. Do this slowly and carefully to keep the air in the mixture. You want a marbled effect at first, then fold until it is mostly uniform but still light. Do not overmix, or you will deflate the cream. (Time: 3 minutes)
- Assemble the Cups: Take your clear plastic cups. Start by adding a layer of the cookie crumb mixture to the bottom of each cup. Press it down lightly with the back of a spoon. Then, add a generous layer of the chocolate pudding mixture. You can stop here for a two-layer cup, or add another layer of cookie crumbs on top for a third layer. (Time: 5 minutes)
- Add the Worms: Take your gummy worms and stick them into the top layer of cookie crumbs. Make them look like they are burrowing into the dirt. You can leave the heads sticking out or push them in halfway. This is the fun part, so get creative with the angles. (Time: 2 minutes)
- Chill and Serve: Place the cups in the refrigerator for at least 30 minutes before serving. This helps the pudding set slightly and the flavors meld together. Serve cold with plastic spoons. (Time: 30 minutes chilling)
Total active time is about 15 minutes, with 30 minutes of chilling time. The result is a dessert that looks professional but is incredibly simple to make.
Cooking Tips & Techniques
Even simple recipes can go wrong if you don’t pay attention to a few details. Here are some professional tips to ensure your dirt cups turn out perfectly every time.
First, the moisture level of your cookie crumbs is key. If the butter mixture is too dry, it won’t stick to the sides of the cup. If it is too wet, it will turn into a paste. Aim for the consistency of wet beach sand. If you are in a humid climate, you might need slightly less butter. If you are in a dry climate, you might need a touch more. Trust your hands when you squeeze the mixture.
Second, do not skip the chilling step. While you can eat these immediately, the flavors develop and the texture firms up after sitting in the fridge. The pudding needs time to fully set against the weight of the whipped topping. If you serve them too soon, they might be too runny. Plan ahead and make them at least an hour before you need them.
Third, handle the whipped topping gently. I know it is tempting to mix it quickly, but overmixing is the enemy of a light dessert. You want to preserve the air bubbles that give the filling its fluffy texture. Fold, don’t stir. It takes a bit more time, but the result is worth it.
Finally, consider the type of gummy worms you use. Some brands are very chewy and hard to bite through. If you are serving this to young children, look for softer gummy worms or cut them in half. You don’t want a choking hazard or a frustration factor. Also, make sure the worms are food-safe and stored properly before adding them to the cups.
Variations & Adaptations
While the classic chocolate version is a crowd-pleaser, this recipe is very adaptable. Here are a few ways to twist it up:
- Strawberry Dirt Cups: Swap the chocolate pudding for vanilla or strawberry instant pudding. Use vanilla wafers or strawberry sandwich cookies for the crumbs. Top with fresh strawberry slices instead of worms for a springtime vibe.
- Gluten-Free Option: Use certified gluten-free chocolate sandwich cookies and ensure your pudding mix and whipped topping are also gluten-free. Most major brands offer gluten-free versions now. The texture might be slightly softer, so chill them a bit longer.
- Low-Sugar Version: Use a sugar-free chocolate pudding mix and sugar-free cookies. You can use a sugar-free whipped topping as well. It won’t taste exactly like the original, but it is a much lighter option for those watching their sugar intake.
- Mint Chip Twist: Use mint chocolate chip ice cream as the base instead of pudding. Crush chocolate cookies for the dirt and top with chocolate shavings. This is less of a “dirt” cup and more of a frozen treat, but it is delicious.
- Personal Variation: I sometimes add a layer of crushed peppermint candies between the pudding and the cookie crumbs. It adds a nice crunch and a refreshing contrast to the rich chocolate. It’s a bit more festive for winter holidays, but it works in October too.
Feel free to experiment with different cookie flavors. Peanut butter sandwich cookies with chocolate pudding is a classic combo. Or try using chocolate chip cookies for a cookie dough vibe.
Serving & Storage Suggestions
These dirt cups are best served chilled. The cold temperature enhances the creaminess of the pudding and the crispness of the cookies. For presentation, use clear cups so the layers are visible. You can arrange them on a platter with a Halloween theme, like fake spiderwebs or orange napkins.
For storage, keep the cups covered in the refrigerator. They will stay fresh for up to 3 days. The cookie crumbs will soften over time as they absorb moisture from the pudding, which some people prefer. If you like them crunchy, add the cookie topping just before serving. Do not freeze them, as the texture of the whipped topping and pudding will change and become icy.
Reheating is not recommended. This is a cold dessert. If you need to serve them at room temperature, take them out of the fridge 15 minutes before serving. The flavors will mellow, but the texture should remain acceptable. For parties, make them the day before to save time on the day of the event.
Nutritional Information & Benefits
While these are definitely a treat, they offer some nutritional benefits depending on the ingredients you choose. Chocolate pudding contains some calcium and iron, especially if made with milk. Cookies provide carbohydrates for energy. Gummy worms are mostly sugar, so they should be enjoyed in moderation.
If you use low-fat milk or sugar-free pudding, you can reduce the calorie count significantly. The whipped topping adds fat, so using a lighter version can also help. Overall, this is a high-calorie dessert due to the sugar and fat content, but it is satisfying in small portions. One cup is a perfect serving size for a party snack.
From a wellness perspective, I appreciate that this recipe allows for customization. You can control the sugar levels by choosing your own cookies and pudding mix. It is a better option than buying pre-made, sugary snacks from the store because you know exactly what is in it. It is a fun way to enjoy a sweet treat without feeling guilty, as long as you balance it with a healthy meal earlier in the day.
Conclusion
These Fun No-Bake Halloween Dirt Cups are the perfect blend of spooky fun and delicious taste. They are easy to make, require minimal cleanup, and are sure to be a hit with both kids and adults. The combination of chocolate pudding, cookie crumbs, and gummy worms is a classic for a reason. It is simple, effective, and incredibly satisfying.
I encourage you to try this recipe and make it your own. Experiment with different cookie flavors, add your own twist to the layers, or use it as a base for other seasonal treats. The possibilities are endless. I love this recipe because it brings back memories of simpler times and allows me to share joy with my family and friends. It is a small thing, but it makes a big difference.
Please give this recipe a try and let me know how it turns out. Share your creations on social media and tag me. I love seeing your variations and hearing about your successes. Happy Halloween, and enjoy digging into the dirt!
Frequently Asked Questions
Can I make these dirt cups ahead of time?
Yes, you can make them up to 24 hours in advance. Store them covered in the refrigerator. This actually helps the flavors meld together, making them even more delicious. Just add the gummy worms right before serving so they don’t get soggy.
What can I use instead of Oreos?
You can use any chocolate sandwich cookies, such as chocolate Oreos or generic store brands. For a different flavor, try peanut butter sandwich cookies or even chocolate chip cookies. The key is to use a cookie that crushes well and complements the pudding flavor.
Can I use homemade whipped cream instead of Cool Whip?
Absolutely. Homemade whipped cream works great, but you will need to whip it to stiff peaks first. When folding it into the pudding, be extra gentle to maintain the airy texture. Keep it cold until the very last moment.
How long do the gummy worms last in the cup?
Gummy worms can last in the cup for a day or two, but they will absorb moisture and become softer. For the best texture, add them just before serving. If you are making them for a party the night before, you can add them, but expect them to be softer the next day.
Are these dirt cups gluten-free?
Not if you use regular Oreos. However, you can make them gluten-free by using gluten-free chocolate sandwich cookies and ensuring your pudding mix and whipped topping are also gluten-free. Always check the labels on your ingredients.
Pin This Recipe!
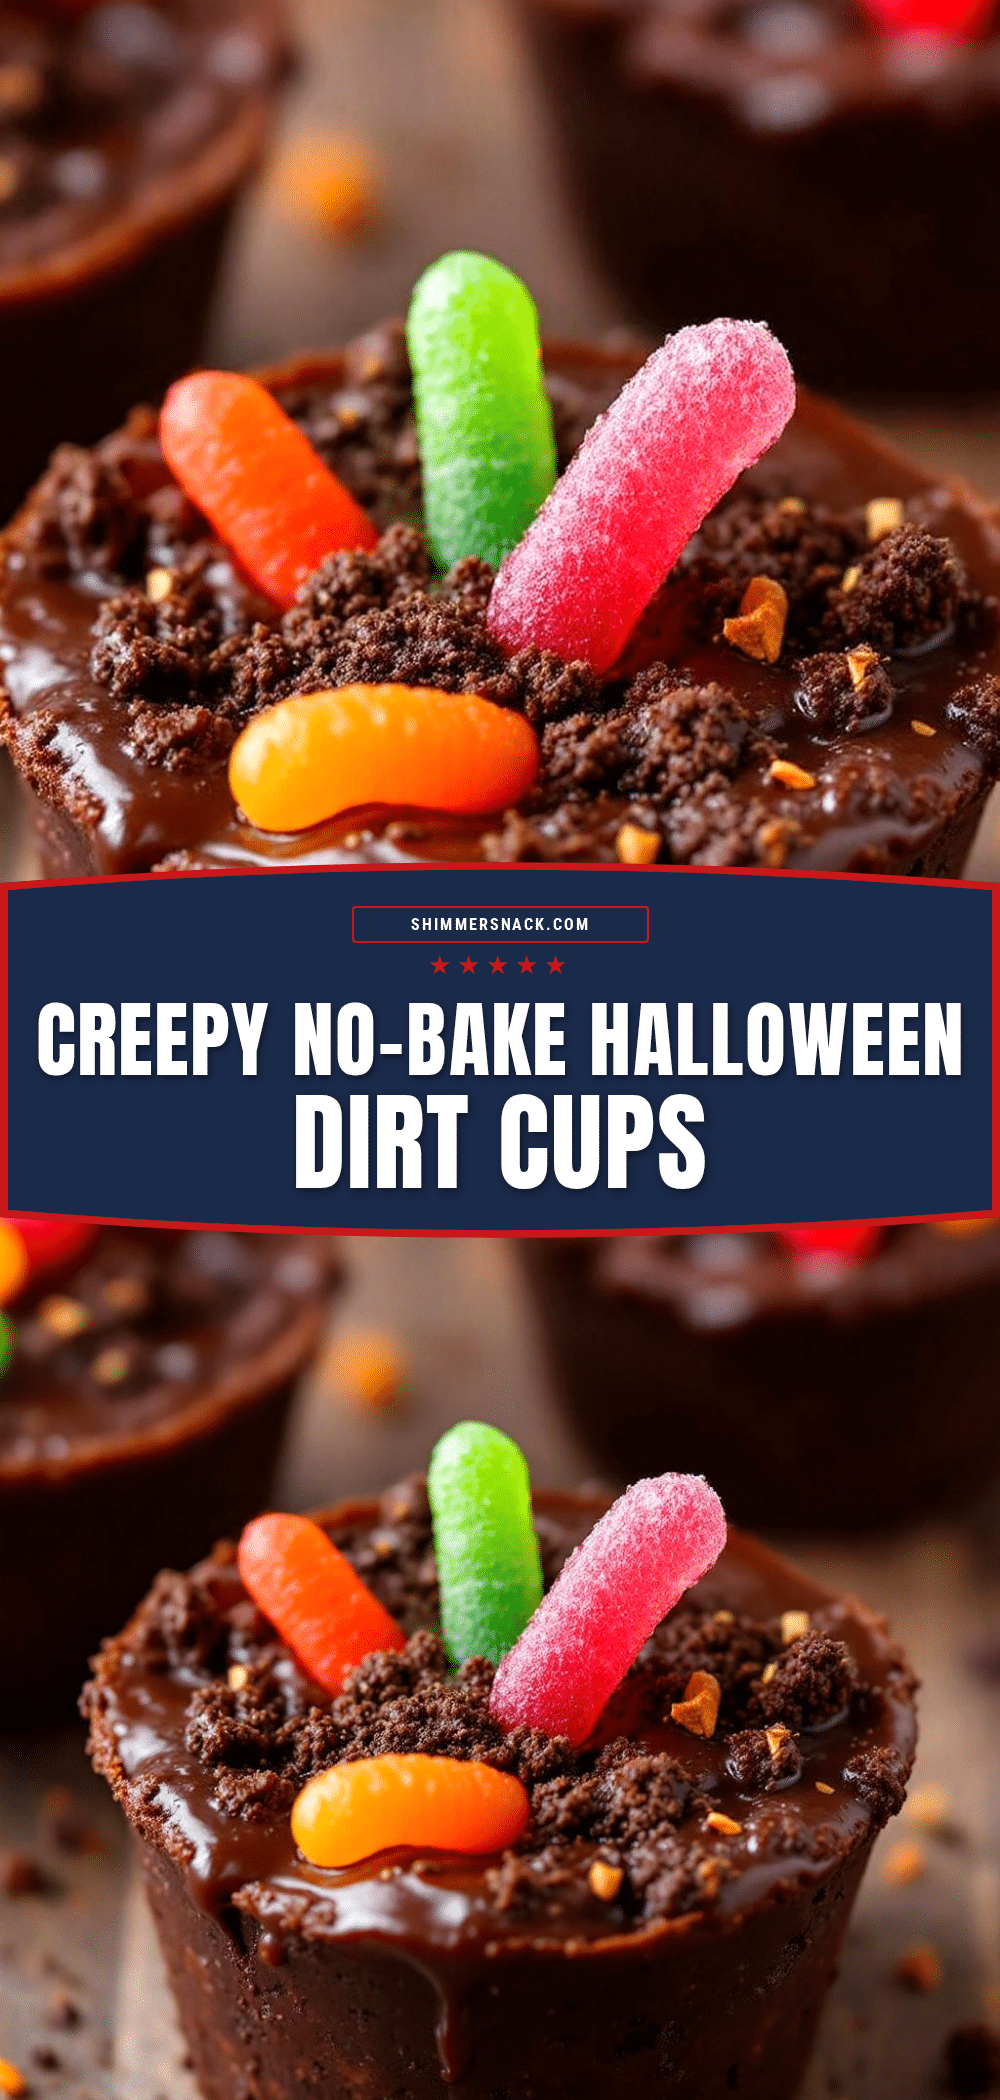
Fun No-Bake Halloween Dirt Cups: 3-Ingredient Easy Recipe

These spooky yet delicious no-bake Halloween dirt cups are a crowd-pleasing dessert made with crushed chocolate sandwich cookies, rich chocolate pudding, and fluffy whipped topping, topped with gummy worms for a fun, interactive treat.
- Prep Time: 15 minutes
- Cook Time: 0 minutes
- Total Time: 45 minutes
- Yield: 8 servings 1x
- Category: Dessert
- Cuisine: American
Ingredients
- 24 Oreo cookies (or similar chocolate sandwich cookies)
- 4 tablespoons unsalted butter, melted
- 1 box (3.4 oz) instant chocolate pudding mix
- 2 cups cold whole milk
- 1 tub (8 oz) thawed whipped topping (e.g., Cool Whip)
- 1 cup gummy worms
- Small clear plastic cups or mason jars
Instructions
- Crush the 24 Oreo cookies into a mix of fine crumbs and small chunks using a food processor or a Ziplock bag with a rolling pin.
- Melt the 4 tablespoons of unsalted butter in the microwave in 30-second intervals, stirring until liquid, and let it cool slightly.
- Pour the melted butter over the crushed cookies in a medium bowl and stir until the crumbs are evenly coated and resemble wet sand.
- In a large mixing bowl, whisk the instant chocolate pudding mix with 2 cups of cold milk vigorously for about 2 minutes until smooth and thick.
- Gently fold the thawed whipped topping into the pudding mixture using a rubber spatula until mostly uniform but still light and airy.
- Assemble the cups by adding a layer of the cookie crumb mixture to the bottom, pressing down lightly, followed by a generous layer of the chocolate pudding mixture. Optionally add another layer of cookie crumbs on top.
- Stick gummy worms into the top layer of cookie crumbs to look like they are burrowing into the dirt.
- Refrigerate the cups for at least 30 minutes before serving to allow the pudding to set and flavors to meld.
Notes
Ensure cookie crumbs have varying sizes for texture. Do not overmix the whipped topping to keep the filling light. Chill for at least 30 minutes for best texture. Store covered in the refrigerator for up to 3 days. Add gummy worms just before serving to prevent sogginess. For gluten-free, use GF cookies and ensure other ingredients are GF certified.
Nutrition
- Serving Size: 1 cup
- Calories: 350
- Sugar: 32
- Sodium: 250
- Fat: 18
- Saturated Fat: 8
- Carbohydrates: 45
- Fiber: 2
- Protein: 5
Keywords: Halloween dessert, no-bake, dirt cups, Oreo cookies, chocolate pudding, gummy worms, easy recipe, kids party food, spooky treats


