Love this? Save it for later!
Share the inspiration with your friends
I burned the butter three times before I finally understood what was happening in the pan. Honestly, it felt like I was fighting the pan itself. The milk solids in the butter were browning too fast, turning from golden to bitter black in a matter of seconds. I kept thinking my stove was broken or that I was using the wrong pan. It turned out I just didn’t understand the chemistry of browning butter yet.
It took me a while to accept that this small, nutty step was non-negotiable for the recipe I was trying to perfect. I had been making standard stuffing for years, and it was always fine. But fine doesn’t win Thanksgiving. Fine doesn’t make people ask for the recipe before the turkey is even carved. I wanted something deeper, something with that toasted, nutty aroma that reminds you of autumn leaves and cozy fires.
The idea of putting stuffing into a muffin tin seemed ridiculous at first. Who has time for individual portions? But then I realized the benefits were obvious. More crispy edges, no soggy centers, and the ability to make savory treats that people actually want to grab with their hands. I stopped worrying about the burnt butter and started focusing on the sage. That earthy, pine-like flavor paired with the toasted nuts changed everything.
Now, I make these crispy brown butter sage stuffing muffins almost every holiday season. They are the first thing to disappear from the table, usually right after the gravy boat is refilled. There is a quiet satisfaction in knowing I finally mastered that golden-brown stage. It’s not just about cooking; it’s about getting the details right.
Why You’ll Love This Recipe
You might be wondering why you should bother with muffin tins when you have a perfectly good casserole dish. Let’s face it, traditional stuffing can be a bit heavy. It sits in your stomach like a brick. These muffins are different. They are lighter, crispier, and packed with flavor in every single bite. I developed this recipe after years of testing different bread types and butter ratios, and I can tell you this is the winning combination.
Here is why these muffins are worth the extra effort:
- Maximum Crispy Edges: When you bake stuffing in a muffin tin, you maximize the surface area. This means every muffin has crispy, golden sides and bottoms, unlike the soft, steamed center of a baked casserole. It’s the best of both worlds.
- Perfect Portion Control: Thanksgiving stress is real. You don’t want to overstuff your plate or worry about leftovers. These individual portions are perfect for mixing and matching sides. You can have a little bit of everything without the guilt.
- Nutty, Rich Flavor Profile: The brown butter adds a depth of flavor that regular melted butter just can’t achieve. It’s nutty, toasty, and incredibly savory. Combined with fresh sage, it tastes like fall in a bite.
- Make-Ahead Friendly: You can assemble these muffins the night before. Just pop them in the fridge and bake them while the turkey rests. This frees up your oven space and your sanity during the busiest part of the day.
- Great for Leftovers: If you have any left (which is rare), they reheat beautifully. You can pop them in the toaster oven for a few minutes to regain that crunch. They also make for an incredible lunch the next day.
This isn’t just a side dish; it’s a game-changer. I remember serving these to my in-laws for the first time. My father-in-law, who usually sticks to plain bread cubes, took two and didn’t say a word. That silence was louder than any compliment. It’s the kind of recipe that elevates your entire Thanksgiving spread without adding too much chaos to your prep list.
What Ingredients You Will Need
This recipe relies on simple, high-quality ingredients to deliver bold flavor. The magic happens in the details, like the type of bread you use and the freshness of your herbs. You don’t need fancy grocery trips for this one. Most of these items are likely already in your kitchen or easy to find at any local store.
Here is what you need to gather:
- Day-Old Sourdough or Country White Bread (8-10 cups, cubed): You need bread that is dry. Fresh bread will turn into mush. Sourdough adds a nice tang, but a sturdy white loaf works too. Cube it into 1-inch pieces and let it sit out overnight to stale.
- Unsalted Butter (1 cup / 226g): This is the star of the show. You will be browning it, so use good quality butter. I prefer European-style butters for their higher fat content, which helps create that deep nutty flavor.
- Fresh Sage Leaves (1/2 cup, chopped): Fresh sage is essential. Dried sage lacks that vibrant, pine-like punch. Look for bright green leaves and chop them finely. If you can’t find fresh, you can use dried, but reduce the amount by half.
- Yellow Onion (1 large, finely diced): This provides the savory base. You want it to cook down until it is soft and translucent, not browned. It adds sweetness without overpowering the sage.
- Garlic (3 cloves, minced): Add this towards the end of cooking the onions so it doesn’t burn. Burnt garlic tastes bitter and ruins the whole batch.
- Chicken or Vegetable Broth (1.5 cups): Use a low-sodium broth so you can control the saltiness. Homemade broth is best, but a good quality carton works fine. Warm it up before adding it to the bread.
- Eggs (2 large): These act as a binder to hold the muffins together. Room temperature eggs mix more evenly into the bread mixture.
- Dried Thyme (1 teaspoon): Thyme complements the sage beautifully. It’s a classic pairing in savory dishes.
- Salt and Black Pepper (to taste): Taste your broth first, as salt content varies by brand. Add pepper for a little bit of heat and complexity.
- Optional: Cooked Sausage (1 cup): If you like meat in your stuffing, add some mild Italian sausage. Brown it separately and drain the fat before mixing it in.
I always recommend using a sharp knife for the bread and onions. It makes the prep work faster and safer. Also, don’t skip the step of drying the bread. If you’re short on time, you can spread the cubes on a baking sheet and toast them in the oven at 300°F for 10 minutes. This speeds up the staling process without cooking the bread.
Equipment Needed
You don’t need a lot of fancy tools to make these muffins, but having the right equipment makes the process much smoother.
- Muffin Tin: A standard 12-cup muffin tin is perfect. If you want bigger muffins, use a jumbo muffin tin, but adjust the baking time accordingly.
- Parchment Paper Liners: These are a lifesaver. They prevent sticking and make cleanup a breeze. You can also just grease the tin well with butter or oil, but liners are easier.
- Large Mixing Bowl: You need something big enough to toss the bread cubes with the wet ingredients. A bowl with a wide opening is best for tossing.
- Saucepan: Use a light-colored saucepan for browning the butter. This allows you to see the color change clearly. A dark pan can hide the browning process, leading to burnt butter.
- Wooden Spoon or Silicone Spatula: For stirring the onions and garlic. You need something that won’t scratch your pan.
- Chef’s Knife and Cutting Board: Essential for dicing the onions and chopping the sage.
- Measuring Cups and Spoons: Precision helps, especially with the liquid-to-bread ratio.
I usually keep a silicone mat on my counter for prep work. It catches any spills from the butter or broth, making cleanup instant. Also, having a timer set for the butter browning is crucial. It goes from perfect to burnt in seconds, so you need to be ready.
Preparation Method
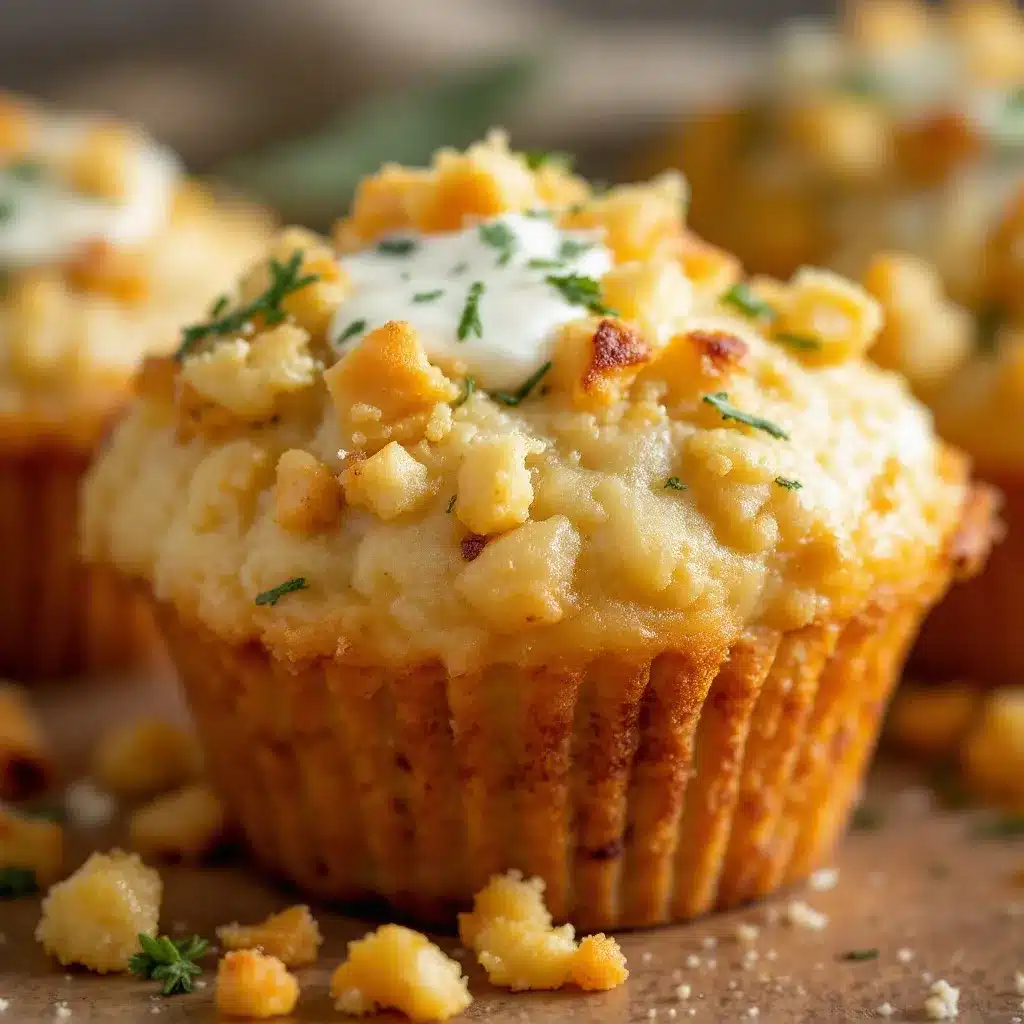
Getting these muffins ready involves a few key steps. The process is straightforward, but timing is everything. Follow these steps carefully for the best results.
- Prep the Bread: Start with your day-old bread cubes. If they are too dry, they will absorb the broth too quickly. If they are too moist, the muffins will be soggy. Aim for cubes that are dry to the touch but still have some chew. Place them in your large mixing bowl.
- Brown the Butter: This is the most critical step. Melt your butter in a saucepan over medium heat. Stir constantly. You will see it foam up. Once the foaming subsides, the milk solids will start to brown. The butter will smell nutty, like hazelnuts. This takes about 5-7 minutes. Remove it from the heat immediately once it reaches a golden amber color. Pour it into a measuring cup to stop the cooking process.
- Sauté the Aromatics: In the same pan, add a little oil if needed (since some butter is left behind). Add the diced onions and cook over medium-low heat until soft and translucent, about 5 minutes. Add the garlic and cook for another minute until fragrant. Do not let the garlic brown.
- Mix the Wet Ingredients: In a separate bowl, whisk the eggs, warmed broth, browned butter, chopped sage, thyme, salt, and pepper. The mixture should be well combined and aromatic.
- Combine Everything: Pour the wet mixture over the bread cubes. Add the sautéed onions and garlic. Gently toss everything together until every piece of bread is coated. Let it sit for 10 minutes. This allows the bread to absorb the liquid. If you skip this, you might end up with dry edges and a wet center.
- Fill the Muffin Tin: Preheat your oven to 375°F (190°C). Line your muffin tin with parchment paper. Divide the mixture evenly among the cups. Press it down firmly with the back of a spoon. This ensures the muffins hold their shape and get crispy tops.
- Bake: Bake for 20-25 minutes. You are looking for a deep golden brown color on top and crispy edges. The center should be set, not jiggly.
- Cool and Serve: Let them cool in the pan for 5 minutes. Then, transfer them to a wire rack. This prevents the bottoms from getting soggy from steam. Serve warm.
I often make a double batch because they disappear so fast. If you are short on oven space, you can bake them in two batches. The flavor is consistent regardless of the batch number.
Cooking Tips & Techniques
There are a few tricks I’ve learned along the way to ensure these muffins turn out perfectly every time.
- Watch the Butter Closely: Browning butter is tricky. It can go from perfect to burnt in seconds. If you smell something acrid, you’ve gone too far. Start over. The smell should be nutty and pleasant, like popcorn or hazelnuts.
- Don’t Skip the Resting Time: Letting the bread mixture rest for 10 minutes is crucial. It ensures the bread absorbs all the liquid evenly. If you bake it immediately, you might have dry crumbs and liquid pools.
- Press Down Firmly: When filling the muffin cups, press the mixture down. This creates a denser texture that holds together better and gets crispier edges.
- Use a Thermometer: If you are unsure if the muffins are done, use an instant-read thermometer. The center should reach 165°F (74°C). This ensures the eggs are cooked and safe to eat.
- Adjust for Moisture: If your bread was particularly dry, you might need a little extra broth. If it was moist, you might need less. Add the broth gradually if you are unsure.
I once tried using stale baguette slices instead of cubed bread. It worked, but the texture was a bit too hard. Stick to softer, day-old loaves for the best balance of crisp and tender. Also, fresh sage can be potent. Taste your mixture before baking and adjust the herb amount if needed.
Variations & Adaptations
While the classic sage and brown butter version is my favorite, there are many ways to customize these muffins.
- Sausage and Apple: Add cooked Italian sausage and diced apples to the mixture. The sweetness of the apple balances the savory sage perfectly. This is a great option for those who like a bit of fruit in their stuffing.
- Vegan Version: Use olive oil or vegan butter instead of dairy butter. Use vegetable broth and flax eggs (1 tablespoon ground flaxseed mixed with 3 tablespoons water per egg) instead of regular eggs. The texture will be slightly different but still delicious.
- Gluten-Free: Use gluten-free bread cubes. Make sure to check the broth and sausage labels for hidden gluten. Gluten-free bread can be drier, so you might need a bit more liquid.
- Spicy Kick: Add some red pepper flakes or diced jalapeños to the mixture. This adds a nice heat that contrasts with the rich butter.
- Cranberry and Walnut: Stir in dried cranberries and toasted walnuts. This adds chewiness and crunch, making the muffins more complex.
I often experiment with different herbs. Rosemary and thyme work well together. Just be careful not to overpower the sage, which is the main flavor profile here. Try small batches of variations to see what you like best.
Serving & Storage Suggestions
These muffins are best served warm, right out of the oven. They pair beautifully with roasted turkey, mashed potatoes, and cranberry sauce. You can also serve them as an appetizer with a side of gravy for dipping.
- Storage: Store leftover muffins in an airtight container in the refrigerator for up to 4 days. They can also be frozen for up to 3 months. Wrap them individually in plastic wrap and place them in a freezer bag.
- Reheating: To reheat, place them in a toaster oven or conventional oven at 350°F for 10-15 minutes. This restores the crispiness. Avoid the microwave, as it will make them soggy.
- Make-Ahead: You can assemble the muffins the night before and store them in the fridge. Bake them directly from the fridge, adding a few extra minutes to the baking time.
The flavors develop over time, so they often taste even better the next day. Just make sure to reheat them properly to get that crispy texture back.
Nutritional Information & Benefits
These muffins are a hearty side dish, but they do contain butter and bread, so they are calorie-dense. Here is an approximate nutritional breakdown per muffin:
- Calories: 250-300 kcal
- Carbohydrates: 25g
- Protein: 5g
- Fat: 15g
- Fiber: 2g
The brown butter adds healthy fats, and the sage has antioxidant properties. If you are watching your sodium intake, use low-sodium broth and control the salt added. For a lighter option, use whole wheat bread and reduce the butter slightly.
Conclusion
These crispy brown butter sage stuffing muffins are a Thanksgiving game-changer. They offer a perfect blend of crispy edges and soft centers, with a nutty, savory flavor that everyone will love. I hope you try this recipe and make it your own. Feel free to add your favorite ingredients like sausage, apples, or cranberries.
If you make these, I’d love to hear how they turn out. Please leave a comment below and share your variations. Don’t forget to share your photos on social media and tag me. Happy cooking, and enjoy your holiday meal!
FAQs
Can I use fresh bread instead of day-old bread?
It is not recommended. Fresh bread is too moist and will result in a mushy texture. If you must use fresh bread, cube it and toast it in the oven for 10 minutes at 300°F to dry it out.
Can I make these ahead of time?
Yes, you can assemble the muffins the night before and store them in the fridge. Just bake them directly from the fridge, adding a few extra minutes to the baking time.
Can I freeze these muffins?
Absolutely. Let them cool completely, then wrap them individually in plastic wrap and place them in a freezer bag. They will last for up to 3 months. Reheat in the oven for best results.
Can I use dried sage instead of fresh?
You can, but fresh sage has a much better flavor. If you use dried sage, reduce the amount by half, as dried herbs are more potent.
What is the best way to reheat leftover muffins?
Use a toaster oven or conventional oven at 350°F for 10-15 minutes. This will restore the crispiness. Avoid the microwave, as it will make them soggy.
Pin This Recipe!
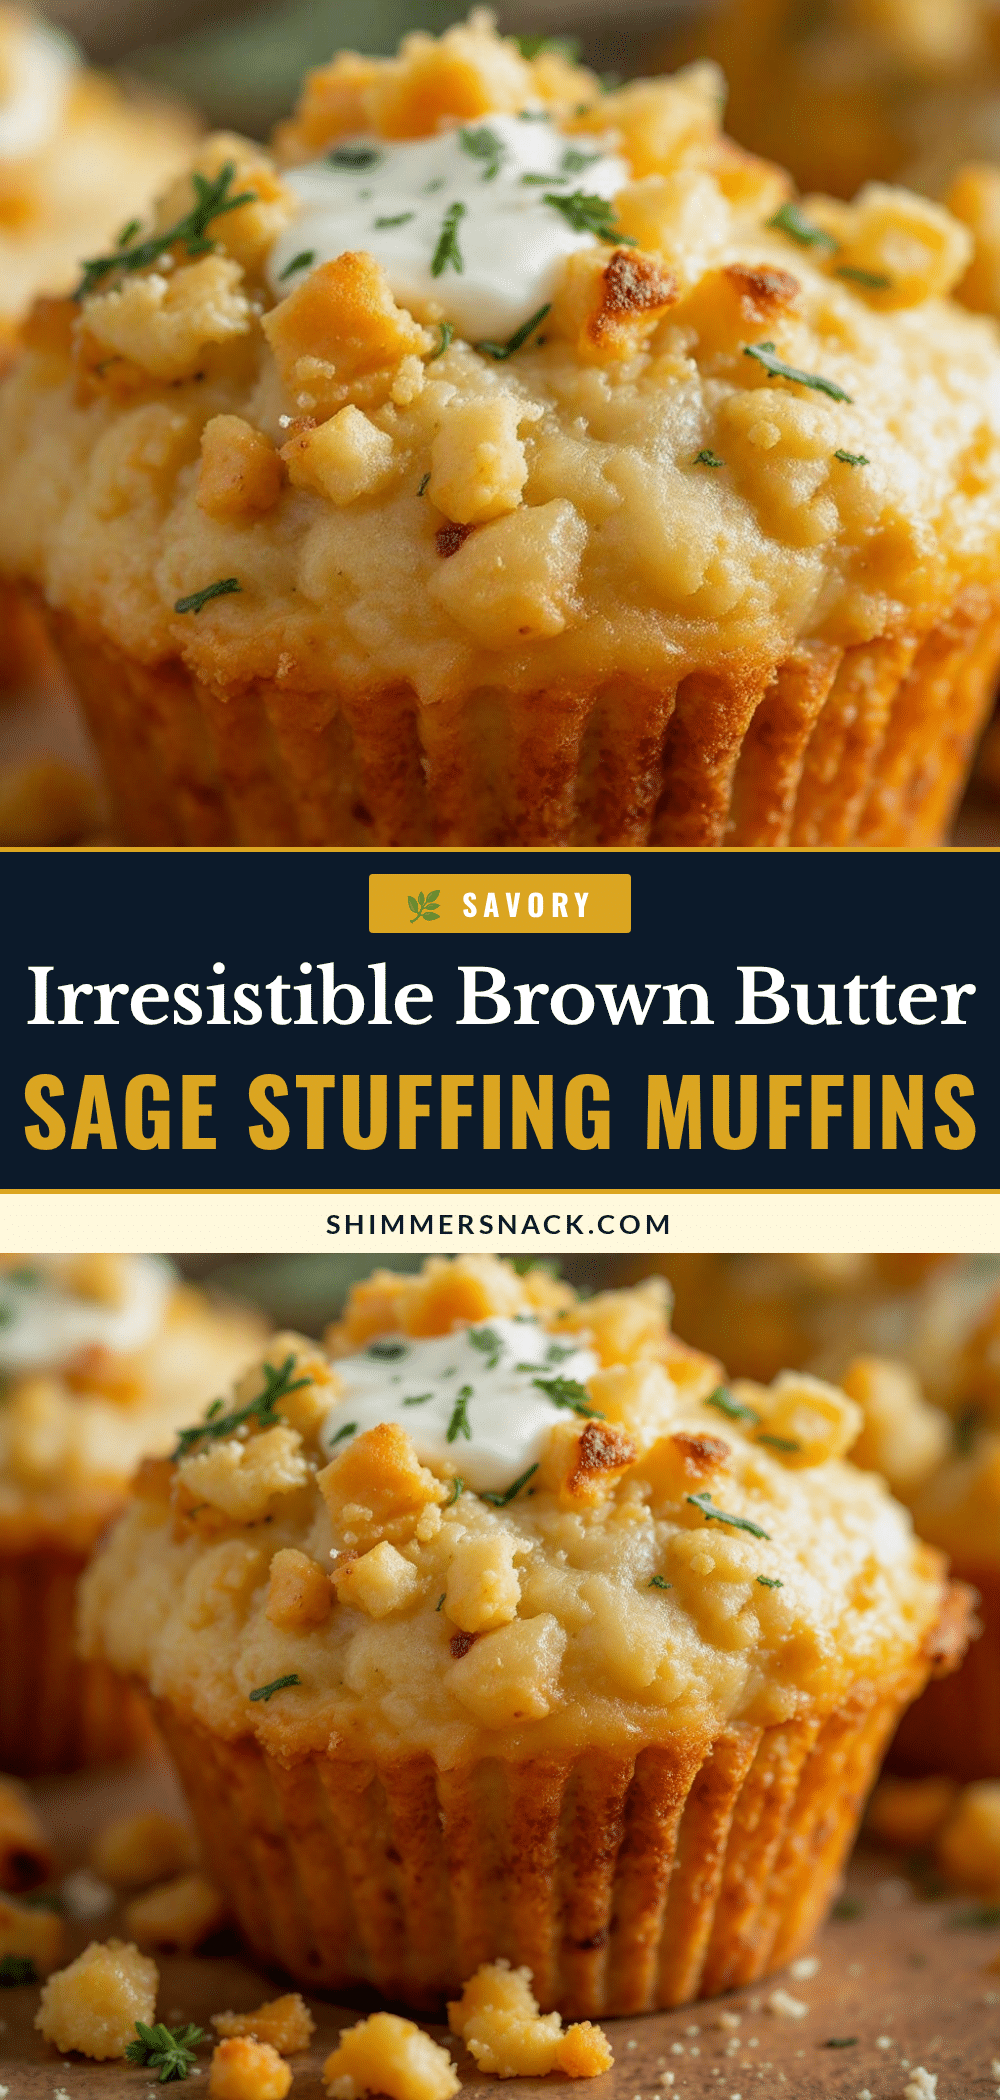
Crispy Brown Butter Sage Stuffing Muffins

Individual portions of stuffing baked in a muffin tin to maximize crispy edges and nutty brown butter flavor, perfect for Thanksgiving.
- Prep Time: 20 minutes
- Cook Time: 25 minutes
- Total Time: 45 minutes
- Yield: 12 muffins 1x
- Category: Side Dish
- Cuisine: American
Ingredients
- 8–10 cups day-old sourdough or country white bread, cubed
- 1 cup (226g) unsalted butter
- 1/2 cup fresh sage leaves, chopped
- 1 large yellow onion, finely diced
- 3 cloves garlic, minced
- 1.5 cups chicken or vegetable broth, warmed
- 2 large eggs
- 1 teaspoon dried thyme
- Salt and black pepper to taste
- 1 cup cooked sausage (optional)
Instructions
- Preheat oven to 375°F (190°C). Line a standard 12-cup muffin tin with parchment paper liners.
- Melt butter in a saucepan over medium heat. Stir constantly until it foams, then subsides. Continue cooking until milk solids turn golden amber and smell nutty (5-7 minutes). Remove from heat immediately and pour into a measuring cup.
- In the same pan, add a little oil if needed. Sauté diced onions over medium-low heat until soft and translucent (about 5 minutes). Add garlic and cook for 1 minute until fragrant.
- In a separate bowl, whisk together eggs, warmed broth, browned butter, chopped sage, thyme, salt, and pepper.
- Place bread cubes in a large mixing bowl. Pour the wet mixture and sautéed onions/garlic over the bread. Gently toss to coat evenly.
- Let the mixture sit for 10 minutes to allow the bread to absorb the liquid.
- Divide the mixture evenly among the muffin cups. Press down firmly with the back of a spoon.
- Bake for 20-25 minutes until tops are deep golden brown and edges are crispy.
- Cool in the pan for 5 minutes, then transfer to a wire rack to prevent sogginess. Serve warm.
Notes
Use day-old bread to ensure the stuffing absorbs liquid without becoming mushy. Brown butter carefully as it can burn quickly. For make-ahead, assemble the night before and refrigerate; add a few minutes to baking time if baking from cold.
Nutrition
- Serving Size: 1 muffin
- Calories: 275
- Sugar: 2
- Sodium: 350
- Fat: 15
- Saturated Fat: 8
- Carbohydrates: 25
- Fiber: 2
- Protein: 5
Keywords: Thanksgiving, stuffing, brown butter, sage, muffins, side dish, holiday cooking, crispy stuffing


