Love this? Save it for later!
Share the inspiration with your friends
The last scoop had been taken before I even managed to grab a napkin. My brother-in-law, usually the most polite guest at the table, practically scraped the ceramic dish clean with his fork. He didn’t even say a word, just looked at me with that wide, surprised grin and pointed at the empty space where the stuffing used to be. It was the fourth year in a row this had happened, and honestly, I’m starting to think it’s my only real talent.
I remember the first time I made it. I was terrified of making it soggy. You know how it is with holiday sides; they sit there for hours under a turkey tent, steaming to death while you panic about the gravy. But this time, I was different. I had learned the hard way that moisture is the enemy of texture. I had spent the morning roasting the bread cubes until they were essentially croutons. I had rendered the sausage fat slowly, letting it get nutty and brown. I wasn’t just tossing ingredients together; I was building a structure.
When I pulled the pan out of the oven, the smell hit the kitchen like a physical wave. It wasn’t just “smells good.” It was savory, herbal, and deeply comforting. The sage leaves had crisped up into little green chips, and the bread had formed a golden, crunchy crust that shattered when you pressed your spoon into it. Inside, it was soft and juicy, soaked in that rich, brown broth. But the outside? That was the magic. That was the part everyone fought for.
I watched my family dig in. The sound of that crunch was louder than the conversation. My niece, who usually picks around the onions, asked for seconds before she finished her first plate. I stood there, holding the serving spoon, feeling this quiet, warm pride. It wasn’t about showing off. It was just knowing that I had made something that brought people together, something that tasted like home but better. This recipe isn’t just a side dish. It’s the anchor of the meal. And now, it’s yours to make.
Why You’ll Love This Recipe
Let’s be real for a second. Most stuffing recipes are fine. They’re good, even. But they’re safe. They’re predictable. This Best Crispy Sage and Sausage Stuffing is different because it refuses to apologize for being bold. I’ve tested dozens of versions over the years, from the traditional bread-and-butter style to fancy mushroom-heavy variations. This one wins because it balances texture and flavor in a way that feels almost unfair. It’s not just soft bread soaked in broth; it’s a study in contrasts.
- Texture That Actually Matters: The secret isn’t just the ingredients; it’s the technique. By toasting the bread first and baking it uncovered with a buttery topping, you get a crust that stays crisp even if you make it a few hours ahead. It’s the kind of crunch that makes you close your eyes.
- Savory Depth Without Overpowering: We use a mix of sweet Italian sausage and fresh sage. The fat from the sausage infuses every single crumb of bread. It’s rich, but the sage cuts through that richness with a peppery, earthy note. It’s not just “herby”; it’s complex.
- Perfect for Holiday Stress: I know, I know. The holidays are chaotic. This recipe is forgiving. You can prep the sausage and bread mixture the night before. In fact, it tastes better the next day because the flavors have had time to meld. It’s a lifesaver when you’re trying to keep the turkey warm and the gravy smooth.
- A Crowd-Pleaser for Everyone: Some people hate stuffing. Some people only eat the crispy bits from the pan. This recipe gives everyone what they want. The kids love the savory sausage flavor, and the adults appreciate the sophisticated herbal notes. It’s the one dish that disappears completely.
- Comfort Food Reimagined: This isn’t just food; it’s a hug on a plate. It’s the smell of Thanksgiving morning. It’s cozy dinners in November. It’s the kind of side dish that makes you want to stay at the table an extra twenty minutes, just talking.
What makes this truly stand out is the attention to the sausage. We aren’t using generic pork. We’re using high-quality Italian sausage with fennel and anise notes, which pairs perfectly with the sage. It’s a flavor combination that feels classic but elevated. It’s the kind of recipe that earns you compliments you didn’t expect. You’ll see people going back for third helpings, and you’ll just smile and say, “I told you so.”
What Ingredients You Will Need
This recipe relies on simple, wholesome ingredients to deliver bold flavor and satisfying texture without the fuss. The beauty of this stuffing is that you likely have most of the pantry staples already. The key is quality over quantity. Since there are so few ingredients, each one needs to do heavy lifting. We’re focusing on savory, herbal, and crunchy elements.
Here is what you need to gather:
- Stale Bread (1 loaf): This is non-negotiable. You need a sturdy bread that can hold up to the broth without turning into mush. Sourdough, ciabatta, or a rustic country white bread are my top choices. Avoid soft sandwich bread; it just falls apart. If your bread is fresh, slice it and toast it in the oven at 300°F for 15 minutes to dry it out. This step is crucial for that crispy texture.
- Italian Sausage (1 pound): Go for sweet Italian sausage with the casings removed. If you like a bit of heat, you can mix in a pound of hot Italian sausage. Look for brands with visible flecks of fennel and herbs. I personally prefer Johnsonville or Applegate for their clean ingredient lists and consistent flavor. Avoid pre-crumbled sausage if you can help it; it often lacks that fresh, juicy texture.
- Fresh Sage Leaves (1 large bunch): Don’t use dried sage. Dried sage can be dusty and bitter. Fresh sage has a volatile oil that releases a beautiful aroma when cooked. You’ll need about 2 tablespoons of chopped leaves, plus extra whole leaves for garnish if you want to go fancy. The sage is the star here, so don’t skimp.
- Yellow Onion (1 large): Finely diced. Onion provides the savory base. Yellow onions are sweet when cooked and pungent when raw, making them perfect for sautéing until translucent. They add moisture and depth without being overpowering.
- Garlic (3 cloves): Minced. Garlic adds that essential pungency. Add it in the last minute of cooking the onions so it doesn’t burn. Burnt garlic tastes bitter and ruins the whole batch.
- Chicken Stock (3-4 cups): Use a low-sodium chicken stock. You want to control the salt level yourself. High-sodium stock will make the stuffing taste like a salt mine. Homemade stock is best, but a good quality store-bought brand like Imagine or Kettle & Fire works well. Warm the stock before adding it to the bread; this helps it absorb faster.
- Unsalted Butter (1/2 cup): Melted. Butter adds richness and helps create that golden crust. Since we are using unsalted butter, we can control the saltiness precisely. If you are dairy-free, you can use olive oil or a high-quality plant-based butter, but the flavor profile will shift slightly.
- Eggs (2 large): Beaten. Eggs act as a binder, holding the stuffing together so it’s easy to scoop. They also add a bit of richness and help create a softer interior texture.
- Salt and Black Pepper (to taste): Freshly cracked black pepper adds a nice bite. Taste your sausage first, as it may already be salty, before adding extra salt.
- Optional Add-ins: Dried cranberries for sweetness, chopped pecans for crunch, or diced celery for extra crunch. I usually stick to the basics, but these are great if you want to switch it up.
For the best results, make sure your bread is completely cool before mixing. Warm bread will melt the butter and eggs prematurely, leading to a dense, gummy texture. Also, if you can’t find fresh sage, you can substitute with a mix of thyme and rosemary, but sage is the traditional flavor profile for a reason—it just works.
Equipment Needed
You don’t need a fancy kitchen to make this stuffing, but having the right tools makes the process smoother and the results better. Here is what you’ll need:
- Large Skillet or Dutch Oven: A cast-iron skillet is ideal for browning the sausage because it holds heat well and creates a nice crust. A large non-stick skillet works too if you prefer easy cleanup. You’ll use this to cook the sausage and sauté the vegetables.
- Large Mixing Bowl: You need something big enough to hold all the bread cubes, sausage, and liquids. A 6-quart bowl is perfect. If you don’t have one, use your clean bathtub or a large roasting pan, but a bowl is easier to manage.
- Baking Dish: A 9×13 inch baking dish is standard. You can use two smaller 8×8 dishes if you want to make individual portions or have leftovers. Glass or ceramic dishes are great because they heat evenly. Metal pans will brown the top faster, so keep an eye on it.
- Wooden Spoon or Spatula: For stirring the sausage and mixing the stuffing. A wooden spoon is gentle on non-stick surfaces and sturdy enough for cast iron.
- Measuring Cups and Spoons: Basic baking essentials. Accuracy matters here, especially with the liquid-to-bread ratio.
- Aluminum Foil: You’ll need this to cover the stuffing if it starts browning too quickly in the oven. It’s a simple tool that saves you from burnt edges.
I recommend investing in a good cast-iron skillet. It’s versatile, durable, and improves with age. For the baking dish, a sturdy ceramic one like Le Creuset is nice, but a basic Pyrex dish works just as well and is much cheaper. The most important tool is your oven thermometer. Oven temperatures can be off by 25 degrees, which can mean the difference between perfect browning and burnt stuffing.
Preparation Method
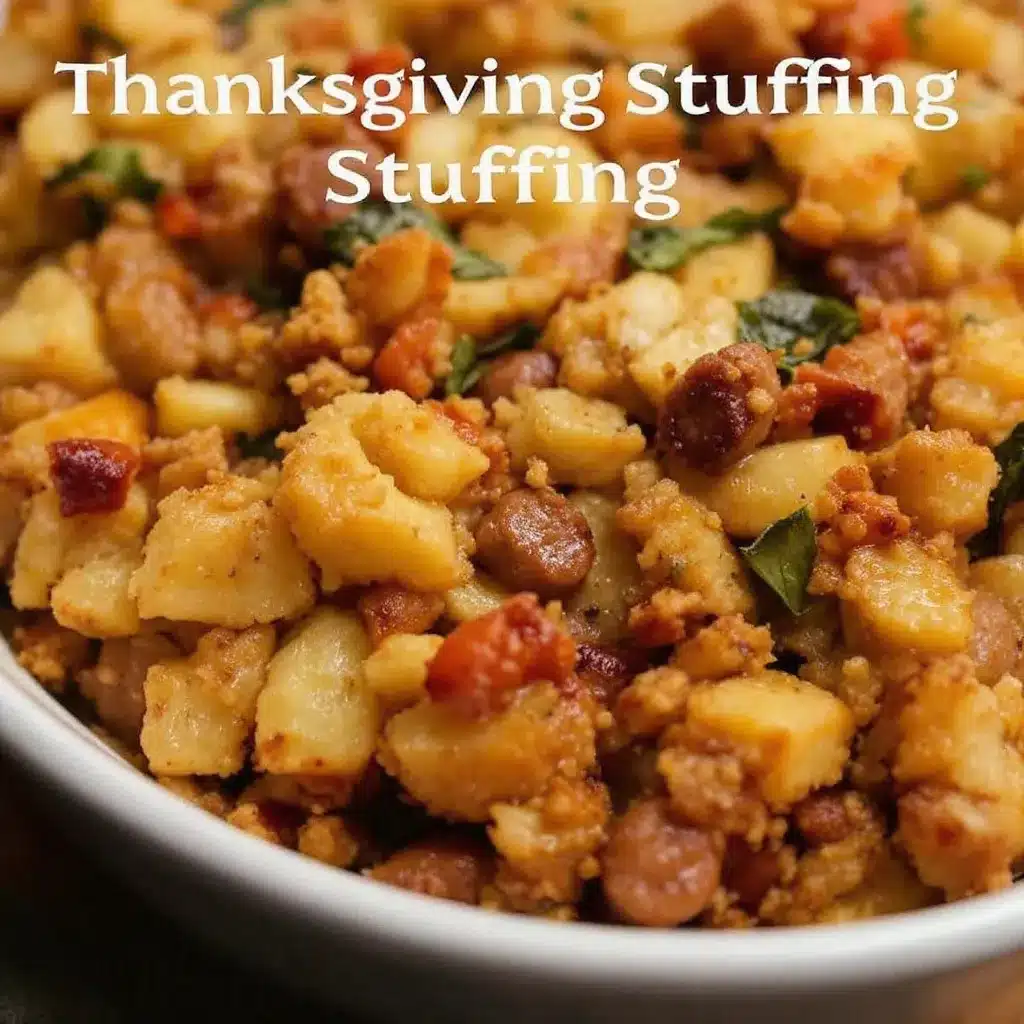
Making this stuffing is straightforward, but it requires a few steps to get the texture right. Take your time with the sausage browning; that’s where the flavor starts. Here is how to put it all together:
- Prepare the Bread (10 minutes): Preheat your oven to 300°F. Slice your loaf of bread into 1-inch cubes. Spread them out in a single layer on two large baking sheets. Toast them in the oven for 15-20 minutes, flipping halfway through, until they are dry and lightly golden. They should feel hard to the touch, like croutons. Let them cool completely. This step removes moisture, ensuring your stuffing doesn’t get soggy later.
- Cook the Sausage (10 minutes): Heat a large skillet over medium-high heat. Add the sausage meat, breaking it up with a wooden spoon as it cooks. Cook until browned and crispy on the edges, about 8-10 minutes. You want some browning, not just gray meat. If there is excessive grease, drain some of it, but leave about 2 tablespoons in the pan for flavor. Transfer the cooked sausage to a large bowl.
- Sauté the Aromatics (5 minutes): In the same skillet (with the sausage fat), add the diced onion. Cook over medium heat for 5 minutes until soft and translucent. Add the minced garlic and chopped fresh sage. Cook for another minute until fragrant. Be careful not to burn the garlic. Pour this mixture over the sausage in the bowl.
- Combine Dry Ingredients (2 minutes): Add the toasted bread cubes to the bowl with the sausage and vegetable mixture. Toss gently to combine. The bread should be evenly coated with the fat and herbs. If the mixture looks dry, you can add a splash more stock here.
- Add Wet Ingredients (3 minutes): In a separate small bowl, whisk together the beaten eggs, warm chicken stock, salt, and black pepper. Pour this liquid mixture over the bread and sausage. Use a large spoon or your hands to gently toss everything together. You want every piece of bread to absorb some liquid. Let it sit for 10 minutes. This allows the bread to soften and the flavors to meld. The mixture should look moist but not swimming in liquid.
- Transfer to Baking Dish (2 minutes): Preheat your oven to 350°F. Grease your 9×13 baking dish with butter or cooking spray. Transfer the stuffing mixture into the dish. Press it down gently with the back of a spoon to create an even surface. Do not pack it too tightly; you want some air circulation for even cooking.
- Bake Uncovered (45-60 minutes): Place the dish in the oven. Bake uncovered for 30 minutes. Then, check the top. If it’s golden brown, you’re good. If it’s still pale, bake for another 15-30 minutes. The goal is a crispy, golden top and a hot, bubbly center. The internal temperature should reach 165°F.
- Rest and Serve (10 minutes): Remove the stuffing from the oven and let it rest for 10 minutes before serving. This allows it to set slightly, making it easier to scoop. Garnish with extra fresh sage leaves if you like. Serve warm alongside your turkey or roast.
If you are making this ahead of time, you can assemble the stuffing in the dish, cover it tightly with plastic wrap, and refrigerate overnight. When you’re ready to bake, let it sit on the counter for 30 minutes to take the chill off, then bake as directed, adding 10-15 minutes to the cooking time.
Cooking Tips & Techniques
I’ve made a lot of stuffing mistakes in my day, so you don’t have to. Here are some pro tips to ensure your Best Crispy Sage and Sausage Stuffing turns out perfect every time.
- Don’t Skip the Toasting: I know it’s an extra step, but toasting the bread is the single most important thing you can do. Fresh bread has too much moisture. If you skip this, your stuffing will be a dense, soggy mess. The dry bread acts like a sponge, soaking up the flavorful broth without falling apart.
- Warm the Stock: Never add cold stock to room-temperature bread. It shocks the system and makes the bread absorb it unevenly. Warm stock integrates faster and helps the eggs cook slightly, creating a better binder.
- Brown the Sausage Well: Maillard reaction is your friend. You want deep brown bits in the sausage. Those browned bits are packed with flavor. If the sausage is pale, the stuffing will taste bland. Don’t crowd the pan; cook in batches if necessary.
- Listen to the Oven: Ovens vary. Start checking your stuffing at the 30-minute mark. You want a crust, but you don’t want it burnt. If the top is getting too dark, tent it loosely with aluminum foil. This lets the inside finish cooking without scorching the outside.
- Let It Rest: I know it’s tempting to dig in immediately. But resting allows the stuffing to set. If you cut into it right out of the oven, it might fall apart. Letting it sit for 10 minutes gives it structure.
- Test for Doneness: Insert a knife into the center. It should come out hot to the touch. If you pull it out and the bread is still cold, it needs more time. The center should be bubbly and hot.
One common mistake is adding too much liquid. Bread varies in how much it absorbs. Start with 3 cups of stock, mix, and then add more as needed. It’s better to add a little extra stock at the end than to have a soupy mess from the start. Trust your eyes, not just the recipe measurements.
Variations & Adaptations
While the classic sage and sausage version is my favorite, this recipe is a blank canvas. Here are some ways to customize it based on your preferences or dietary needs.
- Vegetarian Option: Skip the sausage and use vegetable broth. To keep the savory depth, add a tablespoon of soy sauce or miso paste to the broth. You can also add sautéed mushrooms, which provide a meaty texture and umami flavor. Use olive oil instead of butter for a vegan version.
- Gluten-Free: Use gluten-free bread. Make sure it’s sturdy, like a gluten-free sourdough or a dense roll. Gluten-free bread can be more fragile, so be gentle when mixing. You might need slightly less liquid, as GF bread absorbs differently.
- Spicy Kick: Swap the sweet Italian sausage for hot Italian sausage. Add a pinch of red pepper flakes to the onion mixture. You can also add diced jalapeños for a fresh heat.
- Apple and Walnut: For a sweeter twist, add diced apples and chopped walnuts. The apples add moisture and sweetness, which pairs beautifully with the sage. This is a great option for autumn dinners.
- Seafood Twist: While unusual, some people like adding smoked salmon or shrimp. This is more of a modern, fusion take. Add the seafood at the very end to prevent overcooking.
I once tried making this with cornbread instead of white bread. It was delicious but very crumbly. If you use cornbread, reduce the liquid by half a cup. Every variation I try teaches me something new about texture and flavor balance. Don’t be afraid to experiment, but stick to the core technique of toasting the bread.
Serving & Storage Suggestions
This stuffing is best served hot and crispy. I recommend serving it directly from the baking dish for a rustic look. Garnish with fresh parsley or extra sage leaves for a pop of color. It pairs wonderfully with roasted turkey, ham, or even a vegetarian main like roasted delicata squash.
If you have leftovers, store them in an airtight container in the refrigerator for up to 4 days. To reheat, you want to restore that crispiness. The microwave will make it soft and chewy, which is not ideal. Instead, spread the leftovers in a baking dish and bake at 350°F for 15-20 minutes. You can also toast individual portions in a skillet with a little butter for a crispy bottom.
You can also freeze the stuffing. Assemble it in the baking dish, wrap it tightly in plastic wrap and foil, and freeze for up to 3 months. Thaw it in the refrigerator overnight before baking. The texture might be slightly softer after freezing, but the flavor will still be excellent.
The flavors of this stuffing actually improve over the first day. The herbs have time to infuse the bread, and the sausage flavor deepens. So if you can resist eating it all at dinner, you’re in for a treat the next day.
Nutritional Information & Benefits
While this stuffing is indulgent, it can fit into a balanced diet. Here is a general overview of the nutritional profile per serving (assuming 8 servings):
- Calories: Approximately 350-400 calories per serving.
- Fat: High in saturated fat from the sausage and butter, but also contains unsaturated fats from the bread and olive oil if used.
- Carbohydrates: Moderate carbs from the bread. If using gluten-free bread, check the carb count as it varies.
- Protein: Good source of protein from the sausage and eggs.
- Fiber: Depends on the bread used. Sourdough or whole wheat bread will add more fiber.
Sage has antioxidant properties and may aid digestion. Sausage provides iron and B vitamins. Overall, this is a hearty side dish that provides energy and satisfaction. Enjoy it in moderation as part of a larger meal.
Conclusion
Making the Best Crispy Sage and Sausage Stuffing is more than just cooking; it’s creating a centerpiece for your holiday table. It’s the dish that brings people together, the one that gets scraped clean. With its perfect balance of crispy and soft, savory and herbal, it’s a recipe that deserves a spot in your rotation. I hope you try it and see why my family fights over it every year.
Feel free to customize it with your favorite additions. Maybe you’ll add cranberries, or maybe you’ll stick to the classic. Either way, you’ll end up with something delicious. If you make this recipe, I’d love to hear how it turned out. Leave a comment below or share a photo on social media. Tag me so I can see your creations!
Thank you for cooking with me. Happy holidays, and enjoy every bite.
FAQs
Can I make this stuffing ahead of time?
Yes! You can assemble the stuffing the night before and refrigerate it. Just let it sit at room temperature for 30 minutes before baking. You may need to add 10-15 minutes to the baking time.
What kind of bread is best for stuffing?
Stale, sturdy bread like sourdough, ciabatta, or French bread works best. Avoid soft sandwich bread as it will turn mushy. Toasting the bread cubes first is key for texture.
Can I use dried sage instead of fresh?
You can, but fresh sage has a much better flavor and aroma. If using dried, use one-third the amount called for in fresh sage, as dried herbs are more potent.
How do I keep the stuffing crispy?
Bake it uncovered for the majority of the cooking time. Make sure the bread is toasted before mixing, and don’t add too much liquid. Letting it rest for 10 minutes after baking also helps the crust set.
Can I freeze leftover stuffing?
Yes, freeze it in an airtight container for up to 3 months. Reheat in the oven at 350°F to restore crispiness. Avoid microwaving if you want to keep the texture.
Pin This Recipe!
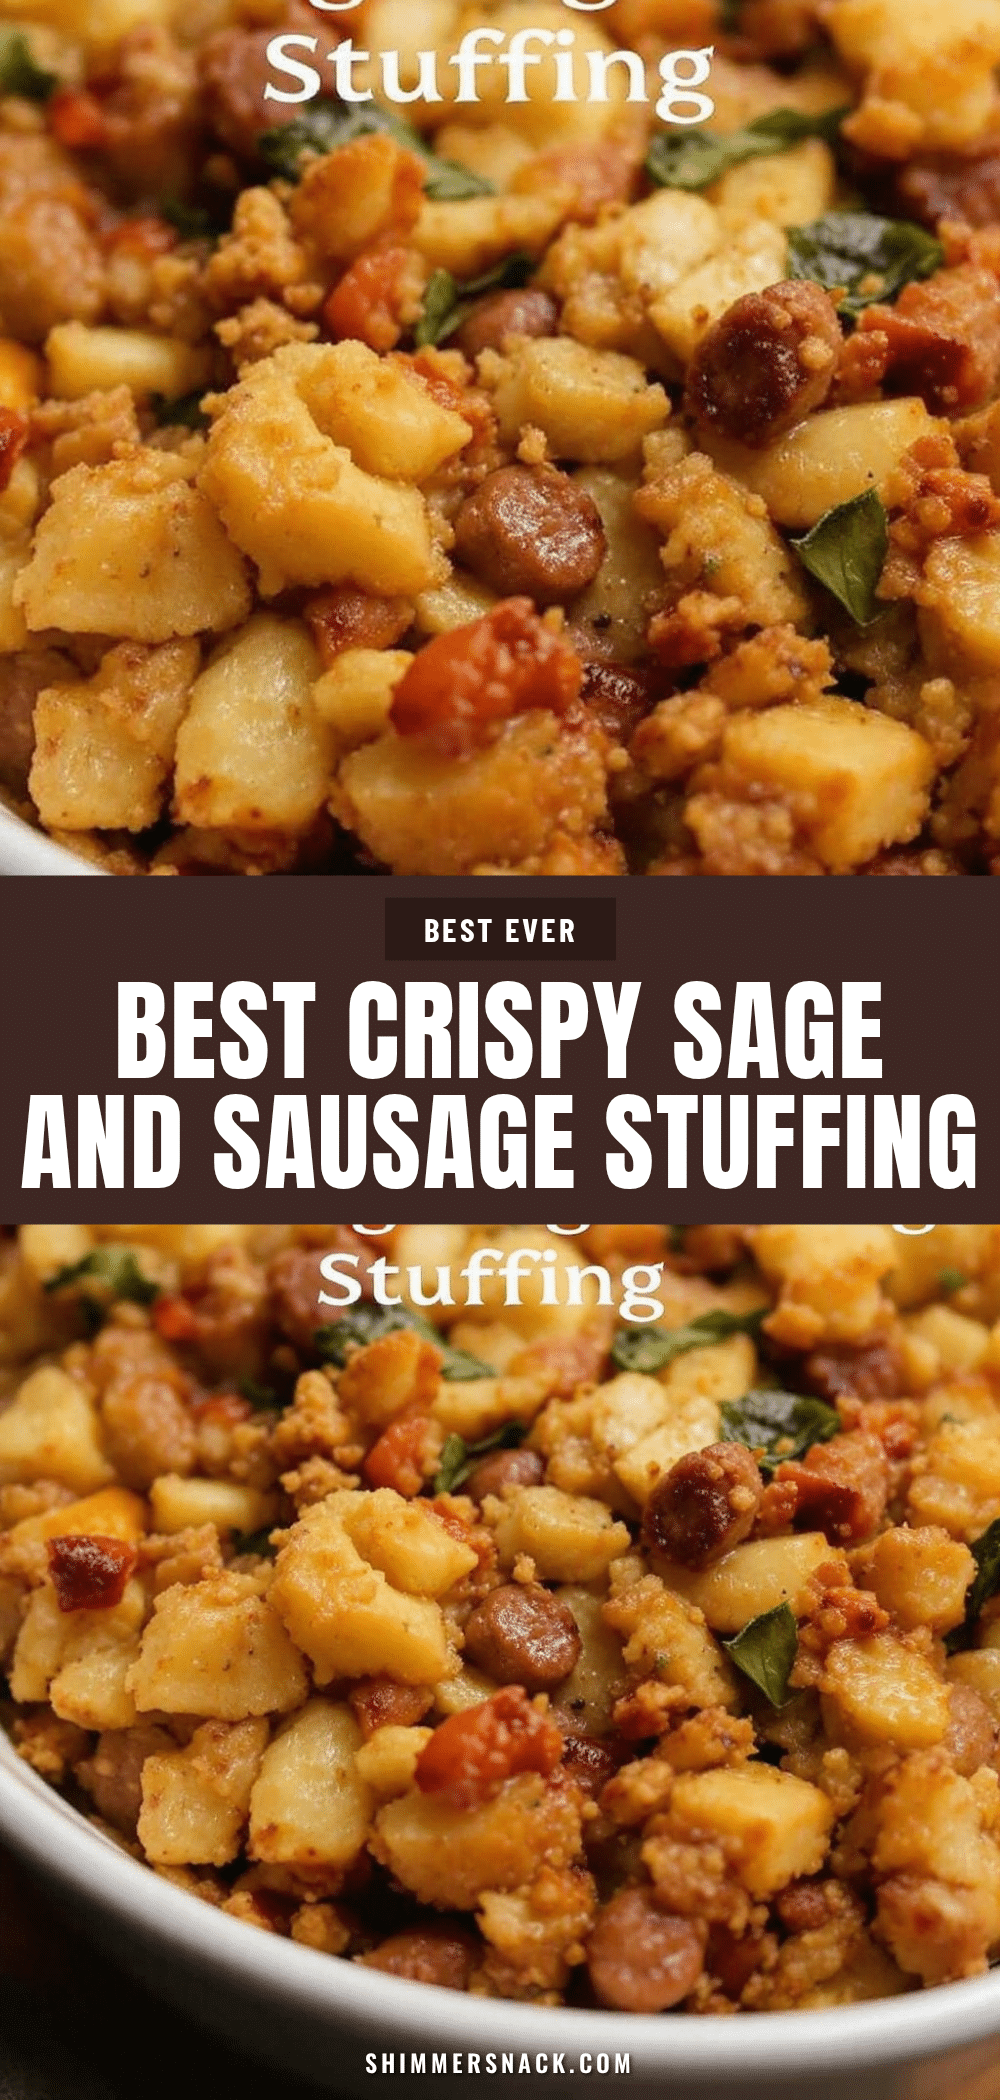
Best Crispy Sage and Sausage Stuffing: 5 Easy Holiday Side
A bold and textured holiday side dish featuring toasted bread cubes, savory Italian sausage, and fresh sage, baked to achieve a golden, crunchy crust and a soft, juicy interior.
- Prep Time: 30 minutes
- Cook Time: 60 minutes
- Total Time: 90 minutes
- Yield: 8 servings 1x
- Category: Side Dish
- Cuisine: American
Ingredients
- 1 loaf stale sturdy bread (sourdough, ciabatta, or country white), cut into 1-inch cubes
- 1 pound sweet Italian sausage, casings removed
- 1 large bunch fresh sage leaves (approx. 2 tablespoons chopped, plus extra for garnish)
- 1 large yellow onion, finely diced
- 3 cloves garlic, minced
- 3–4 cups low-sodium chicken stock, warmed
- 1/2 cup unsalted butter, melted
- 2 large eggs, beaten
- Salt and freshly cracked black pepper to taste
- Optional: Dried cranberries, chopped pecans, or diced celery
Instructions
- Preheat oven to 300°F. Spread bread cubes on baking sheets and toast for 15-20 minutes until dry and lightly golden. Let cool completely.
- Heat a large skillet over medium-high heat. Cook sausage, breaking it up, until browned and crispy (8-10 minutes). Drain excess grease, leaving about 2 tablespoons in the pan. Transfer sausage to a large bowl.
- In the same skillet, sauté diced onion for 5 minutes until translucent. Add garlic and chopped sage, cooking for 1 minute until fragrant. Pour over the sausage.
- Add toasted bread cubes to the bowl with the sausage and vegetable mixture. Toss gently to coat.
- In a separate bowl, whisk together beaten eggs, warm chicken stock, salt, and pepper. Pour over the bread mixture and toss to combine. Let sit for 10 minutes to absorb liquid.
- Preheat oven to 350°F. Grease a 9×13 inch baking dish. Transfer stuffing mixture to the dish and press down gently.
- Bake uncovered for 30 minutes. Check top; if pale, bake another 15-30 minutes until golden brown and internal temperature reaches 165°F.
- Remove from oven and let rest for 10 minutes before serving. Garnish with fresh sage leaves.
Notes
Toast bread thoroughly to ensure crispiness. Warm the stock before adding to help absorption. Brown the sausage well for flavor. Let the stuffing rest before serving to allow it to set. Can be assembled ahead and refrigerated overnight.
Nutrition
- Serving Size: 1 cup
- Calories: 375
- Sugar: 2
- Sodium: 650
- Fat: 22
- Saturated Fat: 9
- Carbohydrates: 28
- Fiber: 2
- Protein: 12
Keywords: stuffing, sage, sausage, holiday, Thanksgiving, crispy, bread, side dish, easy recipe


