Love this? Save it for later!
Share the inspiration with your friends
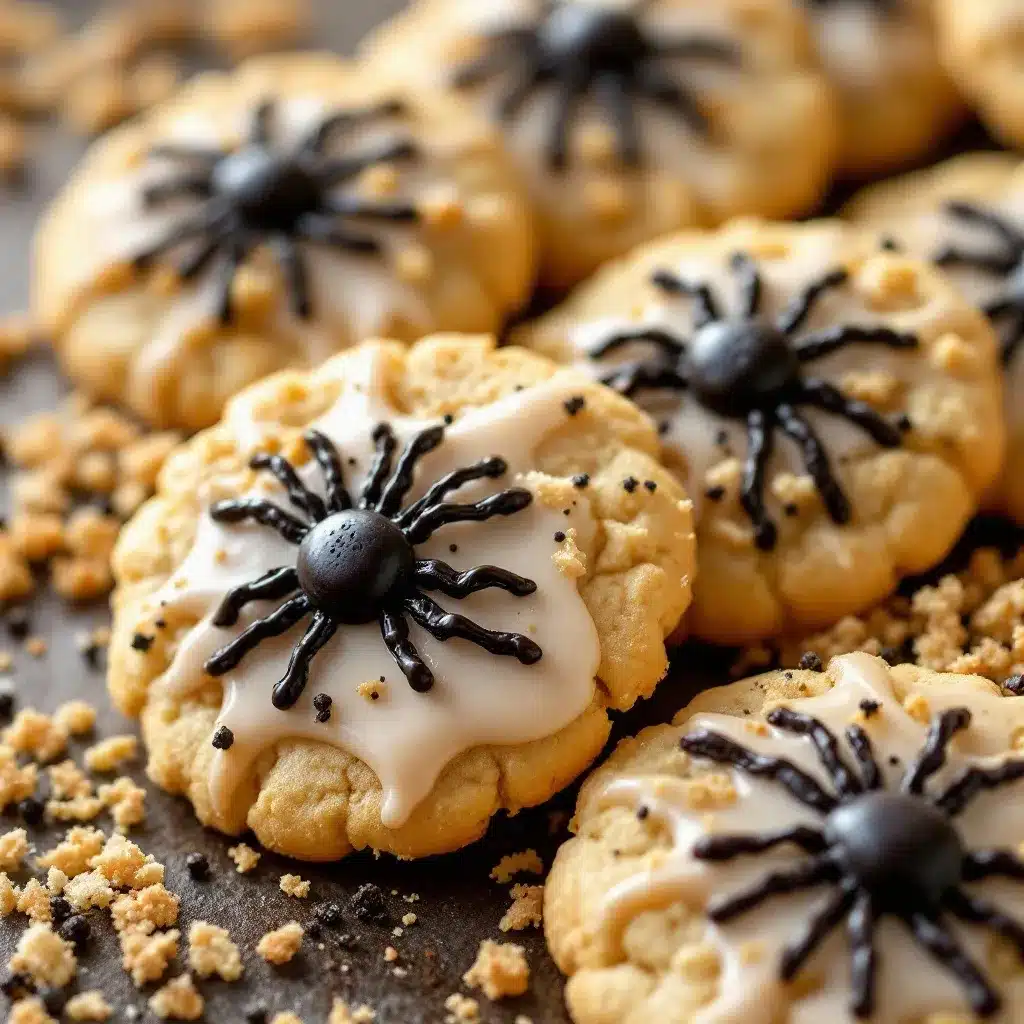
That’s what my niece said to me last year while staring at a plate of sugar cookies I’d just pulled from the oven. She wasn’t talking about the heat, or the sugar, or even the fact that I’d accidentally used too much vanilla extract (I didn’t, but she likes to drama). She was looking at the spiders. Specifically, the little royal icing spiders I’d piped onto the tops with a steady hand and a whole lot of patience.
Let’s face it, Halloween baking is a minefield. You want something that looks impressive enough for your neighbor’s judging eye but simple enough to make while your toddler is attempting to “help” by licking the bowl. Most recipes promise the “best” sugar cookies but deliver cakes that are dry as dust or cookies that spread into flat, sad pancakes. I’ve been there. I’ve baked batches that cracked, batches that burned, and batches that tasted like regret. But this recipe? This one is different.
I first perfected this Best Halloween Sugar Cookies with Royal Icing Spiders version during a chaotic October afternoon. The house was covered in cobwebs, the cat was hiding under the sofa, and I needed a win. I tweaked the butter-to-flour ratio, added a pinch of cream of tartar for that perfect chew, and focused heavily on the icing consistency. It’s the kind of cookie that stays soft for days, holds its shape beautifully, and looks spooky without being scary. Honestly, it’s the only Halloween treat that survives until the next morning.
There’s something deeply satisfying about rolling out dough, cutting out shapes, and then transforming plain white icing into creepy-crawly legs. It’s meditative. It’s fun. And yes, it results in a cookie that makes people stop mid-bite and ask for the recipe. That quiet realization that you’ve actually nailed a classic is the best part. It’s not just about the sugar; it’s about the nostalgia of Halloween morning, the smell of vanilla, and the joy of making something small but mighty.
Why You’ll Love This Recipe
Let’s be real for a second. There are a million sugar cookie recipes out there. So why this one? Why should you spend your Saturday evening piping tiny icing legs? Because this isn’t just another cookie. It’s the result of years of trial, error, and a few burnt batches that taught me exactly what works and what doesn’t. I’ve tested this dough with different flours, different butters, and even different moods. This version is the gold standard.
- Quick & Easy: While the dough needs to chill, the actual active time is under 30 minutes. It’s perfect for busy weeknights or those frantic last-minute Halloween prep sessions when you’re realizing you bought the wrong candy.
- Simple Ingredients: You likely already have everything in your pantry. Flour, sugar, butter, eggs, vanilla—nothing fancy. No obscure spices or hard-to-find flours. Just honest, good-quality baking staples.
- Perfect for Parties: These are the ultimate crowd-pleaser for school bake sales, office Halloween parties, or just a cozy night in. They stack well, travel well, and look amazing on a platter.
- Crowd-Pleaser: Kids love the spooky factor, and adults love the classic sugar cookie taste. It’s a win-win. Even the pickiest eaters who usually shy away from “costume” foods will dive into these.
- Unbelievably Delicious: The texture is the star here. Crisp edges that shatter slightly when you bite them, giving way to a soft, chewy center. It’s next-level comfort food that doesn’t feel heavy.
What makes this recipe different is the balance. Many sugar cookies are overly sweet, masking the butter flavor. Here, the ratio is dialed in so the vanilla and butter shine through. Plus, the royal icing isn’t just a garnish; it’s a structural element that keeps the cookie moist. Whether you’re a novice baker or a seasoned pro, this recipe is forgiving. It’s the kind that makes you close your eyes after the first bite and just smile. It’s comfort food reimagined—festive, fun, but with the same soul-soothing satisfaction as a warm cookie fresh from the oven.
What Ingredients You Will Need
This recipe uses simple, wholesome ingredients to deliver bold flavor and satisfying texture without the fuss. The magic here is in the quality of your staples. Since there are so few ingredients, each one plays a huge role. I recommend using high-quality unsalted butter so you can control the saltiness, and real vanilla extract rather than imitation. Trust me, it makes a world of difference.
For the Sugar Cookies
- All-purpose flour: 2 ½ cups (315g). Don’t use cake flour; you need that structure. Sift it to avoid lumps.
- Unsalted butter: 1 cup (226g), softened to room temperature. This is crucial for creaming properly. If it’s too cold, it won’t mix; too warm, and the cookies will spread.
- Granulated sugar: 1 cup (200g). This provides the crisp edges. For a softer cookie, you can swap half for brown sugar, but this ratio is my favorite.
- Egg: 1 large egg, room temperature. Helps bind the dough.
- Vanilla extract: 2 teaspoons. Use pure vanilla. It’s the flavor backbone.
- Baking powder: 1 teaspoon. Gives a slight lift without making them cakey.
- Salt: ½ teaspoon. Balances the sweetness.
- Cream of tartar: ½ teaspoon. This is the secret weapon. It adds tang and helps keep the cookies tender and chewy.
For the Royal Icing Spiders
- Confectioners’ sugar: 2 cups (240g), sifted. Essential for smooth icing. Any lumps will clog your piping tip.
- Egg white: 1 large egg white, room temperature. Or use 2 tablespoons of meringue powder for food safety if you’re worried about raw eggs.
- Vanilla extract: ½ teaspoon. Optional, but adds flavor.
- Black gel food coloring: A small amount. Gel coloring is best because it doesn’t thin out the icing like liquid does. I prefer Sussex or Wilton brands for their intense pigment.
- Edible markers or black icing pens: For drawing eyes and details on the spiders.
If you need a gluten-free option, you can swap the all-purpose flour for a 1:1 gluten-free baking blend that includes xanthan gum. For dairy-free, use a high-quality plant-based butter stick, though the texture might be slightly different. Always check your labels for allergens.
Equipment Needed
You don’t need a fancy kitchen to make these, but having the right tools makes the process so much smoother. Here is what you’ll need:
- Mixing bowls: One large bowl for the dough and one medium bowl for the icing.
- Electric mixer: A hand mixer or stand mixer is best for creaming the butter and sugar. Doing this by arm is possible but not recommended if you value your wrists.
- Cooling racks: Essential for cooling the cookies completely before icing. Warm cookies will melt the icing.
- Piping bags and tips: You’ll need small piping bags and a small round tip (like a Wilton #2 or #3) for the spider legs. You can also use ziplock bags with the corner snipped off.
- Cookie cutters: Standard round cutters work best for this recipe, but you can use any shape you like. The spiders will go on top regardless.
- Parchment paper: Line your baking sheets to prevent sticking and ensure even baking.
If you don’t have a stand mixer, a sturdy wooden spoon and some elbow grease will work. For the icing, if you don’t have piping bags, just use a small spoon or a knife to drizzle the icing and use a toothpick to pull it into legs. It’s less precise but still effective.
Preparation Method
Let’s get into the nitty-gritty. Making these cookies is straightforward, but timing is everything. Here is how to make the Best Halloween Sugar Cookies with Royal Icing Spiders from start to finish.
- Cream the butter and sugar: In a large bowl, beat the softened butter and granulated sugar together on medium-high speed for about 3-4 minutes. You want this mixture to be pale, fluffy, and light. This step incorporates air, which helps the cookies rise slightly. Scrape down the sides of the bowl with a spatula to ensure everything is mixed evenly.
- Add wet ingredients: Add the egg and vanilla extract. Mix on low speed until just combined. Don’t overmix here. You want a smooth, homogeneous batter. If the mixture looks curdled, it might be because the butter was too cold. Just keep mixing for another minute.
- Combine dry ingredients: In a separate bowl, whisk together the flour, baking powder, salt, and cream of tartar. This ensures the leavening agents are evenly distributed.
- Make the dough: Gradually add the dry ingredients to the wet ingredients on low speed. Mix until the dough just comes together. It will look a bit crumbly at first, but it will form a ball. Be careful not to overmix the flour, or your cookies will be tough. Stop as soon as no dry flour is visible.
- Chill the dough: Divide the dough in half. Flatten each half into a disk shape. Wrap tightly in plastic wrap. Refrigerate for at least 1 hour, or up to 2 days. This step is non-negotiable. Chilling prevents the cookies from spreading too much in the oven. If you skip this, you’ll end up with puddles.
- Preheat and prep: Preheat your oven to 350°F (175°C). Line two baking sheets with parchment paper.
- Roll and cut: On a lightly floured surface, roll out one disk of dough to about ¼-inch thickness. Use your cookie cutter to cut out shapes. Place them on the baking sheet, leaving about 1 inch between each cookie. Re-roll the scraps and cut more cookies. Repeat with the second disk.
- Bake: Bake for 8-10 minutes. The edges should be lightly golden, but the centers should still look soft and slightly underdone. They will firm up as they cool. Do not overbake, or they will be hard. Remove from the oven and let them cool on the baking sheet for 5 minutes, then transfer to a cooling rack to cool completely.
- Make the royal icing: While cookies cool, make the icing. In a medium bowl, beat the egg white (or meringue powder mixture) with a bit of vanilla until frothy. Gradually add the sifted confectioners’ sugar, beating on low speed. Once combined, increase speed and beat for 5-7 minutes until stiff peaks form. The icing should be thick enough to hold its shape but fluid enough to pipe.
- Color the icing: Divide the icing into small bowls. Add black gel food coloring to one portion. Mix until you get a deep, opaque black. Add a tiny bit of water if it’s too thick, but keep it thick for piping legs.
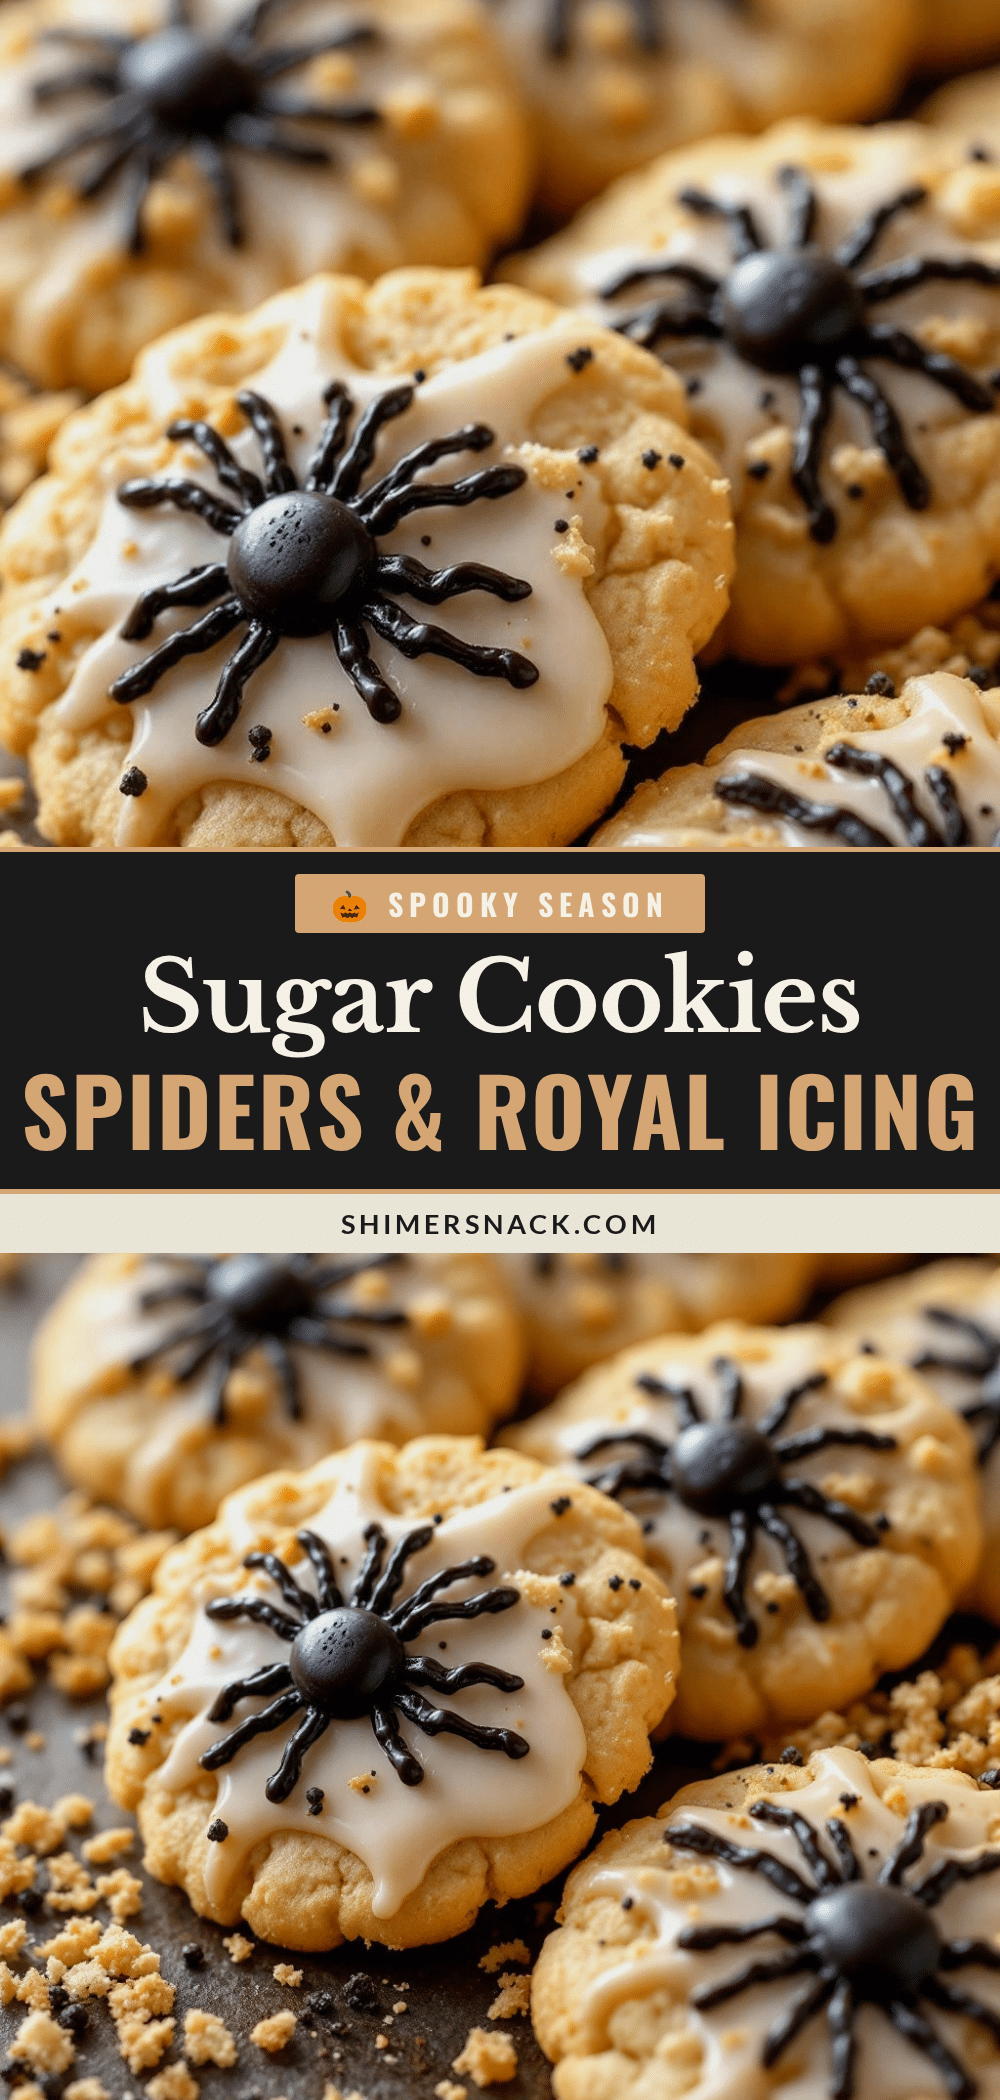
- Pipe the spiders: Transfer the black icing into a piping bag fitted with a small round tip. Pipe a small blob for the body. Then, pipe eight thin legs radiating out from the body. Use a toothpick to adjust the legs if they merge. Let the icing set for at least 30 minutes before handling or stacking.
Cooking Tips & Techniques
I’ve learned a few things the hard way, so you don’t have to. Here are some pro tips to ensure your cookies turn out perfect every time.
Butter temperature is key: Your butter should be soft enough to leave an indent when you press it, but not so soft that it’s greasy. If it’s too warm, the cookies will spread. If it’s too cold, it won’t cream properly. I usually take my butter out about an hour before baking.
Don’t overmix the dough: Once you add the flour, mix only until combined. Overmixing develops gluten, which leads to tough cookies. You want tender, melt-in-your-mouth sugar cookies.
Chill your pans: If your kitchen is warm, your dough might soften quickly while you’re cutting. Pop the cut-out cookies in the fridge for 10 minutes before baking if they start to lose their shape. This helps them keep their crisp edges.
Underbake slightly: Sugar cookies continue to cook on the hot baking sheet after you remove them from the oven. Take them out when the edges are just starting to turn golden. If they look fully cooked in the oven, they will be hard when cooled.
Icing consistency: For the spider legs, you want a thick icing. If it’s too thin, the legs will spread and look like a mess. If it’s too thick, it won’t pipe smoothly. Test it on a piece of parchment paper first. If it holds its shape but flows slightly, it’s perfect.
Variations & Adaptations
While the classic white cookie with black spiders is iconic, there are plenty of ways to twist this recipe to suit your taste or dietary needs.
- Gluten-Free: As mentioned, use a 1:1 gluten-free flour blend. The texture might be slightly more crumbly, so handle them gently.
- Dairy-Free: Swap the butter for a high-quality plant-based butter stick. Avoid margarine spreads, as they have higher water content. The dough might be slightly softer, so chill it longer.
- Flavor Variations: Add 1 teaspoon of orange zest to the dough for a citrusy twist. Or, add ½ teaspoon of almond extract for a richer flavor profile. You can also add food coloring to the dough itself for colored cookies, though the black icing will still stand out.
- Alternative Icing: If royal icing feels too intimidating, you can use a simple glaze made from powdered sugar and milk. It won’t be as stiff, so the spiders might not hold their shape as well, but it will still taste delicious. You could also use melted chocolate for a different look.
- Shape Variations: While round cookies are traditional, you can cut them into ghosts, pumpkins, or bats. The royal icing spiders can be placed on top of any shape for a spooky touch.
I once tried making these with pumpkin spice extract in the dough, and it was a hit with my family. It added a nice autumnal warmth that paired well with the stark black icing. Don’t be afraid to experiment!
Serving & Storage Suggestions
These cookies are best served at room temperature. The texture is perfect then—crisp on the outside, chewy on the inside. They make a stunning centerpiece for a Halloween party platter, especially when arranged on a black slate board or a white cake stand.
Storage: Store the cookies in an airtight container at room temperature for up to 5 days. Place parchment paper between layers to prevent the icing from sticking. If you need to store them longer, freeze the uniced cookies for up to 3 months. Thaw them at room temperature before icing.
Reheating: You don’t need to reheat these, but if you prefer a slightly warm cookie, you can microwave one for 10 seconds. Just be careful not to melt the icing.
Flavors over time: Interestingly, sugar cookies often taste better the next day. The moisture from the dough distributes more evenly, making them softer. So if you can wait, wait!
Nutritional Information & Benefits
Here is an estimated nutritional breakdown per cookie (assuming 24 cookies from the recipe):
- Calories: ~120 kcal
- Carbohydrates: 18g
- Sugar: 12g
- Fat: 5g
- Protein: 1g
These cookies are not exactly a health food, but they are a fun treat for a special occasion. The butter provides some fat-soluble vitamins, and the egg adds a bit of protein. If you’re watching your sugar intake, you can reduce the granulated sugar in the dough by ¼ cup, though the texture will be slightly different. For a lower-calorie option, you can use a sugar substitute in the dough, but note that royal icing relies on sugar for structure, so the icing should remain as is.
They are naturally nut-free, making them safe for most school parties, but always check your specific ingredients for allergens. They are also dairy-free if you use plant-based butter.
Conclusion
Making the Best Halloween Sugar Cookies with Royal Icing Spiders is more than just baking; it’s a tradition. It’s about the laughter in the kitchen, the mess of flour, and the pride of seeing a spooky creation come together. These cookies are easy enough for beginners but impressive enough for experts. They are the perfect balance of fun and flavor.
I encourage you to try this recipe and make it your own. Add your own twist, change the shapes, or just enjoy the classic version. I’d love to see your creations! Please leave a comment below with your thoughts, or share a photo on social media and tag me. Let’s make this Halloween the spookiest and sweetest one yet.
Happy baking, and don’t forget to save a cookie for yourself!
FAQs
Can I make the dough ahead of time?
Yes! You can make the dough up to 2 days in advance. Keep it wrapped tightly in the refrigerator. You can also freeze the dough disks for up to 3 months. Thaw in the fridge overnight before rolling.
Why did my cookies spread in the oven?
This usually happens if the butter was too warm or if the dough wasn’t chilled enough. Make sure your butter is soft but not melted, and chill the dough for at least 1 hour. Also, ensure your oven is fully preheated.
Can I use liquid food coloring for the icing?
I don’t recommend it. Liquid coloring adds water to the icing, which can thin it out and make it hard to pipe. Gel food coloring is much more concentrated and won’t affect the consistency.
How do I store the cookies with royal icing?
Store them in a single layer in an airtight container at room temperature. Do not refrigerate, as the humidity can make the icing sticky. They will last up to 5 days.
What if I don’t have a piping bag?
You can use a ziplock bag with the corner snipped off. Or, you can pipe the icing with a spoon and use a toothpick to pull it into legs. It’s less precise but still works in a pinch.
Pin This Recipe!
Halloween Sugar Cookies with Royal Icing Spiders
Soft, chewy sugar cookies with crisp edges, decorated with spooky royal icing spiders. A festive, easy-to-make Halloween treat that is perfect for parties and keeps well for days.
- Prep Time: 30 minutes
- Cook Time: 10 minutes
- Total Time: 1 hour 40 minutes
- Yield: 24 cookies 1x
- Category: Dessert
- Cuisine: American
Ingredients
- 2 ½ cups (315g) all-purpose flour
- 1 cup (226g) unsalted butter, softened to room temperature
- 1 cup (200g) granulated sugar
- 1 large egg, room temperature
- 2 teaspoons pure vanilla extract
- 1 teaspoon baking powder
- ½ teaspoon salt
- ½ teaspoon cream of tartar
- 2 cups (240g) confectioners’ sugar, sifted
- 1 large egg white, room temperature (or 2 tablespoons meringue powder)
- ½ teaspoon vanilla extract (for icing)
- Black gel food coloring
- Edible markers or black icing pens (for details)
Instructions
- Cream the softened butter and granulated sugar together on medium-high speed for 3-4 minutes until pale and fluffy. Scrape down the sides of the bowl.
- Add the egg and vanilla extract, mixing on low speed until just combined.
- In a separate bowl, whisk together the flour, baking powder, salt, and cream of tartar.
- Gradually add the dry ingredients to the wet ingredients on low speed, mixing until the dough just comes together. Do not overmix.
- Divide the dough in half, flatten into disks, wrap in plastic wrap, and refrigerate for at least 1 hour (or up to 2 days).
- Preheat oven to 350°F (175°C) and line baking sheets with parchment paper.
- Roll out dough to ¼-inch thickness on a lightly floured surface. Cut into shapes and place on baking sheets, leaving 1 inch between cookies.
- Bake for 8-10 minutes until edges are lightly golden but centers look soft. Cool on the sheet for 5 minutes, then transfer to a cooling rack to cool completely.
- While cookies cool, beat the egg white (or meringue mixture) with vanilla until frothy. Gradually add sifted confectioners’ sugar, beating on low then high speed for 5-7 minutes until stiff peaks form.
- Divide icing and mix in black gel food coloring to create a deep black color.
- Transfer black icing to a piping bag with a small round tip. Pipe a body blob and eight thin legs for each spider.
- Let the icing set for at least 30 minutes before handling or stacking.
Notes
Butter must be softened but not melted to prevent spreading. Chill the dough thoroughly to maintain shape. Underbake slightly for a chewy center. Use gel food coloring for icing to maintain consistency. Cookies taste better the next day as moisture distributes evenly.
Nutrition
- Serving Size: 1 cookie
- Calories: 120
- Sugar: 12
- Sodium: 50
- Fat: 5
- Saturated Fat: 3
- Carbohydrates: 18
- Protein: 1
Keywords: Halloween cookies, sugar cookies, royal icing spiders, easy Halloween baking, spooky treats, holiday desserts


