Love this? Save it for later!
Share the inspiration with your friends
Introduction
“You won’t believe this started as a total kitchen mess,” my friend Jill said one Sunday afternoon as she stirred the creamy layers of banana pudding. Honestly, I was skeptical at first. I mean, the idea of combining simple bananas with custard and those crunchy vanilla wafers seemed almost too basic to be memorable. But the moment I took my first spoonful, I was hooked. It reminded me of that time I tried to bake a banana bread and accidentally doubled the sugar—only this was so much better.
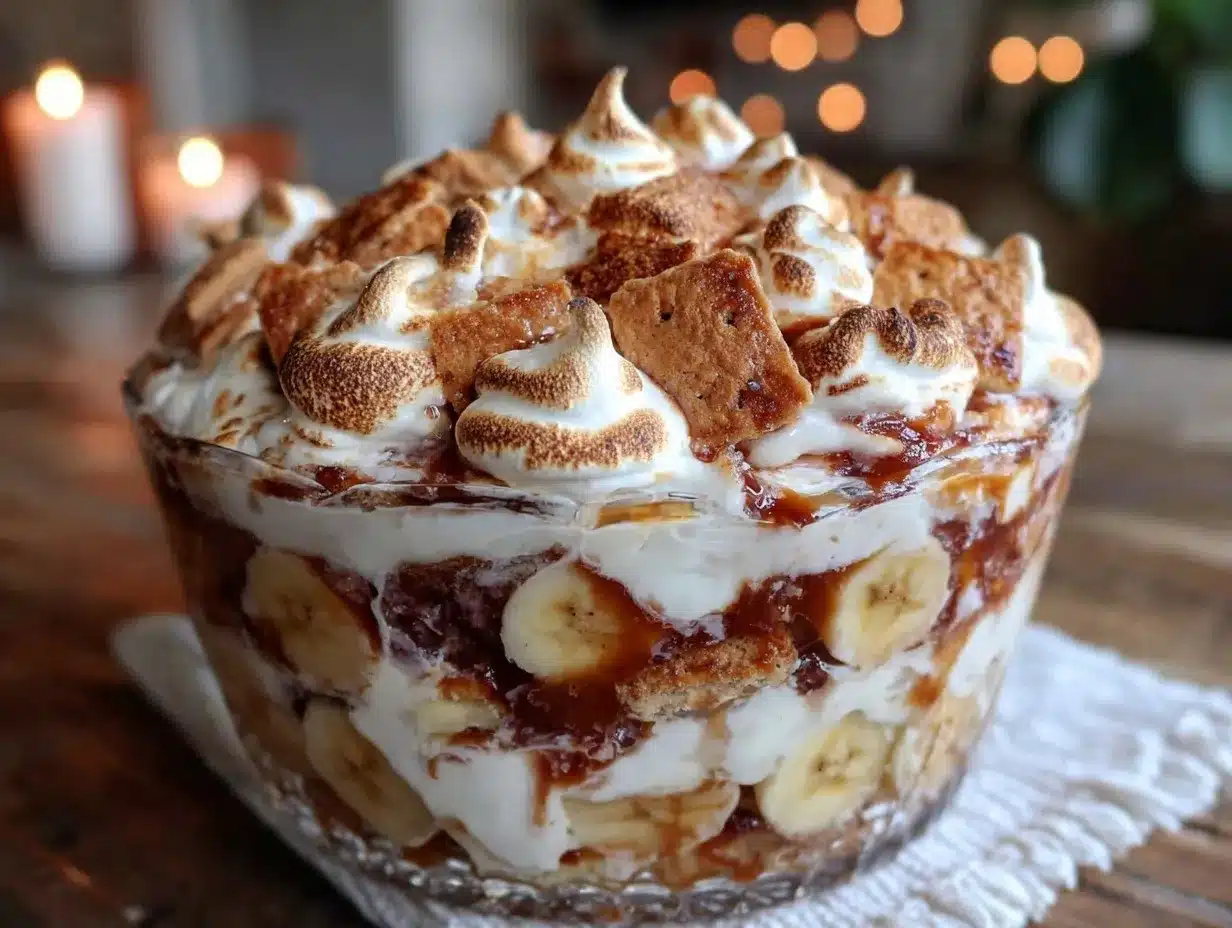
The truth is, this classic homemade banana pudding with real vanilla wafers carries a kind of nostalgic magic that’s hard to put into words. I first stumbled upon this recipe scribbled on a folded piece of paper tucked inside an old cookbook at a local flea market. The handwriting was faded, but the promise of a five-step dessert was too tempting to pass up. Since then, it’s become my go-to for potlucks, cozy family dinners, or whenever I just want a sweet escape.
You know that feeling when a simple dessert transports you back to a warm kitchen filled with laughter? That’s exactly what happens here. Maybe you’ve been there—searching for a treat that’s easy, satisfying, and just plain comforting. That’s why I keep coming back to this banana pudding recipe; it’s like an old friend you never forget, even if life gets busy and chaotic.
Why You’ll Love This Recipe
After testing countless banana puddings, I’m confident this version hits all the right notes. It’s not just a classic; it’s the kind of homemade dessert that feels special without demanding hours in the kitchen. Here’s why this recipe stands out:
- Quick & Easy: Ready in under 30 minutes, making it perfect for last-minute dessert cravings or casual gatherings.
- Simple Ingredients: You probably already have everything in your pantry and fridge—no fancy or hard-to-find items required.
- Perfect for Any Occasion: Whether it’s a summer picnic, Sunday dinner, or a holiday potluck, this dessert fits right in.
- Crowd-Pleaser: Kids love the creamy sweetness, and adults appreciate the nostalgic flavor combo.
- Unbelievably Delicious: The texture balance between silky pudding, soft bananas, and crunchy vanilla wafers creates that perfect spoonful every time.
This recipe isn’t just another banana pudding—it’s my perfected version after many tweaks. Blending real vanilla into the pudding base and using classic vanilla wafers instead of generic cookies makes a huge flavor difference. Plus, layering the bananas carefully keeps them from turning mushy, which was a game changer for me.
Honestly, it’s the kind of dessert that makes you close your eyes after the first bite and sigh. If you’re looking for a fuss-free, soul-soothing sweet treat, you’ll want to keep this one in your recipe box forever.
What Ingredients You Will Need
This recipe features simple, wholesome ingredients that come together to create bold flavor and a satisfying texture without any fuss. The ingredients are mostly pantry staples, and substitutions are easy to make if needed.
- For the Pudding:
- 2 cups whole milk (you can use 2% or almond milk for a lighter option)
- 3/4 cup granulated sugar
- 1/3 cup all-purpose flour (for gluten-free, try almond or oat flour)
- 1/4 teaspoon salt
- 3 large egg yolks, lightly beaten (room temperature for best results)
- 2 tablespoons unsalted butter, softened (adds richness)
- 2 teaspoons pure vanilla extract (I prefer Nielsen-Massey for authentic flavor)
- For the Assembly:
- 4-5 ripe bananas, sliced (firm but ripe bananas work best to avoid mushiness)
- 1 box classic vanilla wafers (Nilla Wafers are my go-to for the perfect crunch)
- Optional Topping:
- Whipped cream or meringue (if you want a creamy or slightly toasted finish)
When choosing bananas, I like to pick ones with just a few brown spots. Overripe bananas make the pudding too sweet and soft, but you can adjust if you prefer. Also, if you don’t have unsalted butter, just use salted and skip the extra salt in the recipe.
Equipment Needed
- Medium saucepan – for cooking the pudding evenly without scorching
- Whisk – essential for smooth pudding and to prevent lumps
- Mixing bowls – for beating egg yolks and assembling the pudding layers
- 9×13 inch baking dish or trifle bowl – I like glass because you can see those pretty layers
- Measuring cups and spoons – accuracy is key for pudding texture
- Spatula – for folding butter and vanilla into the pudding smoothly
If you don’t have a whisk, a fork can work in a pinch, but the pudding might be a bit lumpier. I also recommend keeping your utensils handy and pre-measured to make the process smoother. Nothing worse than scrambling for tools mid-cooking!
Preparation Method
- Mix dry ingredients: In your medium saucepan, whisk together the 3/4 cup sugar, 1/3 cup flour, and 1/4 teaspoon salt. This dry mix will help thicken the pudding and keep it smooth. (Time: 2 minutes)
- Add milk and cook: Slowly pour in 2 cups of milk, whisking constantly to avoid lumps. Set the pan over medium heat and stir frequently until the mixture thickens and starts to bubble gently—about 6-8 minutes. The pudding should coat the back of a spoon. (Watch closely to prevent burning.)
- Temper the egg yolks: Beat the 3 egg yolks in a separate bowl. Gradually whisk about 1/2 cup of the hot pudding mixture into the yolks to warm them up without scrambling. Then slowly pour the yolk mixture back into the saucepan, whisking constantly. Continue cooking for another 2 minutes until thickened. (Important: don’t rush or the eggs will curdle!)
- Finish the pudding: Remove from heat and stir in the 2 tablespoons butter and 2 teaspoons vanilla extract until smooth and glossy. Let it cool slightly while you slice the bananas. (The pudding should be warm but not hot.)
- Layer the pudding: In your baking dish, start with a layer of vanilla wafers, then a layer of banana slices, followed by a generous spoonful of pudding. Repeat layers until ingredients are used, finishing with a pudding layer on top. Cover and chill for at least 2 hours to let flavors meld and wafers soften just right.
If you want a fancy touch, finish with whipped cream or browned meringue before serving. Just remember, this recipe is forgiving—if your pudding seems too thick, a splash of milk helps loosen it up. And if the bananas brown too fast, a quick toss in lemon juice keeps them fresh-looking.
Cooking Tips & Techniques
Let me share a few tricks I learned the hard way to make this recipe foolproof:
- Whisk constantly: Pudding can get lumpy fast if you stop stirring, so keep at it, especially when heating the milk and flour mixture.
- Temper the eggs: This step avoids scrambled eggs in your pudding. Slowly mixing hot liquid into the yolks keeps things silky.
- Banana timing: Slice bananas just before assembling to prevent them from turning mushy or brown. If you need to prep ahead, toss slices in a little lemon juice.
- Chill for best results: I usually let it rest overnight. The wafers soak up just enough moisture to be soft but still hold a slight crunch.
- Layer with care: Don’t over-layer or the dessert might become too heavy. I aim for 3-4 layers to balance flavors and textures.
Once, I accidentally skipped the butter and vanilla in the pudding—big mistake! The flavor was flat and the texture wasn’t as smooth. Lesson learned: those final touches matter more than you think.
Also, multitask by slicing your bananas while the pudding cools to save time. Trust me, a little prep rhythm goes a long way.
Variations & Adaptations
This classic banana pudding recipe is versatile and easy to tweak for different tastes or dietary needs.
- Gluten-Free: Swap the all-purpose flour with cornstarch or gluten-free flour, and use gluten-free vanilla wafers. The pudding thickens just as nicely.
- Dairy-Free: Use coconut or almond milk and substitute butter with coconut oil or a dairy-free margarine. The vanilla flavor really shines through here.
- Chocolate Banana Pudding: Mix 2 tablespoons of cocoa powder into the dry ingredients for a chocolate twist. Use chocolate wafer cookies instead of vanilla wafers.
- Extra Creamy Version: Fold in whipped cream or mascarpone after the pudding cools for a richer texture.
- Fruit Mix-Up: Add sliced strawberries or blueberries to the layers for a fresh burst of flavor. I tried this last summer, and the mix was surprisingly delightful!
Feel free to experiment with layering order or toppings. Some friends prefer more wafers, others pile on extra bananas. Make it your own!
Serving & Storage Suggestions
This banana pudding tastes best chilled, so serve it cold straight from the fridge. The contrast between the cool pudding and the soft bananas is just right. For presentation, sprinkle a few whole vanilla wafers or a dusting of cinnamon on top.
Pair it with a cup of strong coffee or a light, fruity white wine if you want to get fancy. It’s great as a sweet ending to summer barbecues or cozy fall dinners.
Store leftovers covered in the refrigerator for up to 3 days. The flavors actually deepen after a day, but the wafers will soften further—still delicious, just a different texture. If you want to keep that crispness, add fresh wafers right before serving.
Reheat is not recommended since the pudding is best enjoyed cold. But if you like a warm dessert, try making the pudding fresh and serving it with a warm caramel sauce.
Nutritional Information & Benefits
This classic homemade banana pudding is a moderate treat with nutritional perks. Here’s a rough estimate per serving (1/8 of the recipe):
| Calories | 280 |
|---|---|
| Fat | 7g |
| Carbohydrates | 50g |
| Protein | 5g |
| Sugar | 30g |
Bananas provide potassium, vitamin C, and fiber, while the milk and eggs add protein and essential nutrients. Using real vanilla extract ensures no artificial flavoring.
For those watching carbs, consider cutting sugar slightly or swapping to a sugar substitute that bakes well. If dairy is an issue, almond or oat milk options keep it accessible.
Allergy note: Contains eggs, dairy, and gluten unless substitutions are made.
Conclusion
This classic homemade banana pudding with real vanilla wafers is a recipe I keep coming back to time and again. It’s simple enough for weeknights but special enough to impress guests. The balance of creamy pudding, fresh bananas, and crunchy wafers is pure comfort food magic.
Feel free to customize it based on your pantry, taste buds, or dietary needs. I love how this recipe adapts and still delivers that nostalgic, soul-satisfying flavor every time.
If you try it, let me know how it turns out! I’m always curious which variation becomes your favorite. Share your tweaks, stories, or even mishaps—I’m all ears.
Remember, great cooking is about joy and connection, and this banana pudding brings both to the table in every spoonful.
FAQs About Classic Homemade Banana Pudding
Can I make banana pudding ahead of time?
Absolutely! It actually tastes better after chilling for a few hours or overnight. Just cover it tightly and store in the fridge.
What if I don’t have vanilla wafers?
You can substitute with shortbread cookies or ladyfingers, but traditional vanilla wafers give the classic texture and flavor.
How do I prevent bananas from turning brown?
Slice them just before assembling and toss lightly with lemon juice to slow browning.
Can I use instant pudding mix instead of making from scratch?
You could, but homemade pudding has a richer flavor and better texture. Plus, it’s surprisingly easy to make!
Is this recipe suitable for kids?
Yes, it’s a favorite among kids and adults alike. Just ensure eggs are cooked through in the pudding for safety.
For a fun twist on creamy desserts using similar techniques, you might enjoy my creamy lemon pudding or the beloved classic peach cobbler. Both recipes bring that homemade comfort to your table with simple steps and familiar flavors.
Pin This Recipe!
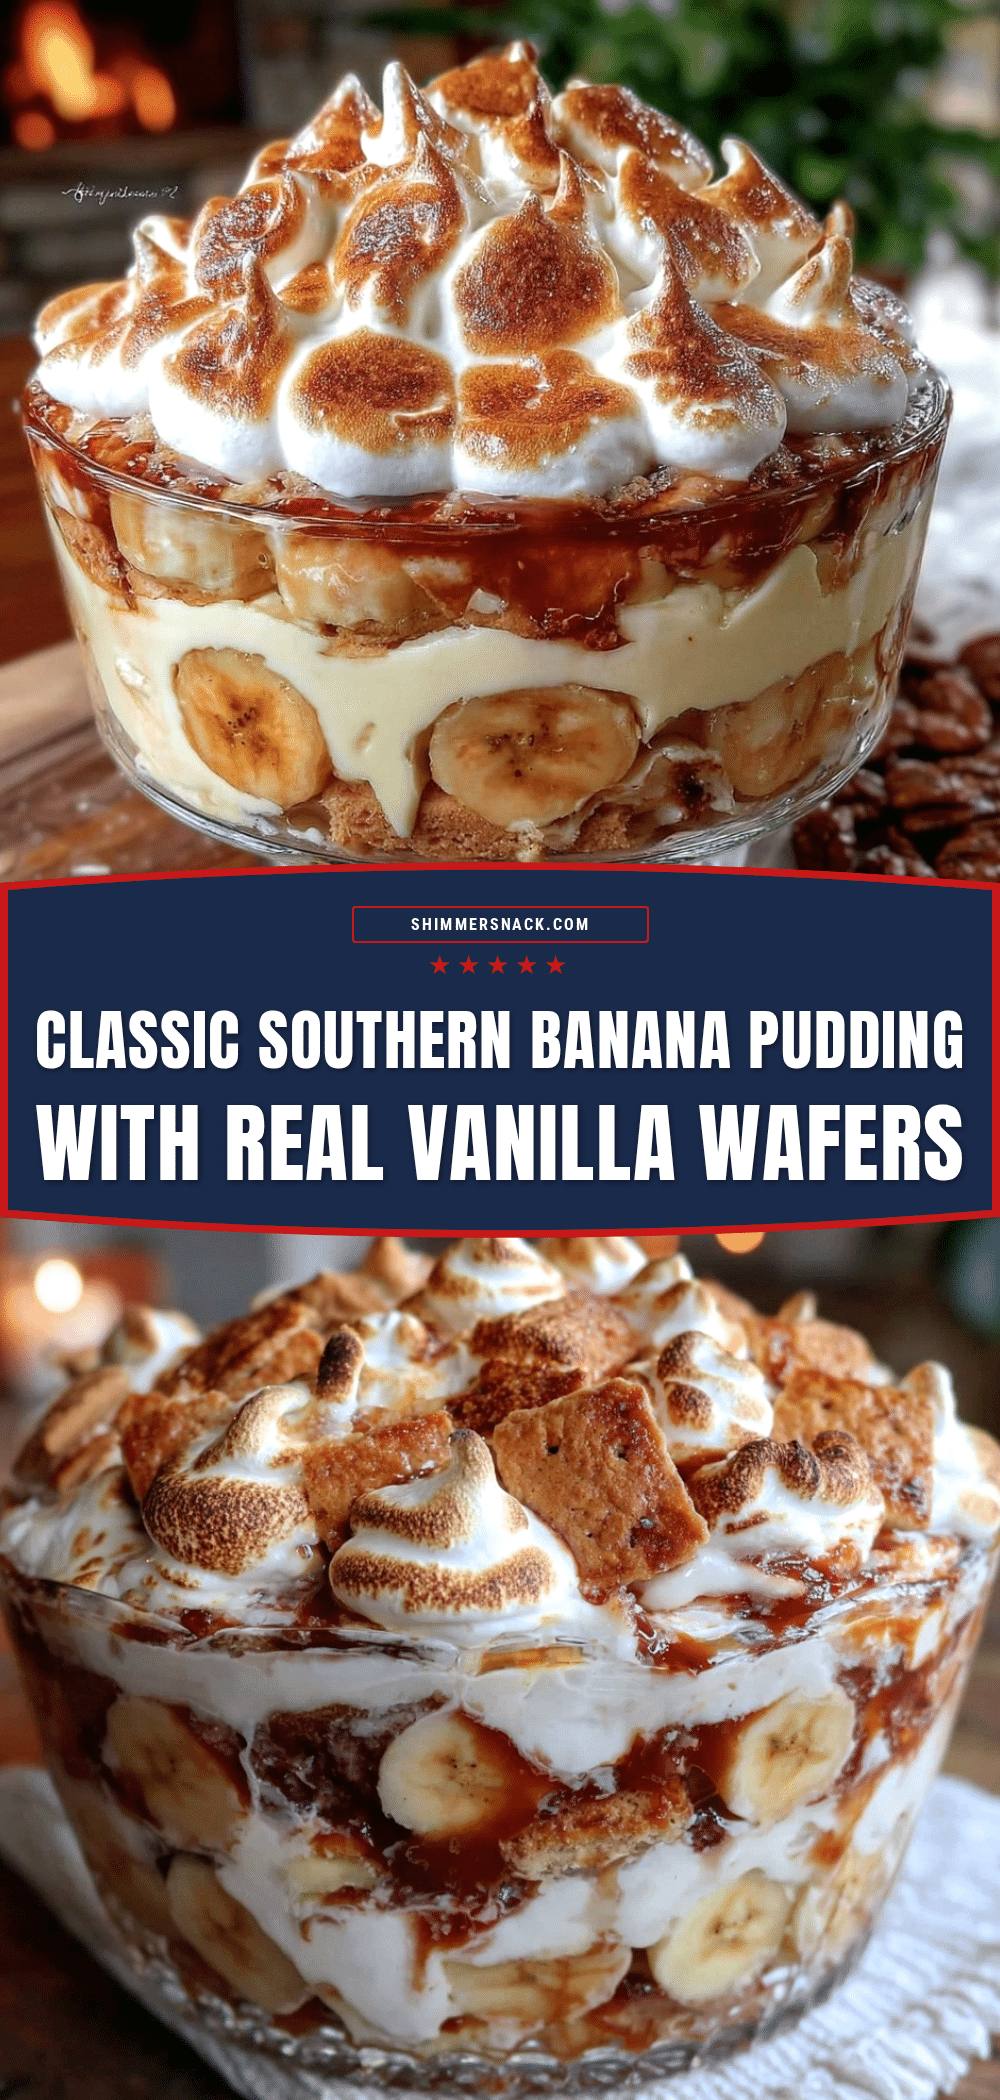
Classic Homemade Banana Pudding Recipe Easy 5-Step Vanilla Wafer Dessert
A nostalgic and easy-to-make banana pudding featuring creamy homemade vanilla pudding, ripe bananas, and crunchy vanilla wafers. Perfect for any occasion and ready in under 30 minutes.
- Prep Time: 10 minutes
- Cook Time: 15 minutes
- Total Time: 2 hours 25 minutes
- Yield: 8 servings 1x
- Category: Dessert
- Cuisine: American
Ingredients
- 2 cups whole milk (or 2% or almond milk for lighter option)
- 3/4 cup granulated sugar
- 1/3 cup all-purpose flour (or almond/oat flour for gluten-free)
- 1/4 teaspoon salt
- 3 large egg yolks, lightly beaten (room temperature)
- 2 tablespoons unsalted butter, softened
- 2 teaspoons pure vanilla extract
- 4–5 ripe bananas, sliced
- 1 box classic vanilla wafers (Nilla Wafers preferred)
- Optional: whipped cream or meringue for topping
Instructions
- Mix dry ingredients: In a medium saucepan, whisk together sugar, flour, and salt.
- Add milk and cook: Slowly pour in milk while whisking constantly. Cook over medium heat, stirring frequently until mixture thickens and bubbles gently, about 6-8 minutes.
- Temper the egg yolks: Beat egg yolks in a separate bowl. Gradually whisk about 1/2 cup of hot pudding into yolks to warm them. Slowly pour yolk mixture back into saucepan, whisking constantly. Cook for another 2 minutes until thickened.
- Finish the pudding: Remove from heat and stir in butter and vanilla extract until smooth and glossy. Let cool slightly.
- Layer the pudding: In a baking dish, layer vanilla wafers, banana slices, and pudding. Repeat layers finishing with pudding on top. Cover and chill at least 2 hours before serving.
Notes
Whisk constantly to avoid lumps. Temper eggs carefully to prevent curdling. Slice bananas just before assembling or toss with lemon juice to prevent browning. Chill pudding at least 2 hours or overnight for best flavor and texture. Optional toppings include whipped cream or meringue. For gluten-free, substitute flour and wafers accordingly. For dairy-free, use plant-based milk and butter substitutes.
Nutrition
- Serving Size: 1/8 of the recipe
- Calories: 280
- Sugar: 30
- Fat: 7
- Carbohydrates: 50
- Protein: 5
Keywords: banana pudding, homemade dessert, vanilla wafers, easy banana pudding, classic banana pudding, creamy pudding, layered dessert


