Love this? Save it for later!
Share the inspiration with your friends
The way the orange Rice Krispie mixture clings to your fingers—that’s the part nobody warns you about. It’s sticky, a little stubborn, and somehow still warm as you press it into the greased bowl of your palm. And that’s the whole point. These Easy Halloween Rice Krispie Jack-O-Lanterns aren’t about perfection; they’re about getting your hands messy and laughing while you do it.
I remember the first time I made these with my niece. She was four, maybe five, and her little hands were coated in marshmallow goo, her face scrunched in concentration as she tried to shape a perfect pumpkin. She didn’t get a round one—hers looked more like a lopsided potato—but she was so proud of that orange blob. She named him “Bob.” Bob the Jack-O-Lantern. That’s when I realized this recipe wasn’t just cute; it was a memory in the making.
These little guys are the kind of treat that feels like Halloween in your mouth. The marshmallow holds everything together just right, and the candy corn teeth give them that goofy, friendly grin. Honestly, they’re the easiest thing you’ll make all season, and they disappear faster than you’d think. There’s something about shaping food with your own hands that makes it taste better—or maybe that’s just the sugar talking.
Why You’ll Love This Recipe
Let’s be real: Halloween treats can be a lot. Between the elaborate cakes and the Pinterest-perfect cookies that take three hours, sometimes you just want something that actually works. These Easy Halloween Rice Krispie Jack-O-Lanterns are that recipe. They’re the ones you pull out when you need a quick win, whether it’s for a classroom party or a last-minute spooky snack.
- No-Bake and Fast: From start to finish, you’re looking at about 20 minutes. No oven, no waiting, no fuss.
- Kid-Friendly: Little hands can help shape, press, and decorate. It’s a perfect activity for a rainy October afternoon.
- Minimal Ingredients: You probably already have marshmallows and cereal in your pantry. The candy decorations are the only special trip.
- Completely Customizable: Make them spooky, silly, or fancy—you’re in charge of the face.
- Portable and Sturdy: These hold up well in lunchboxes or on treat platters. They don’t melt or crumble easily.
What makes these different from every other pumpkin-shaped treat? It’s the texture. The Rice Krispies stay slightly chewy on the inside while the outside sets firm enough to hold its shape. And because you’re using your hands to mold them, each one has its own personality. No two Jack-O-Lanterns look the same, and that’s exactly how it should be.
I’ve tested this recipe with three different marshmallow brands (yes, really) and I can tell you that the name-brand ones give the best stretch. The store-brand versions work fine, but they don’t get quite as gooey. So if you want that perfect, pliable texture, splurge on the good stuff. Your fingers will thank you.
What Ingredients You Will Need
This recipe uses simple, everyday ingredients that come together to create something genuinely fun. You don’t need any special baking supplies or hard-to-find items—just the basics and a little creativity.
- 3 tablespoons unsalted butter (plus extra for greasing your hands and the baking dish) – The butter adds richness and helps the marshmallows melt smoothly. I prefer using salted butter in a pinch, just reduce the added salt if you do.
- 1 package (10 oz) regular marshmallows (or about 40 large marshmallows) – These are the glue that holds everything together. Mini marshmallows melt faster, but regular ones work just fine. I’ve used both and honestly, the regular ones give a slightly better chew.
- 6 cups Rice Krispies cereal (or any crispy rice cereal) – The classic choice. Don’t substitute with puffed rice or generic crispy rice—they don’t hold up the same way. The texture gets weird.
- Orange food coloring gel (not liquid) – Gel coloring gives you that vibrant, true pumpkin orange without watering down the marshmallow mixture. Liquid coloring can make the mixture too sticky and hard to work with. I’ve learned this the hard way.
- Green candy melts or green frosting (for the stems) – You can also use green licorice strings cut into small pieces. I like candy melts because they harden nicely and look clean.
- Candy corn (for the teeth) – The classic Jack-O-Lantern smile. You’ll need about 3-4 pieces per pumpkin.
- Mini chocolate chips or black decorating gel (for the eyes and mouth) – Chocolate chips give a nice subtle look; black gel makes the faces pop more. Both work, so pick your vibe.
- Optional: Orange sanding sugar or edible glitter (for a sparkly finish) – This is totally extra, but kids love it. I skip it for school treats because it gets everywhere.
One thing I always tell people: don’t skip the extra butter for your hands. The marshmallow mixture is incredibly sticky, and greasing your palms well is the difference between a fun experience and a frustrating one. I keep a small bowl of softened butter right next to my work station so I can reapply as needed.
If you’re looking for a slightly healthier spin, you can use brown rice cereal or a gluten-free crispy rice cereal. The texture will be a little different—a bit more brittle—but the taste is still great. Just don’t try to use puffed quinoa or anything like that. Trust me, it doesn’t work.
Equipment Needed
You don’t need a lot of fancy gear for this recipe, which is part of what makes it so great. Here’s what you’ll want on hand:
- Large microwave-safe bowl (or a large pot if you’re doing this on the stovetop) – I prefer the microwave method because it’s faster and means fewer dishes. But both work.
- Rubber spatula – A sturdy one that won’t bend under the sticky marshmallow weight. Silicone is best.
- 9×13-inch baking dish (optional, for pressing the mixture flat if you want to cut shapes instead of hand-molding) – I actually prefer hand-molding for the Jack-O-Lanterns because it gives them that homemade, imperfect look.
- Parchment paper or wax paper – For setting the finished pumpkins on. The marshmallow sticks to everything, so this is non-negotiable.
- Small offset spatula or butter knife – Helpful for pressing in candy decorations without burning your fingers.
- Measuring cups and spoons – Standard stuff.
- Small bowl for greasing your hands – You’ll need to reapply butter between each pumpkin. I keep a little dish of softened butter nearby.
If you don’t have a microwave, you can melt the butter and marshmallows in a large pot over low heat on the stovetop. Just stir constantly so nothing burns. I did this for years before I got a microwave, and it works perfectly—just takes a few extra minutes.
Preparation Method
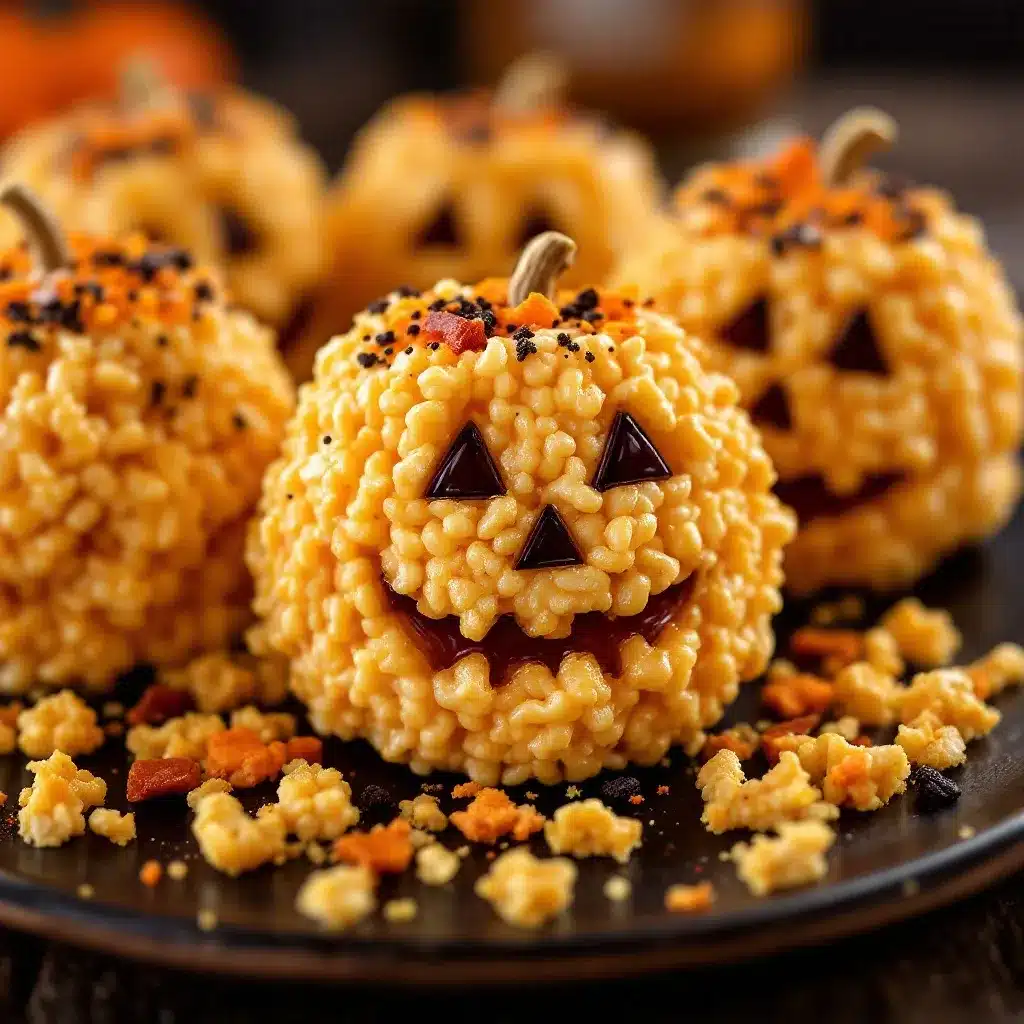
- Prepare your work surface. Line a large baking sheet or counter space with parchment paper. This is where your finished pumpkins will rest. Make sure you have enough room to work—you don’t want to be crowded.
- Grease your hands and a large bowl. Rub softened butter all over your palms and fingers, then grease the inside of a large microwave-safe bowl. This step is crucial. The marshmallow mixture will stick to everything, and I mean everything.
- Melt the butter and marshmallows. Place the 3 tablespoons of butter in the greased bowl and microwave for 30 seconds, or until melted. Add the entire package of marshmallows and stir to coat them in butter. Microwave in 30-second intervals, stirring between each, until the marshmallows are completely melted and smooth. This usually takes about 1.5 to 2 minutes total. Don’t overheat—you want them just melted, not bubbling.
- Add the orange food coloring. Stir in a few drops of orange gel food coloring until you get a deep, vibrant pumpkin shade. Start with a small amount—you can always add more. I usually end up using about 4-5 drops for that perfect Halloween orange. If the color looks too pale, add another drop and stir well.
- Mix in the cereal. Pour the 6 cups of Rice Krispies into the colored marshmallow mixture. Stir gently but thoroughly with your rubber spatula until every piece of cereal is coated. Work quickly here—the mixture starts to set as it cools. If it gets too stiff to stir, you can microwave it for 10 seconds to soften it up again.
- Let it cool slightly. Allow the mixture to sit for about 2-3 minutes. It needs to be cool enough to handle but still warm and pliable. If it’s too hot, it will burn your hands. If it’s too cold, it won’t shape well.
- Shape the pumpkins. Re-grease your hands with butter. Scoop up about a heaping tablespoon of the mixture (roughly the size of a golf ball) and roll it into a ball. Then gently press it between your palms to form a slightly flattened, pumpkin-like shape. Don’t worry about making them perfect—the charm is in the imperfection. Place each shaped pumpkin on the parchment paper. Repeat until all the mixture is used. You should get about 12-14 pumpkins, depending on size.
- Add the stems. While the pumpkins are still slightly warm, press a small piece of green candy melt or a tiny bit of green frosting onto the top of each pumpkin to form the stem. If using candy melts, press them in gently so they stick.
- Create the faces. Use mini chocolate chips or black decorating gel to make the eyes. For the mouth, press 3-4 candy corn pieces into the lower half of each pumpkin, pointy side in, to create a jagged smile. You can also use the black gel to draw a more traditional Jack-O-Lantern mouth if you prefer. Work carefully—the candy decorations should stick easily to the still-warm surface.
- Let them set completely. Allow the finished pumpkins to sit at room temperature for about 15-20 minutes, or until they are firm to the touch. The marshmallow needs time to set so the pumpkins hold their shape when picked up.
One thing I learned the hard way: don’t make the pumpkins too big. They look cute as big honking spheres, but they’re really hard to eat. A golf ball size is perfect—two or three bites and done. Also, if your hands get too sticky during shaping, just wash them and reapply butter. It’s easier than fighting with the mixture.
Cooking Tips & Techniques
After making these Easy Halloween Rice Krispie Jack-O-Lanterns about a dozen times (not kidding), I’ve picked up a few tricks that make the process smoother and the results better. Here’s what I wish someone had told me:
Use the microwave method for melting. I know stovetop feels more “legit,” but the microwave gives you more control. You can see exactly when the marshmallows are melted, and you won’t accidentally scorch the bottom. Just remember to stir every 30 seconds—no skipping.
Don’t overmix the cereal. Stir just until everything is coated. Overmixing crushes the cereal and gives you a dense, tough texture instead of that light, airy crunch. You want to see some whole pieces in there.
Work in small batches if needed. If the mixture starts to cool and stiffen before you’re done shaping, pop the bowl back in the microwave for 10 seconds. It’ll soften right up. Just don’t overdo it or you’ll end up with a sticky mess.
Keep your hands buttered. I cannot stress this enough. I keep a little dish of softened butter nearby and reapply between every 2-3 pumpkins. It makes the shaping process so much easier and less frustrating. If you forget, the mixture will stick to your hands like glue and you’ll end up with orange fingers for the rest of the day.
Let kids go wild with the faces. My niece once gave her pumpkin three eyes and a sideways mouth. It looked ridiculous and she was so proud. That’s the spirit of Halloween—embrace the weird. If you’re making these for a party, let everyone decorate their own. It’s more fun that way.
One mistake I made early on was using too much food coloring. I wanted them super orange, so I added like 10 drops. The mixture got a little wet and the pumpkins didn’t set properly. Start with 3-4 drops and add more if needed. You can always make them brighter, but you can’t take color out.
Variations & Adaptations
These Jack-O-Lanterns are super flexible. Here are some ways to switch them up depending on your mood, dietary needs, or what you have on hand:
Spooky Spider Pumpkins: Instead of a happy face, use black decorating gel to draw a spider web pattern on the pumpkin. Add eight pretzel stick legs sticking out from the sides. It’s creepy in a cute way, and kids get a kick out of the extra crunch.
Gluten-Free Version: Use a certified gluten-free crispy rice cereal. Most brands have a gluten-free option now, and the texture is almost identical. Just check the label to be sure. Everything else in the recipe is naturally gluten-free, so this is an easy swap.
Vegan Adaptation: Use vegan marshmallows (Dandies is my go-to brand) and substitute the butter with a plant-based butter or coconut oil. The texture will be slightly different—vegan marshmallows don’t stretch as much—but they still shape up nicely. I’ve made these for a vegan friend’s Halloween party and they were a hit.
Chocolate Pumpkin Faces: Instead of candy corn for the teeth, use small pieces of white chocolate or milk chocolate. Cut them into little triangles or rectangles. It gives a more subtle, sophisticated look. Great for adult gatherings where you want something a little less sugary.
Mini Pumpkin Bites: Make them bite-sized by using a teaspoon of mixture instead of a tablespoon. These are perfect for snack platters or lunchboxes. Kids love the tiny size—they feel like they’re getting a special treat. If you’re packing them for school lunches, these pair wonderfully with our healthy after-school snack board with fresh fruits for a balanced Halloween-themed lunch.
Spiced Pumpkin Flavor: Add 1/2 teaspoon of pumpkin pie spice to the marshmallow mixture along with the food coloring. It gives a subtle fall flavor that pairs beautifully with the sweet marshmallow. I tried this on a whim last year and it was surprisingly good—like a Rice Krispie treat and a pumpkin pie had a baby.
If you’re feeling extra creative, you can also make these into ghost shapes by using white chocolate instead of orange coloring. Just shape them into little rounds and press in mini chocolate chips for eyes. They’re adorable alongside the pumpkins on a Halloween treat platter. For a complete spooky spread, try serving these alongside our perfect Halloween Oreo spider web cheesecake bars for a dessert table that will wow everyone.
Serving & Storage Suggestions
These Easy Halloween Rice Krispie Jack-O-Lanterns are best served at room temperature. The marshmallow is soft and chewy, and the cereal keeps its crunch. If you’ve just made them, let them set for about 20 minutes before serving so they hold their shape nicely.
For a Halloween party: Arrange them on a platter lined with orange or black napkins. You can scatter some candy corn around the base for extra color. They’re great for a spooky snack table alongside other finger foods. I like to serve them with a bowl of popcorn and some apple slices for balance—because let’s be honest, you can’t just eat sugar all night.
For lunchboxes: Wrap each pumpkin individually in plastic wrap or place them in a small container with a lid. They’ll stay fresh for a day or two. Just keep them away from anything moist—the marshmallow will get sticky if it’s too humid. They’re a fun surprise for a school lunch, especially during Halloween week. Pair one with some cheese cubes and fruit for a balanced meal that still feels like a treat.
Storage: Keep the pumpkins in an airtight container at room temperature for up to 5 days. Don’t refrigerate them—the cold makes the marshmallow hard and the cereal loses its crunch. If you live in a humid climate, add a silica gel packet to the container to keep them from getting sticky. I learned this trick from a friend who makes Rice Krispie treats for a living, and it really works.
Freezing: You can freeze these for up to 2 months. Wrap each pumpkin individually in plastic wrap, then place them in a freezer-safe bag. To thaw, just leave them at room temperature for about 30 minutes. The texture will be slightly softer, but they’re still delicious. I’ve done this for Halloween parties where I wanted to prep ahead, and nobody could tell the difference.
Reheating: If your pumpkins have been sitting out for a day and feel a little stale, pop them in the microwave for 5-8 seconds. It softens the marshmallow and brings back some of that fresh-made chewiness. Just don’t overdo it—they’ll get too soft and lose their shape.
Nutritional Information & Benefits
Let’s be honest: these are a treat, not a health food. But here’s the approximate nutritional breakdown for one Jack-O-Lantern (based on 12 servings):
- Calories: 180-200
- Total Fat: 5g
- Saturated Fat: 3g
- Carbohydrates: 35g
- Sugar: 18g
- Protein: 2g
- Sodium: 180mg
These values are estimates and will vary based on the specific brands you use and the size of your pumpkins. The candy decorations add a little extra sugar, so if you’re watching your intake, you can use fewer candy corn pieces or skip them altogether.
Potential Allergens: This recipe contains dairy (butter) and may contain gluten depending on the cereal you use. The candy corn and chocolate chips may also contain soy or other allergens. Always check labels if you’re serving to someone with food sensitivities.
On the plus side, Rice Krispies are fortified with iron and B vitamins, so there’s a tiny nutritional silver lining. And the portion control is built in—each pumpkin is a single serving, which makes it easier to enjoy without overdoing it. I like to think of these as a “sometimes food” that brings a lot of joy for relatively few calories. Plus, making them with kids gets them in the kitchen, which is always a win in my book.
Conclusion
These Easy Halloween Rice Krispie Jack-O-Lanterns are the kind of recipe that makes you feel like a holiday hero without actually doing much work. They’re fun to make, adorable to look at, and delicious to eat—the trifecta of a great Halloween treat. Whether you’re making them for a classroom party, a spooky movie night, or just because you want to get your hands sticky and laugh a little, they deliver every time.
I love that this recipe doesn’t take itself too seriously. It’s okay if your pumpkins are lopsided. It’s fine if the faces look a little derpy. That’s the whole point. Halloween is supposed to be a little weird and a little wonderful, and these little guys capture that spirit perfectly. They’re the treat you make when you want to create something special without spending hours in the kitchen.
So go ahead—melt that butter, get your hands sticky, and shape up some spooky fun. And when you do, I’d love to hear about it. Leave a comment below and tell me how your Jack-O-Lanterns turned out. Did you give them silly faces? Did your kids name theirs? Share your creations and tag me on social media—I can’t wait to see what you come up with!
Frequently Asked Questions
Can I make these ahead of time?
Absolutely! You can make them up to 2 days in advance. Store them in an airtight container at room temperature, and they’ll stay fresh and chewy. If you need to make them even further ahead, freeze them for up to 2 months.
Why is my mixture too sticky?
This usually happens if the marshmallows were overheated or if you added too much food coloring. Next time, melt the marshmallows just until smooth and use gel coloring sparingly. Also, make sure your hands are well-buttered before shaping.
Can I use a different cereal?
You can, but the texture will change. Cocoa Krispies make chocolate pumpkins, and Fruity Pebbles give a fun colorful twist. Just note that some cereals are more fragile and may crumble more easily when mixed.
How do I get the orange color just right?
Start with 3-4 drops of orange gel food coloring and stir well. If it’s too pale, add one drop at a time until you reach the shade you want. Remember that the color deepens slightly as the mixture cools, so don’t overdo it.
Can I use natural food coloring?
Yes, but natural colors are less vibrant and may not give you that bright Halloween orange. You’ll likely need more drops, which can make the mixture wetter. If using natural colors, reduce the butter slightly to compensate.
Pin This Recipe!
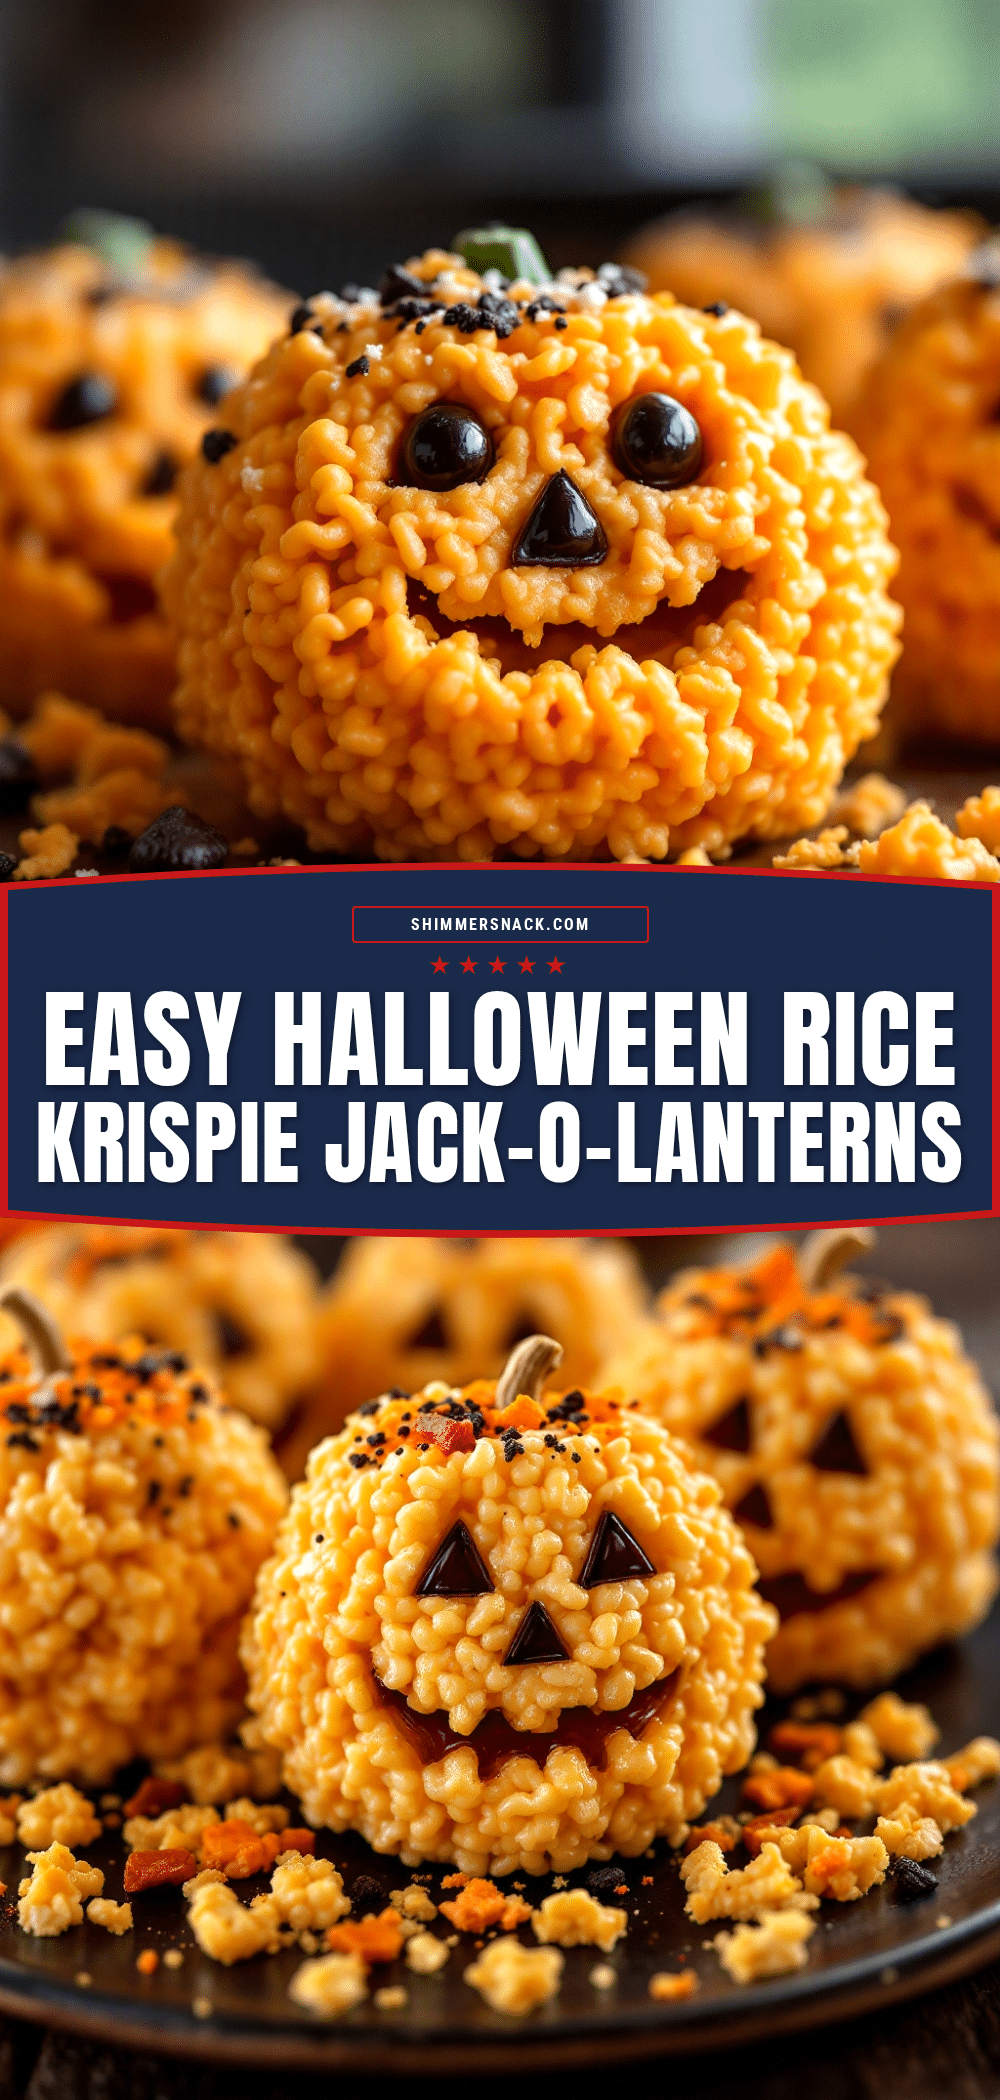
Easy Halloween Rice Krispie Jack-O-Lanterns
These no-bake Halloween treats are fun to make with kids and perfect for parties. Shaped like little pumpkins with candy corn smiles, they’re a festive and delicious addition to any spooky celebration.
- Prep Time: 10 minutes
- Cook Time: 5 minutes
- Total Time: 20 minutes
- Yield: 12-14 servings 1x
- Category: Dessert
- Cuisine: American
Ingredients
- 3 tablespoons unsalted butter (plus extra for greasing)
- 1 package (10 oz) regular marshmallows (or about 40 large marshmallows)
- 6 cups Rice Krispies cereal (or any crispy rice cereal)
- Orange food coloring gel (not liquid)
- Green candy melts or green frosting (for stems)
- Candy corn (for teeth, about 3-4 pieces per pumpkin)
- Mini chocolate chips or black decorating gel (for eyes and mouth)
- Optional: Orange sanding sugar or edible glitter (for sparkly finish)
Instructions
- Prepare your work surface. Line a large baking sheet or counter space with parchment paper.
- Grease your hands and a large bowl. Rub softened butter all over your palms and fingers, then grease the inside of a large microwave-safe bowl.
- Melt the butter and marshmallows. Place the 3 tablespoons of butter in the greased bowl and microwave for 30 seconds, or until melted. Add the entire package of marshmallows and stir to coat them in butter. Microwave in 30-second intervals, stirring between each, until the marshmallows are completely melted and smooth (about 1.5 to 2 minutes total).
- Add the orange food coloring. Stir in a few drops of orange gel food coloring until you get a deep, vibrant pumpkin shade (about 4-5 drops).
- Mix in the cereal. Pour the 6 cups of Rice Krispies into the colored marshmallow mixture. Stir gently but thoroughly with a rubber spatula until every piece of cereal is coated.
- Let it cool slightly. Allow the mixture to sit for about 2-3 minutes until cool enough to handle but still warm and pliable.
- Shape the pumpkins. Re-grease your hands with butter. Scoop up about a heaping tablespoon of the mixture (roughly the size of a golf ball) and roll it into a ball. Gently press it between your palms to form a slightly flattened, pumpkin-like shape. Place each shaped pumpkin on the parchment paper. Repeat until all the mixture is used (about 12-14 pumpkins).
- Add the stems. While the pumpkins are still slightly warm, press a small piece of green candy melt or a tiny bit of green frosting onto the top of each pumpkin to form the stem.
- Create the faces. Use mini chocolate chips or black decorating gel to make the eyes. For the mouth, press 3-4 candy corn pieces into the lower half of each pumpkin, pointy side in, to create a jagged smile.
- Let them set completely. Allow the finished pumpkins to sit at room temperature for about 15-20 minutes, or until they are firm to the touch.
Notes
Don’t skip greasing your hands with butter—it’s essential for shaping. Use gel food coloring instead of liquid to avoid making the mixture too sticky. Work quickly as the mixture sets fast; if it stiffens, microwave for 10 seconds to soften. Let kids decorate their own pumpkins for extra fun.
Nutrition
- Serving Size: 1 Jack-O-Lantern
- Calories: 180200
- Sugar: 18
- Sodium: 180
- Fat: 5
- Saturated Fat: 3
- Carbohydrates: 35
- Protein: 2
Keywords: Halloween treats, Rice Krispie treats, Jack-O-Lanterns, no-bake desserts, kid-friendly Halloween, pumpkin-shaped treats, easy Halloween recipe


