Easy Halloween Rice Krispie Jack-O-Lanterns
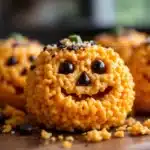
These no-bake Halloween treats are fun to make with kids and perfect for parties. Shaped like little pumpkins with candy corn smiles, they’re a festive and delicious addition to any spooky celebration.
- Prep Time: 10 minutes
- Cook Time: 5 minutes
- Total Time: 20 minutes
- Yield: 12-14 servings 1x
- Category: Dessert
- Cuisine: American
Ingredients
Scale
- 3 tablespoons unsalted butter (plus extra for greasing)
- 1 package (10 oz) regular marshmallows (or about 40 large marshmallows)
- 6 cups Rice Krispies cereal (or any crispy rice cereal)
- Orange food coloring gel (not liquid)
- Green candy melts or green frosting (for stems)
- Candy corn (for teeth, about 3-4 pieces per pumpkin)
- Mini chocolate chips or black decorating gel (for eyes and mouth)
- Optional: Orange sanding sugar or edible glitter (for sparkly finish)
Instructions
- Prepare your work surface. Line a large baking sheet or counter space with parchment paper.
- Grease your hands and a large bowl. Rub softened butter all over your palms and fingers, then grease the inside of a large microwave-safe bowl.
- Melt the butter and marshmallows. Place the 3 tablespoons of butter in the greased bowl and microwave for 30 seconds, or until melted. Add the entire package of marshmallows and stir to coat them in butter. Microwave in 30-second intervals, stirring between each, until the marshmallows are completely melted and smooth (about 1.5 to 2 minutes total).
- Add the orange food coloring. Stir in a few drops of orange gel food coloring until you get a deep, vibrant pumpkin shade (about 4-5 drops).
- Mix in the cereal. Pour the 6 cups of Rice Krispies into the colored marshmallow mixture. Stir gently but thoroughly with a rubber spatula until every piece of cereal is coated.
- Let it cool slightly. Allow the mixture to sit for about 2-3 minutes until cool enough to handle but still warm and pliable.
- Shape the pumpkins. Re-grease your hands with butter. Scoop up about a heaping tablespoon of the mixture (roughly the size of a golf ball) and roll it into a ball. Gently press it between your palms to form a slightly flattened, pumpkin-like shape. Place each shaped pumpkin on the parchment paper. Repeat until all the mixture is used (about 12-14 pumpkins).
- Add the stems. While the pumpkins are still slightly warm, press a small piece of green candy melt or a tiny bit of green frosting onto the top of each pumpkin to form the stem.
- Create the faces. Use mini chocolate chips or black decorating gel to make the eyes. For the mouth, press 3-4 candy corn pieces into the lower half of each pumpkin, pointy side in, to create a jagged smile.
- Let them set completely. Allow the finished pumpkins to sit at room temperature for about 15-20 minutes, or until they are firm to the touch.
Notes
Don’t skip greasing your hands with butter—it’s essential for shaping. Use gel food coloring instead of liquid to avoid making the mixture too sticky. Work quickly as the mixture sets fast; if it stiffens, microwave for 10 seconds to soften. Let kids decorate their own pumpkins for extra fun.
Nutrition
- Serving Size: 1 Jack-O-Lantern
- Calories: 180200
- Sugar: 18
- Sodium: 180
- Fat: 5
- Saturated Fat: 3
- Carbohydrates: 35
- Protein: 2
Keywords: Halloween treats, Rice Krispie treats, Jack-O-Lanterns, no-bake desserts, kid-friendly Halloween, pumpkin-shaped treats, easy Halloween recipe