Love this? Save it for later!
Share the inspiration with your friends
Third time in a Halloween and the eighth leg is still crooked. I stared at the little deviled egg sitting on the platter, its black olive body leaning slightly to the left like it had just tripped over its own web. Honestly, I should have stopped after the second batch. The yolk mixture was getting stiff in the bowl, and my hands were trembling from too much coffee and not enough sleep. But I couldn’t stop. I had to get it right. I had to make sure the little spider looked like it was actually crawling, not just falling over.
My kitchen counter looked like a crime scene of mayonnaise and paprika. There were olive pits scattered everywhere, little black seeds of failure. I remember the first time I tried this, I used toothpicks for legs. They looked stiff. Artificial. Like a spider made of plastic. I threw them out. The second time, I used chives, but they wilted too fast. By the third time, I finally figured out the trick. It’s all in the angle. You have to press the olive half deep enough into the yolk so it doesn’t slide off, but not so deep that it crushes the filling.
People think Halloween cooking is about elaborate cakes or scary drinks. It’s not. It’s about these tiny, manageable victories. It’s about taking something simple, like a boiled egg, and turning it into a little monster that makes your kids scream with delight. I’ve made these for three parties now. Three. And every year, I swear this will be the last time I stress over a single olive slice. But then I see the empty platter, the crumbs of crusty bread, the happy, sticky faces of guests, and I’m back at the counter with another carton of eggs.
It’s not about perfection. It’s about the obsession. The way the paprika dust looks like dirt on the plate. The way the cream cheese adds that tangy bite that cuts through the rich yolk. I don’t know why I can’t stop making them. Maybe it’s the challenge. Maybe it’s just the fun of making something look spooky with ingredients I already have. Either way, here it is. The recipe that haunts me. And you’re going to love it.
Why You’ll Love This Recipe
Let’s be real for a second. Most Halloween appetizers are just sugar bombs wrapped in red food coloring. You eat two cookies and feel guilty. These spider deviled eggs are different. They’re savory. They’re clever. And they come together fast enough that you can still enjoy the party. I’ve tested this recipe dozens of times, tweaking the yolk ratio until it was perfectly creamy, not too loose, not too dry. This is the version that works every single time.
Here is why this recipe is a total win:
- Quick & Easy: You can make a dozen of these in under 30 minutes. That’s faster than ordering pizza. Perfect for those last-minute Halloween gatherings or when you’re hosting a spooky movie night.
- Simple Ingredients: You don’t need a specialty store. You likely have eggs, mayo, mustard, and olives in your kitchen right now. No fancy grocery trips needed.
- Perfect for Parties: These are finger food gold. Guests can grab one without needing a plate or utensils. It’s the ultimate crowd-pleaser for both kids and adults.
- Unbelievably Delicious: The texture is smooth and rich, balanced by the salty punch of the black olives. It’s comfort food with a creepy twist.
- Customizable Fun: You can make the spiders as cute or as scary as you want. Big eyes? Tiny legs? It’s your canvas.
What makes this different from the rest? It’s the balance. A lot of deviled egg recipes are too mustard-heavy or too runny. This one uses a precise ratio of cream cheese to mayonnaise to keep it firm enough to hold the olive “body” without sliding off. It’s not just another deviled egg recipe. It’s the one that actually holds up on a platter for hours. It’s the kind of recipe that makes you feel like a genius host without the stress. Close your eyes after the first bite. That creamy, savory hit with the salty olive finish? It’s next-level.
What Ingredients You Will Need
This recipe uses simple, wholesome ingredients to deliver bold flavor and satisfying texture without the fuss. The magic here is in the balance of savory and salty. You want the egg yolk to be rich and creamy, so the quality of your mayo and mustard matters. And the olives? They’re the star of the show.
Here is what you need to gather:
- Large Eggs (12): The base of everything. Use large eggs for consistent sizing. If they’re too small, you’ll run out of filling. If they’re jumbo, you might have leftover yolk.
- Hard-Boiled Black Olives (12 halves): Not the green kind. You need the black olives for the spider body. Look for firm, small-curd black olives for the best texture. They hold their shape better. If you can’t find pre-cut halves, buy whole ones and slice them in half lengthwise. This adds the necessary salty punch.
- Mayonnaise (1/2 cup): I recommend Duke’s or Hellmann’s for best texture. It provides the creamy base. Don’t skimp on this. It keeps the filling moist.
- Cream Cheese (2 oz, softened): This is the secret ingredient. It adds structure so the filling doesn’t slide out of the egg white. It also adds a slight tang that cuts the richness.
- Dijon Mustard (1 teaspoon): Adds a little zing. Use a good quality Dijon. It’s smoother than yellow mustard and pairs better with the olives.
- Paprika (for dusting): This is for the “dirt” effect. Use sweet paprika for a classic look, or smoked paprika if you want a deeper, earthier flavor.
- Chives or Green Onion (optional, for legs): I tried chives first, but they wilt. For the best look, use thin strips of black olive skin or tiny strips of cucumber if you want them to stay crisp. But honestly, thin olive strips work best for the spooky look.
- Salt and Pepper (to taste): Always season to taste. The olives are salty, so go easy on the extra salt.
If you need substitutions, you can use Greek yogurt instead of cream cheese for a lighter version, though the texture will be softer. For the olives, if you can’t find black olives, you can use green olives dyed with a drop of black food coloring, but it won’t look as natural. Stick to the black olives if you can. It makes a huge difference in the visual appeal.
Equipment Needed
You don’t need much to make these spooky spiders. Keep it simple.
- Large Saucepan: For boiling the eggs. A pot with a lid is helpful for keeping them warm.
- Ice Bath Bowl: Essential for stopping the cooking process immediately. This prevents the green ring around the yolk. Trust me, you want a smooth, yellow yolk.
- Egg Peeler or Small Knife: For peeling the shells. If the eggs are fresh, they might be harder to peel. Let them cool completely first.
- Egg Separator or Spoon: To scoop out the yolks cleanly. A small spoon works fine if you don’t have a special tool.
- Mixing Bowl: For mashing the yolks. A medium bowl is perfect.
- Piping Bag or Ziploc Bag: To fill the egg whites neatly. If you don’t have a piping bag, just cut a tiny corner off a Ziploc bag. It’s a game-changer for neatness.
- Sharp Knife: For slicing the olives and cutting the legs. A paring knife is best for precision.
- Small Platter: To serve. A dark platter makes the white eggs and black olives pop more.
If you don’t have a piping bag, don’t worry. A spoon works, but it’s messier. The piping bag makes it look professional with zero effort. Also, keep your knife sharp. Dull knives slip when cutting olives, and you don’t want to lose a finger or a perfect olive half.
Preparation Method
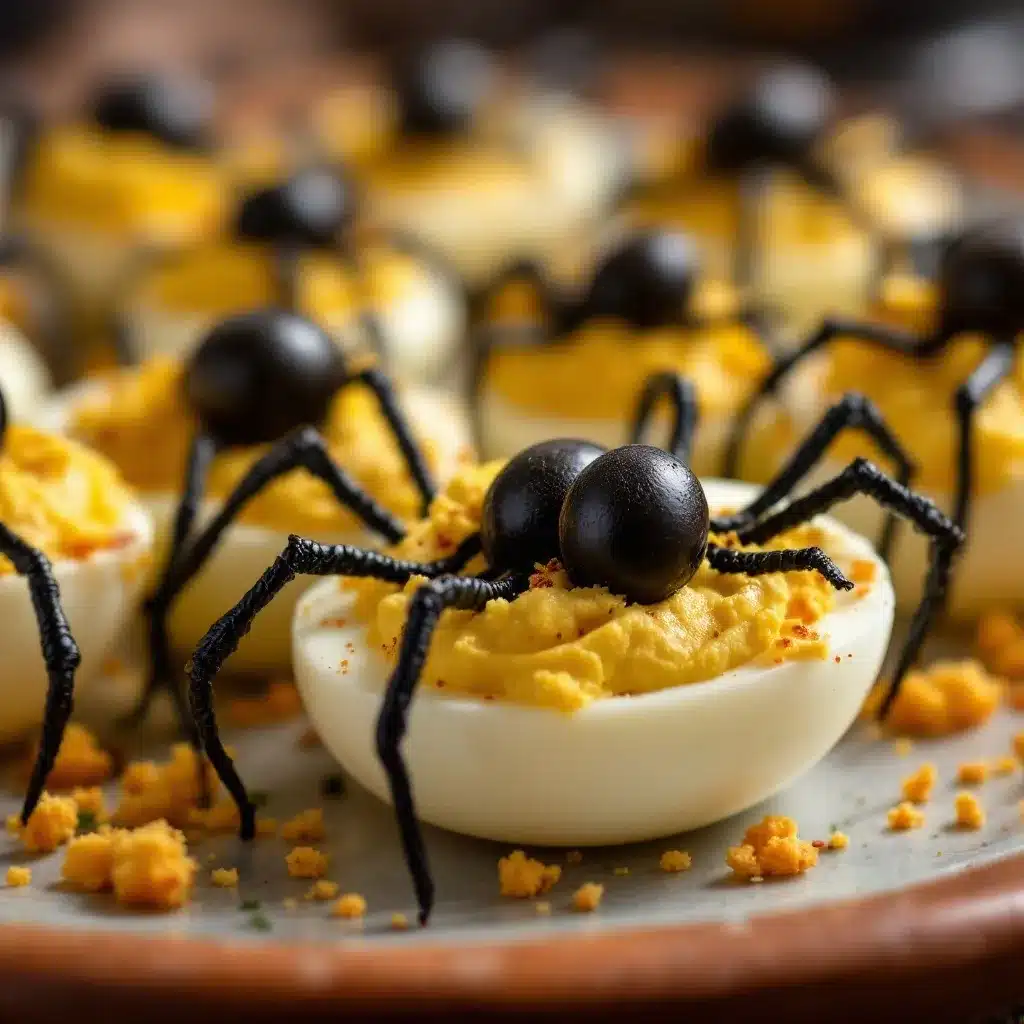
Let’s get into the nitty-gritty. This is where the magic happens. Follow these steps closely, and you’ll have perfect spiders every time.
- Boil the Eggs (12 minutes): Place eggs in a single layer in a saucepan. Cover with cold water by about an inch. Bring to a boil over medium-high heat. Once boiling, reduce heat to a simmer and cook for exactly 12 minutes. This ensures hard-boiled but not chalky eggs. Set a timer. Don’t guess.
- Cool the Eggs (10 minutes): While eggs cook, prepare an ice bath in a large bowl. As soon as the timer goes off, transfer eggs to the ice bath. Let them cool for at least 10 minutes. This makes peeling easier and stops the cooking process. Hot eggs are hard to peel. Cold eggs are easy.
- Peel and Slice (5 minutes): Gently tap each egg on the counter to crack the shell. Peel under running water to help remove shell fragments. Once peeled, slice each egg in half lengthwise. Carefully scoop out the yolks with a spoon or egg separator. Place yolks in a mixing bowl. Arrange egg white halves on a plate, cut side up. Be gentle so you don’t break the whites.
- Mash the Yolks (3 minutes): Add the softened cream cheese, mayonnaise, Dijon mustard, salt, and pepper to the bowl with yolks. Mash with a fork until smooth. Then, switch to a hand mixer or stand mixer for 1-2 minutes until the mixture is completely creamy and lump-free. This step is crucial for texture. Lumpy filling looks amateur. Smooth filling looks pro.
- Fill the Egg Whites (5 minutes): Transfer the yolk mixture to a piping bag fitted with a star tip (or a Ziploc bag with a corner cut off). Pipe the mixture back into the egg white halves. You can make a swirl or a flat mound. I like a slight mound because it gives the olive body something to sit on. Don’t overfill, or it will bulge out the sides.
- Add the Spider Bodies (5 minutes): Take your black olive halves. Press the flat side down into the center of the yolk filling. It should stick. If it doesn’t, add a tiny dab of extra filling to act as glue. You now have the spider body sitting on the egg white base.
- Cut the Legs (10 minutes): This is the tedious part, but it’s worth it. Take the remaining olive halves (or olive skins if you saved them). Cut them into thin, long strips. You need 8 strips per spider. Arrange them around the olive body to look like spider legs. You can curl them slightly for a more dynamic look. Use a toothpick to adjust them if needed, but try to let them rest naturally. The legs should fan out.
- Add the Eyes (2 minutes): For the eyes, you can use tiny dots of black olive paste, or just a dot of mayo with a pinch of paprika. Or, if you have tiny black sesame seeds, those work great. Place two dots on the top of the olive body. They should look like they’re staring at you.
- Dust with Paprika (2 minutes): Lightly dust the platter and the spiders with paprika. This adds the “dirt” effect and ties the colors together. Don’t overdo it. You want a subtle hint of red, not a pile of red powder.
- Chill and Serve: Refrigerate for at least 30 minutes before serving. This helps the filling set and the olives adhere better. Serve cold. They look best when chilled.
Keep an eye on the olives while you cut them. They can slip. Use a damp paper towel under your cutting board to keep them steady. And don’t rush the mashing step. Smooth filling is the key to a professional look.
Cooking Tips & Techniques
I’ve made a few mistakes along the way, so you don’t have to. Here are some pro tips to keep your spiders from falling apart.
- Room Temperature Ingredients: Make sure your cream cheese and mayo are at room temperature before mixing. Cold ingredients lead to lumpy filling. If you’re in a rush, microwave the cream cheese for 10 seconds. It’s a lifesaver.
- Don’t Skip the Ice Bath: I know it’s extra work, but skipping it leads to green yolks and hard-to-peel eggs. The ice bath is non-negotiable for quality.
- Press Firmly: When you place the olive body on the filling, press down gently but firmly. If it’s loose, it will slide off when someone picks it up. That’s a sad spider. You don’t want a sad spider.
- Cut Legs Thin: Thick legs look like bugs, not spiders. Thin strips look delicate and creepy. Use the sharpest knife you have. Dull knives crush the olive, making it mushy.
- Make Ahead: You can boil and peel the eggs up to 2 days in advance. Store them in a sealed container in the fridge. Make the filling and assemble the day of. This saves time on the day of the party.
Also, taste your filling before piping. Adjust salt and mustard if needed. The olives are salty, so you might need less salt in the yolk mix. Trust your palate.
Variations & Adaptations
Want to switch it up? Here are a few ways to adapt this recipe.
- Spicy Spider: Add a dash of hot sauce or cayenne pepper to the yolk mixture. It adds a kick that pairs well with the salty olives. Great for adults who like a little heat.
- Herb Garden Spider: Mix fresh chives or dill into the yolk filling. It adds a fresh flavor and a green speckle that looks cool against the white.
- Gluten-Free: This recipe is naturally gluten-free. Just ensure your mustard and mayo are certified gluten-free if you have severe allergies. Most are, but always check labels.
- Dairy-Free Option: Swap the cream cheese and mayo for dairy-free alternatives. Note that the texture might be slightly softer, so chill longer before serving.
- Mini Spiders: Use quail eggs for a bite-sized version. They’re cute and perfect for cocktail parties. Just adjust the filling amount accordingly.
I once tried using pickles instead of olives for the body. It was too watery and didn’t hold up. Stick to olives. They’re the right texture and flavor.
Serving & Storage Suggestions
Serve these cold, straight from the fridge. They look best on a dark platter, like a slate or black ceramic plate. The contrast makes the white eggs and black olives pop. Pair them with easy no-bake spider web brownies for a full spooky theme. Or serve them alongside spooky mummy hot dogs for a complete appetizer spread.
For storage, keep them in an airtight container in the fridge for up to 2 days. Do not freeze them, as the egg whites will become rubbery. If you need to make them ahead, boil and peel the eggs, and store the yolks and whites separately. Assemble the day of. The olives might release a little water over time, so pat them dry with a paper towel before serving if they look wet.
Nutritional Information & Benefits
These eggs are a good source of protein and healthy fats. Eggs are a complete protein, containing all nine essential amino acids. The olives provide monounsaturated fats, which are heart-healthy. However, they are also high in cholesterol and sodium due to the olives and mayo. Enjoy in moderation. One serving (2 eggs) has approximately 150 calories. It’s a low-carb option, perfect for keto or paleo diets if you skip any sugary dips. Just be mindful of the sodium content if you’re watching your salt intake.
Conclusion
These Easy Spooky Spider Deviled Eggs are more than just a snack. They’re a fun, creative way to bring Halloween spirit to your table. They’re easy to make, delicious to eat, and guaranteed to get a few laughs (and maybe a few screams). I love how simple they are, yet how much impact they have. Try them out. Customize them. Make them your own. And then come back and tell me how many you ate. I won’t judge. I probably ate six myself.
FAQs
Can I make these ahead of time?
Yes! You can boil and peel the eggs up to 2 days in advance. Assemble the spiders the day of the party for the best texture and presentation.
What can I use instead of black olives?
You can use green olives, but they won’t look as spooky. You can also use small mozzarella balls for a white spider look, but the texture will be different.
How do I keep the olives from sliding off?
Press the olive half firmly into the yolk filling. If it’s still loose, add a tiny dab of extra filling to act as glue. Chilling them for 30 minutes helps too.
Can I freeze deviled eggs?
No. Freezing makes the egg whites rubbery and the filling watery. It’s best to eat them fresh or store them in the fridge for up to 2 days.
Are these kid-friendly?
Most kids love them because they look fun and creepy. The flavor is mild and creamy, which is usually a hit with picky eaters. Just watch out for the olive saltiness!
Pin This Recipe!
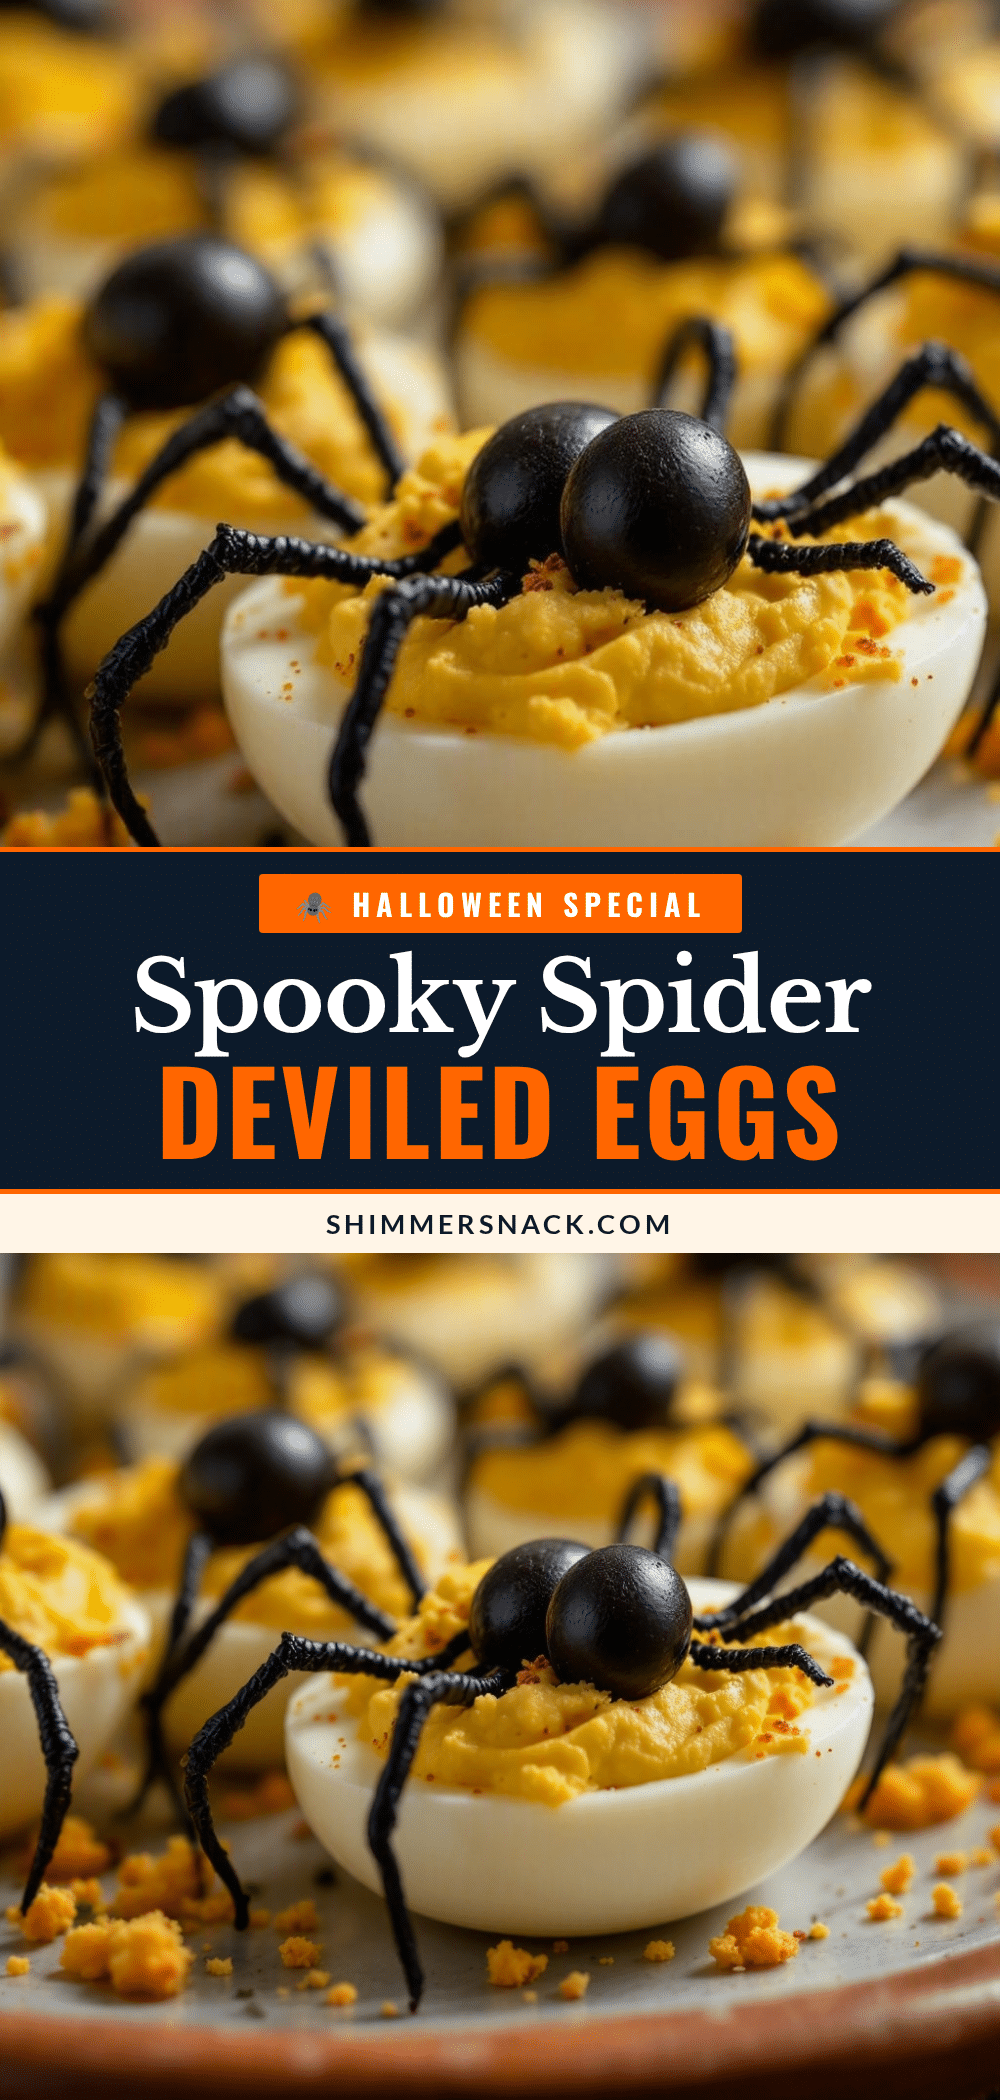
Easy Spooky Spider Deviled Eggs: 4-Step Halloween Recipe
These savory and spooky deviled eggs are perfect for Halloween parties. Featuring a creamy yolk filling topped with black olive spiders, they are easy to make, delicious, and visually striking.
- Prep Time: 30 minutes
- Cook Time: 12 minutes
- Total Time: 45 minutes
- Yield: 12 servings 1x
- Category: Appetizer
- Cuisine: American
Ingredients
- 12 large eggs
- 12 hard-boiled black olive halves
- 1/2 cup mayonnaise
- 2 oz cream cheese, softened
- 1 teaspoon Dijon mustard
- Paprika, for dusting
- Thin strips of black olive skin or cucumber, for legs (optional)
- Salt and pepper to taste
Instructions
- Boil eggs in a single layer covered with cold water. Bring to a boil, then reduce to a simmer and cook for exactly 12 minutes.
- Transfer eggs to an ice bath and let cool for at least 10 minutes to stop cooking and aid peeling.
- Peel the eggs under running water, slice them in half lengthwise, and scoop out the yolks into a mixing bowl.
- Mash the yolks with cream cheese, mayonnaise, Dijon mustard, salt, and pepper until smooth. Use a hand mixer for a lump-free texture.
- Pipe the yolk mixture back into the egg white halves, creating a slight mound.
- Press the flat side of black olive halves into the center of the yolk filling to create the spider body.
- Cut remaining olive halves or skins into thin strips to create 8 legs per spider. Arrange them around the body.
- Add eyes using tiny dots of black olive paste, mayo with paprika, or black sesame seeds.
- Lightly dust the platter and spiders with paprika for a ‘dirt’ effect.
- Refrigerate for at least 30 minutes before serving to help the filling set.
Notes
Ensure cream cheese and mayo are at room temperature for smooth filling. Do not freeze deviled eggs as egg whites become rubbery. For best results, use firm, small-curd black olives. Chill for 30 minutes before serving to help olives adhere.
Nutrition
- Serving Size: 2 deviled eggs
- Calories: 150
- Sugar: 1
- Sodium: 180
- Fat: 12
- Saturated Fat: 3
- Carbohydrates: 2
- Protein: 6
Keywords: Halloween recipe, deviled eggs, spider appetizer, easy party food, savory snacks, gluten-free appetizer


