Love this? Save it for later!
Share the inspiration with your friends
I want brownies. Not just any brownies—the kind that are so fudgy they almost qualify as truffle batter, the kind that set up in the fridge while you clean up the kitchen chaos, the kind that look like a spider crawled across them and left behind something magical instead of terrifying. The problem is, I don’t want to turn on the oven. It’s October, sure, but my kitchen runs hot, and Halloween prep already has me running around like I’m the one being chased. So I need a dessert that delivers on drama without the heat. That’s how these easy no-bake spider web brownies happened. Honestly? They might be the smartest thing I’ve made all season.
I remember standing in my pantry, staring at a box of Oreos and a bag of chocolate chips, and thinking—there has to be a way to make this work without firing up the oven. And there is. These no-bake spider web brownies are basically a crust made from crushed cookies and melted butter (simple, I know), topped with a silky, rich chocolate filling that sets firm in the fridge. Then comes the fun part—the spider web design on top, made with white chocolate and a toothpick. It’s the kind of project that looks like you spent hours on it, when really, you just waited for the fridge to do the hard work.
And look, I get it. Halloween desserts can be a whole production. You’ve got the spider web cheesecake bars that take forever, the complicated cookie decorating kits that end up in tears. But these brownies? They’re the chill version. The one you can make with kids, or while watching a scary movie, or at 10 PM the night before the school party because you forgot (we’ve all been there). They’re forgiving, they’re fun, and they taste like something you’d actually want to eat—not just something that looks good on Instagram.
Why You’ll Love This Recipe
Let me tell you why this recipe has become my go-to for Halloween gatherings. I’ve tested it at three different parties now, and every single time, someone asks for the recipe before they’ve even finished their first bite.
- No Oven Required: This is the biggest win. You don’t need to heat up the kitchen, monitor baking times, or worry about over-baking. The fridge does all the work.
- Simple Ingredients: Oreos, butter, chocolate chips, cream cheese, powdered sugar, and white chocolate. That’s it. No weird specialty items you’ll never use again.
- Perfect for Halloween Parties: The spider web design is dramatic enough to impress adults, but simple enough that kids can help make it. It’s the ultimate crowd-pleaser.
- Make-Ahead Friendly: These brownies actually taste better after they’ve rested overnight. So you can make them two days before your party and cross one thing off your to-do list.
- Unbelievably Fudgy: The texture is dense, rich, and almost truffle-like. It’s not cakey at all—it’s the kind of brownie that makes you close your eyes on the first bite.
What makes these different from other no-bake brownie recipes I’ve tried? The double-chocolate base. Most no-bake brownies use just cocoa powder, which can taste flat. Here, we’re using melted chocolate chips in the filling, which gives it that deep, glossy, almost ganache-like richness. Plus, the Oreo crust adds a subtle crunch and that iconic cookies-and-cream flavor that pairs beautifully with the dark chocolate filling.
This is the kind of dessert that makes you feel like you pulled off something impressive, even though it took maybe twenty minutes of active work. It’s comfort food for the Halloween season—spooky on the outside, cozy on the inside.
What Ingredients You Will Need
This recipe uses simple, store-bought ingredients to create something that tastes completely homemade. Here’s what you’ll need, broken down by component.
For the Crust
- 24 Oreo cookies (regular, not double-stuffed) — You’ll crush these into fine crumbs. The cream filling inside helps bind the crust, so don’t scrape it out.
- 5 tablespoons unsalted butter, melted — This helps the crust hold together. Use salted butter if that’s what you have, just reduce any added salt elsewhere.
For the Brownie Filling
- 2 cups semi-sweet chocolate chips — I prefer Ghirardelli or Guittard for the smoothest melt. The quality of your chocolate really matters here since it’s the star of the filling.
- 8 oz cream cheese, softened to room temperature — Full-fat works best for texture, but reduced-fat will also work in a pinch.
- 1/2 cup powdered sugar — This sweetens the filling without adding graininess.
- 1 teaspoon vanilla extract — Pure vanilla adds warmth; imitation works fine too.
- Pinch of salt — Balances the sweetness and deepens the chocolate flavor.
For the Spider Web Topping
- 1/2 cup white chocolate chips — Use a brand like Ghirardelli or Nestlé Toll House for smooth melting.
- 1 teaspoon coconut oil or vegetable oil — This helps thin the white chocolate so it drizzles smoothly.
Ingredient Tips from My Kitchen
I’ve made this recipe with both generic store-brand Oreos and name-brand, and honestly, the name-brand ones crush more evenly and have a better cream-to-cookie ratio. For the chocolate chips, splurge a little—cheap chocolate can seize up when melted and leave you with a grainy filling. And if you’re dairy-free, use a vegan cream cheese and dairy-free chocolate chips; the texture still comes out beautifully.
Equipment Needed
You don’t need fancy equipment for this recipe, which is part of why I love it. Here’s what you’ll want to have on hand:
- 8×8 inch square baking pan — This is the perfect size for thick brownies. A 9×9 pan will work, but your brownies will be thinner.
- Parchment paper — Line your pan with two overlapping strips, leaving overhang on all sides. This makes lifting the brownies out so much easier.
- Food processor or zip-top bag and rolling pin — For crushing the Oreos. The food processor is faster, but the bag-and-rolling-pin method works great and is oddly satisfying.
- Medium microwave-safe bowls — You’ll need one for melting the chocolate and one for the white chocolate topping.
- Rubber spatula — For mixing and spreading the filling evenly.
- Toothpick or skewer — For creating the spider web design. A toothpick is easier to control.
- Small piping bag or zip-top bag — For drizzling the white chocolate. A zip-top bag with a tiny corner snipped off works perfectly.
I’ve made these brownies using just a bowl and a wooden spoon when my food processor was in the dishwasher, and they turned out just fine. The key is making sure your Oreos are crushed uniformly—no big chunks in the crust, or it won’t hold together.
Preparation Method
Let me walk you through this step by step. It’s easier than you think, I promise.
Step 1: Prepare the Pan
Line your 8×8 inch baking pan with parchment paper, leaving about 2 inches of overhang on two opposite sides. This creates “handles” that make lifting the finished brownies out a breeze. Lightly spray the parchment with non-stick cooking spray just to be safe.
Step 2: Make the Oreo Crust
Place 24 Oreo cookies in your food processor and pulse until they form fine crumbs. You should have about 2 cups of crumbs. If you’re using the bag method, put the cookies in a zip-top bag, seal it, and crush them with a rolling pin until no large pieces remain. Transfer the crumbs to a medium bowl, pour in the 5 tablespoons of melted butter, and stir with a fork until the mixture looks like wet sand and all the crumbs are coated. Press this mixture firmly into the bottom of your prepared pan. I use the bottom of a measuring cup to really pack it down. Pop this in the fridge to firm up while you make the filling.
Step 3: Melt the Chocolate
Place 2 cups of semi-sweet chocolate chips in a microwave-safe bowl. Microwave in 30-second intervals, stirring well after each interval, until the chocolate is completely smooth and glossy. This usually takes about 1.5 to 2 minutes total. Be careful not to overheat—chocolate burns easily and will become grainy. Let it cool for about 5 minutes while you prepare the cream cheese mixture.
Step 4: Make the Brownie Filling
In a large bowl, beat the softened cream cheese with an electric mixer (or a strong arm and a wooden spoon) until it’s smooth and fluffy, about 1 minute. Add the powdered sugar, vanilla extract, and a pinch of salt, and beat until combined. Now, pour in the melted chocolate and mix until everything is uniform and glossy. The mixture will be thick and fudgy—that’s exactly what you want. Spread this filling evenly over the chilled Oreo crust. Use an offset spatula or the back of a spoon to smooth the top. Return the pan to the fridge for at least 2 hours, or until the filling is firm to the touch.
Step 5: Create the Spider Web Topping
Once the brownie layer is set, it’s time for the fun part. Place 1/2 cup of white chocolate chips and 1 teaspoon of coconut oil in a microwave-safe bowl. Microwave in 20-second intervals, stirring each time, until smooth. Transfer the melted white chocolate to a small piping bag or a zip-top bag with a tiny corner snipped off.
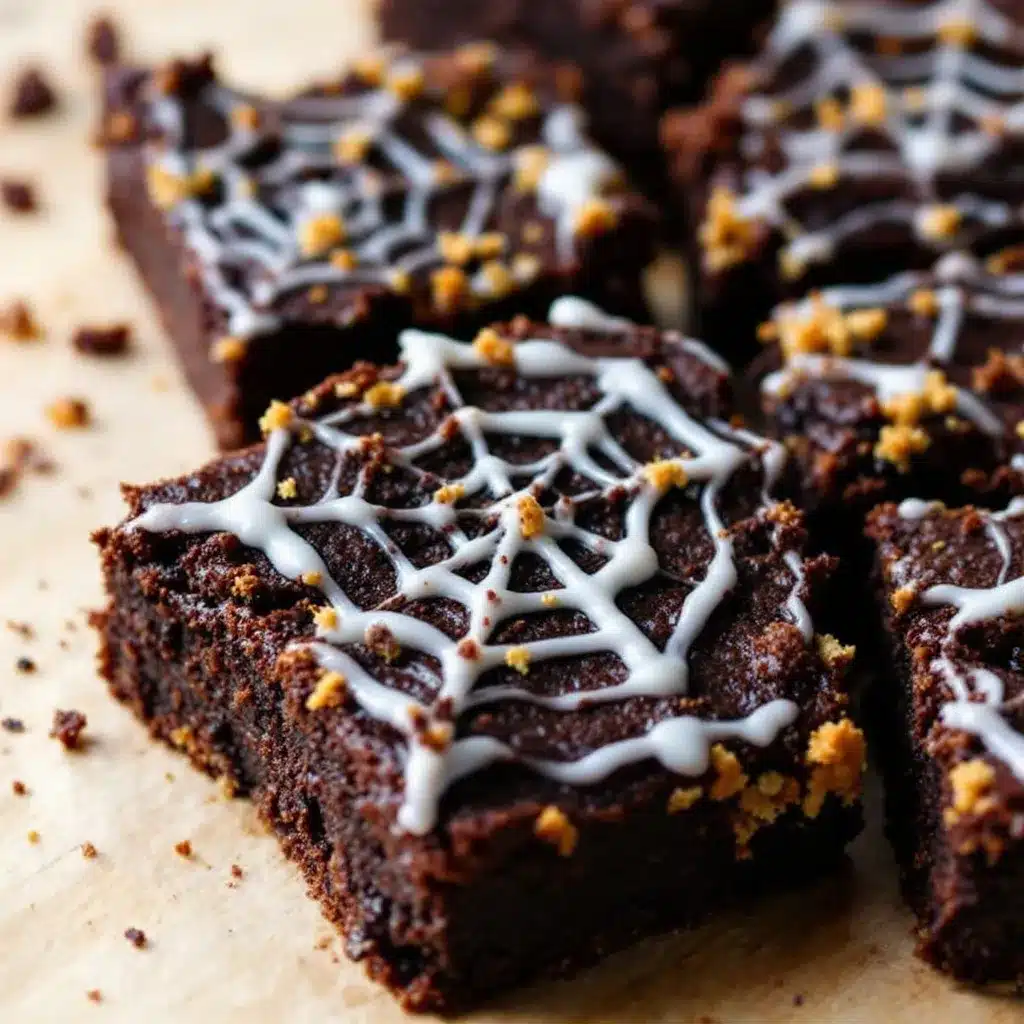
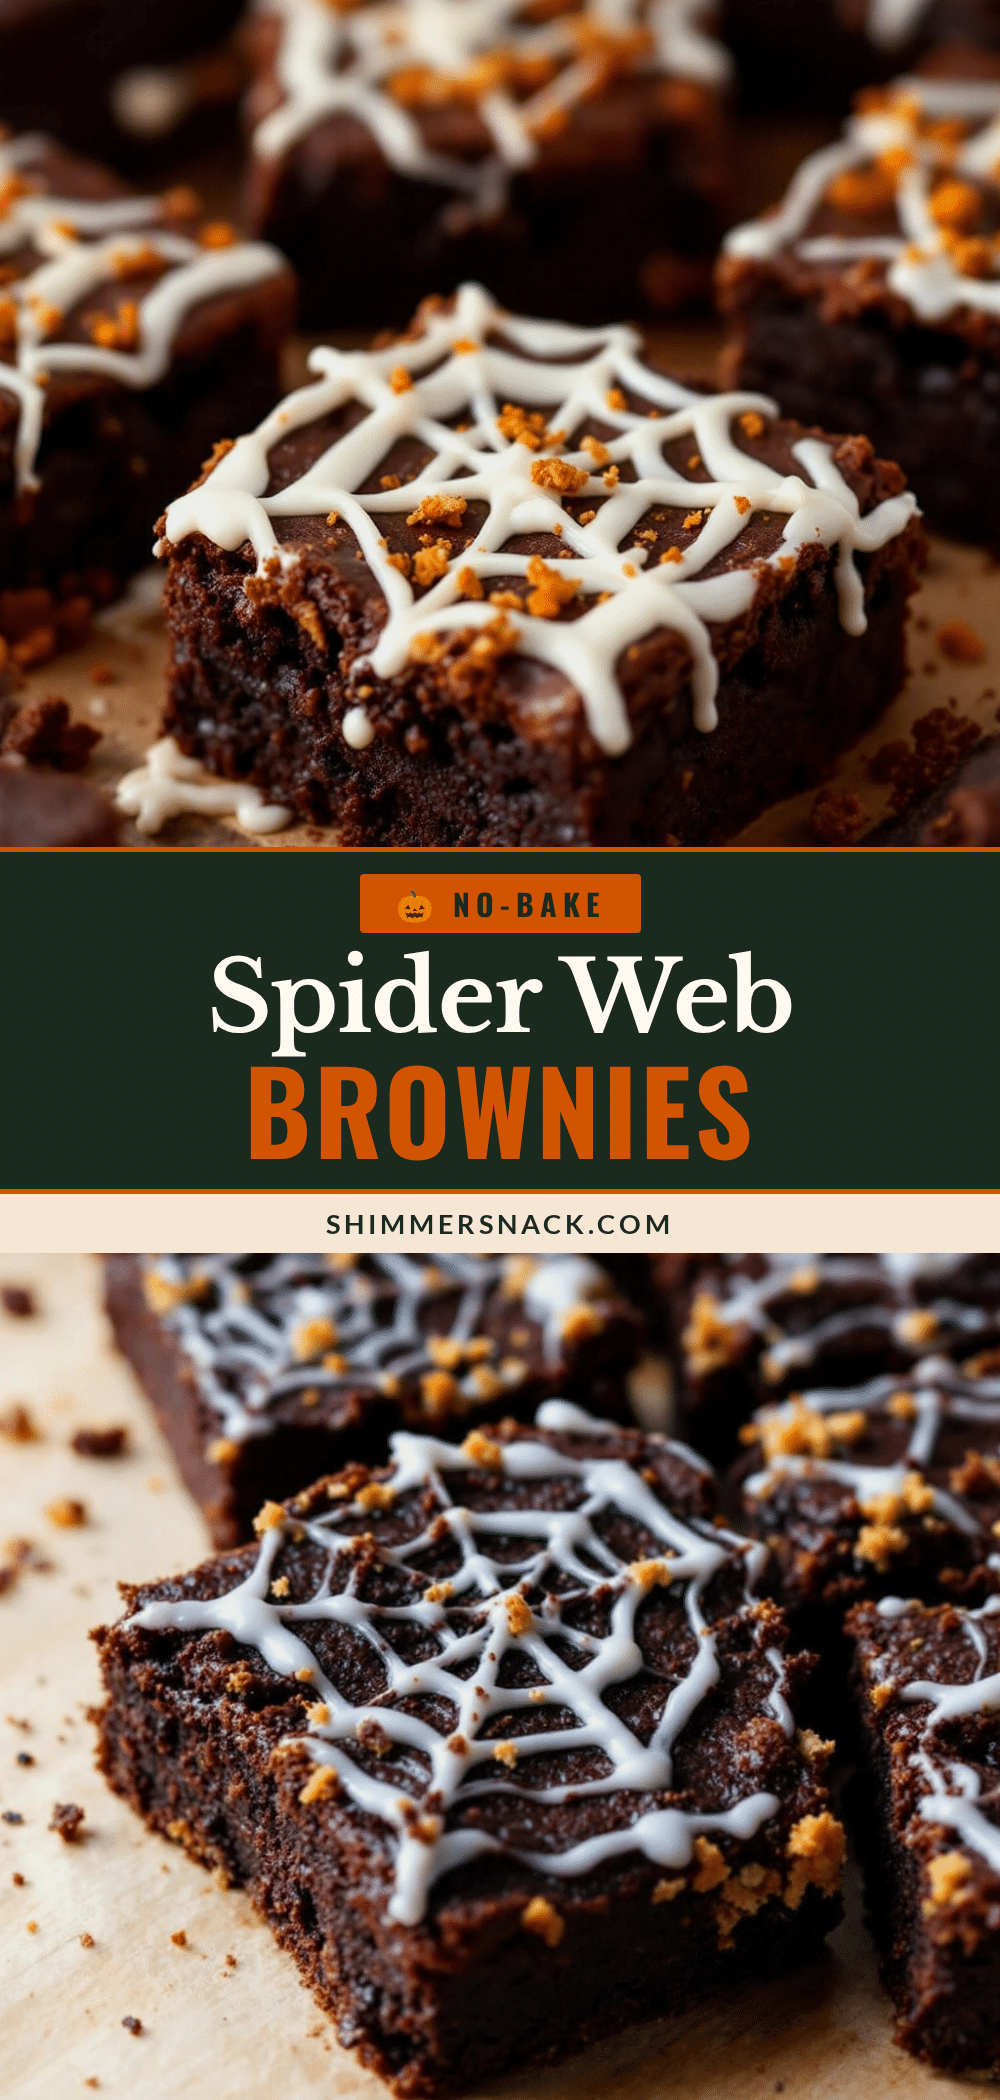
Now, here’s the trick for the spider web: Pipe a spiral starting from the center of the brownies, working your way outward in a continuous circle. Leave about 1/2 inch between each ring. Then, take a toothpick and drag it from the center outward through the white chocolate lines, all the way to the edge. Repeat this around the entire brownie, like you’re drawing spokes on a wheel. The toothpick will pull the white chocolate into a beautiful web pattern. It’s almost magical to watch it happen.
Step 6: Chill and Serve
Place the pan back in the fridge for at least 30 minutes to let the white chocolate set. When you’re ready to serve, lift the brownies out using the parchment overhang, place them on a cutting board, and slice into 16 squares. A sharp knife works best—wipe it clean between cuts for the neatest edges.
Cooking Tips & Techniques
I’ve made this recipe about seven times now, and I’ve learned a few things the hard way. Here are my best tips to make sure yours turn out perfect the first time.
Don’t skip chilling the crust. I tried rushing this once and pressed the filling onto a warm crust. The butter from the crust seeped into the filling, and the whole thing was a greasy mess. Give it at least 15 minutes in the fridge before adding the chocolate layer.
Let the melted chocolate cool slightly. If you pour hot melted chocolate into the cream cheese mixture, it can seize up or create a grainy texture. Let it sit for 5 minutes after melting—it should still be liquid but not hot to the touch.
Use room temperature cream cheese. Cold cream cheese doesn’t blend smoothly and will leave you with lumpy filling. Leave it on the counter for about 30 minutes before you start. In a pinch, you can microwave it for 10 seconds to soften it.
Practice the spider web on a plate first. The first time I tried the web design, my lines were too thick and the toothpick dragged clumps instead of creating clean lines. Do a test run on a plate to get the feel for the pressure and speed.
Keep the brownies cold until serving. These are no-bake, which means they soften at room temperature. If you’re serving them at a party, keep them in the fridge until the last minute. They’ll hold their shape for about 30 minutes on a serving platter.
Variations & Adaptations
One of the best things about this recipe is how easy it is to customize. Here are some variations I’ve tried and loved.
Peanut Butter Spider Web Brownies
Swirl 1/3 cup of creamy peanut butter into the chocolate filling before spreading it over the crust. The peanut butter adds a salty-savory note that pairs beautifully with the chocolate. Use a knife to create a marbled effect.
Vegan Version
Use vegan Oreos (the original flavor is accidentally vegan), dairy-free butter, vegan cream cheese, and dairy-free chocolate chips. The texture is slightly softer but still delicious. I’ve made this for a vegan friend’s Halloween party, and nobody could tell the difference.
Gluten-Free Option
Use gluten-free chocolate sandwich cookies for the crust. Many brands make them now, and they work just as well. Everything else in the recipe is naturally gluten-free, so this is an easy swap.
Mint Chocolate Version
Add 1/2 teaspoon of peppermint extract to the chocolate filling. The cool mint flavor with the rich chocolate is a classic combination. Top with crushed candy canes for a festive touch if you’re making these for Christmas instead of Halloween.
Serving & Storage Suggestions
These brownies are best served cold, straight from the fridge. The filling is firm and fudgy, almost like a chocolate truffle bar. I like to cut them into small squares—they’re rich, so a little goes a long way.
For Serving: Arrange the brownies on a black or orange platter for maximum Halloween vibes. Add a few fake spider rings or plastic spiders around the plate for extra spookiness. They pair beautifully with a cold glass of milk or a warm creamy black velvet Halloween latte for a truly themed dessert spread.
For Storage: Keep the brownies in an airtight container in the refrigerator for up to 5 days. Layer them between sheets of parchment paper so the spider web design doesn’t smudge. They actually taste better on day two—the flavors meld together and the texture becomes even more fudgy.
For Freezing: These freeze beautifully. Wrap individual brownie squares tightly in plastic wrap, then place them in a freezer-safe bag. They’ll keep for up to 3 months. Thaw in the refrigerator overnight before serving. The spider web design might lose some of its crispness, but the flavor stays perfect.
Reheating Note: Don’t microwave these. They’re meant to be eaten cold. If you want a warm brownie experience, let them sit at room temperature for 10 minutes before serving—they’ll soften slightly without losing their shape.
Nutritional Information & Benefits
Let’s be real—these are a treat, not a health food. But knowing what’s in them helps you enjoy them mindfully. Here’s the estimated nutritional breakdown per brownie (based on 16 servings):
- Calories: 285
- Total Fat: 18g
- Saturated Fat: 10g
- Carbohydrates: 32g
- Sugar: 24g
- Protein: 4g
- Fiber: 2g
On the plus side, dark chocolate (the semi-sweet chips) contains antioxidants called flavonoids, which can support heart health in moderation. The cream cheese adds a small amount of calcium and protein. And the Oreo crust? Well, it brings joy—and sometimes that’s the most important nutrient.
If you’re looking for a slightly lighter option, you can use reduced-fat cream cheese and sugar-free chocolate chips. The texture will be a bit less rich, but it’s still a satisfying treat. And if you’re serving these at a party alongside wholesome pumpkin protein muffins, you’ve got something for everyone.
Conclusion
These easy no-bake spider web brownies have become my Halloween secret weapon. They’re the dessert that looks like you spent hours on it, when really, you just let the fridge do the heavy lifting. The Oreo crust is buttery and crunchy, the chocolate filling is dense and fudgy, and the spider web design on top is pure Halloween magic.
I love that this recipe doesn’t require any baking skills—no oven temperature worries, no toothpick tests, no worrying about over-mixing. It’s forgiving enough for beginners but impressive enough for seasoned bakers who just want a shortcut. And honestly? It’s the kind of dessert that makes people smile. The first time someone cuts into that web design and sees the pattern hold, there’s this little moment of delight that never gets old.
So go ahead—make these for your Halloween party, your kid’s classroom celebration, or just because it’s October and you want something spooky and sweet. Customize them however you like, share them with people you love, and don’t forget to save a few for yourself. You deserve them.
If you try this recipe, I’d love to hear how it turned out. Drop a comment below, share a photo, or tell me about your favorite Halloween dessert traditions. Happy haunting—and happy snacking!
Frequently Asked Questions
Can I make these brownies ahead of time?
Absolutely! These are actually better when made a day ahead. The flavors meld together overnight, and the texture becomes even more fudgy. Make them up to 2 days before your event and keep them refrigerated in an airtight container.
Do I have to use Oreos for the crust?
No, but Oreos work best because the cream filling helps bind the crust. You can use any chocolate sandwich cookie, or even graham crackers mixed with a tablespoon of cocoa powder. Just adjust the butter amount slightly—you want the texture of wet sand.
Why did my white chocolate seize up?
White chocolate is finicky. It seizes when it gets too hot or comes into contact with even a drop of water. Microwave it in short bursts and stir gently. Adding a teaspoon of coconut oil helps keep it smooth. If it does seize, add another teaspoon of oil and stir vigorously.
Can I use milk chocolate instead of semi-sweet?
You can, but the brownies will be significantly sweeter. Semi-sweet chocolate balances the sweetness of the Oreo crust and powdered sugar. If you use milk chocolate, consider reducing the powdered sugar by a tablespoon or two.
How do I get clean cuts without smudging the web design?
Use a sharp knife and wipe it clean with a damp paper towel between each cut. For the cleanest edges, chill the brownies for an extra 30 minutes before slicing. You can also use a plastic knife—it cuts through without dragging the chocolate.
Pin This Recipe!
Easy No-Bake Spider Web Brownies: Best Halloween Dessert
These easy no-bake spider web brownies are fudgy, rich, and topped with a dramatic spider web design. Made with an Oreo crust and a silky chocolate filling, they require no oven and are perfect for Halloween parties.
- Prep Time: 20 minutes
- Cook Time: 0 minutes
- Total Time: 2 hours 50 minutes (includes chilling)
- Yield: 16 servings 1x
- Category: Dessert
- Cuisine: American
Ingredients
- 24 Oreo cookies (regular, not double-stuffed)
- 5 tablespoons unsalted butter, melted
- 2 cups semi-sweet chocolate chips
- 8 oz cream cheese, softened to room temperature
- 1/2 cup powdered sugar
- 1 teaspoon vanilla extract
- Pinch of salt
- 1/2 cup white chocolate chips
- 1 teaspoon coconut oil or vegetable oil
Instructions
- Line an 8×8 inch baking pan with parchment paper, leaving overhang on two opposite sides. Lightly spray with non-stick cooking spray.
- Place 24 Oreo cookies in a food processor and pulse until fine crumbs form. Transfer to a bowl, add 5 tablespoons melted butter, and stir until the mixture looks like wet sand. Press firmly into the bottom of the prepared pan. Refrigerate for at least 15 minutes.
- Place 2 cups semi-sweet chocolate chips in a microwave-safe bowl. Microwave in 30-second intervals, stirring after each, until smooth and glossy (about 1.5 to 2 minutes). Let cool for 5 minutes.
- In a large bowl, beat the softened cream cheese with an electric mixer until smooth and fluffy (about 1 minute). Add 1/2 cup powdered sugar, 1 teaspoon vanilla extract, and a pinch of salt; beat until combined. Pour in the melted chocolate and mix until uniform and glossy. Spread the filling evenly over the chilled crust. Refrigerate for at least 2 hours until firm.
- For the spider web topping: Place 1/2 cup white chocolate chips and 1 teaspoon coconut oil in a microwave-safe bowl. Microwave in 20-second intervals, stirring each time, until smooth. Transfer to a small piping bag or zip-top bag with a tiny corner snipped off.
- Pipe a spiral of white chocolate starting from the center of the brownies, working outward. Use a toothpick to drag from the center outward through the white chocolate lines, creating a web pattern. Repeat around the entire brownie.
- Refrigerate for at least 30 minutes to set the white chocolate. Lift the brownies out using the parchment overhang, place on a cutting board, and slice into 16 squares with a sharp knife.
Notes
These brownies are best served cold. They can be made up to 2 days ahead and stored in an airtight container in the refrigerator. For clean cuts, chill for an extra 30 minutes before slicing and wipe the knife clean between cuts. The spider web design may soften slightly if frozen.
Nutrition
- Serving Size: 1 brownie
- Calories: 285
- Sugar: 24
- Fat: 18
- Saturated Fat: 10
- Carbohydrates: 32
- Fiber: 2
- Protein: 4
Keywords: no-bake brownies, spider web brownies, Halloween dessert, Oreo crust, fudgy brownies, easy Halloween recipe


