Love this? Save it for later!
Share the inspiration with your friends
I burned the marshmallows three times before I figured out why they were turning into black, crunchy charcoal instead of golden goo. I stood over the stove, watching the smoke alarm chirp its angry little song, and realized I had been adding the rice cereal while the pan was still on high heat. It was a rookie mistake, but it ruined enough batches that I almost gave up on Halloween snacks altogether. I just wanted something easy that didn’t require a culinary degree or a fire extinguisher, you know?
My kids would stare at the oven with such hopeful eyes, asking if the spooky treats were ready yet. I felt like a failure because I couldn’t even master the basics of melting butter and marshmallows without creating a hazard. The kitchen smelled like burnt sugar and regret. I remember thinking that maybe store-bought cookies were just the smarter choice for October.
But then I turned the heat down to low and took a deep breath. I waited for the butter to melt completely before adding the marshmallows, stirring slowly until they just barely melted. The difference was night and day. The treats came out soft, chewy, and perfectly golden. That small change saved the holiday for us. Now, making these treats is my favorite part of the season, even if I still burn my fingers on the sticky edges sometimes.
Why You’ll Love This Recipe
There is a specific kind of magic that happens when you combine cheap, pantry-staple ingredients with a little bit of creativity. These fun Halloween rice krispie treats aren’t just dessert; they are a canvas for your imagination. I’ve tested this base recipe dozens of times to ensure it holds its shape, even when you’re pressing in candy eyes or carving out spiderwebs. It’s the kind of recipe that saves your sanity when you’re juggling costumes, candy corn, and last-minute party planning.
- Quick & Easy: You can have these ready in under 20 minutes. That is less time than it takes to order pizza, which is honestly a miracle during the busy Halloween rush.
- Simple Ingredients: You likely have everything you need right now. Butter, marshmallows, cereal, and food coloring are standard items, so no fancy grocery runs are needed.
- Perfect for Parties: These are ideal for classroom parties, trick-or-treating exchanges, or just a cozy movie night. They are easy to eat with one hand while holding a flashlight or a bag of candy.
- Crowd-Pleaser: Kids love them because they are sweet and fun to look at. Adults love them because they bring back that nostalgic childhood feeling without the sugar crash of actual candy bars.
- Unbelievably Delicious: The texture is spot-on—crispy on the outside, chewy on the inside. It’s comfort food that feels festive and special.
What makes this recipe different from the rest is the focus on structure and flavor balance. Too many recipes use too much butter, making the treats greasy and heavy. This version uses just enough to bind the cereal without weighing it down. Plus, the ability to customize them into ghosts, pumpkins, or bats means you can adapt them to any theme. It’s not just another rice krispie treat; it’s your best, spookiest version yet.
This recipe isn’t just good—it is the kind that makes you smile when you see the kids’ faces light up. It’s comfort food reimagined for the holiday. Whether you are impressing neighbors or just treating yourself, these treats turn a simple snack into a memorable moment.
What Ingredients You Will Need
This recipe uses simple, wholesome ingredients to deliver bold flavor and satisfying texture without the fuss. The beauty of these treats lies in their simplicity, but choosing the right quality ingredients makes a huge difference in the final result. You want marshmallows that melt smoothly and cereal that stays crisp.
For the Base Treats
- Unsalted Butter: 3 tablespoons. I recommend using high-quality butter like Land O’Lakes for the best flavor. If you are watching sodium, unsalted is the way to go so you can control the saltiness yourself.
- Large Marshmallows: 10 ounces (one standard bag). Use the big, fluffy white ones. Avoid the toasted marshmallows or the mini ones for this base, as they melt differently and can make the texture gritty.
- Rice Cereal: 6 cups. I prefer Kellogg’s Rice Krispies for their classic crunch. Make sure the box is fresh; old cereal can go stale and lose its snap, which ruins the texture of the final treat.
- Vanilla Extract: 1 teaspoon. This adds a subtle depth of flavor that balances the sweetness. Pure vanilla is best, but imitation works in a pinch.
For the Spooky Decorations
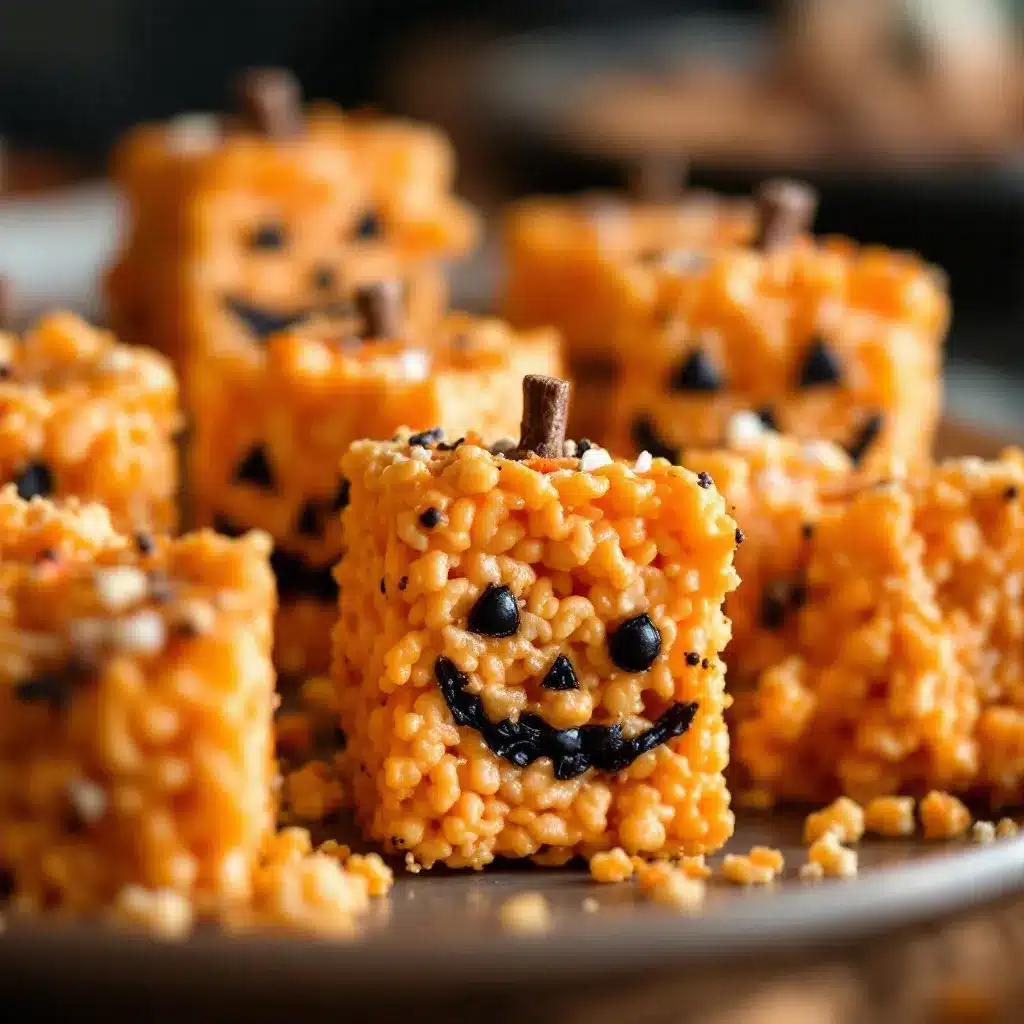
- White Candy Melts or White Chocolate: 1 cup. This is used for dipping to create ghosts or bats. Candy melts are easier for beginners because they don’t require tempering and set quickly. If you prefer a richer taste, use white chocolate chips, but be aware they stay softer.
- Black Candy Melts or Black Food Coloring: For creating spiderwebs or spooky details. Black candy melts make great spider legs. Gel food coloring is better than liquid for coloring the base mixture, as it won’t thin out the marshmallow.
- Mini Marshmallows: For eyes and mouths. These are perfect for creating expressions on your ghosts and pumpkins. Black mini marshmallows are great for eyes.
- Edible Markers or Gel Food Coloring: For drawing faces. Gel coloring is less likely to bleed into the marshmallow coating, keeping your designs sharp.
You can substitute the rice cereal with corn puff cereal if you want a different texture, though it will be puffier. For a gluten-free option, use certified gluten-free rice cereal and marshmallows. I always keep a bag of gluten-free cereal on hand for friends with allergies, and this recipe works just as well for them.
Equipment Needed
You don’t need a lot of fancy gear to make these treats, which is part of why they are so popular. A large, heavy-bottomed saucepan is essential. I use a 4-quart pot because it gives the marshmallows room to bubble without overflowing. A non-stick pan is helpful, but a well-seasoned stainless steel pot works too if you are careful. You will need a wooden spoon or a heat-resistant spatula for stirring. I prefer a silicone spatula because it scrapes the sides of the pan better, ensuring all the butter and marshmallows are incorporated.
A 9×13 inch baking pan is the standard size for this recipe. Line it with parchment paper or lightly grease it with cooking spray. Parchment paper is my go-to because it prevents sticking and makes it easy to lift the block of treats out later for cutting. If you don’t have parchment, non-stick spray works fine, but you might need to add a tiny bit more butter to your pan.
For cutting, a sharp chef’s knife or a pizza cutter is best. I find a pizza cutter makes clean cuts through the sticky cereal without pulling it apart. If you are dipping treats in chocolate, you will need a fork or dipping tools. A pair of chopsticks can also work well for dipping small shapes. Keep a sheet of wax paper nearby to place your dipped treats on while they set. These are budget-friendly tools, and you probably already have most of them in your kitchen.
Preparation Method
Start by preparing your baking pan. Line a 9×13 inch pan with parchment paper, leaving an overhang on the sides. This makes it easy to lift the treats out later. Lightly spray the parchment with non-stick cooking spray to prevent sticking. This step takes about 2 minutes.
Melt the butter in a large saucepan over low heat. Do not rush this step. High heat will burn the butter and give the treats a bitter taste. Once the butter is fully melted, add the marshmallows. Stir constantly with a silicone spatula. This takes about 3-5 minutes. The marshmallows should melt until they are smooth and glossy. If you see any unmelted bits, keep stirring gently. Do not let the mixture boil.
Remove the pan from the heat immediately once the marshmallows are melted. Stir in the vanilla extract. If you are adding gel food coloring for orange or green treats, add it now and mix until the color is uniform. Be careful not to overmix, or the treats can become dense.
Add the rice cereal to the marshmallow mixture. Use a spatula to fold the cereal in gently. You want to coat every piece of cereal evenly. This should take about 1-2 minutes. If you stir too vigorously, you might break the cereal and make the treats crumbly. Stop as soon as the last bit of dry cereal is covered.
Transfer the mixture to the prepared pan. Wet your hands with water or spray them with cooking spray to prevent sticking. Press the mixture into the pan firmly and evenly. Use the bottom of a measuring cup or your hands to flatten the top. Do not press too hard, or the treats will be dense. This step takes about 5 minutes.
Let the treats cool completely at room temperature. This takes about 30-60 minutes. Do not refrigerate them, as this can make the marshmallows too hard. Once cooled, you can lift the block out of the pan using the parchment overhang.
Now for the fun part: decorating. Cut the block into squares or use cookie cutters to make shapes. For ghosts, dip half of a square treat in white candy melts and add a mini marshmallow for a head. For bats, cut triangles and dip them in black candy melts. Use a toothpick to add details. This decorating phase can take 15-30 minutes depending on how elaborate you want to be.
Cooking Tips & Techniques
One of the biggest mistakes people make is using high heat. I learned this the hard way after burning my first batch. Always keep the heat on low. Marshmallows burn easily, and once they start to brown, they taste bitter. Low and slow is the only way to get that smooth, creamy texture.
Another tip is to have all your ingredients ready before you start melting the marshmallows. Once the marshmallows are melted, you need to add the cereal quickly before the mixture starts to set. This is called “mise en place,” and it saves you from panic. Measure out your cereal and line your pan beforehand.
If you are having trouble getting clean cuts, use a sharp knife and wipe it between cuts with a damp paper towel. This removes the sticky residue and ensures each piece looks neat. A pizza cutter works great for this too. Just roll it through the treats with a gentle sawing motion.
For dipping treats in candy melts, keep the melts warm but not hot. If they are too thick, add a tiny bit of vegetable oil to thin them out. This helps the coating spread evenly. If the coating is too thin, it will run off the treats. Test the consistency on a piece of wax paper first.
Don’t skip the step of wetting your hands before pressing the mixture into the pan. Marshmallows are incredibly sticky, and dry hands will just make a mess. Wet hands allow you to press firmly without the mixture sticking to your skin. This small trick makes the process much faster and cleaner.
Variations & Adaptations
While the classic white treat is delicious, there are many ways to customize these treats for Halloween. One of my favorite variations is adding orange food coloring to the marshmallow mixture for a subtle pumpkin flavor. It looks festive and tastes great. You can also add a pinch of pumpkin pie spice to the butter before melting it for an extra aroma.
For a chocolate lover, you can dip the treats in dark or milk chocolate instead of white chocolate. This creates a nice contrast with the white marshmallow inside. You can also drizzle caramel or chocolate sauce over the top for a decadent twist. If you want to add crunch, mix in some crushed pretzels or peanut butter cups before pressing the mixture into the pan.
For a healthier option, you can use gluten-free cereal and dairy-free butter and marshmallows. There are many brands that make vegan marshmallows now, and they work just as well in this recipe. You can also reduce the amount of butter by a tablespoon if you prefer a lighter treat, though it might be slightly less chewy.
Seasonal variations include adding crushed candy corn to the mixture for a burst of color and flavor. It looks like little pieces of pumpkin and tastes like autumn. Another idea is to mix in some crushed red velvet cake mix for a pink hue and a hint of cream cheese flavor. The possibilities are endless, so don’t be afraid to experiment.
Serving & Storage Suggestions
These treats are best served at room temperature. Cold treats can be too hard, and warm treats might be too sticky. Arrange them on a platter with other Halloween snacks like easy no-bake spider web brownies or sweet and salty fall harvest chex mix for a spooky spread. They pair well with hot chocolate or apple cider.
To store leftovers, place them in an airtight container at room temperature. They will stay fresh for up to 5 days. Do not refrigerate them, as the cold will make the marshmallows hard and chewy in an unpleasant way. If you need to store them longer, you can freeze them. Place them in a single layer on a baking sheet and freeze until solid, then transfer to a freezer bag. They will last for up to 2 months. Thaw at room temperature before serving.
If you are dipping treats in chocolate, let them set completely before storing. This prevents the chocolate from sticking together. You can stack them in layers separated by parchment paper. The flavors develop over time, so they might taste even better the next day as the marshmallows settle.
Nutritional Information & Benefits
These treats are a fun, indulgent snack, but they are not particularly nutritious. Each serving contains about 150-200 calories, depending on the size and toppings. They are high in sugar and carbohydrates, so enjoy them in moderation. The rice cereal provides some energy, but it lacks fiber and protein unless you add mix-ins like nuts or seeds.
For those with dietary restrictions, this recipe can be adapted. Use gluten-free cereal and marshmallows for a gluten-free option. Use vegan butter and marshmallows for a dairy-free version. Be sure to check labels for allergens, especially if you are using candy melts, which may contain nuts or soy.
While they are not a health food, these treats can be a fun way to involve kids in cooking. Let them help with mixing and decorating, which can make them more willing to try new foods. It’s a small step toward building positive relationships with food, even if it is just sugar and cereal.
Conclusion
Making fun Halloween rice krispie treats is a simple way to add some spooky joy to your holiday. With just a few basic ingredients and a little creativity, you can create treats that are both delicious and visually stunning. These recipes are perfect for kids and adults alike, offering a nostalgic taste with a modern twist.
I encourage you to try these variations and make them your own. Add your favorite candies, change the colors, or create your own spooky shapes. The best part is that there are no rules—you can make them as fancy or as simple as you like. These treats are a great way to get into the Halloween spirit without spending hours in the kitchen.
I hope you enjoy making these treats as much as I do. They are a staple in my house every October, and I know they will become one in yours too. If you try this recipe, I would love to hear about it. Leave a comment below with your favorite decoration ideas or share your photos on social media. Let’s make this Halloween the spookiest and sweetest one yet. Happy cooking!
Frequently Asked Questions
Can I use mini marshmallows instead of large ones?
Yes, you can use mini marshmallows, but they take longer to melt and may result in a slightly different texture. You might need to add a bit more butter to help them melt evenly. Large marshmallows are preferred for their creamy texture and ease of melting.
Why are my rice krispie treats hard?
If your treats are hard, it is likely because you pressed them too firmly into the pan or used high heat when melting the marshmallows. Pressing too hard compacts the cereal, making the treats dense. Always press gently and evenly, and keep the heat low to maintain a chewy texture.
How do I prevent the candy melts from cracking?
Candy melts can crack if they are too thick or if the treats are too cold. Warm the treats slightly before dipping, and thin the candy melts with a little vegetable oil if needed. Dip quickly and let them set at room temperature to avoid cracking.
Can I make these treats ahead of time?
Yes, you can make the base treats up to 3 days in advance. Store them in an airtight container at room temperature. Decorate them the day you plan to serve them to keep the decorations fresh and crisp.
Are these treats gluten-free?
Traditional Rice Krispies contain malt flavoring derived from barley, so they are not gluten-free. However, you can use certified gluten-free rice cereal to make this recipe safe for those with celiac disease or gluten sensitivity. Always check the labels of all ingredients.
Pin This Recipe!
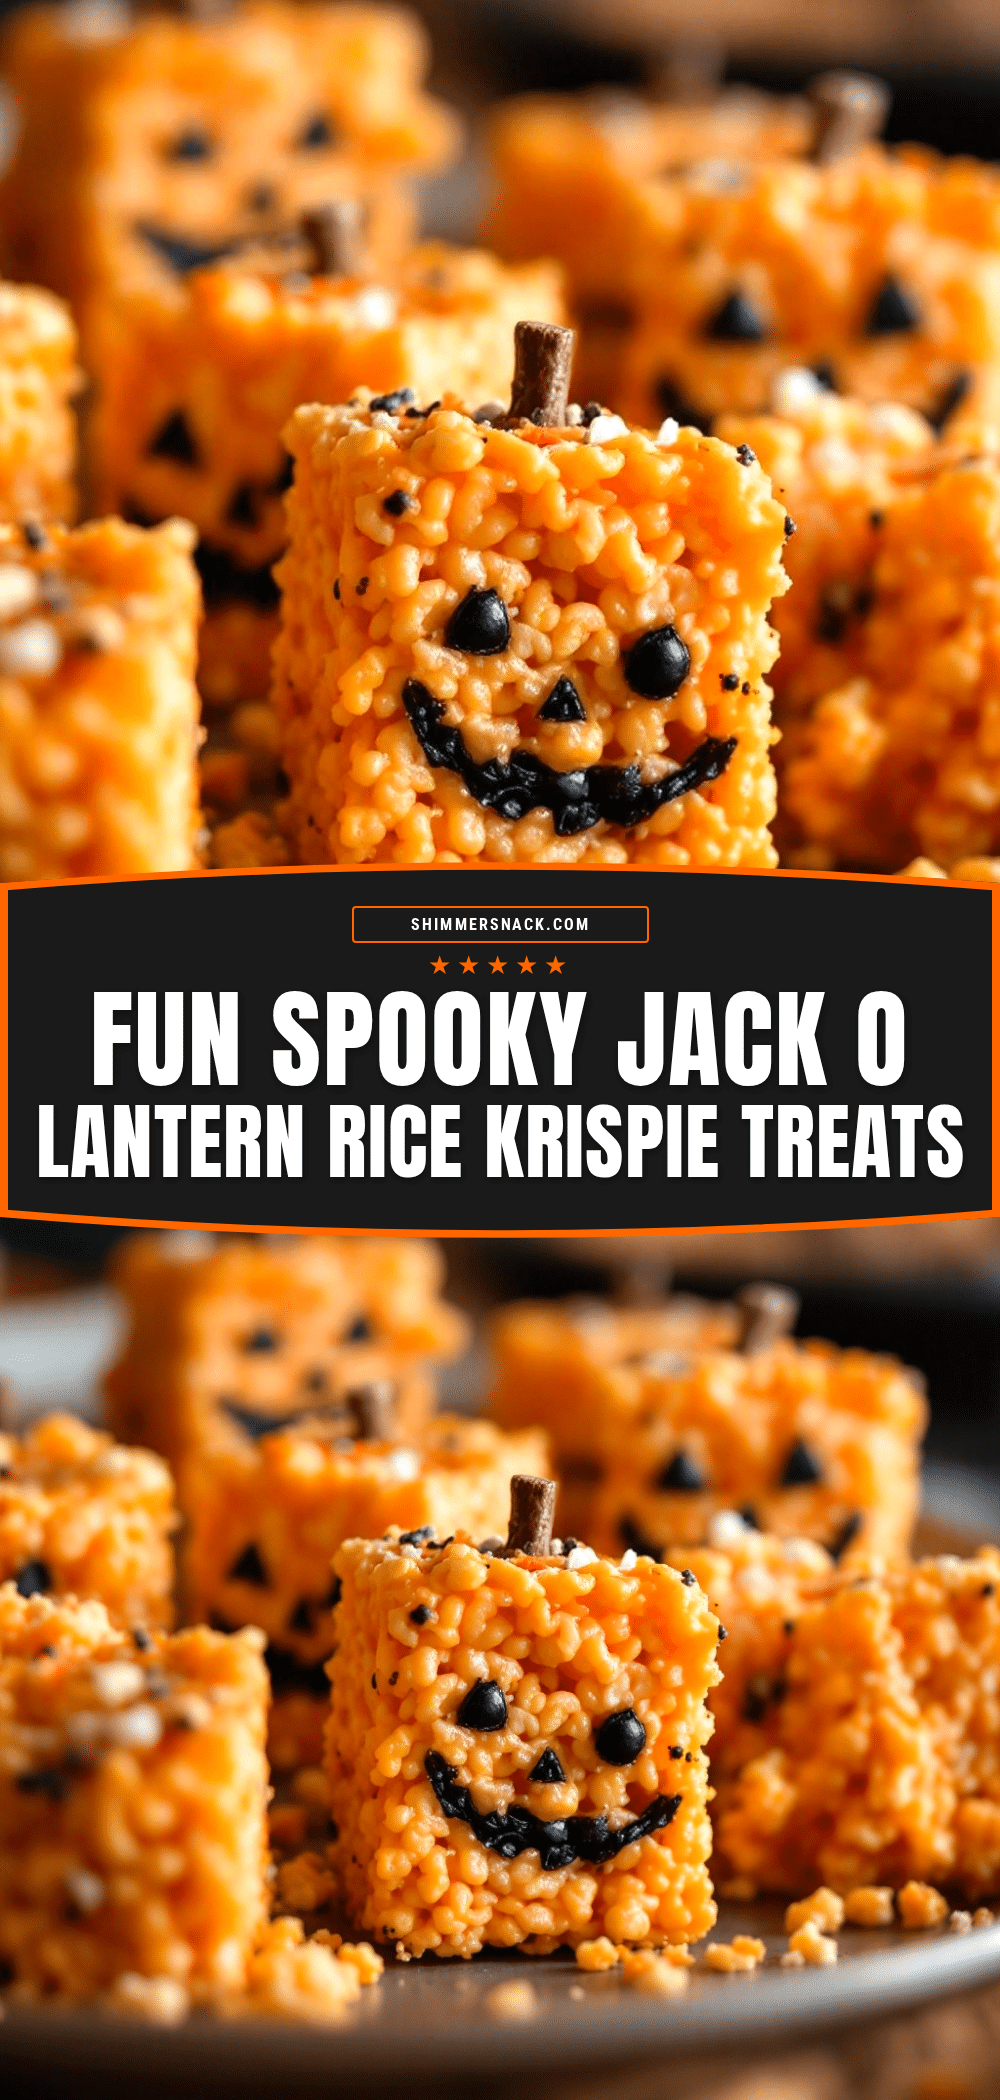
Fun Halloween Rice Krispie Treats: 5 Easy Spooky Ideas

Create easy, spooky Halloween treats with this simple base recipe for soft, chewy Rice Krispie treats. Customize them into ghosts, pumpkins, or bats with candy melts and decorations for a festive, crowd-pleasing snack.
- Prep Time: 10 minutes
- Cook Time: 10 minutes
- Total Time: 45 minutes
- Yield: 16 servings 1x
- Category: Dessert
- Cuisine: American
Ingredients
- 3 tablespoons unsalted butter
- 10 ounces large marshmallows (one standard bag)
- 6 cups Rice Krispies cereal
- 1 teaspoon vanilla extract
- 1 cup white candy melts or white chocolate (for dipping)
- Black candy melts or black gel food coloring (for details)
- Mini marshmallows (for eyes and mouths)
- Edible markers or gel food coloring (for drawing faces)
Instructions
- Line a 9×13 inch baking pan with parchment paper, leaving an overhang on the sides, and lightly spray with non-stick cooking spray.
- Melt the butter in a large saucepan over low heat.
- Add the marshmallows to the melted butter and stir constantly with a silicone spatula until smooth and glossy (about 3-5 minutes). Do not let the mixture boil.
- Remove the pan from the heat and stir in the vanilla extract. Add gel food coloring if desired.
- Add the rice cereal to the marshmallow mixture and fold gently until every piece is evenly coated.
- Transfer the mixture to the prepared pan. Wet your hands with water or spray with cooking spray, then press the mixture firmly and evenly into the pan.
- Let the treats cool completely at room temperature for 30-60 minutes.
- Lift the block out of the pan and cut into squares or shapes using a pizza cutter or sharp knife.
- Decorate by dipping treats in melted candy melts and adding mini marshmallows or edible markers for spooky designs.
Notes
Always keep heat on low to prevent burning marshmallows. Wet your hands before pressing the mixture to prevent sticking. Do not refrigerate as it makes treats too hard. For gluten-free option, use certified gluten-free rice cereal and marshmallows.
Nutrition
- Serving Size: 1 square or shaped p
- Calories: 175
- Sugar: 22
- Sodium: 90
- Fat: 6
- Saturated Fat: 3.5
- Carbohydrates: 28
- Protein: 2
Keywords: Halloween treats, Rice Krispie treats, no bake dessert, spooky snacks, kids cooking, easy Halloween recipes, candy melts decorations


