Love this? Save it for later!
Share the inspiration with your friends
The gravel crunch is what made me build this dessert around — everything else is secondary. You know that specific sound? It’s not the soft squish of pudding or the smooth glide of mousse. It’s the sharp, dry crack of crushed Oreos hitting the back of a spoon. I was standing in my kitchen last October, staring at a pile of chocolate cake crumbs, and I realized I didn’t want something that melted on your tongue. I wanted something that felt like dirt.
Not actual dirt. Please don’t try that. But the illusion of it. The dark, rich, crumbly texture that mimics a freshly dug grave in a spooky movie. That’s the obsession. When I make Spooky Graveyard Dirt Cups with Oreo Crumbs, I’m not thinking about the flavor profile first. I’m thinking about the tactile experience. The way the crumbs stick to your fingers. The contrast between the silky cream cheese layer and the jagged edges of the cookie pieces.
Let’s face it, Halloween desserts often go too far. They’re covered in fondant skeletons or neon green frosting that tastes like sugar and regret. This is different. It’s simple. It’s textural. It’s the kind of treat that makes kids scream in delight when they dig their spoons into the “soil.” I’ve tested this a hundred times. Sometimes I use cake crumbs, sometimes I use graham crackers. But the Oreos? They’re non-negotiable. The black color provides that perfect shadowy depth.
I remember making these for my nephew’s party. He didn’t even eat them right away. He just poked at the dirt, made little tombstones out of wafers, and played with the texture for ten minutes. That’s when I knew it was right. It’s not just food; it’s a sensory prop. And honestly, that’s what makes it memorable. You don’t just taste it. You feel it.
Why You’ll Love This Recipe
There is a specific kind of magic in a dessert that looks like it belongs in a graveyard but tastes like a celebration. This recipe isn’t just a snack; it’s a small victory in the kitchen. I’ve spent years tweaking no-bake desserts, trying to find that sweet spot between “easy weeknight treat” and “impressive party centerpiece.” This one hits the mark every single time. It’s the kind of recipe that takes the pressure off you, the host, while delivering a result that looks like you spent hours in a professional bakery.
Here is why this recipe has earned a permanent spot in my rotation:
- Quick & Easy: You can have these assembled in under 15 minutes. No baking required. No oven preheating. Just crush, mix, and layer. It’s perfect for those last-minute Halloween prep days when you’re already juggling costumes and decorations.
- Simple Ingredients: You likely have everything in your pantry right now. Oreos, cream cheese, powdered sugar, vanilla, and milk. No exotic spices or hard-to-find garnishes. It’s accessible comfort food.
- Perfect for Parties: These cups are portable. They don’t melt as quickly as ice cream, and they don’t require plates. They are ideal for classroom parties, haunted house events, or a cozy movie night.
- Crowd-Pleaser: Kids love the “gross” factor of eating dirt. Adults love the classic Oreo flavor. It bridges the gap between spooky and sweet without alienating anyone.
- Unbelievably Delicious: The texture contrast is next-level. The creamy, tangy cheesecake layer balances the sweet, crunchy cookie layer perfectly. It’s comfort food reimagined for the spookiest season.
What makes this different from the other dirt cups online? It’s the ratio. Too many recipes make the pudding layer too thick, turning it into a cake. Here, the focus is on the “dirt” aspect. The crumbs are coarse, not fine dust. The cream layer is light and airy. It’s designed to be dug into. It’s the kind of dessert that makes you close your eyes after the first bite because the texture is just that satisfying. It’s simple, but it’s done right.
What Ingredients You Will Need
This recipe relies on the principle of contrast. You need ingredients that are distinct in texture and flavor so that the final product feels complex, even though it’s incredibly simple. We aren’t looking for subtle notes here; we want bold, recognizable flavors that scream “Halloween.” The ingredients are pantry staples, which is half the battle won before you even start mixing.
For the “Dirt” Layer
- Oreo Cookies (15-20 cookies): These are the stars of the show. I recommend using the classic original Oreos. The black cookie provides the dark, earthy color. If you use Double Stuf, you’ll need fewer cookies because the filling adds bulk. For the best texture, pulse them in a food processor until they resemble coarse gravel, not fine powder.
- Melted Butter (2-3 tablespoons): This binds the crumbs together slightly so they don’t just slide to the bottom of the cup. It adds a richness that dry crumbs lack. Use unsalted butter so you can control the saltiness.
For the “Graveyard” Cream Layer
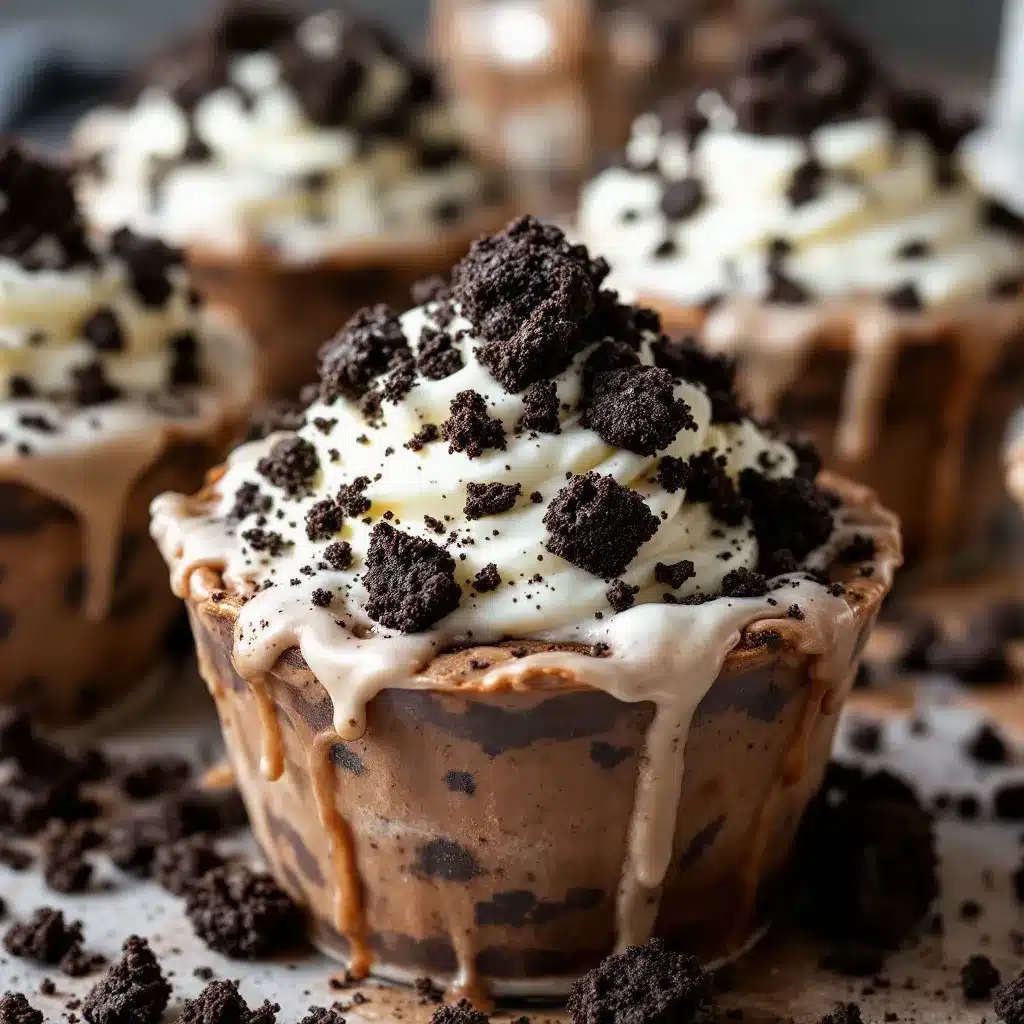
- Cream Cheese (8 oz block): Do not use the tub spreadable kind. It has too much water content and will make your filling runny. Use a full-fat brick cream cheese, softened to room temperature. Brands like Philadelphia are reliable for their consistent texture.
- Heavy Whipping Cream (1 cup): This lightens the cream cheese and gives it that airy, mousse-like quality. It needs to be cold when you start whipping.
- Powdered Sugar (½ cup): Granulated sugar won’t dissolve in the cold cream. Powdered sugar dissolves instantly, giving you a smooth finish. Sift it if it’s lumpy.
- Vanilla Extract (1 teaspoon): Pure vanilla adds depth. Avoid imitation vanilla if you can help it; it tastes chemical and clashes with the chocolate.
For the Decoration
- White Chocolate or Candy Melts: For the tombstones. White chocolate is easier to work with for beginners because it’s forgiving. Candy melts are stable but have a waxier mouthfeel.
- Gummy Worms: Essential for the “digging” aesthetic. Any brand works, but look for the long, squiggly ones for maximum visual impact.
- Whole Oreo Cookies: Used as the tombstones themselves. You can write on them with a black icing pen or just leave them plain for a stark look.
One quick tip: If you are allergic to dairy, you can swap the cream cheese for a vegan alternative like Kite Hill, and use coconut cream instead of heavy cream. The texture will be slightly denser, but the flavor profile remains intact.
Equipment Needed
You don’t need a fancy kitchen to make this. In fact, keeping it simple is part of the charm. Here is what you’ll actually use:
- Food Processor or Ziploc Bag: A food processor is fastest for crushing the Oreos. If you don’t have one, put the cookies in a heavy-duty Ziploc bag and crush them with a rolling pin or a heavy skillet. It’s a good workout.
- Mixing Bowls (2 medium): One for the cream cheese mixture, one for the whipped cream if you’re folding it separately (though you can do it all in one bowl).
- Electric Hand Mixer or Stand Mixer: Essential for getting the cream cheese smooth and the heavy cream to stiff peaks. Doing this by hand is possible but will take your arm off.
- Measuring Cups and Spoons: Standard baking tools. Precision matters less here than in bread, but having the right ratio of cream to cheese helps.
- Serving Cups: Clear plastic cups, mason jars, or even small glass bowls. Clear containers are best because they show off the layers. If you use opaque cups, you lose the visual appeal.
- Piping Bag (Optional): If you want the cream layer to look neat, use a piping bag with a large round tip. If you’re keeping it rustic and messy, just spoon it in.
Budget-friendly note: You don’t need a new mixer. A whisk and strong arms work in a pinch, but you’ll need to chill the bowl in the freezer for 15 minutes first to help the cream whip up. Also, save your plastic cups from yogurt or takeout; they work perfectly for this.
Preparation Method
- Crush the Cookies (5 minutes): Place 15-20 Oreos in a food processor. Pulse until you have coarse crumbs. You want chunks, not dust. If you’re using a bag, crush them until they look like gravel. Transfer to a bowl and stir in 2-3 tablespoons of melted butter. Set aside. This creates the “dirt.”
- Soften the Cream Cheese (10 minutes): Take your 8 oz block of cream cheese out of the fridge. Cut it into cubes. Let it sit on the counter while you prep other things. If it’s cold, it will have lumps, and no amount of mixing will fully fix that without overmixing the rest.
- Make the Cheesecake Filling (5 minutes): In a large bowl, beat the softened cream cheese and ½ cup powdered sugar on medium-high speed until smooth and creamy. This should take about 2-3 minutes. Scrape down the sides of the bowl with a spatula. Add 1 teaspoon of vanilla extract and mix again.
- Whip the Cream (3 minutes): In a separate cold bowl, pour the 1 cup of heavy whipping cream. Whip on high speed until stiff peaks form. This means when you lift the beater, the cream stands up straight. Be careful not to over-whip, or it will turn into butter.
- Fold the Mixtures Together (2 minutes): Gently fold the whipped cream into the cream cheese mixture. Use a spatula and cut through the middle, then sweep around the edge. Do this until just combined. You want it airy and light, not dense. Over-mixing here will deflate the cream.
- Assemble the Cups (5 minutes): Take your serving cups. Spoon a layer of the cream mixture into the bottom (about 2 tablespoons). Then, add a generous layer of the Oreo “dirt” crumbs (about 2-3 tablespoons). Repeat: cream, then dirt. Finish with a top layer of dirt. This creates the layered look.
- Prepare the Tombstones (10 minutes prep + cooling): While the cups are assembling, melt your white chocolate or candy melts according to package instructions. Dip the flat side of whole Oreo cookies into the melt. Place them on a parchment-lined baking sheet. Let them harden in the fridge for 5-10 minutes. Alternatively, you can cut shapes out of white chocolate bars with a knife and press them into the dirt.
- Decorate (5 minutes): Once the dirt cups are assembled, stick the hardened Oreo tombstones into the dirt at an angle. Tuck gummy worms into the dirt around the tombstones. Push them in so they look like they are wriggling out of the grave.
Pro tip: If the cream filling gets too soft while you’re assembling, put the cups in the fridge for 15 minutes before adding the top layer of dirt. This helps them set and hold their shape.
Cooking Tips & Techniques
The biggest mistake people make with dirt cups is making the crumbs too fine. I learned this the hard way during a Halloween party in 2018. I processed the Oreos into a fine powder, and the result was more like chocolate sand than dirt. It felt dry and chalky. The key is texture. You want distinct, crunchy pieces. If you don’t have a food processor, don’t be afraid to use your hands to break up the crumbs after crushing them in a bag.
Another common issue is a runny filling. This usually happens if the cream cheese isn’t soft enough, or if the heavy cream isn’t whipped to stiff peaks. If your filling looks curdled, it’s likely because the cream cheese and cream were at different temperatures. Let everything come to room temperature before mixing, except the heavy cream, which should stay cold until the moment you whip it.
When folding the whipped cream into the cream cheese, go slow. You are trying to preserve the air bubbles you just whipped into the cream. If you stir vigorously, you’ll lose that light, mousse-like texture. Think of it like you’re handling a fragile eggshell. Gentle strokes from the bottom up.
Also, consider the saltiness. Oreos are sweet. Cream cheese is tangy. A tiny pinch of salt in the cream mixture can balance it out and make the chocolate flavor pop. I always add a small pinch of sea salt to my cheesecake fillings. It’s a game-changer.
Variations & Adaptations
While the classic Oreo dirt cup is a staple, you can twist this recipe to fit different themes or dietary needs.
- Green “Toxic” Waste: Swap the white chocolate for green candy melts. Add a drop of green food coloring to the cream cheese mixture. This looks like radioactive sludge and is a hit with kids who love gross-out themes.
- Strawberry Graveyard: Replace the heavy cream with strawberry yogurt or fold in some mashed strawberries. Use strawberry Oreos if you can find them. It’s a pinker, fruitier version that still has the crunch.
- Gluten-Free Option: Simply use gluten-free sandwich cookies. Brands like Simple Mills or Van’s Bakery make great Oreo-style cookies that crush well. The rest of the recipe remains the same.
- Chocolate Mud: Add a tablespoon of cocoa powder to the cream cheese mixture. This makes the filling darker, so the contrast with the Oreo crumbs is less stark, but the flavor is richer. It’s less “dirt” and more “mudslide.”
- Mini Version: Use shot glasses or mini mason jars for individual servings. These are perfect for high school parties or office desks. They look adorable and are easy to hand out.
My personal favorite variation is adding a layer of caramel sauce between the cream and the dirt. It adds a salty-sweet element that breaks up the monotony. Just drizzle a teaspoon on top of the cream layer before adding the crumbs.
Serving & Storage Suggestions
Serve these chilled. The cold temperature helps the cream cheese firm up, making the texture more substantial. They are best eaten within 2 hours of assembly, as the crumbs will start to absorb moisture from the cream and soften. If you want them to stay crunchy, add the top layer of crumbs right before serving.
For storage, keep them covered in the refrigerator for up to 2 days. The flavors will meld together, making the “dirt” taste more like a chocolate cake. If you need to make them ahead, assemble the cups without the top layer of crumbs. Store them in an airtight container. Just before serving, sprinkle the fresh crumbs on top.
These pair well with cold milk or hot coffee. The contrast of hot coffee and cold dessert is surprisingly good. For a party setting, place them on a tiered stand with other Halloween treats like Spooky Black Cat Oreo Cupcakes for a cohesive dessert table.
Nutritional Information & Benefits
While this is definitely a treat, it’s made with simple ingredients. Each cup contains approximately 350-400 calories, depending on the size of the cup and the amount of cream used. The cream cheese provides protein and calcium, while the Oreos offer quick energy from sugar and carbs.
For those watching their sugar intake, you can use a sugar-free cream cheese and sugar-free Oreos. The texture will be slightly different, but the overall experience remains. It’s a balanced indulgence—rich, satisfying, and perfect for a special occasion.
There are no major allergens other than dairy and gluten, which are easily substituted as noted above. It’s a versatile recipe that can be adapted to many dietary preferences.
Conclusion
Spooky Graveyard Dirt Cups are more than just a snack; they are a fun, interactive dessert that brings joy to Halloween. The combination of creamy cheesecake and crunchy Oreo dirt is timeless. It’s easy to make, impressive to look at, and delicious to eat. I love this recipe because it requires minimal effort but delivers maximum fun. It’s the kind of dessert that starts conversations and gets kids excited about eating.
I encourage you to try this recipe and make it your own. Add your own tombstone designs, try different candy decorations, or experiment with flavors. Share your creations with friends and family. And if you make them, please leave a comment below with how they turned out. I love hearing about your Halloween baking adventures.
Happy Halloween, and may your desserts be as spooky as they are sweet!
FAQs
Can I make these ahead of time?
Yes, you can assemble the cups up to 24 hours in advance. However, for the best texture, add the top layer of Oreo crumbs just before serving to keep them crunchy. Store them covered in the fridge.
What can I use instead of Oreos?
You can use any dark chocolate sandwich cookies, like chocolate wafer cookies or chocolate graham crackers. The flavor will be slightly different, but the texture will work.
How do I make the tombstones?
Use whole Oreo cookies. Dip the bottom half in melted white chocolate or candy melts. Let them harden on parchment paper. You can write “RIP” on them with a black icing pen or leave them plain.
Can I use whipped topping instead of heavy cream?
You can use a tub of whipped topping (like Cool Whip), but the texture will be sweeter and less airy. It’s a convenient shortcut, but homemade whipped cream tastes better.
Why is my filling runny?
This usually happens if the cream cheese wasn’t softened enough or if the heavy cream wasn’t whipped to stiff peaks. Make sure your cream cheese is room temperature and your cream is very cold when whipping.
Pin This Recipe!
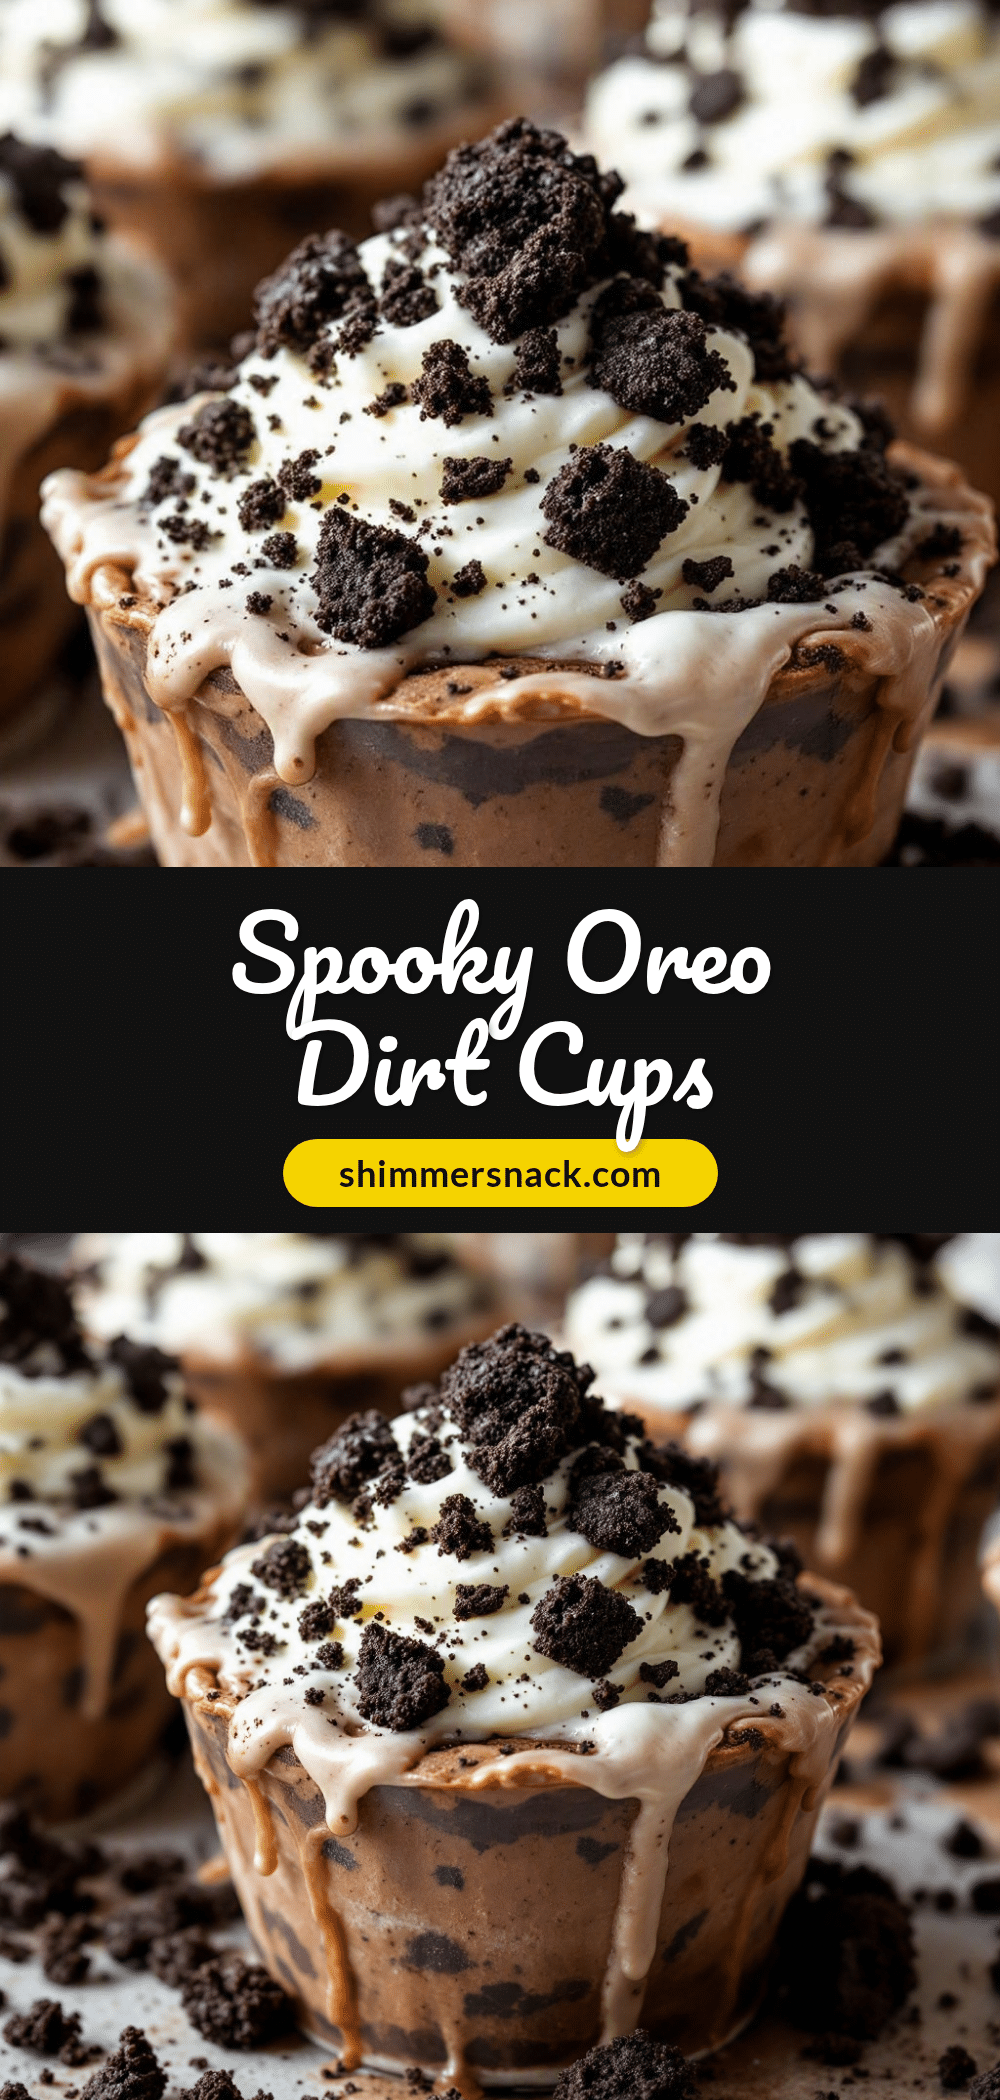
Spooky Graveyard Dirt Cups: 5-Min Easy Halloween Treat

A no-bake Halloween dessert featuring layers of creamy cheesecake filling and crunchy Oreo ‘dirt’ crumbs, decorated with chocolate tombstones and gummy worms for a spooky, textural treat.
- Prep Time: 15 minutes
- Cook Time: 0 minutes
- Total Time: 15 minutes
- Yield: 4 servings 1x
- Category: Dessert
- Cuisine: American
Ingredients
- 15–20 Oreo Cookies (classic original)
- 2–3 tablespoons unsalted butter, melted
- 8 oz block cream cheese (full-fat, softened to room temperature)
- 1 cup heavy whipping cream (cold)
- ½ cup powdered sugar
- 1 teaspoon vanilla extract
- White chocolate or candy melts (for tombstones)
- Whole Oreo Cookies (for tombstones)
- Gummy worms (for decoration)
Instructions
- Crush 15-20 Oreos in a food processor or bag until they resemble coarse gravel, not fine powder.
- Transfer crumbs to a bowl and stir in 2-3 tablespoons of melted butter. Set aside to create the ‘dirt’.
- Cut the softened cream cheese into cubes and let it sit on the counter for 10 minutes to ensure it is fully soft.
- In a large bowl, beat the softened cream cheese and ½ cup powdered sugar on medium-high speed until smooth and creamy (2-3 minutes).
- Add 1 teaspoon of vanilla extract to the cream cheese mixture and mix again.
- In a separate cold bowl, whip the 1 cup of heavy whipping cream on high speed until stiff peaks form.
- Gently fold the whipped cream into the cream cheese mixture using a spatula until just combined and airy.
- Assemble the cups by spooning a layer of cream mixture (about 2 tablespoons) into the bottom of serving cups, followed by a generous layer of Oreo ‘dirt’ crumbs (2-3 tablespoons).
- Repeat the layers (cream, then dirt) and finish with a top layer of dirt.
- Melt white chocolate or candy melts according to package instructions.
- Dip the flat side of whole Oreo cookies into the melted chocolate and place on parchment paper to harden in the fridge for 5-10 minutes.
- Stick the hardened Oreo tombstones into the dirt at an angle and tuck gummy worms into the dirt around them.
Notes
For best texture, ensure the Oreo crumbs are coarse, not fine dust. If the cream filling gets too soft while assembling, chill the cups for 15 minutes before adding the top layer of dirt. For a gluten-free option, use gluten-free sandwich cookies. For a dairy-free option, swap cream cheese for vegan alternatives and heavy cream for coconut cream.
Nutrition
- Serving Size: 1 cup
- Calories: 375
- Sugar: 24
- Sodium: 250
- Fat: 28
- Saturated Fat: 16
- Carbohydrates: 32
- Fiber: 2
- Protein: 5
Keywords: Halloween dessert, dirt cups, Oreo dessert, no-bake treat, easy Halloween recipe, graveyard dessert, kids party food


