Love this? Save it for later!
Share the inspiration with your friends
My niece, Lily, did not trust black food coloring in baked goods. Honestly, I didn’t either. The last time I tried to make something “spooky” for her Halloween party, I ended up with a batch of greyish-green cupcakes that looked more like swamp creatures than festive treats. They tasted fine, sure, but the color was a disaster—muddy and unappetizing. So when she asked me to bring dessert for her school Halloween bash this year, I felt that familiar knot of dread. I wanted something that looked genuinely cool, not like a science experiment gone wrong. I wanted black cat cupcakes that actually looked like black cats, you know? Not sad, smudged blobs.
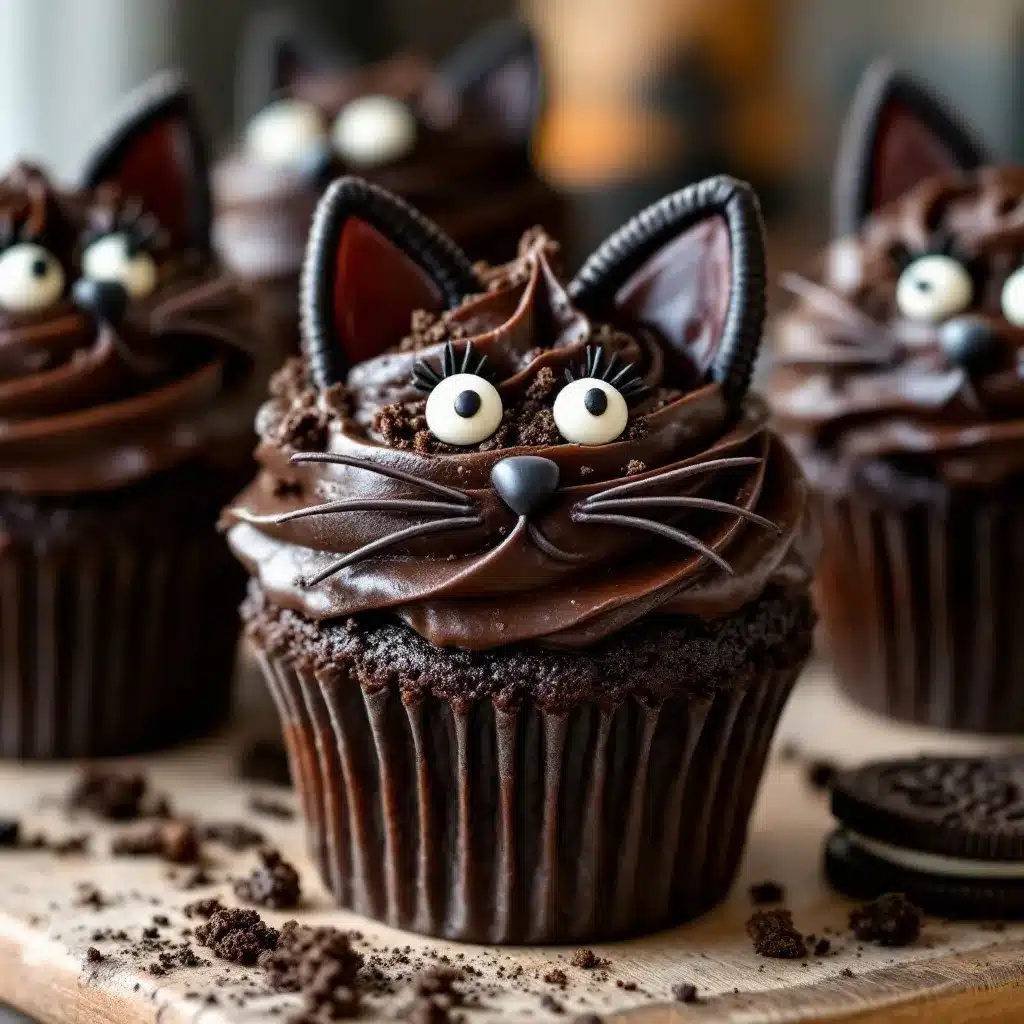
Then it hit me—what if I skipped the liquid food coloring altogether and used something with a naturally dark, rich color? Oreos. Specifically, the black cocoa cookies ground into a fine dust. It was a gamble (I mean, black cocoa is a whole different beast), but the first batch came out of the oven looking like perfect little midnight clouds. The crumb was this deep, dark charcoal color, and the flavor? It was like the most intense, grown-up chocolate you could imagine. I topped them with a swoop of glossy black buttercream, two little Oreo “ears,” and a pair of candy eyes. Lily took one bite and said, “Auntie, these are actually spooky.” And that, my friends, is the highest compliment a Halloween cupcake can get. These Spooky Black Cat Oreo Cupcakes are proof that sometimes the best ideas come from a total failure.
Why You’ll Love This Recipe
Let me tell you, I tested these cupcakes six times. The first batch was too dry. The second was too sweet. The third looked like a cat that had been through a windstorm. But by the end, I had a recipe that I am genuinely proud to share. Here is why these are the ones you need for your Halloween spread:
- Naturally Dark Color: You don’t need a single drop of artificial black food coloring. The magic comes from black cocoa powder and finely crushed Oreo cookies. The color is deep, moody, and perfectly spooky.
- Rich, Not Cloying: Black cocoa has this incredible, almost Oreo-like flavor that is less sweet than regular cocoa. It gives the cake a sophisticated, dark chocolate taste that kids and adults both love.
- Surprisingly Easy: While they look like they took hours of fussy decorating, these come together with a simple buttercream and a few clever tricks. No piping bags required if you don’t want them.
- Perfect for Halloween Parties: Whether it is a classroom party, a spooky movie night, or a family get-together, these little black cats are total showstoppers. They get “oohs” and “ahhs” every time.
- Kid-Approved & Mom-Friendly: My sister, who is usually a strict “no artificial dyes” mom, gave these a huge thumbs up. The kids just see a cool cat. The parents see a clever, delicious treat.
These are not just another Halloween cupcake. They are the cupcake that makes you look like a baking genius without the stress. The texture is perfectly moist, the frosting is silky smooth, and the little cat faces are genuinely fun to create. It is the kind of recipe that makes you feel like you’ve cracked the code to holiday baking.
What Ingredients You Will Need
This recipe uses simple, clever ingredients to build that deep, spooky color and rich flavor. You likely have most of these in your pantry already, which is half the battle won.
For the Black Cat Cupcakes
- All-purpose flour (1 ½ cups / 180g): The structure of our cake. Spoon and level it for the best results—don’t scoop directly from the bag.
- Black cocoa powder (½ cup / 50g): This is the secret weapon. It is Dutch-processed cocoa that has been heavily alkalized, giving it a jet-black color and a smooth, almost Oreo-like flavor. I prefer the brand King Arthur Flour or Rodelle for the best color.
- Granulated sugar (1 cup / 200g): For sweetness and tenderness.
- Light brown sugar (¼ cup / 50g): Adds a touch of moisture and a hint of molasses that deepens the chocolate flavor.
- Baking soda (1 tsp) & Baking powder (½ tsp): The leavening agents that make the cupcakes rise beautifully.
- Salt (½ tsp): Balances the sweetness and enhances the chocolate.
- Large eggs (2, room temperature): Bind the batter and add richness. Let them sit out for 30 minutes before starting.
- Whole milk (1 cup / 240ml, room temperature): Adds moisture and helps the cake rise. You can use buttermilk for an even more tender crumb.
- Vegetable oil (½ cup / 120ml): Keeps the cupcakes incredibly moist for days. I use a neutral oil like canola or grapeseed.
- Vanilla extract (2 tsp): Rounds out the flavor profile.
- Hot coffee or hot water (½ cup / 120ml): Do not skip this. Hot liquid blooms the cocoa powder, intensifying the color and flavor. Coffee makes the chocolate taste richer without making the cupcakes taste like coffee.
- Oreo cookies (6, finely crushed): These get mixed into the batter for extra texture and color. You want them crushed into a fine crumb, not chunks.
For the Black Buttercream Frosting
- Unsalted butter (1 cup / 2 sticks, softened): The base of our frosting. Make sure it is truly soft, almost like mayonnaise, for a smooth, non-grainy frosting.
- Powdered sugar (3 ½ cups / 420g): Sifted to avoid lumps.
- Black cocoa powder (¼ cup / 25g): This gives the frosting its deep, dark color and incredible flavor.
- Vanilla extract (1 tsp): For flavor.
- Heavy cream or whole milk (3-4 tbsp): To adjust the consistency. Start with 3 and add more if needed.
- Pinch of salt: To cut the sweetness.
For the Decoration
- Oreo cookies (12 whole): For the “ears.” You will twist them apart and use the half with the cream filling facing down.
- Candy eyes (24 small): The classic spooky touch. You can find these at any craft store or online.
- Black sprinkles or edible glitter (optional): For a little extra “spook factor.”
Equipment Needed
You don’t need a professional bakery setup for these, but a few specific tools make the process much smoother. Here is what you will need:
- Standard 12-cup muffin tin: This recipe makes exactly 12 perfectly domed cupcakes.
- Paper cupcake liners: Use a dark-colored or black liner if you can find them (it really makes the cat faces pop). Otherwise, a standard white liner works great.
- Electric hand mixer or stand mixer: For creaming the butter and sugar for the frosting. You can do it by hand, but your arm will get a workout.
- Large mixing bowls: One for wet ingredients, one for dry.
- Whisk and rubber spatula: For mixing and scraping down the sides.
- Piping bag with a large round or star tip (optional): I actually prefer using a zip-top bag with the corner snipped off for the frosting. It gives a more rustic, “fur-like” texture. But a piping bag is easier to control.
- Food processor or zip-top bag and rolling pin: To crush the Oreos into a fine dust for the batter. A food processor is much faster and gives a finer crumb.
- Cooling rack: Essential for letting the cupcakes cool completely before frosting.
Preparation Method
Alright, let’s get baking! I am going to walk you through every step so you get perfect, spooky black cat cupcakes. Take your time, and don’t rush the cooling steps—it makes all the difference.
- Preheat and Prep: Preheat your oven to 350°F (175°C). Line your muffin tin with 12 cupcake liners. Set aside.
- Crush the Oreos: Place 6 Oreo cookies (cream and all) into a food processor. Pulse until you have a fine, sand-like powder. If you don’t have a food processor, put them in a zip-top bag and smash them with a rolling pin. You want them very fine, not chunky.
- Mix the Dry Ingredients: In a large bowl, whisk together the flour, black cocoa powder, granulated sugar, brown sugar, baking soda, baking powder, and salt. Make sure the cocoa powder is fully incorporated—sometimes it clumps. Whisk it well. Add the crushed Oreo powder and whisk again.
- Mix the Wet Ingredients: In a separate medium bowl, whisk together the eggs, milk, vegetable oil, and vanilla extract until smooth.
- Combine Wet and Dry: Pour the wet ingredients into the dry ingredients. Stir gently with a rubber spatula until just combined. Do not overmix! A few streaks of flour are okay at this point.
- Add the Hot Liquid: Pour in the hot coffee (or hot water). Stir slowly until the batter is smooth, thin, and glossy. It will look very liquidy—that is normal. The batter should be thinner than a typical cake batter. This is what creates that incredibly moist crumb.
- Fill the Liners: Use a cookie scoop or a measuring cup to fill each liner about ¾ full. This batter is thin, so it will spread. Don’t overfill or they will overflow.
- Bake: Bake for 18-22 minutes, or until a toothpick inserted into the center comes out clean or with a few moist crumbs. The tops should be springy to the touch. Let them cool in the pan for 5 minutes, then transfer them to a wire rack to cool completely. Do not frost them until they are 100% cool. Warm cupcakes will melt your beautiful black buttercream.
- Make the Frosting: While the cupcakes cool, make the frosting. In a large bowl, beat the softened butter with an electric mixer on medium speed until it is pale, fluffy, and smooth (about 2-3 minutes). Scrape down the sides. Add the sifted powdered sugar and black cocoa powder, one cup at a time, mixing on low speed to avoid a sugar cloud. Add the vanilla and a pinch of salt. Pour in 2 tablespoons of heavy cream. Increase the speed to medium-high and beat for 3-4 minutes until the frosting is light, airy, and spreadable. If it is too thick, add another tablespoon of cream. If it is too thin, add a little more powdered sugar.
- Assemble the Cat Faces: Once the cupcakes are cool, it is assembly time. Take the 12 whole Oreos and carefully twist them apart. You want the half with the cream filling. Set the plain cookie halves aside (you can snack on them!).
- Pipe the Frosting: Fill your piping bag (or zip-top bag) with the black buttercream. Starting from the outside edge, pipe a swirl of frosting onto each cupcake. You want a nice, tall swirl—this is the cat’s head.
- Add the Ears: Gently press two of the cream-filled Oreo halves, cream-side down, into the top of the frosting swirl, angled slightly outward like cat ears. They should stick right into the frosting.
- Add the Eyes: Press two candy eyes into the front of the frosting swirl, just below the ears. You can use a tiny dab of frosting as “glue” if the candy eyes don’t stick on their own.
- Finishing Touch: For a little extra magic, you can add a few black sprinkles or a dusting of edible glitter over the “fur.” It gives them a subtle, spooky shimmer.
Cooking Tips & Techniques
I have made my fair share of mistakes with black cocoa, so let me save you the trouble. Here are the things I learned the hard way.
The Coffee Trick is Real: I know it sounds strange, but using hot coffee instead of water in the batter is a game-changer. It doesn’t make the cupcakes taste like coffee. Instead, it deepens the chocolate flavor and helps the black cocoa “bloom,” resulting in a much darker, richer color. If you are serving this to kids who are sensitive to caffeine, you can use decaf coffee or just very hot water.
Don’t Overbake: Black cocoa can make baked goods dry out faster than regular cocoa because it is more absorbent. Start checking your cupcakes at the 18-minute mark. The toothpick test is your friend. A perfectly baked cupcake will have a moist, tender crumb. An overbaked one will be crumbly and dry.
The Butter Must Be Soft: For the frosting, this is non-negotiable. If your butter is cold, your frosting will be lumpy and look like cottage cheese. Leave the butter out on the counter for at least an hour before you start. You should be able to press a finger into it with almost no resistance.
Patience with the Frosting: When you first start beating the butter and sugar, it might look dry and crumbly. Do not panic. Keep beating it. As the butter warms up and the sugar incorporates, it will magically come together into a smooth, silky cloud. This takes a solid 3-4 minutes with an electric mixer.
Multi-Tasking Strategy: While the cupcakes are baking, you can make the frosting and twist apart the Oreos for the ears. This way, by the time the cupcakes are cool, you are ready to go. It makes the whole process feel much faster and less stressful.
Variations & Adaptations
One of the best things about this recipe is how flexible it is. You can switch things up based on what you have on hand or who you are serving.
- Gluten-Free Version: Swap the all-purpose flour for a 1:1 gluten-free baking blend (like Bob’s Red Mill or King Arthur). Make sure your Oreos are certified gluten-free (the original ones are not, but there are great GF dupes available). The texture will be slightly more delicate, but still delicious.
- Dairy-Free Version: Use a plant-based milk (like oat or almond milk) in the batter and a dairy-free butter substitute (like Miyoko’s or Earth Balance) for the frosting. The texture might be a tiny bit less tender, but the flavor will still be spot on.
- Spooky Spider Variation: Instead of making cat faces, you can pipe the frosting in a flat swirl and then use black licorice strings to create spider legs. Add a single candy eye in the center for a creepy spider effect. This is a fun alternative for a different kind of Halloween treat.
- Mint Chocolate Twist: Add ½ teaspoon of peppermint extract to the batter and the frosting along with the vanilla. The cool mint flavor pairs beautifully with the dark, rich black cocoa. It tastes just like a Thin Mint cookie.
- Pumpkin Spice Fusion: For a fall-inspired version, swap the hot coffee for pumpkin puree (about ½ cup). Reduce the milk to ¾ cup. Add 1 teaspoon of pumpkin pie spice to the dry ingredients. The orange and black color combo is perfect for a Halloween party.
Serving & Storage Suggestions
These cupcakes are best enjoyed at room temperature, but they are also incredibly forgiving. Here is how to serve and store them so they stay perfect.
Serving: I like to serve these on a black or dark grey platter to make the white candy eyes really pop. They are perfect for a Halloween party, a spooky movie night, or even a classroom celebration. Pair them with a glass of cold milk or a warm cup of Creamy Black Velvet Halloween Latte for the ultimate Halloween treat.
Storage: Store the unfrosted cupcakes in an airtight container at room temperature for up to 3 days. The frosted cupcakes should also be stored in an airtight container, but I recommend placing them in the refrigerator if you are not serving them within 24 hours. The buttercream will firm up in the fridge, which actually helps the candy eyes stay put.
Freezing: You can freeze the unfrosted cupcakes for up to 3 months. Wrap each one tightly in plastic wrap, then place them in a freezer-safe bag. To thaw, just leave them on the counter for a couple of hours. Do not freeze the frosted cupcakes—the frosting can get grainy when thawed.
Reheating: If you want that fresh-from-the-oven feel, you can pop an unfrosted cupcake in the microwave for 10-15 seconds. It will be warm and soft. Do not microwave the frosted ones—the frosting will melt.
Flavor Development: Here is a little secret: these cupcakes actually taste better the next day. The flavors meld together overnight, and the crumb becomes even more moist. So if you are making them for a party, bake them a day ahead. Just frost them the day of the party for the best visual effect.
Nutritional Information & Benefits
Let’s be real—these are a treat, not a health food. But that doesn’t mean we can’t be mindful of what’s in them. Here is the estimated nutritional breakdown for one cupcake (with frosting and decoration).
Estimated Nutritional Values (per cupcake):
- Calories: 420
- Fat: 22g
- Carbohydrates: 55g
- Protein: 5g
- Sugar: 38g
- Fiber: 2g
Health Benefits of Key Ingredients:
- Black Cocoa Powder: Like regular cocoa, black cocoa is rich in antioxidants called flavonoids, which can help reduce inflammation and support heart health. It is less processed than some other cocoas, so it retains more of these beneficial compounds.
- Oreo Cookies: Okay, not a health food, but the crushed Oreos add a little bit of fiber and iron from the wheat flour and cocoa. Plus, they make the texture amazing.
- Eggs & Milk: Provide a good dose of protein, calcium, and vitamin D, which are important for bone health and muscle function.
Dietary Considerations: This recipe contains gluten, dairy, and eggs. It is not suitable for vegans or those with celiac disease without the substitutions listed above. It is also high in sugar, so it’s best enjoyed as an occasional treat.
Personal Perspective: I always say that life is about balance. Enjoying a beautifully crafted, homemade treat like this one is part of a happy, healthy life. You know exactly what went into it—no artificial colors, no preservatives, just real ingredients that make you smile.
Conclusion
These Spooky Black Cat Oreo Cupcakes are more than just a Halloween dessert. They are a little piece of edible art that brings joy to everyone who sees them. They are the recipe that turned my biggest baking failure into one of my proudest creations. The deep, dark color, the rich, chocolatey flavor, and the adorable little cat faces make them a total crowd-pleaser.
I love that they are surprisingly easy to make, even though they look like they came from a fancy bakery. I love that they use real ingredients and no artificial dyes. And I love that they make people smile—from the kids at the party to the adults who sneak one after the kids go to bed.
So go ahead, give these a try. Customize them with your favorite variations. Make them with your kids. Bring them to your next Halloween party. And when you do, I want to hear all about it. Leave a comment below and tell me how they turned out, or share a photo on social media and tag me. I can’t wait to see your spooky creations!
Happy Halloween, and happy baking!
Frequently Asked Questions
Can I use regular cocoa powder instead of black cocoa powder?
You can, but the color will not be as dark. Regular cocoa powder will give you a dark brown cupcake, not a jet-black one. For the best spooky effect, I really recommend using black cocoa. You can find it at most grocery stores or online. If you absolutely must substitute, use a high-quality Dutch-process cocoa for the darkest possible color.
Why did my cupcakes turn out dry?
This is usually a sign of overbaking. Black cocoa is very absorbent, so it can dry out quickly. Make sure your oven temperature is accurate (use an oven thermometer!) and start checking the cupcakes at the 18-minute mark. Also, make sure you are measuring your flour correctly—spoon it into the measuring cup and level it off, don’t scoop directly from the bag.
Can I make these cupcakes ahead of time?
Absolutely! You can bake the cupcakes up to 2 days in advance and store them unfrosted in an airtight container at room temperature. The frosting can also be made ahead and stored in the fridge for up to a week. Just let it come to room temperature and re-whip it before using. I recommend frosting the cupcakes the day you plan to serve them for the best visual effect.
How do I get the frosting to be such a dark black color?
The key is using black cocoa powder in the frosting. It is naturally very dark. You do not need any food coloring at all. If you want an even darker color, you can let the frosting sit for 30 minutes after you make it. The cocoa will continue to “bloom” and deepen in color. A tiny pinch of black food coloring gel (optional) can also help, but it is not necessary.
Can I use a different type of cookie for the ears?
You can! Oreos are the classic choice because they are the right size and shape, and they match the dark color. But you could also use chocolate sandwich cookies, or even homemade chocolate shortbread cut into small triangles. If you are making the gluten-free version, look for a gluten-free chocolate sandwich cookie. The key is that they are sturdy enough to hold their shape when pressed into the frosting.
Pin This Recipe!
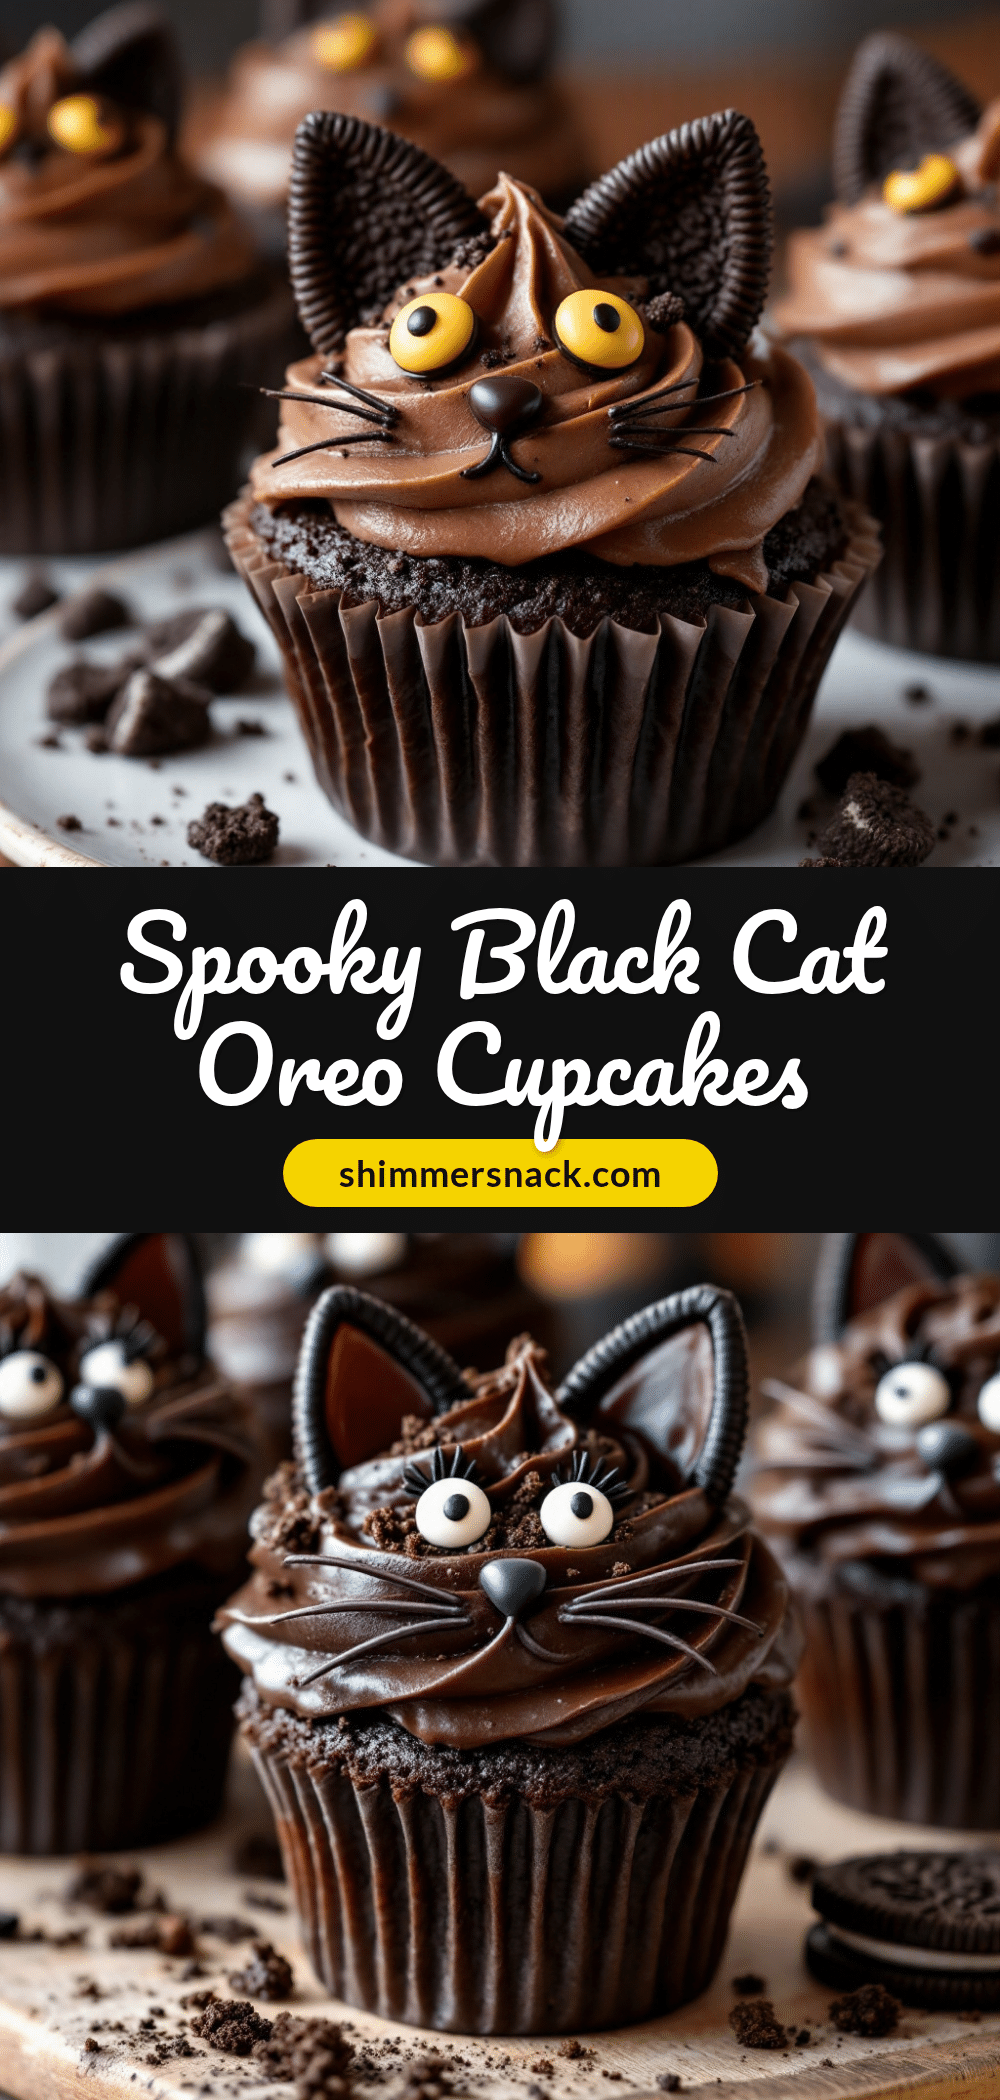
Best Spooky Black Cat Oreo Cupcakes – Easy Halloween Recipe
These spooky black cat Oreo cupcakes are naturally dark using black cocoa and crushed Oreos, topped with a silky black buttercream and adorable cat faces. They are surprisingly easy to make and perfect for Halloween parties.
- Prep Time: 20 minutes
- Cook Time: 20 minutes
- Total Time: 40 minutes
- Yield: 12 cupcakes
- Category: Dessert
- Cuisine: American
Ingredients
- All-purpose flour (1 ½ cups / 180g)
- Black cocoa powder (½ cup / 50g)
- Granulated sugar (1 cup / 200g)
- Light brown sugar (¼ cup / 50g)
- Baking soda (1 tsp)
- Baking powder (½ tsp)
- Salt (½ tsp)
- Large eggs (2, room temperature)
- Whole milk (1 cup / 240ml, room temperature)
- Vegetable oil (½ cup / 120ml)
- Vanilla extract (2 tsp)
- Hot coffee or hot water (½ cup / 120ml)
- Oreo cookies (6, finely crushed)
- Unsalted butter (1 cup / 2 sticks, softened)
- Powdered sugar (3 ½ cups / 420g)
- Black cocoa powder (¼ cup / 25g)
- Vanilla extract (1 tsp)
- Heavy cream or whole milk (3-4 tbsp)
- Pinch of salt
- Oreo cookies (12 whole)
- Candy eyes (24 small)
- Black sprinkles or edible glitter (optional)
Instructions
- Preheat your oven to 350°F (175°C). Line your muffin tin with 12 cupcake liners.
- Crush 6 Oreo cookies (cream and all) into a fine powder using a food processor or a zip-top bag and rolling pin.
- In a large bowl, whisk together flour, black cocoa powder, granulated sugar, brown sugar, baking soda, baking powder, and salt. Add the crushed Oreo powder and whisk again.
- In a separate medium bowl, whisk together eggs, milk, vegetable oil, and vanilla extract until smooth.
- Pour the wet ingredients into the dry ingredients. Stir gently with a rubber spatula until just combined. Do not overmix.
- Pour in the hot coffee (or hot water). Stir slowly until the batter is smooth, thin, and glossy.
- Fill each liner about ¾ full with the batter.
- Bake for 18-22 minutes, or until a toothpick inserted into the center comes out clean or with a few moist crumbs. Let cool in the pan for 5 minutes, then transfer to a wire rack to cool completely.
- While the cupcakes cool, make the frosting: In a large bowl, beat the softened butter with an electric mixer on medium speed until pale, fluffy, and smooth (about 2-3 minutes). Add sifted powdered sugar and black cocoa powder, one cup at a time, mixing on low speed. Add vanilla and a pinch of salt. Pour in 2 tablespoons of heavy cream. Increase speed to medium-high and beat for 3-4 minutes until light, airy, and spreadable. Adjust consistency with more cream or powdered sugar as needed.
- Once cupcakes are cool, twist apart 12 whole Oreos to get the cream-filled halves. Set plain halves aside.
- Fill a piping bag (or zip-top bag) with black buttercream. Pipe a swirl of frosting onto each cupcake.
- Gently press two cream-filled Oreo halves, cream-side down, into the top of the frosting swirl, angled outward like cat ears.
- Press two candy eyes into the front of the frosting swirl, just below the ears.
- Optionally, add black sprinkles or edible glitter for extra shimmer.
Notes
The coffee trick deepens the chocolate flavor and helps the black cocoa bloom. Do not overbake; start checking at 18 minutes. Butter must be soft for the frosting. Patience with the frosting: it may look dry at first but will come together. Multi-task by making frosting and twisting Oreos while cupcakes bake.
Nutrition
- Serving Size: 1 cupcake
- Calories: 420
- Sugar: 38
- Fat: 22
- Carbohydrates: 55
- Fiber: 2
- Protein: 5
Keywords: Halloween cupcakes, black cat cupcakes, Oreo cupcakes, black cocoa cupcakes, spooky cupcakes, easy Halloween recipe


