Love this? Save it for later!
Share the inspiration with your friends
It was November, and the house smelled like damp wool coats and roasted turkey. I remember standing on a step stool, watching her fold the yellow Jiffy mix into the canned corn with a wooden spoon. She didn’t measure anything. She just knew. The batter was thick, yellow, and studded with kernels that looked like little golden jewels. She stirred it until it was smooth, then poured it into that specific Pyrex dish with the handle that always got too hot to hold.
I was eight years old, hungry and impatient, tapping my feet against the linoleum floor. The oven timer was the only thing keeping me sane. When she finally pulled it out, the top was bubbly and slightly browned around the edges. The cheese had melted into a creamy, gooey blanket that clung to every corn kernel. She cut a square, steam rising in lazy spirals, and handed it to me on a paper plate. I blew on it for what felt like an hour before taking that first bite.
It wasn’t just food. It was safety. It was the sound of laughter in the next room, the creak of the floorboards, and the warmth of being fed by someone who loved you. That creamy jiffy cheddar corn casserole became my benchmark for comfort. It wasn’t fancy. It didn’t need fresh herbs or imported cheeses. It just needed to be hot, salty, and sweet all at once.
Years later, I make it for my own family. The kitchen is different, the voices are different, but the smell is exactly the same. And when that cheese melts and the corn pops in the heat, I’m back on that step stool again. It’s a quiet promise that no matter how chaotic life gets, dinner will be ready, and it will taste like home.
Why You’ll Love This Recipe
Let’s be honest, not all corn casseroles are created equal. Some are dry. Some are too eggy. But this creamy jiffy cheddar corn casserole hits that perfect sweet spot that makes people ask for seconds before the main course is even cleared. I’ve tested this recipe dozens of times, tweaking the ratios until I got it just right. It’s not rocket science, but it does require a little bit of attention to detail.
- Quick & Easy: You can have this from start to oven in about 15 minutes. Seriously. If you can open a can and mix ingredients, you can make this. It’s perfect for those weeknights when you’re tired and just want good food on the table.
- Simple Ingredients: You don’t need to run to three different stores. Everything you need is likely already in your pantry or fridge. It’s the beauty of using Jiffy mix — it’s already pre-measured and balanced for you.
- Perfect for Holidays: Whether it’s Thanksgiving, Christmas, or a summer BBQ, this dish fits right in. It’s versatile enough to stand next to a fancy roast or a simple grilled burger.
- Crowd-Pleaser: Kids love the sweetness. Adults love the saltiness. Everyone loves the cheese. I’ve served this at potlucks and watched the dish disappear in minutes. It’s a guaranteed hit.
- Unbelievably Delicious: The texture is creamy but not mushy. The corn provides a nice pop, and the cheese binds it all together. It’s comfort food at its finest.
What makes this version special is the balance. Too much egg makes it like a custard. Too little, and it falls apart. I found that using a full can of cream-style corn along with whole kernel corn gives it the best texture. It’s rich, it’s savory, and it’s easy to make. It’s the kind of recipe that makes you close your eyes after the first bite and sigh. It’s not just a side dish; it’s a memory on a plate.
What Ingredients You Will Need
This recipe relies on simple, wholesome ingredients to deliver bold flavor and satisfying texture without the fuss. You don’t need fancy substitutes or hard-to-find items. The magic is in how these basic components come together. Here is what you need to get started.
- Jiffy Corn Muffin Mix (1 box): This is the base. I prefer the standard yellow mix. It has that distinct cornbread flavor that works perfectly here. Don’t try to swap this for a generic brand unless you have to; the flavor profile is different.
- Whole Kernel Corn (1 can, drained): Look for corn that isn’t too watery. Drain it well. Some people like to chop the kernels slightly, but I leave them whole for a better bite.
- Cream-Style Corn (1 can): This is the secret ingredient for the creamy texture. It binds everything together. Use a good quality brand. I like Del Monte or store brands that list corn as the first ingredient.
- Butter (1/2 cup, melted): Use real butter. Don’t use margarine. It changes the flavor and texture. Melt it in the microwave or a small saucepan. Let it cool slightly before adding.
- Eggs (2 large): Room temperature eggs mix better. Crack them into a bowl first to check for shells, then whisk them lightly before adding to the batter.
- Shredded Cheddar Cheese (1 cup): I use sharp cheddar for the most flavor. Pre-shredded cheese has anti-caking agents that can make the casserole grainy. Buy a block and shred it yourself for the best melt.
- Salt and Pepper (to taste): The Jiffy mix and cheese are already salty, so go easy on the salt. Freshly cracked black pepper adds a nice bite.
If you are dairy-free, you can swap the butter for coconut oil and use vegan cheese, but the texture will be different. For a gluten-free option, use a gluten-free cornbread mix, but note that it may absorb moisture differently. Always check your labels if you have allergies.
Equipment Needed
You don’t need much to make this, but having the right tools helps. A 9×13 inch baking dish is standard. I use a glass Pyrex dish because it heats evenly and lets you see the browning on the bottom. If you don’t have one, a ceramic dish works too, but keep an eye on it so it doesn’t burn.
You’ll need a large mixing bowl. A ceramic or glass bowl is nice because it doesn’t hold static, so the corn doesn’t stick to the sides. A whisk is better than a spoon for mixing the eggs and butter smoothly. A spatula is useful for scraping the bowl and folding in the cheese.
I recommend having a can opener that doesn’t slip. It sounds silly, but nothing ruins the mood like a rusty lid. Also, a measuring cup for the melted butter is helpful for accuracy. If you don’t have a 9×13 dish, you can use two 8×8 dishes. Just reduce the baking time by about 10 minutes.
Preparation Method

Getting this creamy jiffy cheddar corn casserole ready is straightforward, but following the steps in order ensures the best result. Here is how to do it.
- Preheat the Oven: Start by heating your oven to 350°F (175°C). This takes about 10-15 minutes, so get it going first. While it heats, prepare your baking dish. Grease it lightly with butter or non-stick spray. This prevents sticking and adds flavor.
- Prepare the Corn: Open your cans of corn. Drain the whole kernel corn well. You want to remove as much liquid as possible. If you leave too much water in, the casserole will be soupy. Place the drained corn in your large mixing bowl.
- Add the Cream Corn: Pour the entire can of cream-style corn into the bowl with the whole kernel corn. Stir it gently to combine. You should see a mix of liquid cream and solid kernels.
- Mix the Dry Ingredients: Pour the entire box of Jiffy corn muffin mix into the bowl. Do not add the milk or egg that the box instructions usually call for for muffins. We are making a casserole, so skip that part. Stir the dry mix into the corn until it is just combined. It will look thick and clumpy. That is normal.
- Add the Wet Ingredients: Crack the two eggs into a small bowl and whisk them. Pour the melted butter into the same bowl. Whisk them together. Pour this mixture into the corn batter. Stir until smooth. The batter should be thick but pourable.
- Fold in the Cheese: Add the shredded cheddar cheese. Gently fold it in with a spatula. Don’t overmix. You want streaks of cheese throughout, not a uniform yellow paste.
- Bake: Pour the batter into the prepared 9×13 baking dish. Spread it out evenly. Place it in the oven and bake for 45-50 minutes. The top should be golden brown and set. A knife inserted in the center should come out clean.
- Cool and Serve: Remove from the oven and let it cool for 5-10 minutes. This helps it set so you can cut clean squares. Serve warm.
If you notice the top browning too quickly, cover it loosely with aluminum foil for the last 10 minutes of baking. This prevents burning while the center finishes cooking.
Cooking Tips & Techniques
I’ve made this recipe so many times that I’ve learned a few tricks to avoid common pitfalls. The biggest mistake people make is using cold butter. If the butter is too hot, it can cook the eggs slightly, creating little curds in your batter. Let the butter cool for a minute after melting. It should be warm, not scalding.
Another tip is about the corn. If your canned corn is very watery, drain it twice. I even pat it dry with a paper towel if it seems extra wet. This ensures your casserole is creamy, not runny. Also, when you shred your own cheese, make sure it is finely shredded. Large chunks take longer to melt and might not distribute evenly.
Timing is everything. Ovens vary. Start checking at 40 minutes. Look for bubbles around the edges. If the center is still jiggly, give it more time. But don’t overbake it. Overbaking makes it dry. You want it to be just set. Let it rest before cutting. This is hard, I know, but it makes a huge difference in the final texture.
If you are making this ahead of time, you can mix the batter and refrigerate it overnight. Just add 5-10 minutes to the baking time since the batter will be cold. This is great for holiday planning. You can mix it in the morning and bake it right before dinner.
Variations & Adaptations
While the classic version is hard to beat, there are fun ways to twist this recipe. Here are some ideas.
- Spicy Kick: Add a diced jalapeño or a teaspoon of cayenne pepper. This pairs well with the sweetness of the corn. It’s a great addition if you like heat.
- Herb Twist: Stir in a tablespoon of fresh chopped chives or parsley. This adds a fresh, green flavor that cuts through the richness of the cheese and butter.
- Protein Power: Add cooked bacon bits or diced ham. This turns it into a heartier side dish. Bacon and corn are a classic combination for a reason.
- Gluten-Free: Use a gluten-free cornbread mix. Check that your corn and cheese are certified gluten-free if you have celiac disease.
- Dairy-Free: Use vegan butter and dairy-free cheddar shreds. The texture might be slightly different, but it still tastes good. I’ve tried it, and it works in a pinch.
I once made this with smoked gouda instead of cheddar. It was smoky and rich, and it went perfectly with roasted chicken. Don’t be afraid to experiment. The base recipe is forgiving.
Serving & Storage Suggestions
This creamy jiffy cheddar corn casserole is best served warm. It pairs well with roasted meats, grilled chicken, or even turkey. For a complete meal, serve it with a green salad or steamed broccoli. The contrast of textures is nice.
Leftovers can be stored in an airtight container in the refrigerator for up to 4 days. Reheat in the microwave for 1-2 minutes or in the oven at 350°F for 15 minutes. The texture will be slightly firmer after reheating, but it still tastes great.
You can also freeze this casserole. Bake it first, let it cool completely, then wrap it tightly in plastic wrap and foil. Freeze for up to 3 months. Thaw in the refrigerator overnight and reheat. It’s a great option for meal prep.
The flavors meld together over time. Leftovers often taste even better the next day as the cheese and corn fully integrate. Just make sure to cover it well to prevent it from drying out in the fridge.
Nutritional Information & Benefits
While this is a comfort food, it does have some nutritional benefits. Corn is a good source of fiber and vitamins like B1 and B5. Cheese provides calcium and protein. However, it is also high in calories and fat due to the butter and cheese. Enjoy it in moderation as part of a balanced diet.
For those watching their sodium, be mindful of the salt in the Jiffy mix and the cheese. You can reduce the added salt in the recipe if you are sensitive to sodium. It’s a treat, not a daily staple, but it’s a delicious one.
From a wellness perspective, this dish brings joy. Food is not just fuel. It’s connection. Sharing a meal like this with loved ones is good for the soul. That’s the real benefit.
Conclusion
This creamy jiffy cheddar corn casserole is a staple in my kitchen for a reason. It’s easy, it’s delicious, and it brings people together. I hope you try it and make it your own. Add your favorite twists, share it with friends, and enjoy every bite.
Don’t forget to leave a comment below with your variations. I love hearing how you adapt recipes. And if you make this, tag me on social media. I’d love to see your creations. Happy cooking!
FAQs
Can I use frozen corn instead of canned?
Yes, you can use frozen corn. Just thaw it and drain it well. You may need to adjust the amount of cream-style corn slightly, as frozen corn releases more water.
Why is my casserole runny?
This usually happens if the corn wasn’t drained well or if the oven wasn’t hot enough. Make sure to drain the canned corn thoroughly and check your oven temperature with a thermometer.
Can I make this in a slow cooker?
Yes, but the texture will be different. Cook on low for 2-3 hours. The top won’t brown, so you might want to broil it for a few minutes at the end.
Is this recipe gluten-free?
The standard Jiffy mix contains wheat. To make it gluten-free, use a gluten-free cornbread mix and ensure all other ingredients are certified gluten-free.
Can I add other vegetables?
Yes, diced bell peppers or onions can be added for extra flavor. Just sauté them first to remove the raw taste.
Pin This Recipe!
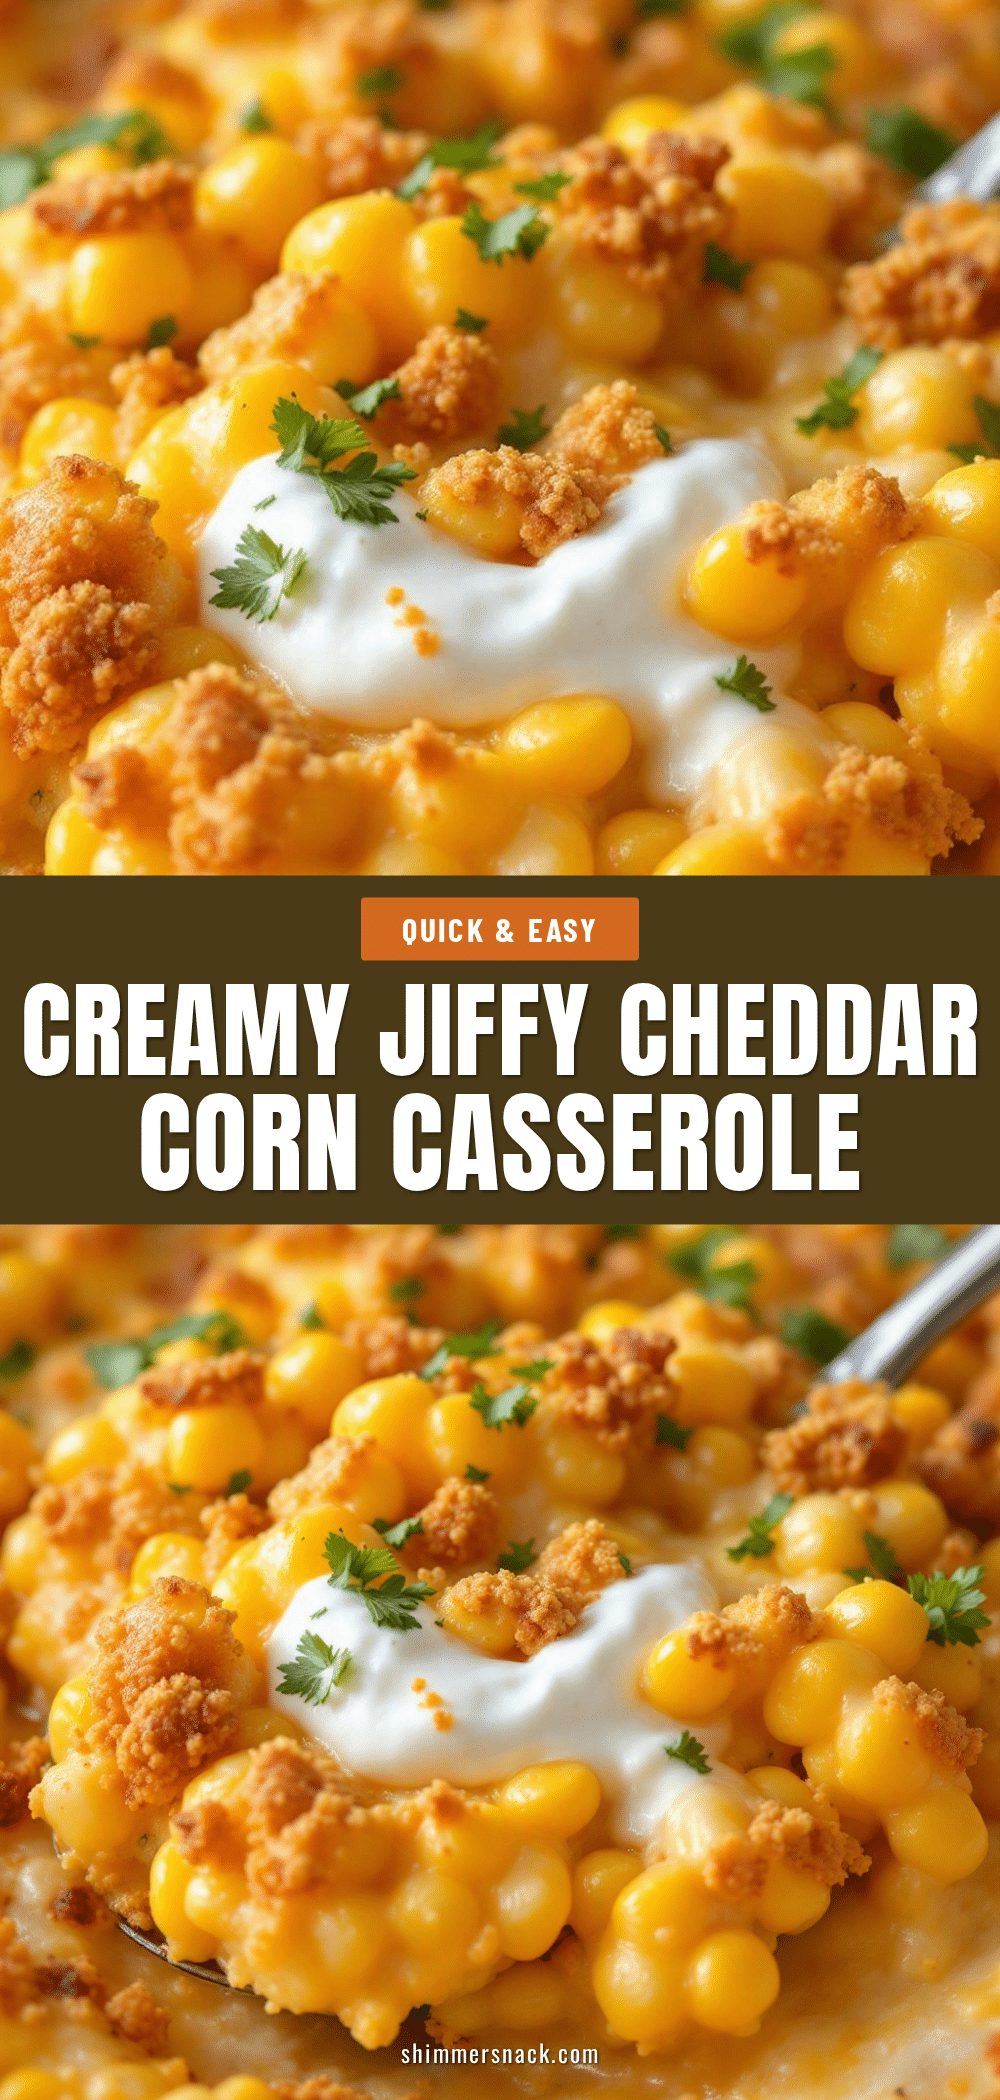
Creamy Jiffy Cheddar Corn Casserole

A nostalgic and easy side dish made with Jiffy corn muffin mix, canned corn, and cheddar cheese. This creamy, savory casserole is perfect for holidays and weeknight dinners.
- Prep Time: 15 minutes
- Cook Time: 45-50 minutes
- Total Time: 60-65 minutes
- Yield: 8-10 servings 1x
- Category: Side Dish
- Cuisine: American
Ingredients
- 1 box Jiffy Corn Muffin Mix (standard yellow)
- 1 can whole kernel corn, drained well
- 1 can cream-style corn
- 1/2 cup butter, melted and cooled slightly
- 2 large eggs, room temperature
- 1 cup shredded sharp cheddar cheese
- Salt and pepper to taste
Instructions
- Preheat oven to 350°F (175°C). Grease a 9×13 inch baking dish with butter or non-stick spray.
- Drain the whole kernel corn thoroughly to remove excess liquid and place it in a large mixing bowl.
- Add the can of cream-style corn to the bowl and stir gently to combine.
- Pour the entire box of Jiffy corn muffin mix into the bowl. Stir until just combined; the mixture will look thick and clumpy.
- In a separate small bowl, whisk the eggs and melted butter together. Pour this mixture into the corn batter and stir until smooth.
- Fold in the shredded cheddar cheese with a spatula until streaks of cheese are distributed throughout.
- Pour the batter into the prepared baking dish and spread evenly.
- Bake for 45-50 minutes, or until the top is golden brown and a knife inserted in the center comes out clean.
- Let cool for 5-10 minutes before cutting into squares and serving warm.
Notes
Ensure the corn is drained well to prevent a runny casserole. Let the melted butter cool slightly before adding to avoid cooking the eggs. For a spicy kick, add diced jalapeños. Can be made ahead by mixing batter and refrigerating overnight, adding 5-10 minutes to baking time.
Nutrition
- Serving Size: 1 square
- Calories: 320
- Sugar: 6
- Sodium: 580
- Fat: 18
- Saturated Fat: 10
- Carbohydrates: 32
- Fiber: 2
- Protein: 8
Keywords: Jiffy corn casserole, cheddar corn, holiday side dish, easy corn recipe, comfort food, Thanksgiving side