Love this? Save it for later!
Share the inspiration with your friends
I had been looking for a side dish that actually balanced sweet and savory without turning into a sugary mess. For a while, I just accepted that green beans were going to taste like boiled vegetables, no matter how much butter I added. It wasn’t that I hated them, but they felt like a chore to serve at dinner parties. You know the type, the ones that sit quietly on the plate while everyone fights over the potatoes.
My first attempts at glazed green beans were a disaster. I’d dump brown sugar on top and bake them until the sugar burned, leaving black bits that ruined the whole batch. Let’s face it, burning sugar smells terrible and tastes bitter. I kept trying different sauces, but they always made the beans soggy. I wanted crunch. I wanted that snap that fresh green beans have, but with a coating that stuck.
Then I tried wrapping them in bacon. Honestly, it seemed like overkill at first. Who needs extra fat when you have butter? But the saltiness of the pork changed everything. It created a barrier that kept the beans crisp while the fat rendered down. The brown sugar didn’t burn because it caramelized against the bacon instead of the pan.
I remember eating one and closing my eyes. It wasn’t just a vegetable anymore. It was a snack, a side, and a flavor bomb all in one bite. The contrast between the salty, crispy bacon and the tender, sweet bean was exactly what I had been missing. It’s not fancy, but it works. That’s why I keep coming back to this version. It’s reliable, it’s tasty, and it solves the boring side dish problem once and for all.
Why You’ll Love This Recipe
This isn’t just another green bean recipe that sits in the middle of the table. It’s the kind of dish that disappears before you can even grab a second serving. I’ve tested this method dozens of times, adjusting the bacon thickness and the sugar ratio, to get it just right. Here is why this version stands out from the rest:
- Quick & Easy: You can have this on the table in under 30 minutes. It’s perfect for busy weeknights when you want something special but don’t have hours to cook. Honestly, it’s faster than making a salad and way more exciting.
- Simple Ingredients: You likely already have everything in your kitchen. Bacon, green beans, brown sugar, and a little butter. No fancy grocery trips needed. It uses pantry staples to deliver bold flavor without the fuss.
- Perfect for Game Day: These are incredible finger foods. They hold up well in a slow cooker or on a platter, making them ideal for parties. Think of them as a healthier alternative to the jalapeno popper bites but with a savory-sweet twist that everyone loves.
- Crowd-Pleaser: Kids usually avoid vegetables, but they devour these. The bacon makes them irresistible, and the sweet glaze masks any bitter notes. It’s a win for parents and picky eaters alike.
- Unbelievably Delicious: The texture combo is next-level. You get the snap of the bean, the chew of the bacon, and the sticky crunch of the caramelized sugar. It’s comfort food reimagined.
What makes this recipe different is the technique. Most recipes boil the beans first, which can make them mushy. I prefer roasting them so the edges crisp up slightly. The brown sugar glaze is applied at the right moment so it caramelizes without burning. It’s not just a side dish; it’s the kind of bite that makes you savor the meal. It’s perfect for impressing guests without stress or turning a simple Tuesday dinner into something memorable.
What Ingredients You Will Need
This recipe uses simple, wholesome ingredients to deliver bold flavor and satisfying texture. The beauty of this dish lies in the balance between the salty bacon, the fresh vegetable, and the sweet glaze. Here is what you need to make it work:
- Fresh Green Beans: Look for bright green, firm beans. Avoid any that are slimy or have soft spots. I prefer organic if you can find them, as they tend to have a better snap. Trim the woody ends off before starting.
- Thick-Cut Bacon: This is non-negotiable. Thin bacon will burn before the beans cook. You want something that can hold up to the heat. I recommend Oscar Mayer Thick Cut or a local butcher’s choice for the best texture. The fat content is crucial for flavor.
- Brown Sugar: Use light or dark brown sugar. Dark sugar has more molasses and gives a deeper, richer flavor. Make sure it is fresh and not clumpy. If it’s hard, microwave it for a few seconds to loosen it up.
- Unsalted Butter: This helps the sugar stick and adds richness. Melt it slightly before mixing with the sugar. If you are dairy-free, you can substitute this with coconut oil, though the flavor will change slightly.
- Garlic Powder: A little bit goes a long way. It adds depth without the risk of burning fresh garlic bits. It complements the smokiness of the bacon perfectly.
- Black Pepper: Freshly cracked pepper adds a nice heat that cuts through the sweetness. Don’t skip this step, as it balances the sugar.
- Optional: Red Pepper Flakes: If you like a kick, add a pinch of red pepper flakes to the glaze. It adds a subtle heat that pairs well with the sweet and salty profile.
For the best results, buy your bacon from a reliable source. Cheap bacon can be inconsistent in thickness, which leads to uneven cooking. Also, make sure your green beans are uniform in size so they cook at the same rate. If they are too thick, you might need to trim them further. This attention to detail makes a huge difference in the final texture.
Equipment Needed
You don’t need much to make this recipe, which is part of its appeal. Here is what you will need:
- Baking Sheet: Use a standard half-sheet pan. Line it with parchment paper for easy cleanup. Aluminum foil works too, but parchment prevents sticking better.
- Parchment Paper: Essential for keeping the sugar from burning onto the pan. It makes cleanup a breeze.
- Tweezers or Tongs: Good for handling the bacon-wrapped beans. Your fingers might get greasy, so tools help keep things tidy.
- Mixing Bowl: A small bowl for mixing the brown sugar, butter, and spices.
- Oven: Preheated to 400°F (200°C). Make sure your oven is calibrated correctly, as ovens can vary.
If you don’t have a baking sheet, you can use a roasting pan, but the cooking time might vary slightly. For those who prefer air frying, you can use an air fryer, but you will need to cook in batches to avoid overcrowding. The key is to have enough space for air to circulate around the beans.
Preparation Method
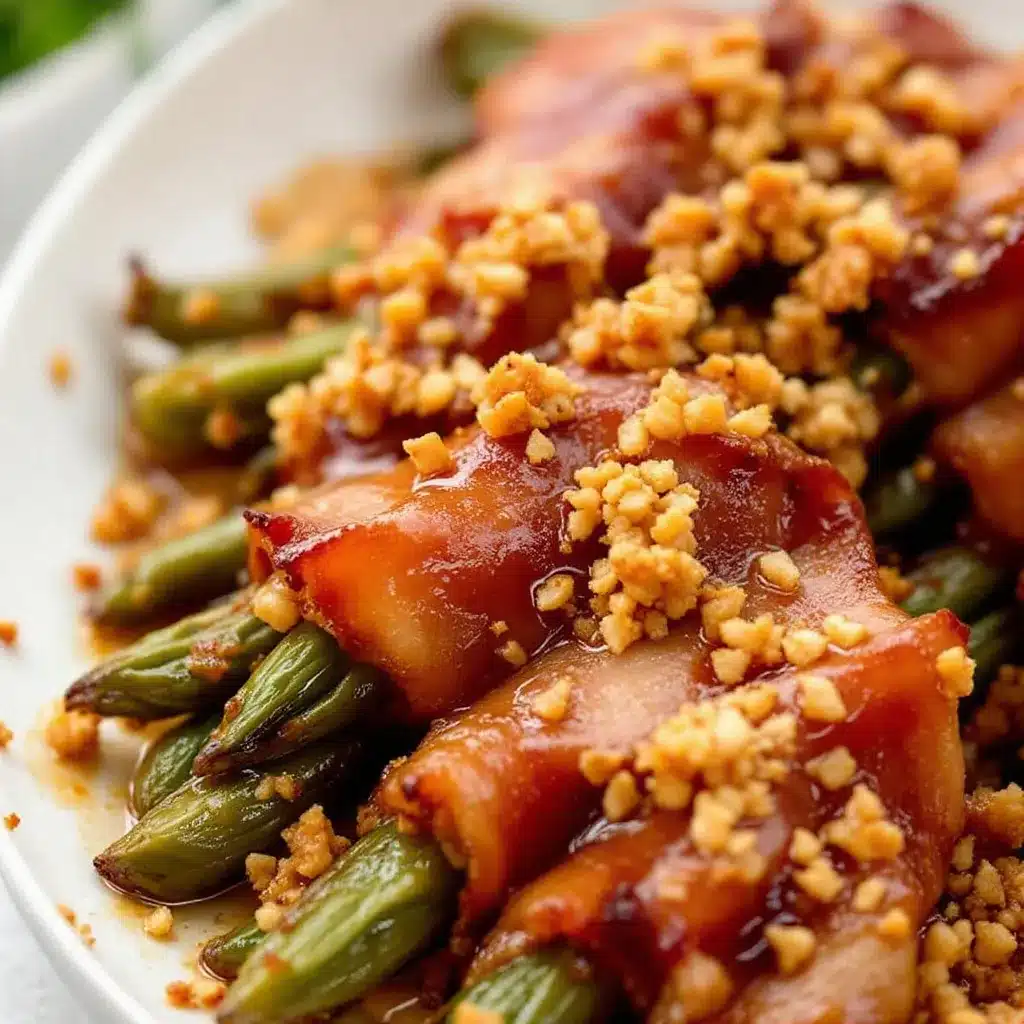
- Prep the Green Beans: Wash the green beans thoroughly. Trim off the hard ends. If the beans are very thick, you can slice them in half lengthwise, but whole beans are traditional. Pat them dry with a paper towel. Moisture is the enemy of crispiness, so make sure they are as dry as possible. This step takes about 5 minutes.
- Wrap the Beans: Take a slice of bacon and wrap it around 2-3 green beans. Twist the ends of the bacon to secure them. You don’t need toothpicks; the twisting holds them in place. If the bacon is too long, you can trim it, but leaving extra helps wrap around the beans. Do this for all the beans. It’s a bit tedious, but the result is worth it.
- Prepare the Glaze: In a small bowl, mix 1/4 cup of brown sugar, 2 tablespoons of melted butter, 1/2 teaspoon of garlic powder, and 1/4 teaspoon of black pepper. Stir until it forms a paste. If it’s too dry, add a tiny bit more melted butter. The consistency should be like wet sand.
- Arrange on Pan: Place the wrapped beans on the lined baking sheet. Leave some space between them so they roast evenly. Do not crowd the pan. If you have too many, use two sheets. This step takes about 10 minutes.
- Initial Bake: Bake in the preheated oven for 15 minutes. This cooks the bacon partially and softens the beans slightly. The bacon should start to render its fat. Check the beans to ensure they are not burning.
- Apply Glaze: Remove the pan from the oven. Brush the brown sugar mixture over the bacon-wrapped beans. Be generous but don’t let it pool on the pan. The sugar will caramelize quickly, so watch it closely. Return to the oven for another 5-10 minutes.
- Final Crisp: Bake until the bacon is crispy and the sugar is bubbly and golden brown. This usually takes about 5-8 more minutes. Keep an eye on them, as sugar burns fast. The beans should be tender-crisp. Remove from the oven and let cool for 2 minutes.
Personal tip: If you like extra crunch, broil them for the last minute, but watch them like a hawk. One minute can mean the difference between caramelized and charcoal. Let them cool slightly before serving so the glaze sets.
Cooking Tips & Techniques
Getting the bacon crispy without burning the sugar requires a bit of timing. Here are some tips I’ve learned through trial and error:
- Don’t Skip the Dry Step: Wet beans steam instead of roast. Always pat them dry before wrapping. This small step ensures crispiness.
- Uniform Wraps: Try to make the wraps consistent in tightness. Loose wraps can unravel in the oven. If they do unravel, just tuck them back in.
- Temperature Control: 400°F is the sweet spot. Higher heat might burn the sugar before the bacon is done. Lower heat might leave the bacon limp.
- Batch Cooking: If you are making a large batch, cook in two rounds. Overcrowding the pan lowers the temperature and leads to soggy results. It’s better to cook twice than to serve mushy beans.
- Glaze Application: Apply the glaze halfway through cooking, not at the beginning. Sugar burns quickly, so adding it later ensures a glossy finish without bitterness.
I once tried making this in a slow cooker, and it was a disaster. The beans got too soft and the bacon slid off. Roasting is the only way to get that perfect texture. Also, if you are using a convection oven, reduce the cooking time by 5 minutes. Convection cooks faster and can dry out the beans if left too long.
Variations & Adaptations
This recipe is versatile and can be adapted to suit different tastes:
- Spicy Kick: Add cayenne pepper or red pepper flakes to the glaze for a spicy version. It pairs well with the sweetness.
- Honey Glaze: Substitute half the brown sugar with honey for a lighter, floral sweetness. It works well with thinner bacon.
- Herb Infused: Add dried thyme or rosemary to the glaze for an earthy flavor. This works well if you are serving it with roast chicken.
- Dairy-Free: Use coconut oil instead of butter for the glaze. It adds a subtle coconut flavor that might not suit everyone, but it keeps the dish dairy-free.
- Smoky Variation: Use smoked bacon for a deeper flavor profile. This adds a BBQ-like quality to the dish.
I often experiment with different spices, like adding a pinch of smoked paprika. It enhances the bacon flavor without adding more salt. If you are hosting a party, you can make these ahead of time and reheat them in the oven. They taste just as good the next day.
Serving & Storage Suggestions
Serve these green beans warm, right out of the oven. They pair well with grilled meats, roast chicken, or parmesan garlic chicken wings. They are also great alongside texas style chili cheese fries for a hearty meal.
Storage: Store leftovers in an airtight container in the refrigerator for up to 3 days. The bacon will soften in the fridge, so reheat them in the oven or air fryer to restore crispiness. Microwave heating will make them soggy.
Reheating: Reheat at 375°F for 5-7 minutes. This brings back the crunch. If you have an air fryer, 350°F for 3 minutes works wonders. They taste best when fresh, but leftovers are still delicious.
These beans hold up well in a slow cooker on the low setting for up to 2 hours. This is great for potlucks where you need to keep them warm. Just stir gently to avoid breaking the beans.
Nutritional Information & Benefits
While this dish is indulgent, it offers some nutritional benefits. Green beans are low in calories and high in fiber, vitamin C, and vitamin K. The bacon adds protein and fat, which helps keep you full. The brown sugar adds sweetness but should be consumed in moderation.
Each serving contains approximately 150-200 calories, depending on the bacon thickness. It is not a low-carb dish due to the sugar, but it can fit into a balanced diet. If you are watching your sodium intake, choose low-sodium bacon. This recipe is gluten-free by default, making it suitable for those with celiac disease.
I enjoy this dish as a treat rather than a daily staple. It’s a great way to get more vegetables into your diet if you find plain greens boring. The flavors make it feel like a dessert, but it’s actually a savory side. Balance is key, and this recipe hits that sweet spot.
Conclusion
Crispy Bacon Wrapped Green Beans with Brown Sugar Glaze is a side dish that deserves a spot in your regular rotation. It’s sweet, salty, crispy, and tender all at once. I love how easy it is to make and how much it elevates a simple meal. Whether you are hosting a party or just want a delicious dinner, this recipe delivers.
Feel free to experiment with the glaze and spices to match your preferences. I hope you enjoy this recipe as much as I do. If you try it, let me know how it turned out in the comments below. Share your photos and variations with the community. Happy cooking!
FAQs
Can I use thin-cut bacon for this recipe?
It’s not recommended. Thin bacon burns quickly and may not hold the beans securely. Thick-cut bacon provides the best texture and flavor.
How do I prevent the brown sugar from burning?
Apply the glaze halfway through the cooking process. This gives the bacon time to cook without the sugar burning. Keep an eye on the oven during the final minutes.
Can I make this in an air fryer?
Yes, you can. Cook at 375°F for 10-12 minutes, flipping halfway. Apply the glaze in the last 2 minutes. Cook in batches to avoid overcrowding.
Can I prepare these ahead of time?
You can wrap the beans and store them in the fridge for up to 24 hours. Add the glaze just before baking. This saves time on the day of serving.
What can I serve with these green beans?
They pair well with grilled steak, roast chicken, loaded potato skins, or sheet pan nachos. They are also great with holiday meals like turkey.
Pin This Recipe!
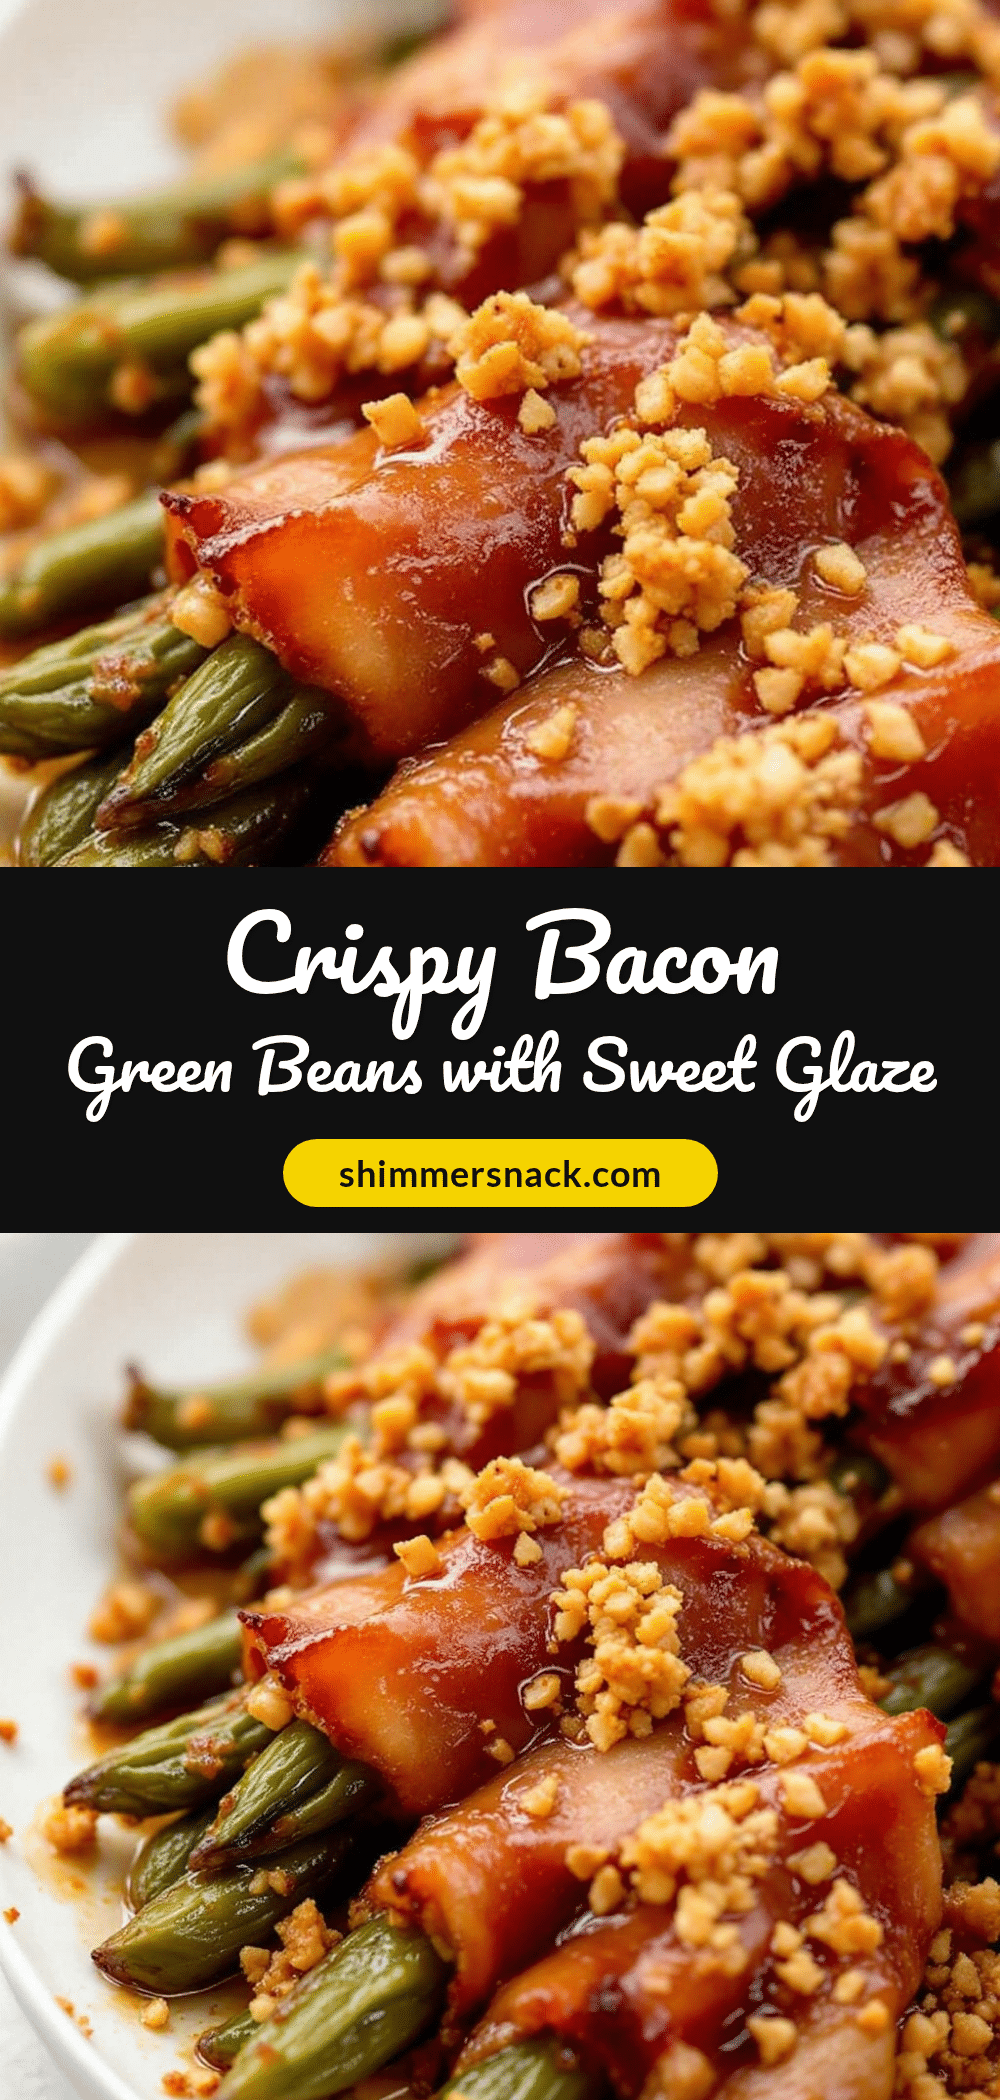
Crispy Bacon Wrapped Green Beans: Best Brown Sugar Recipe
A delicious side dish featuring fresh green beans wrapped in thick-cut bacon and glazed with a sweet and savory brown sugar mixture, roasted until crispy and tender.
- Prep Time: 15 minutes
- Cook Time: 20-25 minutes
- Total Time: 35-40 minutes
- Yield: 4 servings 1x
- Category: Side Dish
- Cuisine: American
Ingredients
- Fresh green beans, trimmed and dried
- Thick-cut bacon slices
- 1/4 cup brown sugar (light or dark)
- 2 tablespoons unsalted butter, melted
- 1/2 teaspoon garlic powder
- 1/4 teaspoon black pepper
- Optional: Red pepper flakes for heat
Instructions
- Preheat oven to 400°F (200°C). Line a baking sheet with parchment paper.
- Wash and thoroughly dry the green beans. Trim off the woody ends.
- Wrap 2-3 green beans with a slice of bacon, twisting the ends to secure.
- In a small bowl, mix brown sugar, melted butter, garlic powder, and black pepper to form a paste.
- Arrange wrapped beans on the baking sheet, ensuring space between them.
- Bake for 15 minutes to partially cook the bacon and soften the beans.
- Remove from oven and brush the brown sugar glaze generously over the bacon-wrapped beans.
- Return to oven and bake for another 5-10 minutes until bacon is crispy and sugar is caramelized.
- Let cool for 2 minutes before serving to allow the glaze to set.
Notes
Ensure green beans are completely dry before wrapping to prevent steaming. Use thick-cut bacon to prevent burning. Apply glaze halfway through cooking to avoid burning the sugar. For extra crunch, broil for the last minute, watching closely.
Nutrition
- Serving Size: Approximately 4-6 wr
- Calories: 175
- Sugar: 8
- Sodium: 350
- Fat: 12
- Saturated Fat: 5
- Carbohydrates: 10
- Fiber: 2
- Protein: 6
Keywords: bacon wrapped green beans, brown sugar glaze, crispy green beans, side dish, game day food, sweet and savory, oven roasted


