Love this? Save it for later!
Share the inspiration with your friends
My sourdough starter, affectionately named “Bernard,” was bubbling away on the counter, and a can of pumpkin puree was staring at me from the pantry. It was a Tuesday morning, and I had promised the kids waffles before school. Not just any waffles, but something that felt like a hug in carbohydrate form. I looked at Bernard, then at the pumpkin, and a lightbulb flickered on.
I wasn’t trying to be fancy. Honestly, I was just trying to use up what I had before the pumpkin puree got pushed to the back of the fridge for another year. The starter needed feeding, the kids needed breakfast, and the calendar said October. So, I dumped some starter into a bowl with pumpkin, spices, and a few other pantry staples, hoping for the best. The batter looked promising—thick, fluffy, and that gorgeous sunset orange color.
The first waffle came out of the iron, and I swear the whole kitchen smelled like a fall festival. It was crisp on the outside, tender on the inside, and had this subtle tang from the sourdough that cut right through the sweetness of the pumpkin. My son took one bite and said, “Mom, these are the best waffles you’ve ever made.” That’s a big deal, coming from a kid who usually just drowns things in syrup without comment.
This recipe wasn’t born from a complicated plan. It came from a happy accident, a hungry family, and a starter that needed a job. It’s the kind of morning magic that makes you feel like you accidentally did something really, really right.
Why You’ll Love This Recipe
Let me tell you why these fluffy sourdough pumpkin waffles have become a non-negotiable part of my fall rotation. After testing this recipe about six times (someone had to eat all those waffles), I can confidently say it’s a winner for so many reasons.
- Incredibly Fluffy Texture : The sourdough starter doesn’t just add flavor—it creates a waffle that is light, airy, and has the perfect crisp-to-soft ratio. You get that satisfying crunch on the outside and a pillowy, tender center.
- Complex Flavor Profile : The tangy sourdough pairs beautifully with the earthy sweetness of pumpkin and the warm spice blend. It’s not your average pumpkin waffle; it has depth that makes every bite interesting.
- Make-Ahead Friendly : You can mix the batter the night before and let it ferment on the counter. In the morning, just stir in a few ingredients and cook. It’s the ultimate shortcut for a busy weekday breakfast.
- Uses Up Your Discard : This is a fantastic way to use that unfed starter discard you hate throwing away. It gives the discard a delicious purpose and reduces food waste.
- Naturally Sweetened : With just a touch of maple syrup or brown sugar, these waffles aren’t overly sweet. They’re perfectly balanced, so you can top them with whatever your heart desires.
- Crowd-Pleaser Approved : I’ve served these at a brunch gathering and watched adults go back for seconds and thirds. They’re hearty enough to satisfy but light enough to not weigh you down.
What really sets this recipe apart is how the sourdough fermentation adds a subtle tang that complements the pumpkin instead of overpowering it. It’s a trick I learned from my grandmother’s pancake recipe, and it works like a charm here. This isn’t just another pumpkin waffle—it’s the one that makes you close your eyes after the first bite and sigh contentedly.
What Ingredients You Will Need
This recipe uses simple, wholesome ingredients to create something truly special. Most of these are pantry staples, especially if you’re a fellow sourdough enthusiast. Here’s what you’ll need and why each one matters.
- Sourdough Starter (1 cup, unfed/discard or active) : This is the heart of the recipe. An unfed discard works perfectly because the baking powder and baking soda will provide the lift. If using an active, bubbly starter, you might get an even fluffier result. I use my unfed discard straight from the fridge.
- Pumpkin Puree (1 cup) : Make sure you’re using 100% pure pumpkin puree, not pumpkin pie filling. The pie filling has added sugar and spices that will throw off the balance. I prefer Libby’s brand for its consistent texture and deep color.
- All-Purpose Flour (1 ½ cups) : This gives the waffles structure. You can substitute a 1:1 gluten-free baking flour if needed, but the texture will be slightly different. I haven’t tested this with whole wheat flour yet, but I imagine it would work with a bit more liquid.
- Milk (1 cup, room temperature) : Whole milk adds richness, but 2% or even oat milk works great. The milk helps activate the baking soda and creates a tender crumb. I usually use whatever I have on hand.
- Large Eggs (2, room temperature) : Eggs provide structure and help the waffles puff up. Room temperature eggs incorporate better into the batter, so take them out of the fridge about 20 minutes before you start.
- Melted Butter (4 tablespoons, unsalted) : Butter adds flavor and helps create that crispy exterior. You can substitute coconut oil or a neutral vegetable oil if you’re dairy-free, but butter really is best here for taste.
- Brown Sugar (2 tablespoons, packed) : Just a hint of sweetness to balance the tang and pumpkin. You can use maple syrup or honey instead, but reduce the milk slightly to compensate for the extra liquid.
- Pumpkin Pie Spice (2 teaspoons) : You can use store-bought or make your own blend with cinnamon, nutmeg, ginger, and cloves. I make my own because I like a heavier cinnamon ratio.
- Baking Powder (2 teaspoons) : This is your main leavening agent, working with the baking soda to create lift.
- Baking Soda (½ teaspoon) : This reacts with the acidity in the sourdough starter and pumpkin to create extra fluffiness. Don’t skip it!
- Salt (½ teaspoon) : Enhances all the flavors and balances the sweetness. I use fine sea salt.
- Vanilla Extract (1 teaspoon) : Adds warmth and depth to the overall flavor profile. Pure vanilla extract is worth the splurge here.
That’s it! No weird ingredients, no complicated steps. Just real food that comes together beautifully.
Equipment Needed
You don’t need a professional kitchen to nail this recipe, but having the right tools makes the process smoother. Here’s what I use every time.
- Waffle Iron : This is non-negotiable. I use a classic Belgian waffle iron, but any standard waffle maker will work. If you’re in the market, look for one with a non-stick surface and an adjustable temperature dial. My trusty Cuisinart has been with me for years and never lets me down.
- Large Mixing Bowl : For combining the wet ingredients. A glass or stainless steel bowl works best.
- Medium Mixing Bowl : For whisking the dry ingredients together.
- Whisk : A good whisk is essential for getting a lump-free batter. A silicone spatula is also handy for scraping down the sides.
- Measuring Cups and Spoons : Accurate measurements are key in baking. I prefer stainless steel sets that won’t warp over time.
- Ladle or Measuring Cup (1-cup size) : For pouring the batter onto the waffle iron evenly. A spouted measuring cup is my favorite tool for this job.
- Cooling Rack : This keeps the waffles crisp instead of soggy. If you stack them on a plate, they’ll steam and lose that perfect crunch.
- Pastry Brush or Paper Towel : For lightly greasing the waffle iron between batches. Even non-stick irons benefit from a little butter or oil.
If you don’t have a cooling rack, a wire rack from a baking sheet works perfectly. And if your waffle iron is old and sticky, give it a good clean with a paste of baking soda and water before you start.
Preparation Method
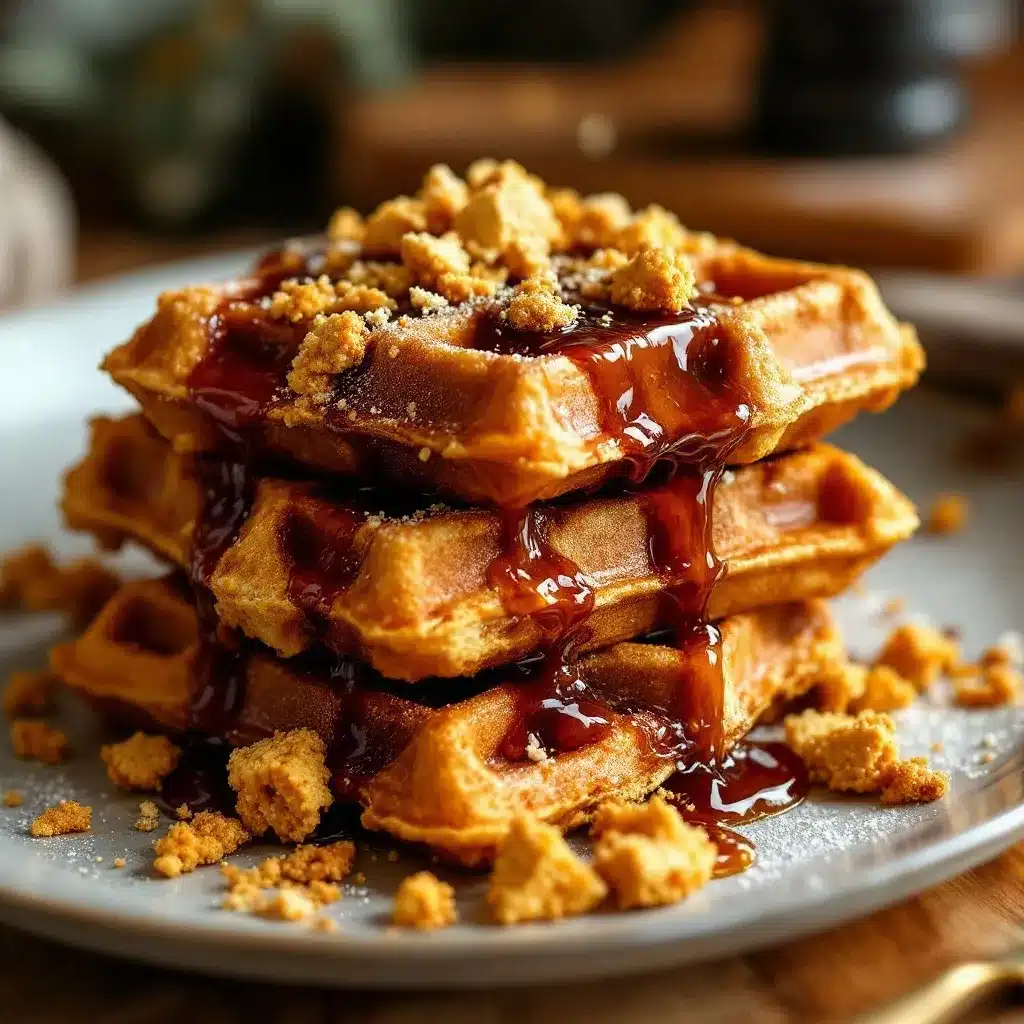
Alright, let’s get cooking! This recipe comes together in about 30 minutes from start to finish, and the actual hands-on time is even less. Follow these steps, and you’ll have a stack of golden, fluffy waffles in no time.
- Preheat Your Waffle Iron : Plug it in and set it to medium-high heat. I usually set mine to a 6 out of 8. This gives a nice golden brown color without burning. Let it heat up while you make the batter.
- Combine the Wet Ingredients : In a large mixing bowl, whisk together the sourdough starter, pumpkin puree, milk, melted butter, eggs, brown sugar, and vanilla extract. Whisk until everything is smooth and well combined. It should look like a thick, creamy orange soup.
- Mix the Dry Ingredients : In a separate medium bowl, whisk together the all-purpose flour, pumpkin pie spice, baking powder, baking soda, and salt. Make sure the baking powder and soda are evenly distributed so you don’t get any bitter pockets in your waffles.
- Combine Wet and Dry : Pour the dry ingredients into the wet ingredients. Gently fold them together with a spatula or whisk until just combined. A few small lumps are totally fine—overmixing will make the waffles tough. The batter should be thick but scoopable, like a loose muffin batter.
- Let the Batter Rest (Optional but Recommended) : If you have 5-10 minutes, let the batter sit on the counter. This allows the flour to fully hydrate and the baking powder to start working, resulting in even fluffier waffles. I usually use this time to set the table or pour myself a coffee.
- Grease the Waffle Iron : Lightly brush the hot waffle iron with melted butter or spray with non-stick cooking spray. Do this even if your iron is non-stick—it guarantees easy release and a crispy edge.
- Cook the Waffles : Ladle about ¾ cup of batter onto the center of the waffle iron (adjust based on your iron’s size). Close the lid and cook for 4-6 minutes, or until the steam stops escaping and the waffle is golden brown and crispy. Don’t peek too early! Opening the lid prematurely can cause the waffle to tear.
- Check for Doneness : The waffle should be easy to lift off the iron. If it sticks, give it another minute. I always look for a deep golden color and a firm feel when I touch the edge.
- Keep Warm in the Oven : Place the cooked waffles on a cooling rack set over a baking sheet in a 200°F (93°C) oven. This keeps them warm and crispy while you finish cooking the rest of the batter.
- Repeat : Continue with the remaining batter, greasing the iron lightly between each batch. You should get about 6-8 standard Belgian waffles, depending on your iron’s size.
Pro Tip : If your batter seems too thick after resting, add a tablespoon of milk to thin it out. If it’s too thin, add a tablespoon of flour. The perfect batter should slowly drip off your spatula.
Cooking Tips & Techniques
I’ve made my fair share of waffle mistakes over the years—soggy waffles, burnt waffles, waffles that stuck to the iron like glue. Here are the lessons I’ve learned so you don’t have to repeat them.
Temperature Control is Everything : If your waffle iron is too hot, the outside will burn before the inside cooks through. Too cool, and you’ll get pale, doughy waffles. I always start on medium-high and adjust after the first waffle. If the first one is too dark, turn it down a notch. Too pale, turn it up.
Don’t Overmix the Batter : This is the number one mistake I see home cooks make. Overmixing develops the gluten in the flour, which results in tough, rubbery waffles. Mix until the flour just disappears into the wet ingredients. Small lumps are your friends here—they’ll cook out and create air pockets that make the waffle fluffy.
Let the Waffles Rest on a Rack : I cannot stress this enough. If you stack hot waffles on a plate, the steam gets trapped and the bottoms turn soggy. Place them in a single layer on a cooling rack in a warm oven. This keeps them perfectly crisp for up to 30 minutes while you finish cooking.
Use Room Temperature Ingredients : Cold eggs and milk can seize the melted butter and create a lumpy batter. Take everything out of the fridge 20-30 minutes before you start. If you forget, you can warm the milk gently in the microwave for 10-15 seconds and place the eggs in a bowl of warm water for 5 minutes.
Grease Between Every Batch : Even if your waffle iron is non-stick, a light brush of butter or oil between each batch ensures easy release and a perfectly crispy edge. I use a silicone pastry brush for this—it’s quick and mess-free.
Listen to the Steam : Most waffle irons have a steam vent. When the waffle is done, the steam will significantly decrease or stop completely. This is a reliable indicator that doesn’t require you to open the lid and peek. Trust the steam!
My Biggest Failure : The first time I made these, I used active, bubbly starter AND added the full amount of baking powder and baking soda. The waffles puffed up like balloons and then collapsed into sad, flat discs. The leavening agents were competing with the starter’s natural rise. Now I always use unfed discard or reduce the baking powder slightly if using an active starter. Learn from my mistake!
Variations & Adaptations
One of the best things about this recipe is how adaptable it is. Whether you have dietary restrictions or just want to switch things up, here are some of my favorite variations.
- Gluten-Free Version : Substitute the all-purpose flour with a 1:1 gluten-free baking blend that contains xanthan gum. I’ve had great results with Bob’s Red Mill 1-to-1 Baking Flour. The texture will be slightly more delicate, but still deliciously fluffy. You might need to add an extra tablespoon of milk to loosen the batter.
- Dairy-Free Version : Use melted coconut oil or a neutral vegetable oil instead of butter, and swap the milk for unsweetened almond milk, oat milk, or coconut milk. I’ve tried oat milk and it works beautifully without changing the flavor much.
- Add Mix-Ins : Fold in ½ cup of chocolate chips, chopped pecans, or dried cranberries into the batter before cooking. The chocolate chips melt into gooey pockets of goodness that pair perfectly with the pumpkin spice. My kids love the chocolate chip version for a special weekend treat.
- Extra Spicy : If you love warm spices, add an extra teaspoon of cinnamon and a pinch of ground cloves or cardamom. This gives the waffles a deeper, more complex flavor that’s perfect for a cozy fall morning.
- Savory Twist : Reduce the brown sugar to 1 tablespoon and omit the vanilla. Add ½ cup of shredded sharp cheddar cheese and 2 tablespoons of chopped fresh sage to the batter. Cook as directed and serve with crispy bacon and a drizzle of maple syrup. The sweet-savory combo is incredible.
- Vegan Option : Use a flax egg (1 tablespoon ground flaxseed mixed with 3 tablespoons water, let sit for 5 minutes) instead of regular eggs, and use plant-based milk and oil instead of butter. The waffles will be slightly less fluffy but still delicious.
I personally love adding a handful of toasted pecans to the batter. The crunch contrasts beautifully with the soft, fluffy interior, and the nutty flavor complements the pumpkin perfectly. It’s a small addition that makes a big difference.
Serving & Storage Suggestions
These waffles are a blank canvas for your favorite toppings, but here are some of my go-to combinations.
Serving Suggestions : Serve the waffles hot off the iron or straight from the warming oven. Top them with a generous pat of butter and a drizzle of pure maple syrup. For an extra-special touch, add a dollop of whipped cream, a sprinkle of cinnamon, and a handful of toasted pecans. You can also serve them with a side of crispy bacon or breakfast sausage for a hearty meal.
If you’re feeling fancy, try a cream cheese glaze: whisk together 4 ounces of softened cream cheese, ¼ cup of powdered sugar, 2 tablespoons of milk, and ½ teaspoon of vanilla extract until smooth. Drizzle it over the waffles for a tangy-sweet finish that rivals any coffee shop creation.
For a fun brunch spread, set up a waffle bar with different toppings like fresh berries, sliced bananas, chocolate chips, coconut flakes, and different syrups. Let everyone build their own perfect waffle. It’s a guaranteed crowd-pleaser, especially if you’re serving a group with different tastes.
Storage Instructions : These waffles store beautifully, making them perfect for meal prep. Let the waffles cool completely on a wire rack (this is crucial to prevent sogginess). Then, place them in a single layer in a zip-top freezer bag or an airtight container with parchment paper between each layer. They’ll keep in the refrigerator for up to 3 days or in the freezer for up to 3 months.
Reheating Tips : The best way to revive frozen or refrigerated waffles is to pop them directly into a toaster or toaster oven. Toast on a medium setting until they’re hot and crispy on the outside, about 2-3 minutes. You can also reheat them in a 350°F (175°C) oven on a baking sheet for 5-7 minutes. Avoid the microwave—it will make them rubbery and sad.
Flavor Development : Here’s a little secret: these waffles actually taste even better the next day. The sourdough flavor deepens and mellows overnight, and the spices meld together beautifully. If you have leftovers, I highly recommend trying one cold, straight from the fridge. It’s a completely different but equally delicious experience.
Nutritional Information & Benefits
While I wouldn’t call these waffles a health food, they do offer some surprising nutritional perks thanks to the pumpkin and sourdough fermentation.
Estimated Nutritional Values (per waffle, based on 8 servings) :
- Calories: Approximately 280
- Fat: 12g
- Carbohydrates: 35g
- Fiber: 3g
- Sugar: 8g
- Protein: 7g
Health Benefits : Pumpkin is packed with vitamin A (in the form of beta-carotene), which is great for eye health and immune function. It’s also a good source of fiber, which helps keep you full and satisfied. The sourdough fermentation process breaks down some of the gluten and phytic acid in the flour, making the nutrients more bioavailable and potentially easier to digest for some people.
Dietary Considerations : This recipe is vegetarian and can easily be made dairy-free or gluten-free with the substitutions mentioned above. It’s not low-carb, but the fiber content helps moderate blood sugar spikes compared to regular waffles. If you’re watching your sugar intake, you can reduce the brown sugar to 1 tablespoon or omit it entirely.
Allergen Note : Contains wheat (gluten), dairy, and eggs. Adjustments can be made for common allergies as outlined in the variations section.
I like to think of these waffles as a “better-for-you” indulgence. They satisfy that craving for something warm and comforting without the crash you might get from a super-sugary breakfast. Plus, the protein content makes them substantial enough to keep you going until lunch.
Conclusion
These fluffy sourdough pumpkin waffles have earned a permanent spot in my fall breakfast rotation. They’re the perfect blend of tangy, sweet, and spiced, with a texture that’s crispy on the outside and pillowy soft on the inside. Whether you’re a seasoned sourdough baker or someone who’s just starting to experiment with your starter, this recipe is forgiving, adaptable, and incredibly rewarding.
I love how this recipe makes me feel like a kitchen magician—turning a bubbling jar of starter and a can of pumpkin into something that makes the whole family smile. It’s the kind of breakfast that turns a regular Tuesday into a special occasion, without any extra stress or fancy ingredients.
Now I want to hear from you! Have you tried making these waffles? Did you add any fun mix-ins or toppings? Drop a comment below and share your creation. And if you loved this recipe, don’t forget to pin it for later and share it with your friends. Happy cooking, and may your waffles always be perfectly crispy!
Frequently Asked Questions
Can I use active sourdough starter instead of discard?
Yes, you can! If using an active, bubbly starter, you might want to reduce the baking powder to 1 ½ teaspoons to avoid over-leavening. The waffles will be even fluffier and have a milder tang.
How do I know when the waffle is done without opening the lid?
Most waffle irons have a steam vent. When the steam significantly decreases or stops, the waffle is usually done. You can also set a timer for 4-5 minutes and check visually for a golden brown color.
Can I make the batter the night before?
Absolutely! This is one of my favorite time-saving tricks. Mix the wet and dry ingredients separately, then combine them right before cooking. Or, mix the batter completely, cover it, and refrigerate overnight. The next morning, stir in an extra tablespoon of milk if it’s too thick, and cook as directed.
Why are my waffles coming out soggy?
Soggy waffles usually mean one of three things: the batter is too wet (add a tablespoon of flour), the waffle iron isn’t hot enough (increase the heat), or you’re stacking the waffles instead of placing them on a cooling rack. Always let them rest on a rack to keep that crispy texture.
Can I freeze these waffles for later?
Yes, they freeze beautifully! Let them cool completely, then place them in a single layer in a freezer bag with parchment paper between each waffle. They’ll keep for up to 3 months. Reheat directly in a toaster or toaster oven for best results.
Pin This Recipe!
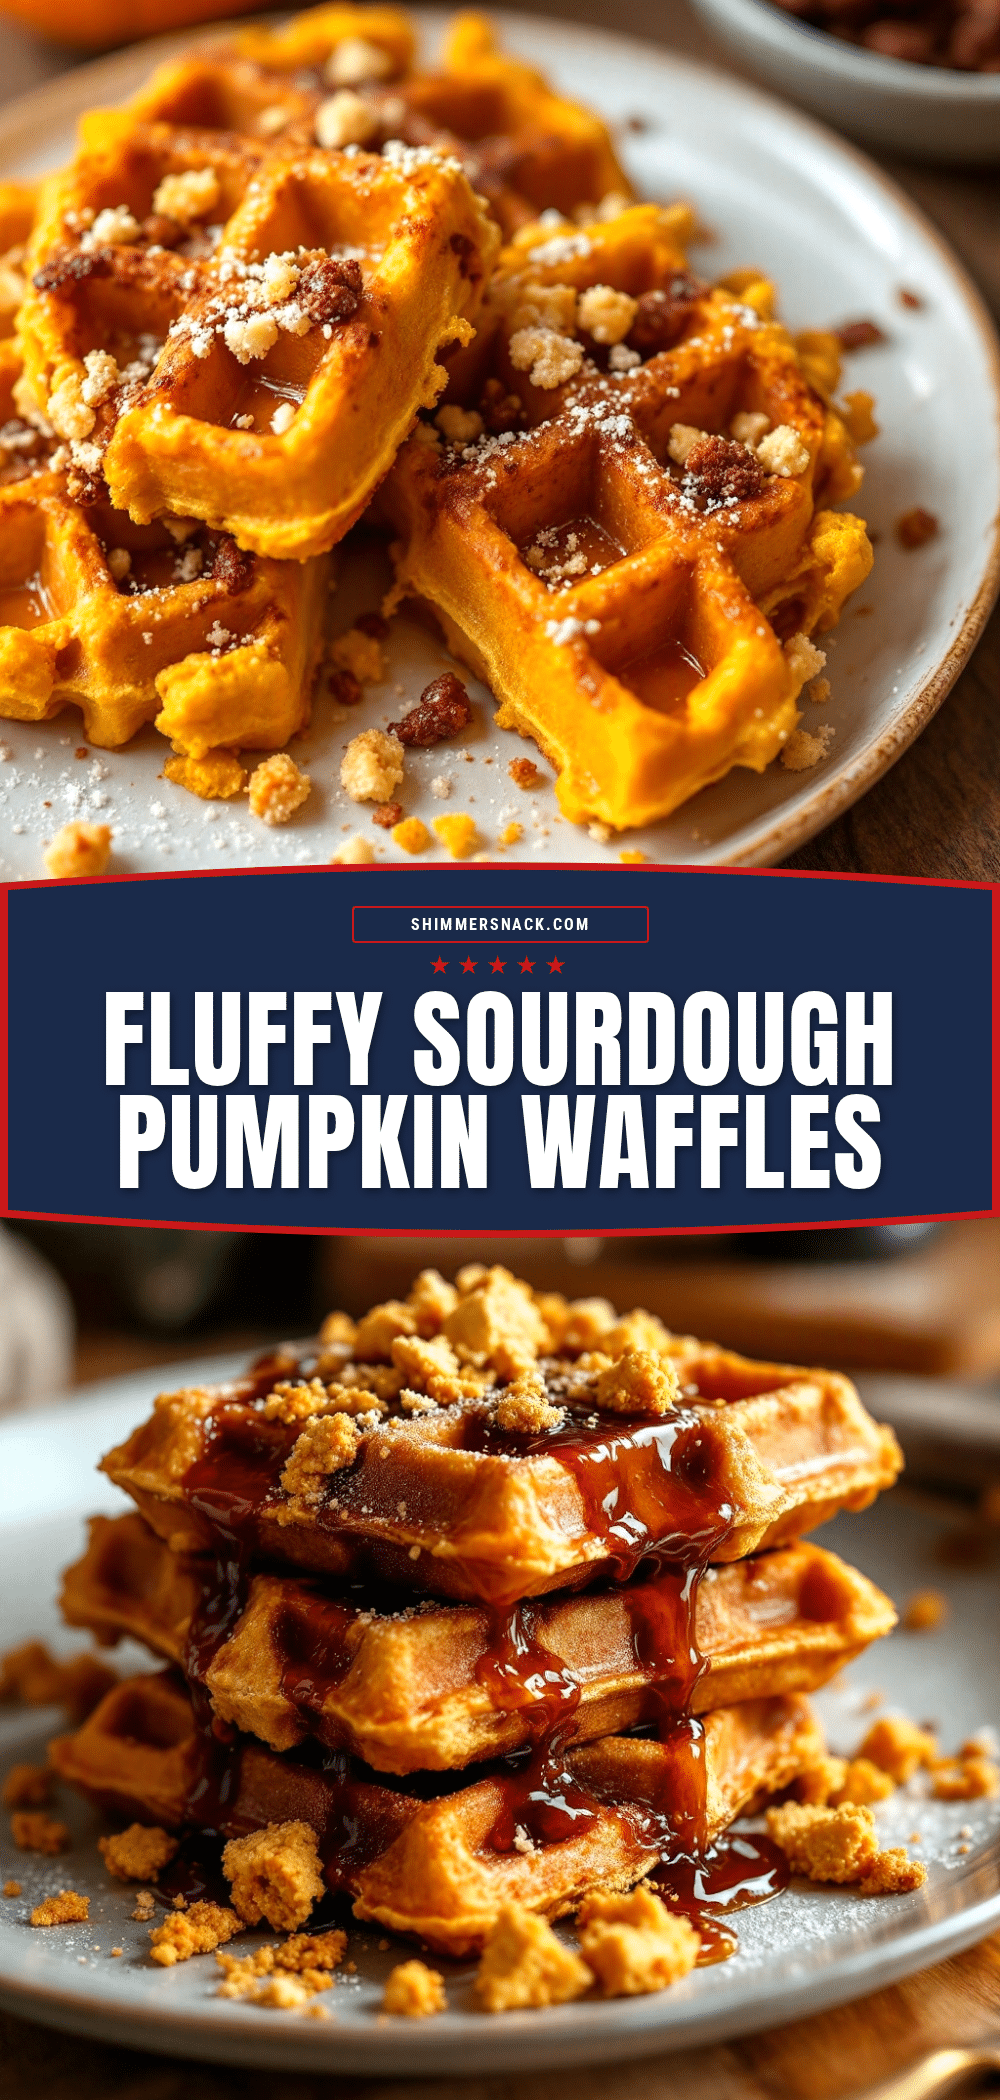
Best Fluffy Sourdough Pumpkin Waffles Recipe (Easy)
These fluffy sourdough pumpkin waffles are the perfect fall breakfast, combining tangy sourdough with earthy pumpkin and warm spices for a crispy-on-the-outside, tender-on-the-inside treat that the whole family will love.
- Prep Time: 15 minutes
- Cook Time: 20 minutes
- Total Time: 35 minutes
- Yield: 8 servings 1x
- Category: Breakfast
- Cuisine: American
Ingredients
- 1 cup sourdough starter (unfed/discard or active)
- 1 cup pumpkin puree (100% pure, not pie filling)
- 1 ½ cups all-purpose flour
- 1 cup milk, room temperature
- 2 large eggs, room temperature
- 4 tablespoons unsalted butter, melted
- 2 tablespoons brown sugar, packed
- 2 teaspoons pumpkin pie spice
- 2 teaspoons baking powder
- ½ teaspoon baking soda
- ½ teaspoon salt
- 1 teaspoon vanilla extract
Instructions
- Preheat your waffle iron to medium-high heat (e.g., 6 out of 8).
- In a large mixing bowl, whisk together the sourdough starter, pumpkin puree, milk, melted butter, eggs, brown sugar, and vanilla extract until smooth.
- In a separate medium bowl, whisk together the all-purpose flour, pumpkin pie spice, baking powder, baking soda, and salt.
- Pour the dry ingredients into the wet ingredients and gently fold until just combined. A few small lumps are fine; do not overmix.
- Let the batter rest for 5-10 minutes if time allows.
- Lightly grease the hot waffle iron with melted butter or non-stick spray.
- Ladle about ¾ cup of batter onto the center of the waffle iron. Close the lid and cook for 4-6 minutes, until golden brown and crispy, and steam has significantly decreased.
- Carefully remove the waffle and place it on a cooling rack set over a baking sheet in a 200°F (93°C) oven to keep warm and crisp.
- Repeat with remaining batter, greasing the iron lightly between each batch. Makes 6-8 standard Belgian waffles.
Notes
For best results, use room temperature ingredients. If using active starter, reduce baking powder to 1 ½ teaspoons. Let waffles rest on a cooling rack to stay crispy. Freeze leftovers for up to 3 months; reheat in a toaster.
Nutrition
- Serving Size: 1 waffle
- Calories: 280
- Sugar: 8
- Sodium: 380
- Fat: 12
- Saturated Fat: 6
- Carbohydrates: 35
- Fiber: 3
- Protein: 7
Keywords: sourdough waffles, pumpkin waffles, fall breakfast, sourdough discard recipe, fluffy waffles, pumpkin spice waffles


