Love this? Save it for later!
Share the inspiration with your friends
“You ever get that feeling when you catch a whiff of something baking, and suddenly you’re transported back to a summer afternoon decades ago?” That’s exactly what happened to me last July. I was wandering through an old flea market in a sleepy town, browsing through stacks of vintage cookbooks and faded recipe cards. Among the clutter, a slightly stained, handwritten note caught my eye. It was a cherry pie recipe, complete with instructions for a lattice crust that looked like it was penned by someone who truly loved the craft of baking. I wasn’t expecting much, but I slipped it into my bag, thinking it might be a fun experiment.
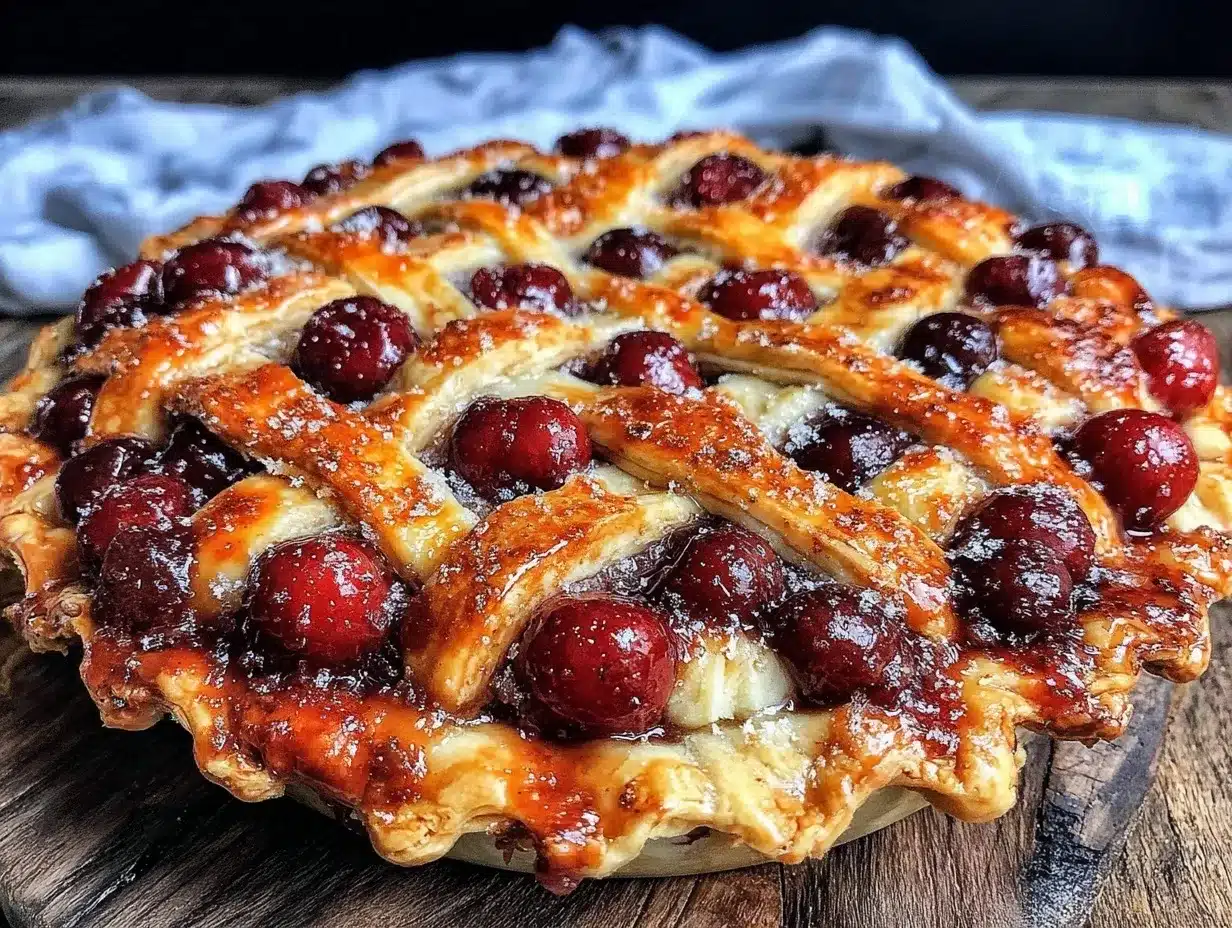
That afternoon, I tried making this classic homemade cherry pie, and let me tell you—the kitchen smelled like summer itself. The lattice top cracked just right, golden and flaky, and the filling was bursting with that perfect balance of tart and sweet cherries. Funny enough, I forgot to set the timer that first time and almost burned the edges (classic me!), but the pie still came out wonderfully. Maybe you’ve been there—rushing but somehow it still turns out better than expected.
Since then, this cherry pie has become my go-to for cozy weekend baking. It’s simple, yet feels like a special occasion every time. Honestly, I love how the lattice top adds a little flair without being intimidating. So, if you’ve been on the lookout for a classic homemade cherry pie recipe with a perfect lattice top that’s easy to nail, you’re in the right place. Let’s get baking!
Why You’ll Love This Recipe
Having tested this cherry pie recipe through multiple baking sessions (and a few kitchen mishaps), I can confidently say it’s a crowd-pleaser every time. Here’s why it might become your favorite too:
- Quick & Easy: The dough comes together in about 15 minutes, and the filling is straightforward—perfect for last-minute baking urges.
- Simple Ingredients: No need for fancy or hard-to-find items. Most are pantry staples you probably already have on hand.
- Perfect for Any Occasion: Whether it’s a summer picnic, a holiday dessert, or a weekend treat, this pie fits the bill.
- Crowd-Pleaser: Kids, adults, cherry lovers, and even those who “aren’t big on pie” tend to ask for seconds.
- Unbelievably Delicious: The tart cherries paired with the buttery, flaky lattice crust create a flavor and texture harmony that’s just next-level.
What sets this recipe apart? The lattice crust technique I learned from that faded note makes the pie look stunning, but it’s surprisingly simple to master. Plus, the filling’s perfectly balanced sweetness and a hint of almond extract (trust me on this) make it uniquely comforting without being overly sugary. I mean, this isn’t just any cherry pie; it’s the kind that has you closing your eyes after the first bite, savoring every mouthful.
It’s like comfort food reimagined with a touch of elegance—no stress, no fuss, just good old-fashioned baking joy. I know once you try it, you’ll want to make it again and again.
What Ingredients You Will Need
This classic homemade cherry pie recipe uses simple, wholesome ingredients to deliver bold flavor and that satisfying flaky texture without fuss. Most are pantry staples, and if you’re craving a seasonal twist, I’ll share some substitutions you can try.
- For the Pie Dough:
- 2 ½ cups (315g) all-purpose flour, plus extra for dusting
- 1 teaspoon salt
- 1 tablespoon granulated sugar (adds a subtle sweetness to the crust)
- 1 cup (227g) unsalted butter, cold and cut into small cubes (I recommend using Kerrygold for its rich flavor)
- 6-8 tablespoons ice water (add gradually for the right dough consistency)
- For the Cherry Filling:
- 5 cups (about 750g) fresh or frozen tart cherries, pitted (fresh are ideal in summer, frozen works well year-round)
- 1 ¼ cups (250g) granulated sugar
- 3 tablespoons cornstarch (for thickening)
- 1 teaspoon vanilla extract
- ½ teaspoon almond extract (optional but highly recommended for that classic cherry pie aroma)
- 1 tablespoon lemon juice (balances the sweetness)
- Pinch of salt
- For Assembly:
- 1 egg, beaten (for egg wash to get that golden lattice)
- 1 tablespoon coarse sugar (optional, for sprinkling on top)
Ingredient tips: For the best texture, look for firm cherries if fresh. If using frozen, thaw and drain excess juice to avoid a soggy crust. You can swap the all-purpose flour with a gluten-free blend if needed, though the crust might be a bit more fragile.
Equipment Needed
- 9-inch (23 cm) pie dish – glass or ceramic works great for even baking
- Mixing bowls – at least two sizes for dough and filling
- Rolling pin – a wooden or silicone one, whatever feels comfortable
- Pastry cutter or food processor – handy for cutting butter into flour, but you can do this by hand too (I often do)
- Bench scraper or sharp knife – for cutting dough strips for the lattice top
- Pastry brush – for applying the egg wash
- Measuring cups and spoons – accuracy helps, especially with flour and cornstarch
If you don’t have a pastry cutter, two knives or even your fingertips work fine. For rolling the dough, I prefer a silicone mat to keep things tidy, but parchment paper works too. Don’t worry about fancy tools—this recipe is forgiving enough for a beginner setup.
Preparation Method
- Make the pie dough: In a large bowl, whisk together 2 ½ cups flour, salt, and sugar. Add the cold butter cubes and use a pastry cutter or your fingers to blend until the mixture resembles coarse crumbs with pea-sized pieces. (This usually takes about 5-7 minutes.)
- Add ice water: Slowly add 6 tablespoons of ice water, stirring gently with a fork. Add more water, one tablespoon at a time, just until the dough starts to hold together when pressed. Avoid overworking the dough to keep it flaky. (This step is crucial—if you add too much water, the crust gets tough.)
- Form dough discs: Divide the dough in half, shape each into a flat disc, wrap in plastic wrap, and chill in the fridge for at least 1 hour. (This resting period lets the gluten relax and the butter firm up.)
- Prepare the cherry filling: In a medium bowl, combine cherries, sugar, cornstarch, vanilla and almond extracts, lemon juice, and a pinch of salt. Mix well until the cherries are evenly coated. Set aside to macerate while you roll out the dough.
- Roll out the bottom crust: On a lightly floured surface, roll out one dough disc to about 12 inches (30 cm) diameter and ⅛ inch (3 mm) thick. Transfer to your pie dish, letting the edges hang over slightly.
- Fill the pie: Pour the cherry mixture into the crust, spreading evenly. (You’ll notice the filling looks juicy—that’s normal and will thicken during baking.)
- Make the lattice top: Roll out the second dough disc similarly. Using a sharp knife or pizza cutter, cut into ½-inch (1.3 cm) wide strips. Lay half the strips evenly spaced across the pie, then fold back every other strip. Place a strip perpendicular, unfold the folded strips over it, and repeat to create a woven lattice pattern. Trim excess dough and crimp edges to seal.
- Egg wash and sugar: Brush the lattice and edges with beaten egg for that golden shine. Sprinkle coarse sugar on top for a slight crunch.
- Bake: Preheat your oven to 400°F (205°C). Bake the pie on the lower rack for 20 minutes, then reduce temperature to 350°F (175°C) and bake for another 35-40 minutes until crust is golden and filling is bubbling. (If edges brown too fast, cover them with foil.)
- Cool: Let the pie cool for at least 2 hours before slicing to allow the filling to set. (I know, the hardest part!)
Pro tip: If your filling seems too runny after baking, you can place the pie in the fridge overnight to firm up further.
Cooking Tips & Techniques
Getting that perfect cherry pie with a flawless lattice top isn’t rocket science, but here are some tips I’ve learned the hard way:
- Cold butter is key: Keep your butter chilled until you’re ready to mix. Warm butter will ruin that flaky texture.
- Don’t overwork the dough: Handle it gently and minimally. Over-kneading can make your crust tough instead of tender.
- Use tart cherries: They hold their shape better and balance sweetness well. Sweet cherries can be too mushy or overly sugary.
- Drain frozen cherries well: If you use frozen, thaw completely and drain excess juice to prevent a soggy bottom crust.
- Master the lattice: Take your time weaving the strips. If the dough becomes too warm, pop it back in the fridge for 10 minutes.
- Prevent burning edges: Use a pie shield or foil to cover the crust edges after the first 20 minutes of baking.
- Time your bake: Keep an eye on the pie, especially the first time you try this recipe. Every oven’s a bit different.
Honestly, the first time I tried the lattice, I got a little tangled and ended up improvising with a striped top! It still tasted fantastic, but practice makes perfect. The key is patience and a light touch.
Variations & Adaptations
This classic homemade cherry pie recipe is versatile—here are some ways to make it your own:
- Dietary variation: Swap regular flour for a gluten-free blend to make the crust friendly for gluten-sensitive folks. Use coconut or almond milk instead of water for a slight flavor twist.
- Seasonal adaptation: In summer, mix fresh blueberries or blackberries with the cherries for a mixed berry pie. In winter, add a pinch of cinnamon or nutmeg for warmth.
- Flavor twist: Try adding a splash of brandy or cherry liqueur to the filling for an adult-only version with a bit of kick.
- Alternative crust: Use a crumb topping instead of lattice if you want a quicker, less fussy finish.
- Personal variation: One time, I added slivered almonds to the crust edges for extra crunch and a nutty note—it was a happy accident that I’ll be repeating.
Feel free to experiment with your favorite flavors or accommodate dietary needs. It’s your cherry pie, after all!
Serving & Storage Suggestions
This cherry pie is best served slightly warm or at room temperature. A scoop of vanilla ice cream or a dollop of whipped cream pairs beautifully, making it a dreamy dessert.
For storage, cover the pie loosely with foil or plastic wrap and refrigerate. It keeps well for up to 4 days. You can freeze the unbaked pie wrapped tightly in plastic and foil for up to 2 months—just thaw overnight before baking.
To reheat, warm slices in a 350°F (175°C) oven for about 10 minutes to bring back that fresh-baked aroma. The flavors actually deepen after a day or two, so it’s perfect for making ahead.
Pro tip: If you want a crisp crust when reheating, avoid microwaving as it tends to soften the pastry.
Nutritional Information & Benefits
This classic homemade cherry pie offers a comforting treat with some nutritional perks. A typical slice (1/8 of pie) contains approximately:
| Calories | 320 |
|---|---|
| Fat | 15g |
| Carbohydrates | 43g |
| Sugar | 28g |
| Protein | 3g |
Cherries are rich in antioxidants and vitamin C, which support immune health. Using real butter adds richness but also healthy fats in moderation. You can always reduce sugar or swap ingredients to suit low-sugar or gluten-free diets. Just remember, this pie is a treat meant to be enjoyed!
Conclusion
Why should you try this classic homemade cherry pie with perfect lattice top? Because it blends simplicity with that nostalgic, homemade charm that makes baking so rewarding. It’s one of those recipes where the results look as good as they taste—golden crust, vibrant filling, and just the right balance of sweet and tart.
Feel free to make it your own by playing with flavors or crust styles. I love this pie because it takes me back to a quiet afternoon at a flea market and forward to countless cozy moments shared over dessert. Now it’s your turn to create those memories.
If you give this recipe a go, I’d love to hear how it turns out for you—drop a comment, share your tweaks, or even tell me about your first lattice attempt! Happy baking!
FAQs about Classic Homemade Cherry Pie
Can I use canned cherries instead of fresh or frozen?
You can, but canned cherries tend to be softer and sweeter with added syrup. If you use them, reduce the sugar in the filling and drain the cherries well to avoid a soggy crust.
How do I prevent the bottom crust from getting soggy?
Make sure to drain frozen cherries well and consider brushing the bottom crust with a thin layer of beaten egg white before adding the filling to create a moisture barrier.
What’s the best way to pit cherries quickly?
I use a small metal straw or a cherry pitter tool. If you don’t have one, a sturdy paperclip can work in a pinch!
Can I make this pie ahead of time?
Absolutely! You can prepare the pie dough and filling separately in advance. Assemble and bake on the day you want to serve it, or bake and reheat gently later.
How do I store leftover cherry pie?
Cover loosely and refrigerate. It keeps well for up to 4 days. For longer storage, freeze unbaked pie dough or baked slices wrapped tightly.
Pin This Recipe!
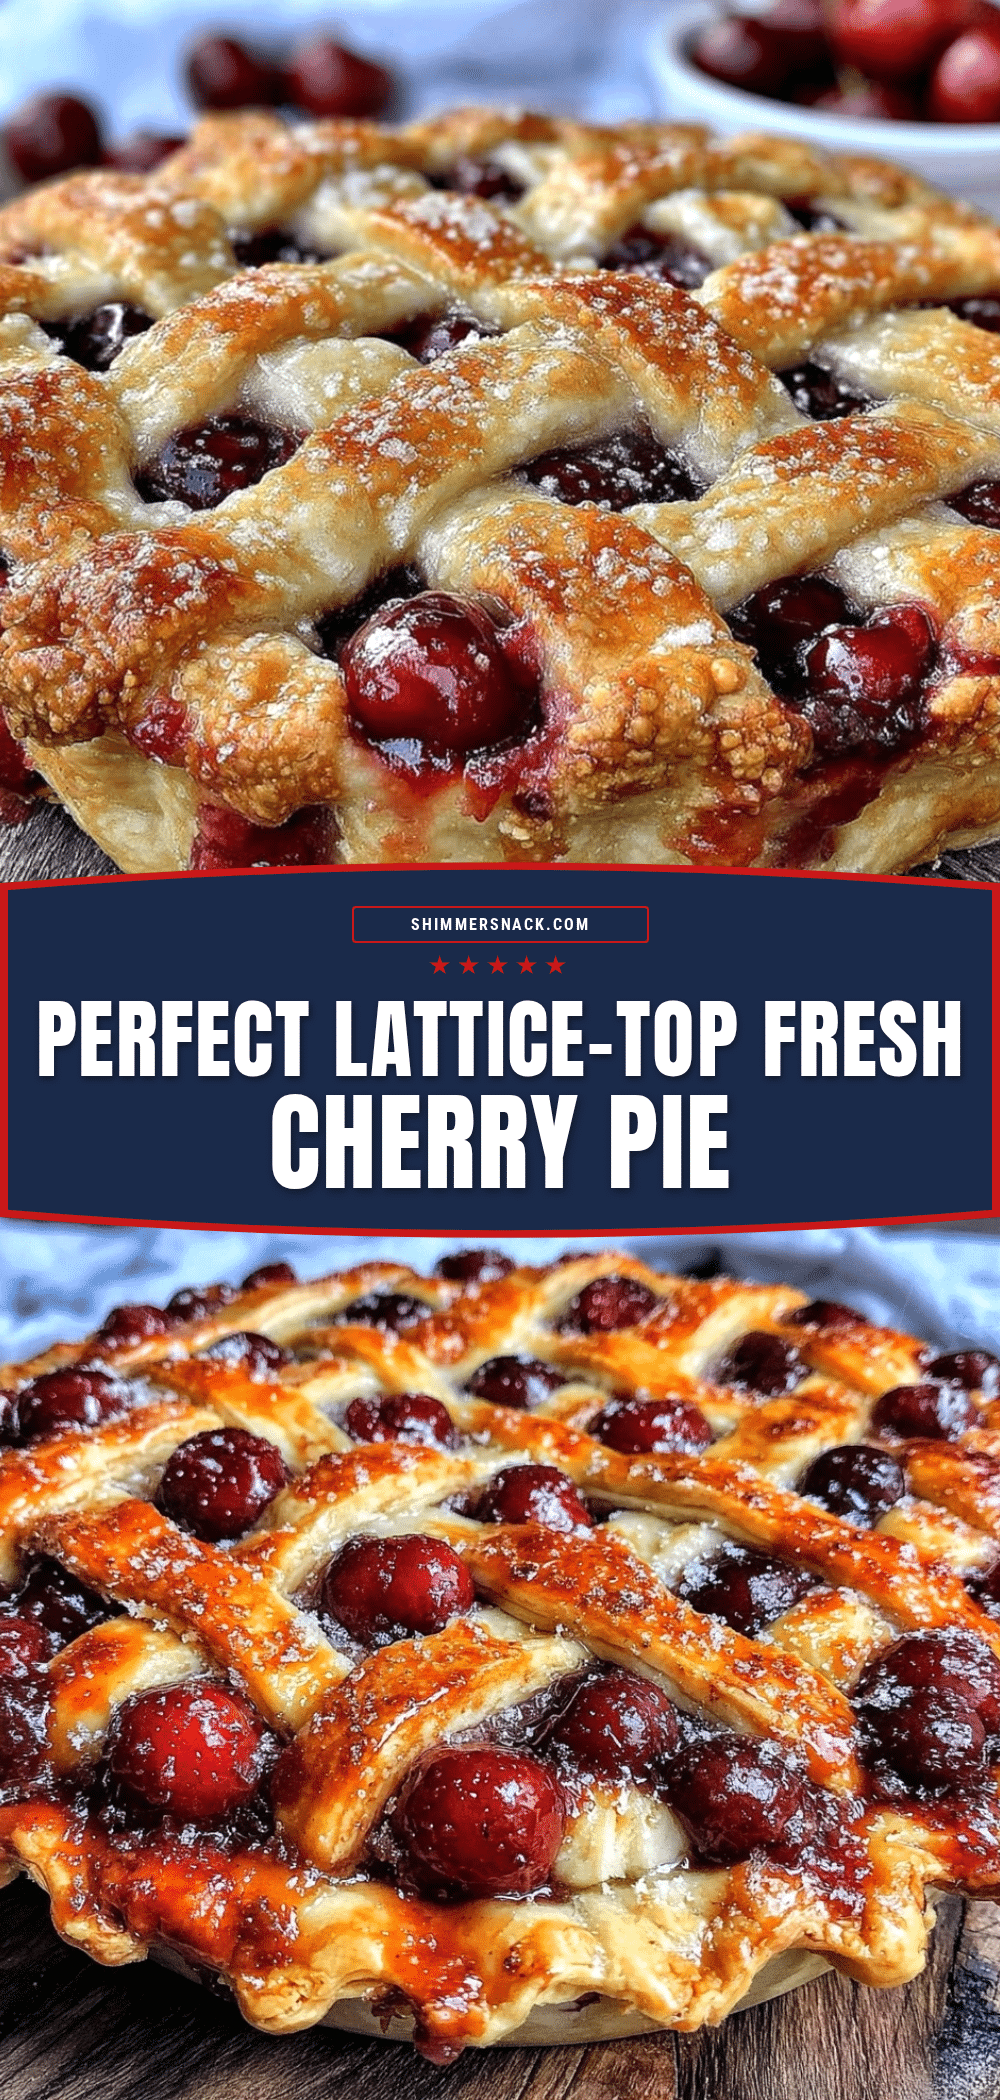
Classic Homemade Cherry Pie
A nostalgic and easy-to-make cherry pie with a perfect flaky lattice crust and a balanced tart and sweet cherry filling. Ideal for any occasion and a crowd-pleaser.
- Prep Time: 15 minutes
- Cook Time: 55-60 minutes
- Total Time: 2 hours 15 minutes
- Yield: 8 servings 1x
- Category: Dessert
- Cuisine: American
Ingredients
- 2 ½ cups (315g) all-purpose flour, plus extra for dusting
- 1 teaspoon salt
- 1 tablespoon granulated sugar
- 1 cup (227g) unsalted butter, cold and cut into small cubes
- 6–8 tablespoons ice water
- 5 cups (about 750g) fresh or frozen tart cherries, pitted
- 1 ¼ cups (250g) granulated sugar
- 3 tablespoons cornstarch
- 1 teaspoon vanilla extract
- ½ teaspoon almond extract (optional)
- 1 tablespoon lemon juice
- Pinch of salt
- 1 egg, beaten (for egg wash)
- 1 tablespoon coarse sugar (optional, for sprinkling on top)
Instructions
- In a large bowl, whisk together 2 ½ cups flour, salt, and sugar.
- Add the cold butter cubes and use a pastry cutter or fingers to blend until mixture resembles coarse crumbs with pea-sized pieces (5-7 minutes).
- Slowly add 6 tablespoons ice water, stirring gently with a fork, adding more water one tablespoon at a time until dough holds together when pressed. Avoid overworking.
- Divide dough in half, shape each into a flat disc, wrap in plastic wrap, and chill in fridge for at least 1 hour.
- In a medium bowl, combine cherries, sugar, cornstarch, vanilla and almond extracts, lemon juice, and a pinch of salt. Mix well and set aside.
- On a lightly floured surface, roll out one dough disc to about 12 inches diameter and ⅛ inch thick. Transfer to pie dish, letting edges hang over slightly.
- Pour cherry mixture into crust, spreading evenly.
- Roll out second dough disc similarly. Cut into ½-inch wide strips. Lay half the strips evenly spaced across pie, fold back every other strip, place a perpendicular strip, unfold folded strips over it, and repeat to create woven lattice. Trim excess dough and crimp edges to seal.
- Brush lattice and edges with beaten egg. Sprinkle coarse sugar on top if desired.
- Preheat oven to 400°F (205°C). Bake pie on lower rack for 20 minutes.
- Reduce oven temperature to 350°F (175°C) and bake for another 35-40 minutes until crust is golden and filling bubbles. Cover edges with foil if browning too fast.
- Let pie cool for at least 2 hours before slicing to allow filling to set.
Notes
Use cold butter and handle dough minimally to keep crust flaky. Drain frozen cherries well to avoid soggy crust. Cover edges with foil after 20 minutes to prevent burning. Let pie cool for at least 2 hours before slicing. Refrigerate overnight if filling is too runny.
Nutrition
- Serving Size: 1 slice (1/8 of pie)
- Calories: 320
- Sugar: 28
- Fat: 15
- Carbohydrates: 43
- Protein: 3
Keywords: cherry pie, homemade pie, lattice crust, classic dessert, easy cherry pie, tart cherry pie, baking, summer dessert