Love this? Save it for later!
Share the inspiration with your friends
Late October dusk, and the kitchen counters are sticky with squash seeds. I had bought the butternut squash on a whim at the farmers market three days ago, and it had been sitting on the counter like an unread book I kept meaning to open. The air outside had that sharp, turning-leaf bite, and I wanted something that would fill the whole apartment with that smell—the one that says everything is slowing down now, and that’s okay.
I didn’t want plain roasted squash. I wanted a hug in a bowl, something that would make my toddler eat a vegetable without negotiation. That’s when the idea hit me—why not turn this gorgeous, sweet squash into a sauce for mac and cheese? It’s not a new concept, I know. But the crispy sage on top? That was the detail I couldn’t let go of. I had a bunch of sage in the fridge from a roasted butternut squash bisque I made the week before, and the thought of those leaves crackling in hot butter made my mouth water.
So I grabbed the squash, a block of sharp cheddar, and some pasta shells. I roasted the squash until it was caramelized and jammy, then blitzed it into a velvety puree. The cheese sauce came together in the same pot—butter, flour, milk, a mountain of cheddar, and that golden squash puree. It turned the most ridiculous shade of orange. I stirred in the pasta, fried the sage leaves until they were paper-thin and translucent, and piled everything into a baking dish.
The first bite was quiet. That’s how you know it’s good—when the person eating it stops talking. This Creamy Butternut Squash Mac and Cheese with Crispy Sage isn’t trying to be fancy. It’s just honest, deeply satisfying comfort food that happens to have a vegetable tucked inside. And honestly? That’s the kind of cooking I trust most.
Why You’ll Love This Recipe
This isn’t your average mac and cheese, and I mean that in the best possible way. Let me tell you why this version deserves a permanent spot in your fall dinner rotation.
- Hidden Veggie Genius: The butternut squash puree blends completely into the cheese sauce. You get all the creamy, cheesy goodness with a boost of vitamin A and fiber. Kids eat it without a second thought—I tested it on mine, and she asked for seconds before I could sit down.
- Restaurant-Quality Flavor at Home: The crispy sage and nutty browned butter topping make this taste like something from a cozy bistro. But it comes together in one pot (plus a sheet pan for roasting) with ingredients you can find at any grocery store.
- Perfect for Fall Gatherings: This dish is a showstopper on a Thanksgiving table, a potluck hero, or a weeknight dinner that feels special. It pairs beautifully with a simple green salad or alongside crispy boneless skinless chicken thighs for a complete meal.
- Make-Ahead Friendly: Assemble it the day before, keep it in the fridge, and bake it when you’re ready. The flavors actually get better overnight—the sage and squash meld together in a way that’s hard to describe but impossible to resist.
- Crowd-Pleaser for All Ages: I’ve served this to my toddler, my in-laws, and a group of friends who are notoriously picky eaters. Every single person went back for more. It’s creamy without being heavy, cheesy without being greasy, and the crispy sage adds a texture that makes every bite interesting.
This recipe came from a place of wanting something that felt like a warm blanket on a cold day, but also something I could feel good about feeding my family. It delivers on both fronts, and I think you’re going to love it as much as we do.
What Ingredients You Will Need
This recipe uses simple, wholesome ingredients to deliver bold flavor and satisfying texture without the fuss. Most of these are pantry staples or easy fall finds, and I’ve included notes on substitutions where I can.
- Butternut Squash (1 medium, about 2-3 lbs): Look for a squash that feels heavy for its size with firm, unblemished skin. You’ll roast it until it’s caramelized and tender, then puree it into the sauce. (Pro tip: You can use pre-cut squash from the store to save time, but roasting a whole squash gives you better flavor.)
- Elbow Macaroni (1 lb or 450g): Classic mac and cheese pasta. You can use shells, cavatappi, or any short pasta you like. I prefer the way the sauce clings to the ridges of shells.
- Sharp Cheddar Cheese (2 cups, shredded, about 8 oz/225g): Use a good-quality block of sharp cheddar and shred it yourself. Pre-shredded cheese has anti-caking agents that can make the sauce grainy. I recommend Tillamook or Cabot for consistent melting.
- Gruyère Cheese (1 cup, shredded, about 4 oz/115g): This adds a nutty, slightly sweet flavor that pairs beautifully with the squash. You can substitute with more cheddar or Monterey Jack if needed.
- Unsalted Butter (4 tbsp, divided): You’ll use 3 tablespoons for the roux (the base of the cheese sauce) and 1 tablespoon for frying the sage leaves. Use unsalted so you can control the salt level.
- All-Purpose Flour (3 tbsp): This thickens the cheese sauce. For a gluten-free version, use a 1:1 gluten-free flour blend.
- Whole Milk (2 cups, 480 ml): Whole milk gives the sauce the creamiest texture. You can use 2% or a mix of milk and half-and-half for extra richness. For a dairy-free option, unsweetened oat milk works well.
- Heavy Cream (1/2 cup, 120 ml): This adds luxurious richness to the sauce. You can skip it and use an extra 1/2 cup of milk, but the sauce won’t be as velvety.
- Fresh Sage Leaves (about 15-20 leaves): These get fried in butter until crispy and translucent. The flavor is earthy, slightly peppery, and absolutely magical with the squash and cheese. Don’t use dried sage here—it won’t give you the same texture or flavor.
- Garlic (3 cloves, minced): Adds a savory depth that rounds out the sweetness of the squash.
- Onion (1/2 medium, diced): Cooked down in the butter before making the roux, it adds a subtle sweetness.
- Chicken or Vegetable Broth (1/2 cup, 120 ml): Used to deglaze the pan and add savory flavor. You can use water in a pinch.
- Salt and Black Pepper (to taste): I use about 1 teaspoon of salt and 1/2 teaspoon of pepper, but adjust based on your cheese and broth.
- Nutmeg (1/4 tsp, freshly grated if possible): This is the secret ingredient that makes the squash and cheese sing. A tiny pinch goes a long way.
- Panko Breadcrumbs (1/2 cup, 60g): Optional, but I love the extra crunch on top. Toss them with a tablespoon of melted butter before sprinkling over the mac and cheese before baking.
Equipment Needed
You don’t need a fancy kitchen to make this recipe work. Here’s what I used, along with some honest notes on alternatives.
- Baking Sheet: For roasting the squash. A rimmed sheet pan works best to catch any juices. Line it with parchment paper for easy cleanup.
- Large Pot (5-6 quart): For boiling the pasta and making the cheese sauce. A Dutch oven is ideal because it holds heat well and has high sides.
- Medium Skillet: For frying the sage leaves. A non-stick skillet makes this easier, but stainless steel works fine too.
- Immersion Blender or Food Processor: To puree the roasted squash. I prefer an immersion blender because I can do it right in the pot, but a food processor or even a fork (if you’re patient) works.
- 9×13-inch Baking Dish: For assembling and baking the mac and cheese. An 8×8-inch dish works for a smaller batch.
- Box Grater: For shredding your cheese. I know it’s tempting to buy pre-shredded, but trust me on this one—freshly grated cheese melts so much better.
- Wooden Spoon or Silicone Spatula: For stirring the sauce. A wooden spoon won’t scratch your pot and gives you good control.
If you don’t have an immersion blender, a regular blender works fine—just let the squash cool slightly before blending, and work in batches to avoid a hot mess (literally).
Preparation Method
Let’s walk through this step by step. I’ve included time estimates and sensory cues so you know exactly what to look for at each stage.
Step 1: Roast the Butternut Squash (45 minutes)
Preheat your oven to 400°F (200°C). Cut the butternut squash in half lengthwise and scoop out the seeds with a spoon. (Save the seeds for roasting later—they make a great snack!) Place the squash halves cut-side down on a parchment-lined baking sheet. Roast for 40-45 minutes, until a fork slides easily into the thickest part. The flesh should be deep orange and smell sweet and caramelized. Let it cool for 10 minutes, then scoop the flesh into a bowl. You should have about 2 cups of roasted squash puree.
Step 2: Cook the Pasta (8-10 minutes)
While the squash roasts, bring a large pot of salted water to a boil. Add the macaroni and cook until al dente—about 1 minute less than the package directions. The pasta will continue cooking in the oven, so you want it slightly firm. Drain the pasta, reserving about 1 cup of the starchy pasta water. Don’t rinse the pasta—the starch helps the sauce stick.
Step 3: Make the Squash Puree (5 minutes)
Transfer the roasted squash to a food processor or use an immersion blender to puree until completely smooth. Add a splash of the reserved pasta water if it seems too thick. The puree should be the consistency of a thick smoothie—smooth, velvety, and a brilliant orange color. Set aside.
Step 4: Start the Cheese Sauce (15 minutes)
In the same large pot (wipe it out if needed), melt 3 tablespoons of butter over medium heat. Add the diced onion and cook for 3-4 minutes until softened and translucent. Add the minced garlic and cook for another 30 seconds until fragrant—don’t let it burn. Sprinkle the flour over the onion mixture and whisk constantly for 1-2 minutes. This cooks out the raw flour taste. The mixture should look like a thick paste and smell slightly nutty.
Step 5: Build the Sauce (10 minutes)
Slowly pour in the milk and heavy cream, whisking constantly to prevent lumps. Add the chicken broth and continue whisking until the sauce thickens, about 3-4 minutes. It should coat the back of a spoon. Stir in the squash puree, nutmeg, salt, and pepper. Reduce the heat to low and add the shredded cheddar and gruyère, a handful at a time, stirring until each addition melts completely before adding more. The sauce should be smooth, glossy, and a gorgeous shade of golden orange. Taste it and adjust the seasoning—it should be well-seasoned because the pasta will absorb some of the salt.
Step 6: Combine and Assemble (5 minutes)
Add the cooked pasta to the cheese sauce and stir until every piece is coated. If the sauce seems too thick, add a splash of the reserved pasta water to loosen it up. Pour the mixture into a greased 9×13-inch baking dish. If using panko breadcrumbs, toss them with a tablespoon of melted butter and sprinkle evenly over the top.
Step 7: Make the Crispy Sage (5 minutes)
In a small skillet, melt the remaining 1 tablespoon of butter over medium heat. Add the sage leaves in a single layer (you may need to do this in batches). Fry for 20-30 seconds per side, until the leaves turn a deeper green and become crisp and translucent. They should sizzle gently—if the butter is smoking, the heat is too high. Transfer the fried sage leaves to a paper towel-lined plate to drain. They will crisp up further as they cool.
Step 8: Bake and Serve (20 minutes)
Preheat your oven to 375°F (190°C). Bake the mac and cheese for 18-20 minutes, until bubbly and golden on top. If you used panko, it should be toasted and crunchy. Remove from the oven and let it rest for 5 minutes—this helps the sauce set so it doesn’t run everywhere when you serve it. Top with the crispy sage leaves and serve hot.
Cooking Tips & Techniques
I’ve made this recipe about a dozen times now, and I’ve learned a few things the hard way. Here are my best tips for getting it right every time.
- Don’t Skip the Nutmeg: I know it sounds weird, but a tiny pinch of nutmeg is what makes the squash and cheese flavor combination sing. It’s one of those secret ingredients that doesn’t scream “nutmeg” but makes everything taste more complete. I’ve forgotten it before, and the dish was noticeably flat.
- Low and Slow for the Sauce: When you add the cheese, keep the heat on low. High heat can cause the cheese to seize up and become grainy. Patience here pays off in a silky, smooth sauce.
- Watch the Sage Closely: Fried sage goes from perfectly crispy to burnt in about 10 seconds. Keep an eye on it and don’t walk away from the pan. The leaves should be a deeper green with slightly translucent edges—if they turn brown, they’re overdone.
- Use a Microplane for the Nutmeg: If you have a whole nutmeg, grate it fresh with a microplane. The flavor is brighter and more aromatic than pre-ground nutmeg. One whole nutmeg will last you through several batches of this recipe.
- Reserve That Pasta Water: I cannot stress this enough. The starchy pasta water is liquid gold for adjusting sauce consistency. If your sauce seems too thick after adding the pasta, a splash of pasta water will loosen it up without diluting the flavor.
- Make It Ahead: This dish actually tastes better the next day. Assemble everything (without the panko and crispy sage), cover, and refrigerate for up to 24 hours. When you’re ready to bake, add the panko and bake for 25-30 minutes, until heated through. Add the crispy sage just before serving.
Variations & Adaptations
One of the things I love most about this recipe is how flexible it is. Here are some ways to make it your own.
- Make It Gluten-Free: Use gluten-free pasta and a 1:1 gluten-free flour blend for the roux. The rest of the ingredients are naturally gluten-free. I’ve tested this with Banza chickpea pasta and it worked beautifully—the sauce clung to the ridges just as well.
- Add Protein: Stir in 2 cups of shredded rotisserie chicken, cooked bacon bits, or crispy pancetta before baking. It turns this side dish into a complete meal. I’ve also added leftover honey sriracha glazed salmon on the side for a fancy dinner.
- Vegetable Boost: Fold in 2 cups of steamed broccoli florets, sautéed spinach, or roasted Brussels sprouts along with the pasta. The extra veggies make it even more nutritious, and the cheese sauce makes everything taste amazing.
- Dairy-Free Version: Use unsweetened oat milk or cashew milk in place of whole milk and cream. For the cheese, try a plant-based cheddar shred that melts well (I like Violife or Miyoko’s). The sauce won’t be as rich, but it’s still delicious.
- Spice It Up: Add 1/4 teaspoon of cayenne pepper or red pepper flakes to the cheese sauce for a subtle kick. The heat pairs beautifully with the sweetness of the squash and the earthiness of the sage.
- Change the Herb: If you can’t find fresh sage, try fried rosemary sprigs or thyme leaves. The texture will be different, but the flavor will still be lovely. Just be careful with rosemary—it can be a bit tough if not fried properly.
Serving & Storage Suggestions
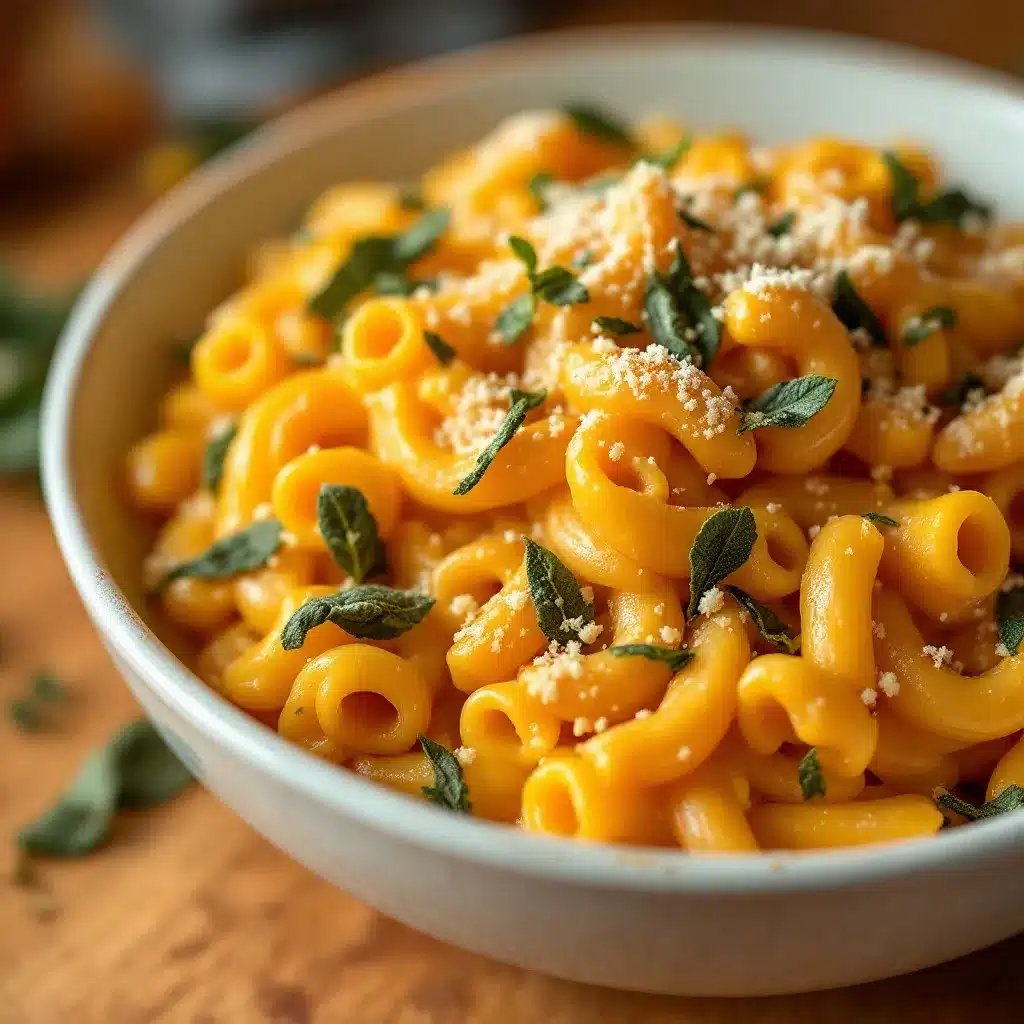
This mac and cheese is best served hot, straight from the oven, with the crispy sage leaves scattered on top like little green jewels. The contrast between the creamy, cheesy pasta and the paper-thin, crunchy sage is what makes this dish special.
- Serving Temperature: Serve it hot, but let it rest for 5 minutes after baking. This allows the sauce to set slightly so it doesn’t turn into a soupy mess on the plate. The crispy sage should be added just before serving—if you add it too early, it will soften.
- What to Serve With It: A simple side salad with a lemon vinaigrette cuts through the richness perfectly. I also love serving it alongside crispy eggplant parmesan stacks for a vegetarian feast, or with a piece of grilled chicken for a heartier meal. A glass of crisp white wine, like a Sauvignon Blanc, pairs beautifully with the sage and squash.
- Storing Leftovers: Transfer any leftovers to an airtight container and refrigerate for up to 4 days. The flavors actually deepen overnight as the sage and squash meld together. The crispy sage will soften, but the dish is still delicious.
- Reheating: The best way to reheat this is in the oven at 350°F (175°C) for 15-20 minutes, covered with foil to prevent drying out. You can also reheat individual portions in the microwave for 1-2 minutes, stirring halfway through. If the sauce seems dry, add a splash of milk before reheating.
- Freezing: This mac and cheese freezes beautifully. Assemble the dish (without the panko and crispy sage), wrap it tightly in plastic wrap and then foil, and freeze for up to 3 months. To bake, thaw overnight in the refrigerator, add the panko, and bake as directed. The texture will be slightly different—the pasta may be a bit softer—but the flavor will still be fantastic.
Nutritional Information & Benefits
I’m not a nutritionist, but I do pay attention to what goes into my family’s food. Here’s a rough breakdown of what’s in this dish, along with some health highlights.
Estimated Nutritional Values (per serving, based on 8 servings):
- Calories: 520
- Protein: 22g
- Carbohydrates: 48g
- Fat: 28g
- Saturated Fat: 16g
- Fiber: 4g
- Sugar: 8g
- Sodium: 680mg
Health Benefits of Key Ingredients:
- Butternut Squash: Packed with vitamin A (over 400% of your daily needs per cup), vitamin C, potassium, and fiber. It supports eye health, immune function, and digestion. Plus, it adds natural sweetness and creaminess without needing extra butter or cream.
- Sage: This herb is rich in antioxidants and has anti-inflammatory properties. It’s also been used traditionally to support digestion and brain health. The crispy fried version is a treat, but you’re still getting some of those benefits.
- Cheese: While it’s high in saturated fat, cheese also provides calcium, protein, and vitamin B12. Using a mix of sharp cheddar and gruyère means you get more flavor with less cheese overall.
Dietary Considerations:
- This recipe is vegetarian as written.
- It can be made gluten-free with simple substitutions.
- It is nut-free (unless you add the walnut variation).
- It contains dairy and gluten (if using regular pasta and flour).
I feel good about serving this to my family because it’s a balanced dish—it has vegetables, protein, and carbs, all wrapped up in a package that makes everyone happy. It’s comfort food with a conscience, and that’s a win in my book.
Conclusion
This Creamy Butternut Squash Mac and Cheese with Crispy Sage has become a fall staple in my kitchen, and I have a feeling it will become one in yours too. It’s the kind of recipe that feels special enough for a holiday table but simple enough for a Tuesday night when you need something warm and satisfying. The roasted squash adds a natural sweetness and a velvety texture that makes the cheese sauce sing, and those crispy sage leaves on top? They’re the finishing touch that turns a good dish into a great one.
I love how flexible this recipe is. You can add protein, swap in different cheeses, or make it gluten-free without losing the soul of the dish. It’s forgiving, it’s delicious, and it’s packed with hidden veggies that even the pickiest eaters will love. Honestly, I don’t think I’ll ever go back to plain mac and cheese again.
I’d love to hear how this turns out for you. Did you add your own twist? Did the crispy sage disappear before you could get it to the table? Drop a comment below and let me know. And if you share it on social media, tag me—I want to see your beautiful, cheesy creations. Until next time, happy cooking!
Frequently Asked Questions
Can I use frozen butternut squash instead of fresh?
Absolutely! Frozen butternut squash works great in this recipe. Thaw it first, then roast it on a baking sheet at 400°F for about 20-25 minutes, until tender. You might need to drain off some excess liquid before pureeing. The flavor won’t be as caramelized as fresh-roasted squash, but it’s a fantastic time-saver for busy nights.
Why did my cheese sauce turn out grainy?
Grainy cheese sauce usually happens for one of two reasons: the heat was too high when you added the cheese, or you used pre-shredded cheese. Pre-shredded cheese contains anti-caking agents like cellulose that prevent smooth melting. Always shred your cheese from a block, and keep the heat on low when melting it into the sauce. If it does get grainy, try whisking in a tablespoon of cold butter—it can sometimes help smooth things out.
Can I make this without baking it?
Yes! This recipe works beautifully as a stovetop mac and cheese. Simply skip the panko topping and the baking step. After stirring the pasta into the sauce, let it simmer on low for 2-3 minutes to thicken slightly. Top with the crispy sage and serve immediately. It’s quicker and still incredibly creamy.
How do I get the sage leaves perfectly crispy?
The key is to make sure the leaves are completely dry before frying (pat them with a paper towel if needed) and to fry them in butter over medium heat, not high heat. They should sizzle gently, not aggressively. Fry for 20-30 seconds per side, until they turn a deeper green and become translucent. Transfer them to a paper towel to drain—they’ll crisp up further as they cool. And don’t overcrowd the pan; work in batches if needed.
Can I double this recipe for a crowd?
Definitely! This recipe doubles beautifully. Use a large roasting pan (about 11×15 inches) or two 9×13-inch dishes. You may need to roast the squash in batches or use two sheet pans. The baking time will increase slightly—about 25-30 minutes for a full pan. Just make sure the center is bubbly and hot before serving. It’s a perfect dish for Thanksgiving or potlucks.
Pin This Recipe!
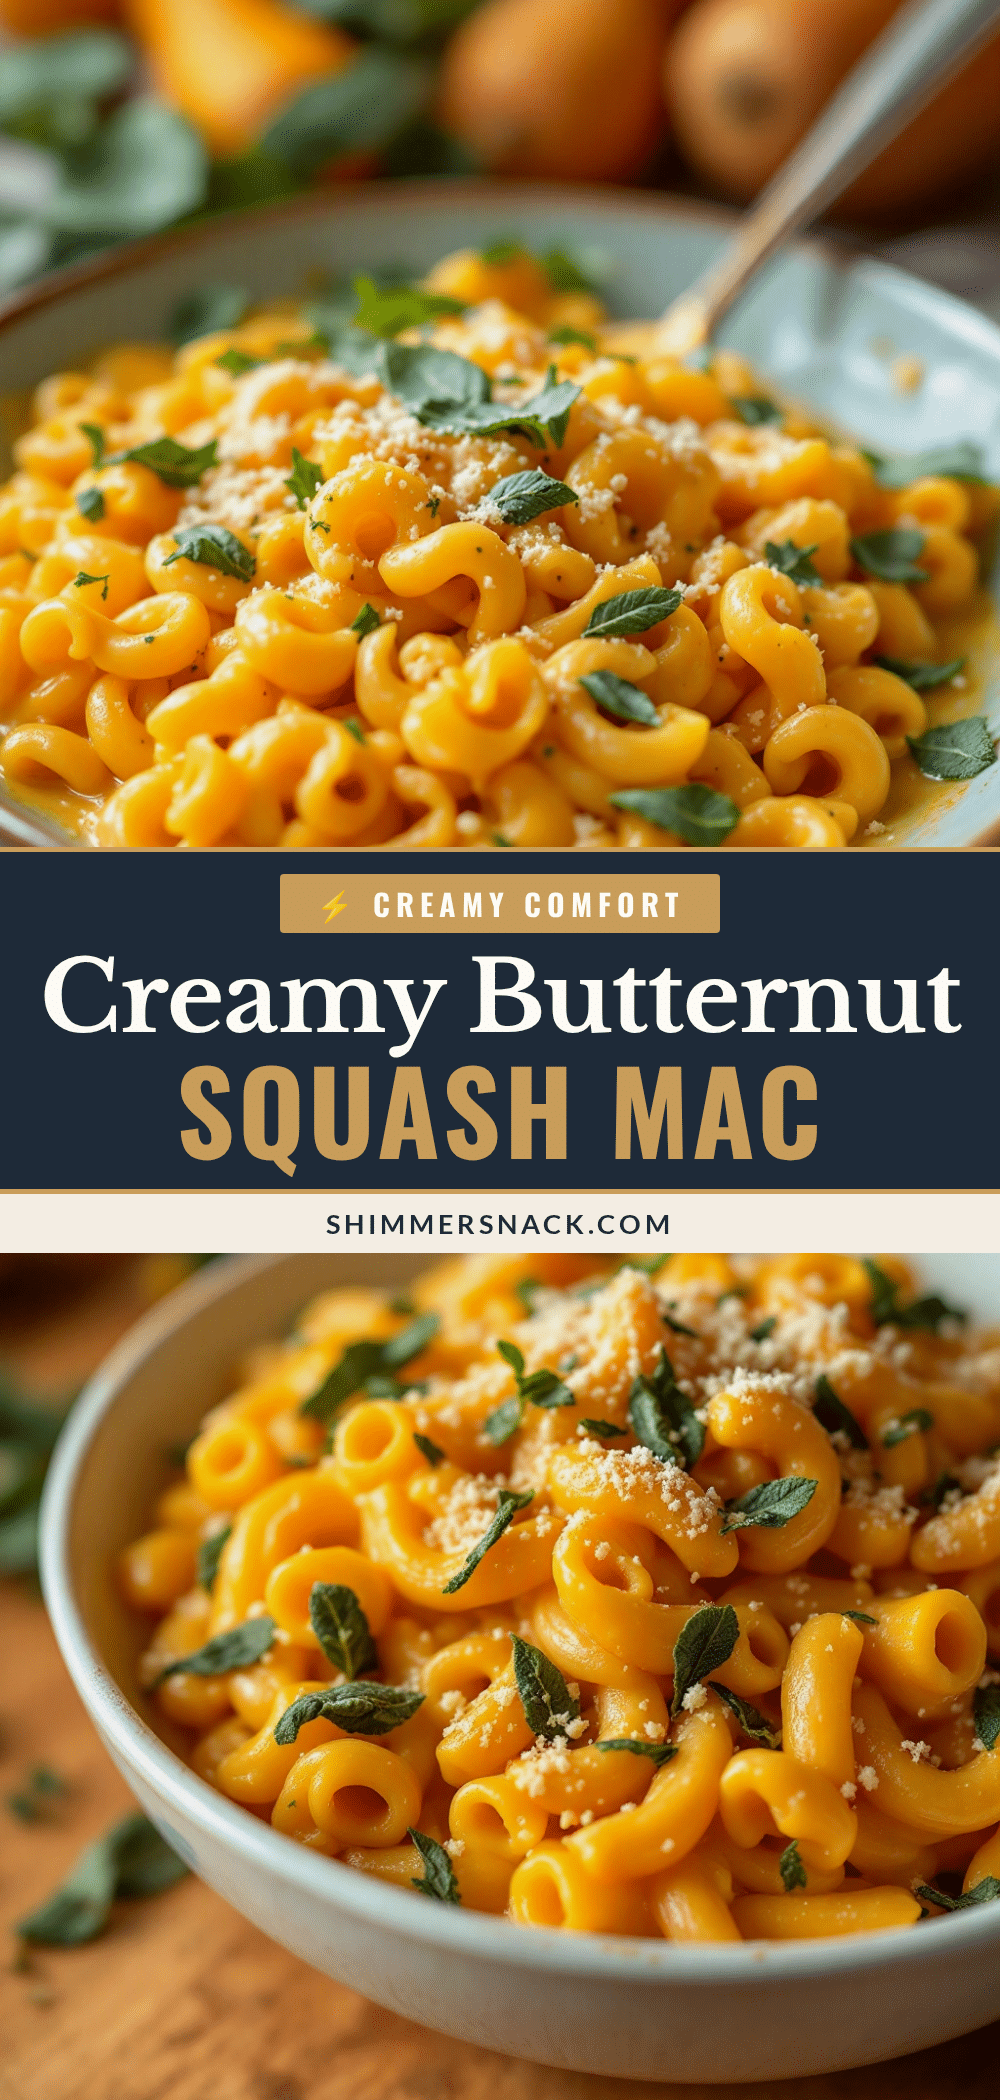
Creamy Butternut Squash Mac and Cheese with Crispy Sage

This creamy, cheesy mac and cheese is made with roasted butternut squash puree for a hidden veggie boost, topped with crispy fried sage leaves for a restaurant-quality finish. It’s the ultimate fall comfort food that’s perfect for weeknights or holiday gatherings.
- Prep Time: 15 minutes
- Cook Time: 45 minutes
- Total Time: 1 hour
- Yield: 8 servings 1x
- Category: Main Course
- Cuisine: American
Ingredients
- 1 medium butternut squash (about 2–3 lbs)
- 1 lb (450g) elbow macaroni or short pasta
- 2 cups (8 oz/225g) sharp cheddar cheese, shredded
- 1 cup (4 oz/115g) Gruyère cheese, shredded
- 4 tbsp unsalted butter, divided
- 3 tbsp all-purpose flour
- 2 cups (480 ml) whole milk
- 1/2 cup (120 ml) heavy cream
- 15–20 fresh sage leaves
- 3 cloves garlic, minced
- 1/2 medium onion, diced
- 1/2 cup (120 ml) chicken or vegetable broth
- Salt and black pepper to taste
- 1/4 tsp freshly grated nutmeg
- 1/2 cup (60g) panko breadcrumbs (optional)
Instructions
- Preheat oven to 400°F (200°C). Cut butternut squash in half lengthwise, scoop out seeds, and place cut-side down on a parchment-lined baking sheet. Roast for 40-45 minutes until fork-tender. Let cool, then scoop out flesh and puree until smooth. Set aside.
- Bring a large pot of salted water to a boil. Cook pasta until al dente, about 1 minute less than package directions. Drain, reserving 1 cup of pasta water. Do not rinse.
- In the same pot, melt 3 tablespoons butter over medium heat. Add onion and cook 3-4 minutes until softened. Add garlic and cook 30 seconds until fragrant.
- Sprinkle flour over onion mixture and whisk constantly for 1-2 minutes until golden and nutty.
- Slowly whisk in milk, heavy cream, and broth. Cook, whisking constantly, until sauce thickens, about 3-4 minutes. Stir in squash puree, nutmeg, salt, and pepper.
- Reduce heat to low. Add shredded cheddar and Gruyère a handful at a time, stirring until each addition melts completely. Sauce should be smooth and glossy.
- Add cooked pasta to sauce and stir to coat. If too thick, add reserved pasta water a splash at a time. Pour into a greased 9×13-inch baking dish. If using panko, toss with 1 tablespoon melted butter and sprinkle on top.
- In a small skillet, melt remaining 1 tablespoon butter over medium heat. Fry sage leaves in a single layer for 20-30 seconds per side until crisp and translucent. Transfer to paper towels to drain.
- Preheat oven to 375°F (190°C). Bake mac and cheese for 18-20 minutes until bubbly and golden. Let rest 5 minutes, then top with crispy sage leaves and serve hot.
Notes
For best results, shred cheese from a block to avoid graininess. Reserve pasta water to adjust sauce consistency. Fried sage leaves crisp up as they cool; add just before serving. The dish can be assembled a day ahead (without panko and sage) and baked when ready.
Nutrition
- Serving Size: 1 serving
- Calories: 520
- Sugar: 8
- Sodium: 680
- Fat: 28
- Saturated Fat: 16
- Carbohydrates: 48
- Fiber: 4
- Protein: 22
Keywords: butternut squash mac and cheese, creamy mac and cheese, crispy sage, fall comfort food, hidden vegetable mac and cheese, baked mac and cheese


