Love this? Save it for later!
Share the inspiration with your friends
For a while, I just accepted that homemade pumpkin pie cookies were going to taste like dry, spiced shortbread. You know how it is. You buy the best canned pumpkin, you measure the cinnamon and nutmeg with precision, and yet the final product feels more like a biscuit than a dessert. It lacked that creamy, custard-like heart that makes actual pumpkin pie so irresistible. I had been looking for a cookie that actually tasted like the filling, not just the crust.
I tried wrapping the filling in the dough, but it always leaked out during baking. I tried mixing it all together, but the texture became cakey and heavy. It was frustrating because the flavor profile was perfect, just the mouthfeel was all wrong. Let’s face it, nobody wants a dry cookie when they could have something with a gooey, spiced center.
Then I started messing with the thumbprint technique. Not the usual jam-filled kind, but something richer. I realized that if I kept the outer cookie tender and slightly crisp, and focused entirely on making the center a stable, creamy ganache, I could finally get that pie experience in a bite-sized form. It wasn’t a sudden revelation, just a slow accumulation of burnt cookies and sticky fingers.
The result wasn’t magical in a fairy-tale sense. It was just really, really good. I made them for a small gathering, and people kept asking for the recipe. It stuck with me because it solved that specific problem of texture without requiring a full oven for a pie. Now, every autumn, these are the first thing I bake. They are simple, comforting, and honestly, they just work.
Why You’ll Love This Recipe
Experience That Matters
I have tested this creamy pumpkin pie thumbprint cookies recipe over a dozen times to get the balance right. The key is not just the ingredients, but the technique of creating a stable filling that doesn’t slide out when you bite into it. This isn’t just another pumpkin cookie; it is a refined version that prioritizes texture and flavor depth.
Standout Benefits
- Quick & Easy: These come together in about 30 minutes of active time, making them perfect for busy weeknights or last-minute holiday prep.
- Simple Ingredients: You likely already have most of these in your pantry, including canned pumpkin, cream cheese, and basic spices.
- Perfect for Fall Gatherings: Whether it is a Thanksgiving potluck or a cozy coffee date, these cookies fit the season perfectly.
- Crowd-Pleaser: They get rave reviews from kids who like the sweetness and adults who appreciate the subtle spice.
- Unbelievably Delicious: The combination of a buttery, crumbly cookie with a rich, cheesecake-like pumpkin center is next-level comfort food.
What Makes It Different
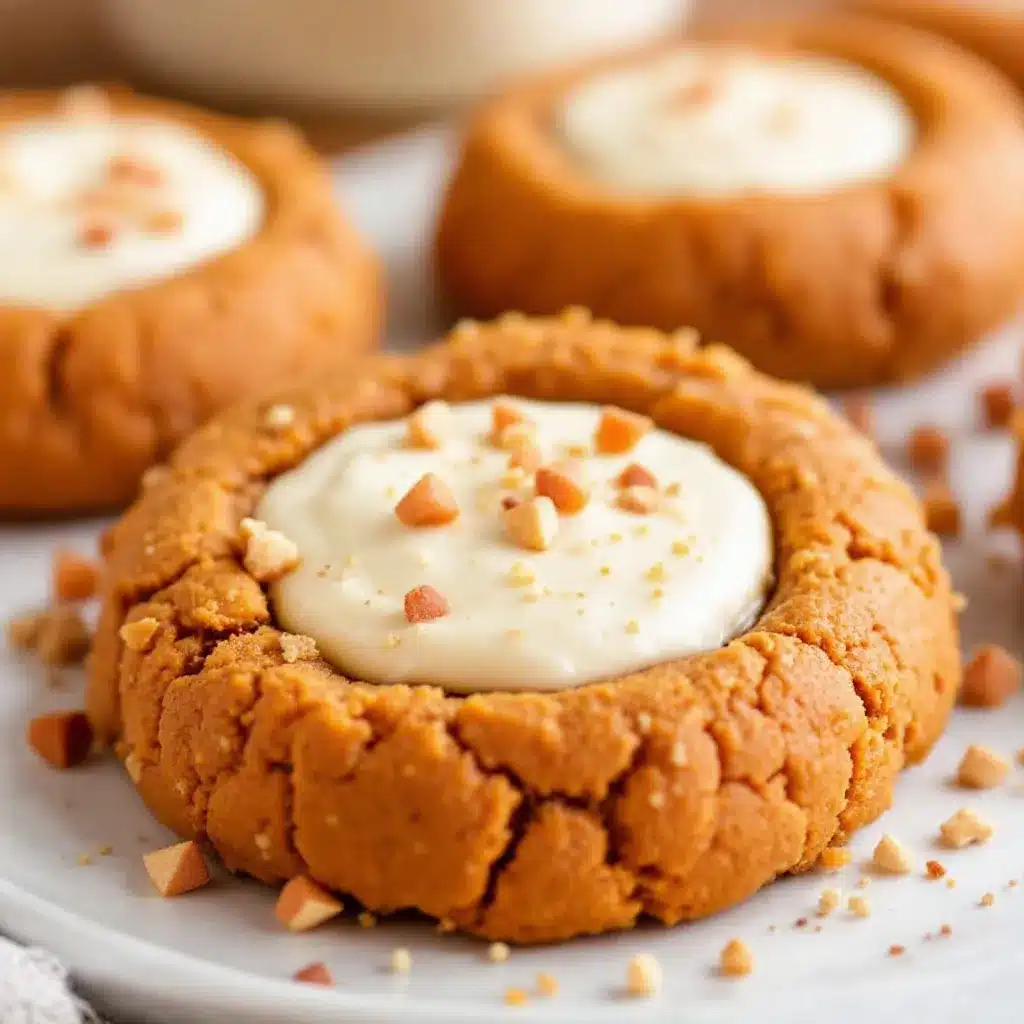
Most pumpkin cookie recipes mix the pumpkin into the dough, resulting in a dense, bread-like texture. This recipe keeps the pumpkin filling separate, creating a distinct contrast between the crisp exterior and the creamy interior. It is like having a mini pie in every bite. I also use a touch of cream cheese in the filling to add tang and stability, which prevents the filling from becoming too runny. This isn’t just a cookie; it is a dessert experience.
Emotional Connection
This recipe is the kind that makes you close your eyes after the first bite. It captures the essence of autumn without the hassle of baking a whole pie. It is perfect for impressing guests without stress, or turning a simple afternoon snack into something memorable.
What Ingredients You Will Need
This recipe uses simple, wholesome ingredients to deliver bold flavor and satisfying texture without the fuss. The magic lies in the balance between the spiced cookie dough and the creamy, tangy pumpkin filling.
For the Cookie Dough
- All-Purpose Flour: 1 ½ cups (190g). Provides the structure. I recommend a brand like Gold Medal for consistent protein content.
- Unsalted Butter: ½ cup (113g), softened. Adds richness and helps create a tender crumb.
- Granulated Sugar: ½ cup (100g). Sweetens the dough without overpowering the spices.
- Vanilla Extract: 1 teaspoon. Enhances the overall flavor profile.
- Baking Powder: ½ teaspoon. Gives the cookies a slight lift.
- Salt: ¼ teaspoon. Balances the sweetness.
For the Creamy Pumpkin Filling
- Canned Pumpkin Puree: ½ cup (120g). Make sure it is 100% pure pumpkin, not pie filling. Libby’s is a trusted brand for its smooth texture.
- Cream Cheese: 4 oz (113g), softened. Adds tang and stability to the filling.
- Powdered Sugar: ½ cup (60g). Sweetens the filling and helps it thicken.
- Pumpkin Pie Spice: 1 teaspoon. A blend of cinnamon, ginger, nutmeg, and cloves.
- Vanilla Extract: ½ teaspoon. Complements the pumpkin flavor.
For the Glaze (Optional)
- Powdered Sugar: 2 tablespoons.
- Milk: 1-2 teaspoons. Adjust for desired consistency.
- Cinnamon: A pinch. For garnish.
Substitution Tips
- Gluten-Free: Use a 1:1 gluten-free flour blend for the dough.
- Dairy-Free: Use plant-based butter and cream cheese alternatives.
- Spice Blend: If you don’t have pumpkin pie spice, mix ½ tsp cinnamon, ¼ tsp ginger, ¼ tsp nutmeg, and a pinch of cloves.
Equipment Needed
You don’t need much to make these, but having the right tools makes the process smoother.
- Mixing Bowls: Two medium bowls, one for the dough and one for the filling.
- Electric Mixer: Hand or stand mixer helps cream the butter and sugar effectively. A wooden spoon works too, but it takes more effort.
- Measuring Cups and Spoons: Essential for accuracy, especially with flour.
- Baking Sheets: Standard 9×13 inch sheets. Line them with parchment paper for easy cleanup.
- Piping Bag or Ziploc Bag: For filling the thumbprints neatly. A small round tip helps, but snipping a corner of a bag works fine.
- Cooling Rack: Allows air circulation so the cookies don’t get soggy.
Tips for Equipment
- Parchment Paper: Always use it. It prevents sticking and makes cleanup a breeze.
- Mixer: If using a stand mixer, use the paddle attachment. Be careful not to overmix the dough.
- Piping Bag: If you don’t have one, use a heavy-duty Ziploc bag and cut a small hole in the corner.
Preparation Method
Step 1: Prepare the Dough
- Cream the Butter and Sugar: In a large bowl, beat the softened butter and granulated sugar together until light and fluffy. This takes about 2-3 minutes. (Time: 3 mins)
- Add Vanilla: Mix in the vanilla extract until combined.
- Combine Dry Ingredients: In a separate bowl, whisk together the flour, baking powder, and salt.
- Mix Dough: Gradually add the dry ingredients to the butter mixture. Mix on low speed until just combined. Do not overmix. (Time: 2 mins)
- Chill Dough: Wrap the dough in plastic wrap and refrigerate for 30 minutes. This makes it easier to handle. (Time: 30 mins)
Step 2: Make the Filling
- Beat Cream Cheese: In a medium bowl, beat the softened cream cheese until smooth.
- Add Sugar and Spice: Add the powdered sugar, pumpkin puree, pumpkin pie spice, and vanilla. Mix until fully combined and smooth.
- Chill Filling: Refrigerate the filling for at least 15 minutes to thicken. (Time: 15 mins)
Step 3: Assemble the Cookies
- Preheat Oven: Preheat your oven to 350°F (175°C). Line baking sheets with parchment paper.
- Portion Dough: Roll the chilled dough into 1-inch balls. Place them on the prepared baking sheets, about 2 inches apart. (Time: 5 mins)
- Create Thumbprints: Use your thumb or the back of a measuring spoon to press a deep indentation into the center of each dough ball. Be careful not to press too hard, or the cookie will break.
- Bake Dough: Bake for 8-10 minutes. The edges should be set but still soft. (Time: 10 mins)
Step 4: Fill and Finish
- Fill: While the cookies are still warm, pipe or spoon the chilled pumpkin filling into the indentations. Do not overfill. (Time: 5 mins)
- Set: Return the filled cookies to the oven for 2-3 minutes to set the filling slightly. (Time: 3 mins)
- Cool: Let the cookies cool on the baking sheet for 5 minutes, then transfer to a wire rack to cool completely. (Time: 5 mins)
- Glaze (Optional): Drizzle with a simple glaze made from powdered sugar and milk, and sprinkle with cinnamon if desired.
Troubleshooting Tips
- Dough Too Sticky: If the dough is too soft, chill it for another 15 minutes.
- Filling Too Runny: Ensure the cream cheese is fully softened but not melted. Chilling the filling is crucial.
- Cookies Spreading Too Much: Make sure your butter is softened, not melted. If the dough is too warm, chill it again.
Cooking Tips & Techniques
Professional Techniques
- Room Temperature Ingredients: Ensure your butter and cream cheese are at room temperature for the best emulsion. Cold ingredients can lead to a grainy texture.
- Don’t Overmix: Overmixing the dough develops gluten, leading to tough cookies. Mix until just combined.
- Chill Before Baking: Chilling the dough balls before baking helps them hold their shape and prevents excessive spreading.
Common Mistakes
- Using Pie Filling: Make sure you use 100% pure pumpkin puree, not pre-sweetened pie filling. Pie filling contains extra sugar and thickeners that will throw off the recipe.
- Overbaking: Pumpkin cookies can dry out quickly. Remove them from the oven when the edges are just set.
- Overfilling: Too much filling will spill over and burn. Fill only about ¾ of the indentation.
Personal Lessons
I once tried to skip the chilling step, and the cookies spread into flat discs. Lesson learned: chill the dough. I also learned that the filling needs to be thick enough to hold its shape. If it’s too loose, it will slide out when you bite into it.
Timing and Multitasking
- Prep Ahead: You can make the dough and filling a day in advance. Store them in the fridge and assemble when ready.
- Batch Baking: If you have a small oven, bake in batches. Keep the unbaked dough balls chilled until ready to bake.
Consistency Tips
- Measure Flour Correctly: Spoon flour into the measuring cup and level it off. Packing the flour leads to dry cookies.
- Use a Scale: For best results, use a kitchen scale to measure ingredients by weight.
Variations & Adaptations
Dietary Variations
- Gluten-Free: Substitute the all-purpose flour with a 1:1 gluten-free flour blend. The texture may be slightly more crumbly.
- Dairy-Free: Use plant-based butter and cream cheese. The flavor will be slightly different, but still delicious.
- Low-Sugar:
Flavor Variations
- Maple Glaze: Replace the vanilla glaze with a maple glaze using maple syrup and powdered sugar.
- White Chocolate Chips: Add white chocolate chips to the dough for extra sweetness and texture.
- Espresso Powder: Add a teaspoon of espresso powder to the dough for a mocha-pumpkin flavor.
Seasonal Adaptations
- Spring: Swap pumpkin puree for sweet potato puree and use spring spices like cardamom.
- Winter: Add crushed peppermint candies to the glaze for a holiday twist.
Allergen Substitutions
- Egg-Free: This recipe is naturally egg-free, making it suitable for those with egg allergies.
- Nut-Free: Ensure your pumpkin pie spice is nut-free, as some blends may contain trace nuts.
Personal Variation
I sometimes add a pinch of cayenne pepper to the filling for a subtle kick. It adds a nice depth of flavor that complements the sweetness.
Serving & Storage Suggestions
Serving Suggestions
- Temperature: Serve at room temperature for the best texture. Cold cookies can make the filling too firm.
- Pairing: Serve with a hot cup of coffee, tea, or mulled cider. They also pair well with classic strawberry shortcake for a mixed dessert table.
- Presentation: Arrange on a platter with a dusting of powdered sugar for an elegant look.
Storage Instructions
- Refrigerator: Store in an airtight container in the refrigerator for up to 5 days. The filling contains cream cheese, so refrigeration is recommended.
- Freezer: Freeze the unbaked dough balls and filling separately. Thaw the dough in the fridge overnight before assembling and baking. The baked cookies can also be frozen for up to 2 months.
Reheating Tips
- Microwave: Heat in the microwave for 10-15 seconds to soften the filling.
- Oven: Warm in a 300°F oven for 5 minutes.
Flavor Development
The flavors meld and deepen after 24 hours. If you make them a day ahead, they will taste even better.
Nutritional Information & Benefits
Nutritional Values (Per Cookie)
- Calories: ~80 kcal
- Carbohydrates: 10g
- Protein: 1g
- Fat: 4g
- Fiber: 0.5g
- Sugar: 6g
Health Benefits
- Pumpkin: Rich in vitamin A and fiber, which supports eye health and digestion.
- Spices: Cinnamon and ginger have anti-inflammatory properties.
Dietary Considerations
- Gluten-Free: Use a GF flour blend.
- Dairy-Free: Use plant-based alternatives.
- Vegan: Use plant-based butter and cream cheese.
Allergens
- Gluten: Present in the flour.
- Dairy: Present in butter and cream cheese.
- Eggs: Not present.
Personal Wellness Perspective
I enjoy these cookies as a moderate treat. They satisfy my sweet tooth without being overly heavy, and the pumpkin adds a touch of nutritional value.
Conclusion
These creamy pumpkin pie thumbprint cookies are a delightful way to enjoy the flavors of fall in a bite-sized format. They are easy to make, customizable, and sure to impress your friends and family. Whether you stick to the classic recipe or try one of the variations, these cookies are a must-try for any pumpkin lover.
I love making these because they bring back memories of autumn baking, but with a modern twist. They are perfect for sharing, gifting, or just enjoying with a cup of coffee. I encourage you to try this recipe and share your results in the comments below. Have you tried adding any unique twists? Let me know!
FAQs
Can I use fresh pumpkin instead of canned?
Yes, but you need to roast and puree the pumpkin yourself. Ensure the puree is very thick and has no excess moisture, or the filling will be runny.
Why did my filling leak out?
This usually happens if the filling was too thin or if the thumbprint indentation was too shallow. Chill the filling before using and make sure to press deep enough into the dough.
Can I make these ahead of time?
Yes, you can prepare the dough and filling up to 2 days in advance. Store them in the fridge and assemble when ready to bake.
How do I store the cookies?
Store in an airtight container in the refrigerator for up to 5 days due to the cream cheese filling.
Can I freeze these cookies?
Yes, freeze the unbaked dough balls and filling separately. Thaw the dough in the fridge overnight before assembling and baking.
Pin This Recipe!
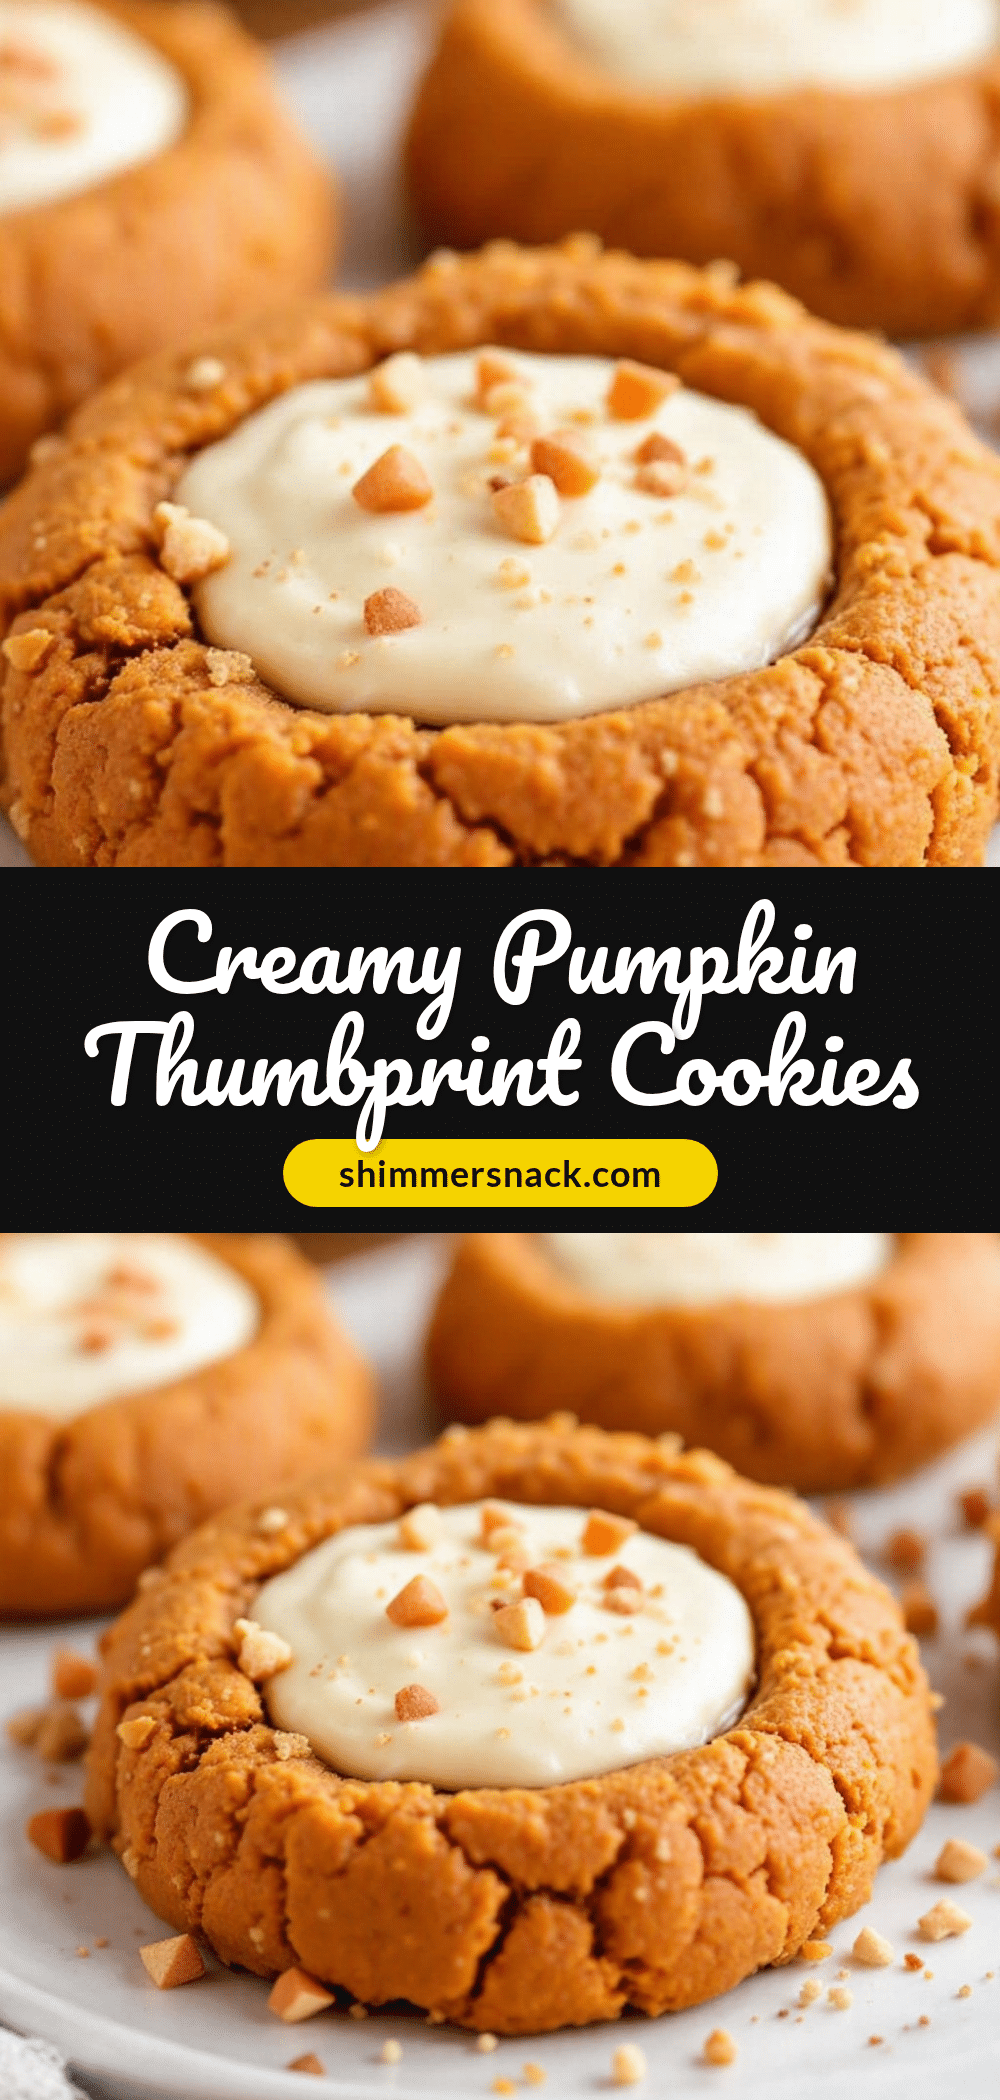
Creamy Pumpkin Pie Thumbprint Cookies: Best Easy 2024
These creamy pumpkin pie thumbprint cookies feature a tender, spiced cookie dough with a rich, stable cream cheese pumpkin filling, offering the taste of pumpkin pie in a bite-sized, easy-to-make format.
- Prep Time: 30 minutes
- Cook Time: 15 minutes
- Total Time: 45 minutes
- Yield: Approximately 24 cookies 1x
- Category: Dessert
- Cuisine: American
Ingredients
- 1 ½ cups (190g) All-Purpose Flour
- ½ cup (113g) Unsalted Butter, softened
- ½ cup (100g) Granulated Sugar
- 1 teaspoon Vanilla Extract
- ½ teaspoon Baking Powder
- ¼ teaspoon Salt
- ½ cup (120g) Canned Pumpkin Puree
- 4 oz (113g) Cream Cheese, softened
- ½ cup (60g) Powdered Sugar
- 1 teaspoon Pumpkin Pie Spice
- ½ teaspoon Vanilla Extract (for filling)
- 2 tablespoons Powdered Sugar (for glaze)
- 1–2 teaspoons Milk (for glaze)
- Pinch of Cinnamon (for glaze)
Instructions
- Cream the softened butter and granulated sugar together in a large bowl until light and fluffy (about 2-3 minutes).
- Mix in 1 teaspoon of vanilla extract until combined.
- In a separate bowl, whisk together the flour, baking powder, and salt.
- Gradually add the dry ingredients to the butter mixture and mix on low speed until just combined. Do not overmix.
- Wrap the dough in plastic wrap and refrigerate for 30 minutes.
- In a medium bowl, beat the softened cream cheese until smooth.
- Add the powdered sugar, pumpkin puree, pumpkin pie spice, and ½ teaspoon vanilla extract to the cream cheese. Mix until fully combined and smooth.
- Refrigerate the filling for at least 15 minutes to thicken.
- Preheat oven to 350°F (175°C) and line baking sheets with parchment paper.
- Roll the chilled dough into 1-inch balls and place them on the prepared baking sheets, about 2 inches apart.
- Use your thumb or the back of a measuring spoon to press a deep indentation into the center of each dough ball.
- Bake the dough balls for 8-10 minutes until the edges are set but still soft.
- While the cookies are still warm, pipe or spoon the chilled pumpkin filling into the indentations.
- Return the filled cookies to the oven for 2-3 minutes to set the filling slightly.
- Let the cookies cool on the baking sheet for 5 minutes, then transfer to a wire rack to cool completely.
- Optional: Drizzle with a glaze made from powdered sugar and milk, and sprinkle with cinnamon.
Notes
Ensure ingredients are at room temperature for best emulsion. Do not overmix the dough to prevent tough cookies. Chill the dough and filling to maintain shape and texture. Use 100% pure pumpkin puree, not pie filling. Store in the refrigerator due to the cream cheese filling.
Nutrition
- Serving Size: 1 cookie
- Calories: 80
- Sugar: 6
- Sodium: 50
- Fat: 4
- Saturated Fat: 2.5
- Carbohydrates: 10
- Fiber: 0.5
- Protein: 1
Keywords: pumpkin cookies, thumbprint cookies, pumpkin pie, fall baking, easy dessert, cream cheese filling, gluten-free option, dairy-free option


