Love this? Save it for later!
Share the inspiration with your friends
Crispy Baked Chicken Tenders: The Best Easy Sheet Pan Recipe
That first crackle—the sound of a panko crust shattering against your teeth—still takes me straight to my tiny apartment kitchen on a Tuesday night. I was tired, hungry, and absolutely convinced that baking chicken tenders would never, ever work. I mean, fried chicken tenders are supposed to be greasy and indulgent, right? Baking them felt like a betrayal of everything a crunchy chicken tender stood for. But my deep fryer had broken the week before, and I was too stubborn to buy a new one. So there I stood, staring at a pile of chicken strips, a bag of panko breadcrumbs, and a single baking sheet, ready to prove myself wrong.
Honestly, I was ready to be disappointed. I had tried baked chicken before, and it always came out sad—soggy on the bottom, dry on top, and lacking that satisfying crunch. But this time, something clicked. Maybe it was the way I preheated the pan until it was screaming hot. Maybe it was the little trick I used to get the breading to stick without a messy egg wash. Or maybe I was just desperate enough to pay attention. Whatever it was, the result was nothing short of a miracle. The chicken came out golden, impossibly crispy, and juicy in a way that made me question everything I thought I knew about oven-baked chicken. I stood at the counter, eating one straight off the sheet pan, and I knew I had stumbled onto something good.
These crispy baked chicken tenders are the kind of recipe that makes you feel like you’ve hacked the system. They are not a compromise. They are not a “healthy version” that you eat because you should. They are the real deal—crunchy, salty, and deeply satisfying, but without the mess of a deep fryer or the guilt of a greasy paper towel. And the best part? They come together on a single sheet pan. No flipping, no fussing, no complicated steps. Just a preheated pan, a simple breading station, and a hot oven doing all the heavy lifting. This recipe has become my go-to for busy weeknights, lazy Sundays, and even the occasional snack attack. It is the kind of meal that feels like a treat but fits into your real life without drama. And honestly, that is the best kind of recipe to have in your back pocket.
Why You’ll Love This Recipe
Look, I have tested a lot of chicken tender recipes. Some were too dry. Some had breading that slid off like a bad toupee. And others just took way too much effort for what you got. This recipe is different. It’s the one I keep coming back to, and here is why you will too:
- Quick & Easy: These come together in under 30 minutes. Seriously. From the moment you pull the chicken out of the fridge to the moment you are biting into that first crispy tender, you are looking at about half an hour. Perfect for those nights when you need dinner on the table, like, yesterday.
- Simple Ingredients: No fancy grocery store trips. You probably have everything in your pantry right now—panko breadcrumbs, a couple of spices, some olive oil, and of course, the chicken. That is it.
- Perfect for Busy Weeknights: This is the definition of a weeknight hero. It is fast enough for a Tuesday dinner but good enough that you would serve it to guests without a second thought.
- Crowd-Pleaser: Kids love these. Adults love these. Picky eaters love these. I have yet to meet someone who doesn’t go back for seconds. They are just that good.
- Unbelievably Crispy: This is the part that always surprises people. The crust is genuinely crunchy—like, deep-fried crunchy—without a drop of oil beyond a light spray. The secret is in the technique, and I promise it works.
What makes this recipe different from all the other baked chicken tender recipes out there? It is the little details. The way I preheat the sheet pan so it sears the bottom of the chicken. The way I season the breadcrumbs so every bite is flavorful, not just the outside. And the way I use just enough oil to get that golden crunch without making the chicken greasy. It is a tested, perfected method that I have tweaked over dozens of batches, and it is finally ready for you to try. This isn’t just another version of baked chicken tenders—it is the best one.
What Ingredients You Will Need
This recipe uses simple, everyday ingredients to create something truly special. The magic is in how they work together, not in a long list of obscure items. Here is what you will need:
For the Chicken Tenders
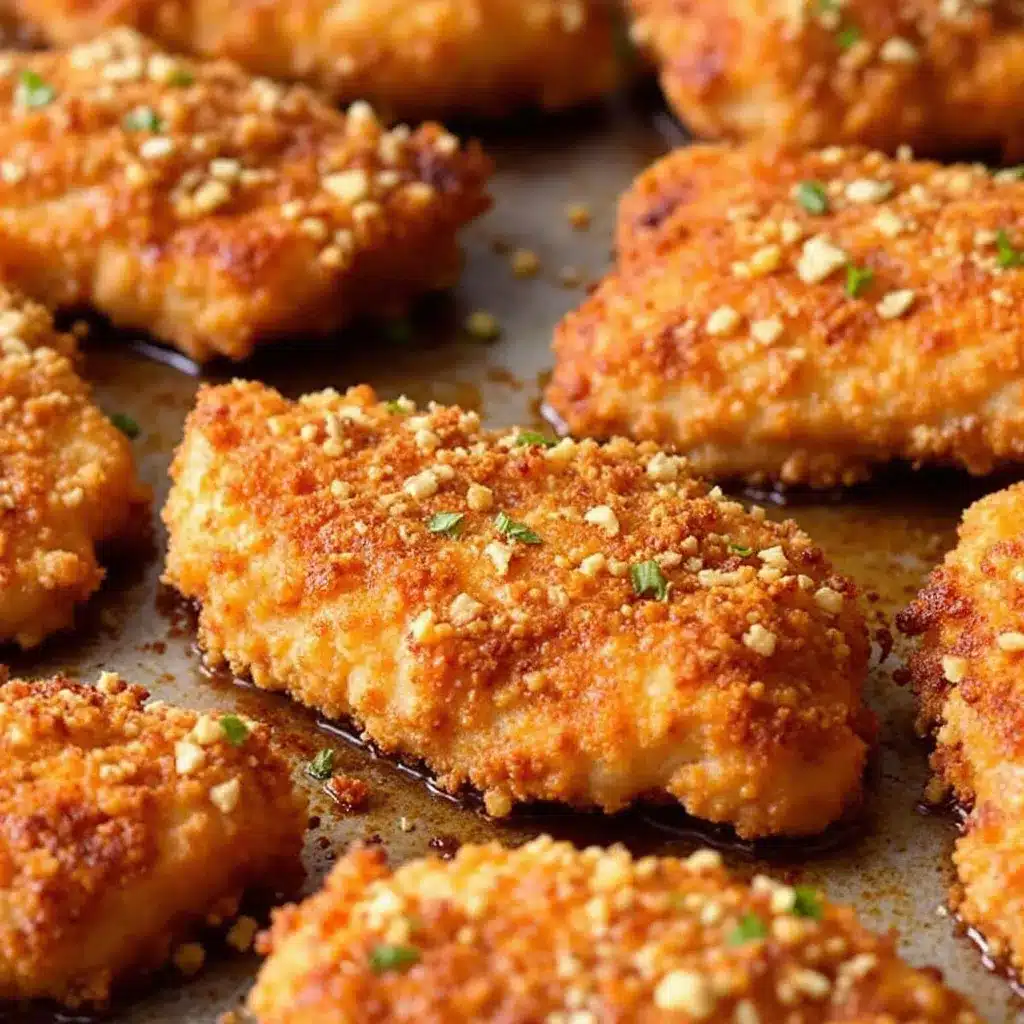
- 1 ½ pounds chicken breast tenders (or boneless, skinless chicken breasts cut into strips)—Look for tenders that are roughly the same size so they cook evenly. If you are using whole breasts, slice them into strips about 1-inch thick.
- 1 cup panko breadcrumbs (I prefer the Japanese-style panko for extra crunch; they are flakier and lighter than regular breadcrumbs)
- ½ cup grated Parmesan cheese (the real stuff, not the green can—it adds a savory, nutty flavor that is irreplaceable)
- 1 teaspoon garlic powder
- 1 teaspoon onion powder
- ½ teaspoon smoked paprika (adds a subtle smokiness that takes these to another level)
- ½ teaspoon salt
- ¼ teaspoon black pepper
- 2 large eggs
- 1 tablespoon Dijon mustard (this is my secret ingredient—it helps the breading stick and adds a tiny tang that you can’t quite place but makes all the difference)
- 2 tablespoons olive oil (for spraying or drizzling)
For Serving (Optional but Recommended)
- Your favorite dipping sauces (honey mustard, ranch, BBQ sauce, or sriracha mayo are all excellent choices)
- Lemon wedges (a squeeze of fresh lemon juice right before eating brightens everything up)
Ingredient Tips: I have tried this recipe with gluten-free panko, and it works beautifully—just make sure you use a gluten-free brand that is sturdy enough to hold up. If you want to cut down on calories, you can skip the Parmesan, but honestly, it adds so much flavor and helps the crust get extra crispy. I recommend using a good-quality Parmesan like Parmigiano-Reggiano if you can find it. For a dairy-free version, use nutritional yeast in place of the Parmesan—it gives a similar savory, cheesy flavor.
Equipment Needed
You do not need a lot of fancy equipment for this recipe, which is part of the beauty of it. Here is what you will need:
- Large baking sheet (a half-sheet pan is perfect; make sure it has a rim to catch any drips)
- Parchment paper or aluminum foil (for easy cleanup; I prefer parchment because it doesn’t stick)
- Two shallow bowls (for the breading station; pie plates work great)
- Whisk or fork (for beating the eggs)
- Tongs (for transferring the chicken without making a mess)
- Cooking spray or a pastry brush (for applying the olive oil)
- Wire rack (optional, but placing the chicken on a rack set inside the baking sheet helps air circulate and makes the bottom extra crispy)
I have made these tenders without a wire rack, and they still turn out great—just a bit less crispy on the bottom. If you have one, use it. If not, no worries. The preheated pan does a lot of the heavy lifting anyway.
Preparation Method
Alright, let’s get cooking. Follow these steps, and you will have the crispiest baked chicken tenders of your life.
- Preheat your oven to 425°F (220°C). Place your baking sheet (lined with parchment or foil) inside the oven while it preheats. This is a non-negotiable step. A hot pan means the chicken starts sizzling the second it hits the surface, which creates that golden, crunchy crust on the bottom. Trust me on this one.
- Set up your breading station. In one shallow bowl, whisk together the eggs and Dijon mustard until smooth. In the second shallow bowl, combine the panko breadcrumbs, grated Parmesan, garlic powder, onion powder, smoked paprika, salt, and pepper. Give it a good stir so everything is evenly distributed.
- Prep the chicken. Pat the chicken tenders dry with paper towels. This is important—excess moisture will steam the breading and make it soggy. If your tenders are uneven in size, try to cut them so they are all about the same thickness (around 1 inch).
- Coat the chicken. Working one piece at a time, dip a chicken tender into the egg mixture, letting any excess drip off. Then transfer it to the panko mixture and press gently so the breadcrumbs stick on all sides. Place the coated tender on a plate or cutting board while you finish the rest. Don’t overcrowd the plate—you want them to stay separate so the coating doesn’t get knocked off.
- Prepare the pan. Carefully remove the hot baking sheet from the oven (use oven mitts—it is hot!). Lightly spray or brush the surface with olive oil. Place the breaded chicken tenders on the hot pan in a single layer, making sure they are not touching. You want space between them so they get crispy instead of steaming.
- Spray the tops. Lightly spray the tops of the chicken tenders with olive oil. This is what gives them that golden, crunchy finish. Don’t skip this—it makes a huge difference.
- Bake. Place the pan in the oven and bake for 10 minutes. Then, carefully flip each tender using tongs and bake for another 5-7 minutes, until the chicken is golden brown and cooked through. The internal temperature should reach 165°F (74°C) when checked with an instant-read thermometer.
- Rest and serve. Remove the pan from the oven and let the chicken tenders rest for 2-3 minutes. This helps the juices redistribute so they stay moist. Serve immediately with your favorite dipping sauces and maybe a squeeze of lemon.
Sensory Cues: At the 10-minute mark, the tenders should look golden and the breading should feel firm to the touch. When you flip them, you should hear a faint crackling sound—that is the crust doing its job. The kitchen will smell like garlic, Parmesan, and toasted breadcrumbs, which is basically the smell of a successful dinner.
Cooking Tips & Techniques
Over the years, I have made every mistake in the book with baked chicken tenders. Here is what I have learned so you don’t have to repeat my failures.
Don’t skip preheating the pan. I know it is an extra step, but it is the single most important thing you can do for crispy results. The moment the chicken hits that hot surface, it starts cooking and searing the bottom. If you put the chicken on a cold pan, the bottom will steam and get soggy. I learned this the hard way after a batch of sad, pale tenders that tasted more like steamed chicken than baked.
Use panko, not regular breadcrumbs. Regular breadcrumbs are too fine and dense—they absorb oil and get heavy. Panko is light, flaky, and creates that signature crunch. If you only have regular breadcrumbs, you can toast them in a dry pan for a few minutes to make them crispier before using them.
Don’t overcrowd the pan. If the tenders are touching, they will steam each other instead of baking. Leave at least an inch of space between each piece. If you are making a large batch, use two pans or bake in batches. It is worth the extra few minutes.
Flip halfway through. This ensures both sides get equal time on the hot pan and develop that beautiful golden crust. Use tongs and be gentle so you don’t knock off the breading.
Check the internal temperature. Chicken tenders are thin and can go from perfectly cooked to dry in a matter of minutes. Use an instant-read thermometer and pull them out at 165°F (74°C). Let them rest for a few minutes before serving to lock in the juices.
Variations & Adaptations
One of the best things about this recipe is how easy it is to customize. Here are a few of my favorite variations:
- Spicy Buffalo Tenders: Add 1-2 teaspoons of cayenne pepper or chili powder to the panko mixture. After baking, toss the tenders in your favorite buffalo sauce for a spicy kick. Serve with blue cheese or ranch dressing.
- Gluten-Free Option: Use gluten-free panko breadcrumbs (I like the Ian’s brand) and make sure your Dijon mustard is gluten-free. The texture is slightly different, but still wonderfully crunchy.
- Parmesan-Herb Tenders: Add 1 tablespoon of dried Italian seasoning or a mix of dried oregano, basil, and thyme to the panko mixture. It gives the tenders a lovely herby flavor that pairs beautifully with marinara sauce.
- Air Fryer Adaptation: Preheat your air fryer to 400°F (200°C). Spray the basket with oil, place the tenders in a single layer (you may need to work in batches), and spray the tops with oil. Cook for 8-10 minutes, flipping halfway through, until golden and cooked through. They get even crispier in the air fryer!
- Lighter Version: Skip the Parmesan and use a mix of panko and crushed cornflakes for a lower-calorie crunch. You can also use egg whites instead of whole eggs to cut down on fat.
I once made a batch with a mix of smoked paprika and chipotle powder for a smoky, spicy version, and it was incredible. Don’t be afraid to experiment—these tenders are forgiving and take well to almost any flavor profile.
Serving & Storage Suggestions
These crispy baked chicken tenders are best served fresh out of the oven, when the crust is at its crunchiest. I like to serve them on a platter with a few dipping sauces on the side—honey mustard is my personal favorite, but ranch, BBQ sauce, and sriracha mayo are all excellent choices. A squeeze of fresh lemon juice right before eating adds a bright, acidic note that cuts through the richness.
Storage: If you have leftovers (which is rare in my house), let them cool completely, then store them in an airtight container in the refrigerator for up to 3 days. The crust will soften a bit, but they are still delicious.
Reheating: The best way to reheat these tenders is in the oven or air fryer. Preheat your oven to 375°F (190°C) and bake for 5-7 minutes, or until heated through and crispy again. You can also reheat them in the air fryer at 350°F (175°C) for 3-4 minutes. Avoid the microwave—it will make the breading soggy.
Freezing: These tenders freeze beautifully. Place the cooled, cooked tenders on a baking sheet in a single layer and freeze until solid (about 2 hours). Then transfer them to a freezer-safe bag or container. To reheat, bake from frozen at 375°F (190°C) for 12-15 minutes, or until hot and crispy.
These tenders also work great in meal prep. I often make a double batch on Sunday and use them for lunches throughout the week—chopped up on salads, stuffed into wraps, or just eaten cold straight from the fridge (no judgment here).
Nutritional Information & Benefits
Here is an approximate nutritional breakdown for one serving (about 4-5 tenders, depending on size):
- Calories: 350-400
- Protein: 35-40g
- Fat: 15-18g
- Carbohydrates: 15-20g
- Fiber: 1-2g
- Sugar: 1-2g
These tenders are a great source of lean protein, thanks to the chicken breast, and the Parmesan adds a little calcium. Using panko breadcrumbs instead of a heavy batter keeps the carb count reasonable. If you are watching your sodium, you can reduce the salt in the breading mixture or use a low-sodium Parmesan. This recipe is also naturally nut-free and can be made gluten-free with a simple swap. It is a balanced, satisfying meal that feels indulgent but fits into a healthy lifestyle without any guilt.
Conclusion
These crispy baked chicken tenders are more than just a recipe—they are a solution to the age-old problem of wanting something crunchy and satisfying without the mess of a deep fryer. They are quick enough for a frantic weeknight, impressive enough for company, and simple enough that even a beginner cook can nail them on the first try. I have made these for my family, for friends, and for myself on lazy Sunday afternoons, and they never disappoint.
I want you to make these your own. Try them with different spices, swap in your favorite dipping sauce, or serve them alongside a big salad for a complete meal. And when you do, come back and let me know how they turned out. Drop a comment below, share a photo, or tell me about your favorite variation. I love hearing from you and seeing how these recipes come to life in your kitchen.
Now go preheat that oven. Your new favorite weeknight dinner is waiting.
Frequently Asked Questions
Can I use chicken thighs instead of chicken breasts?
Absolutely! Chicken thighs are juicier and more forgiving if you accidentally overcook them. Just make sure they are cut into even strips, and adjust the cooking time slightly—thighs may need an extra 2-3 minutes to reach 165°F (74°C).
Why are my chicken tenders not crispy?
There are a few common culprits. First, make sure you preheated the baking sheet. Second, don’t skip spraying the tops with oil—it is essential for that golden crust. Third, avoid overcrowding the pan. If the tenders are touching, they will steam instead of bake. Finally, check that your oven is fully preheated to 425°F (220°C).
Can I make these ahead of time?
You can bread the chicken tenders up to 4 hours ahead of time and keep them covered in the refrigerator. When you are ready to bake, just pop them on the preheated pan and follow the baking instructions. You may need to add a minute or two to the cooking time if they are cold from the fridge.
What dipping sauces go best with these tenders?
Honestly, the possibilities are endless. Honey mustard, ranch, BBQ sauce, sriracha mayo, and buffalo sauce are all classics. I also love a simple dip made from Greek yogurt, lemon juice, and a pinch of garlic powder for a lighter option.
Can I use an air fryer instead of the oven?
Yes! Preheat your air fryer to 400°F (200°C), spray the basket with oil, and place the tenders in a single layer. Spray the tops with oil and cook for 8-10 minutes, flipping halfway through. They will be even crispier than the oven version. Just work in batches to avoid overcrowding.
Pin This Recipe!
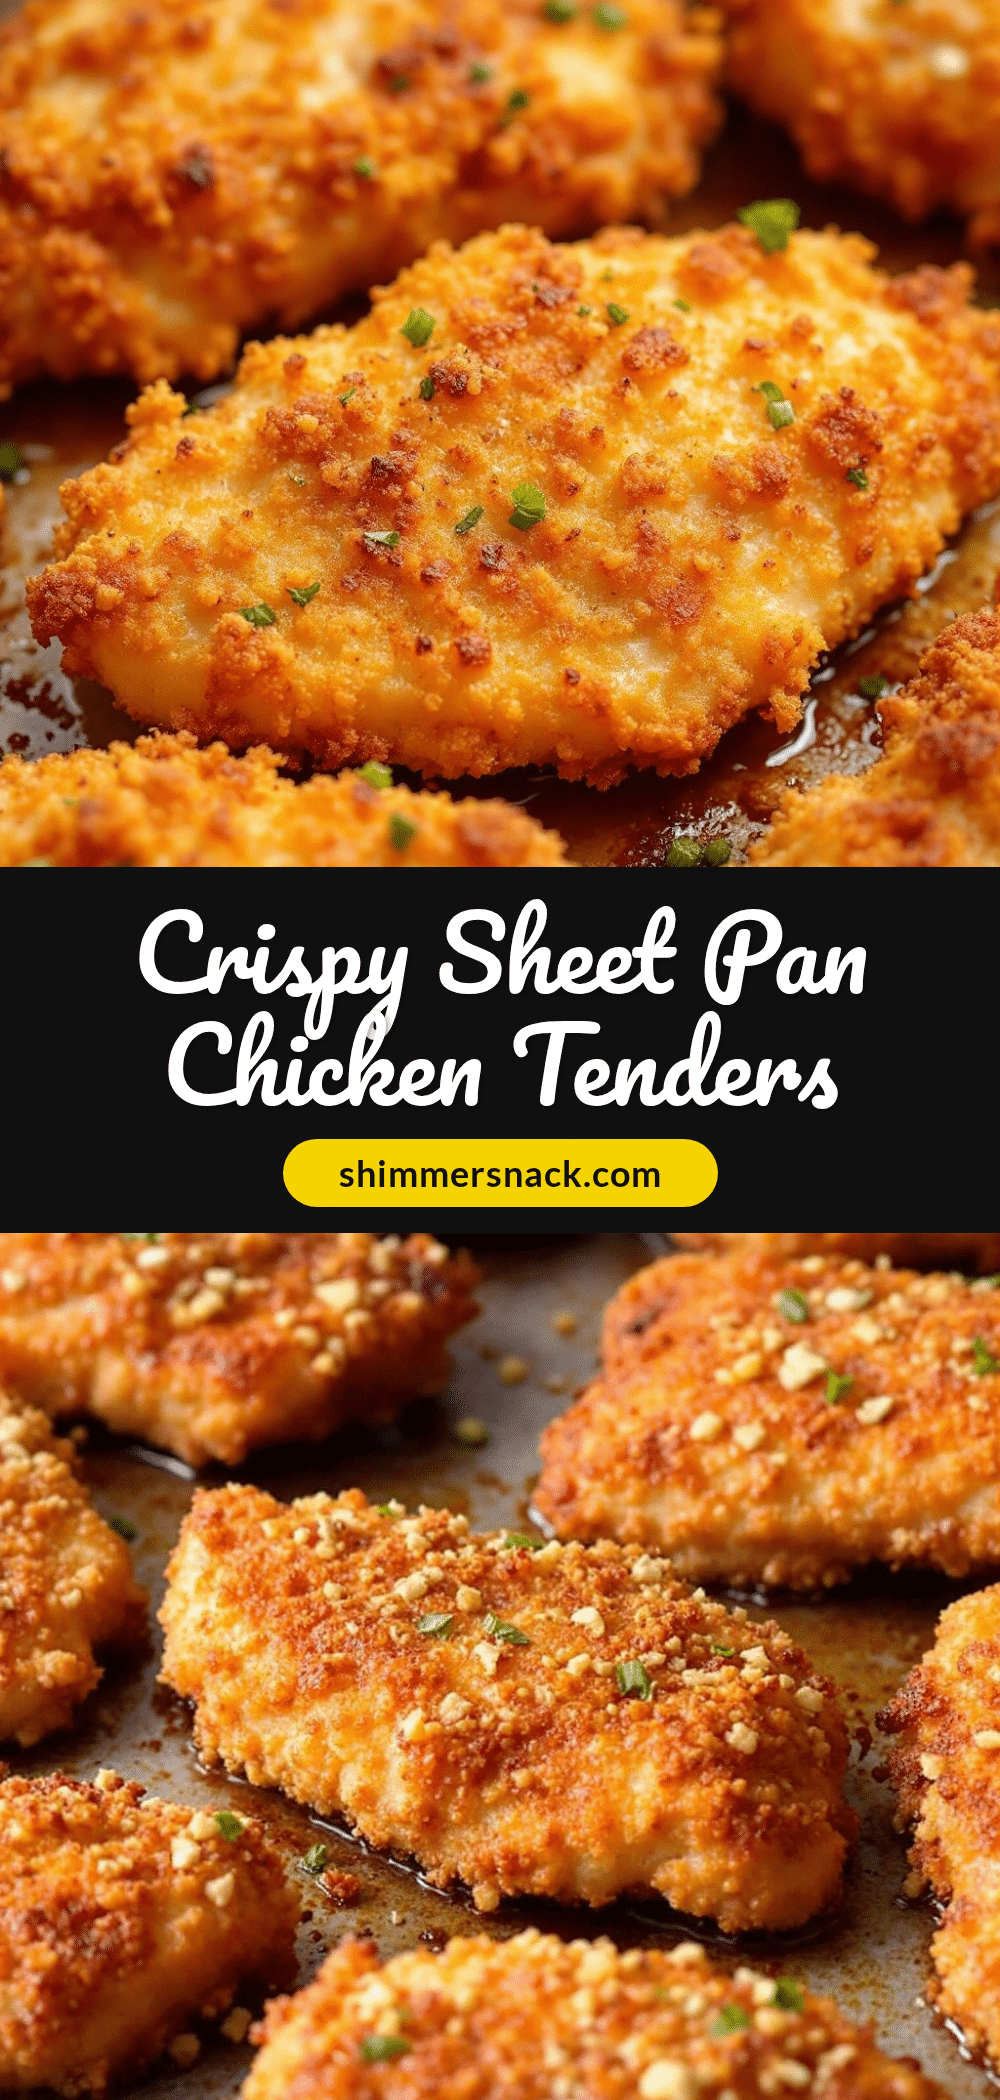
Crispy Baked Chicken Tenders: The Best Easy Sheet Pan Recipe
These crispy baked chicken tenders are the real deal—crunchy, salty, and deeply satisfying, but without the mess of a deep fryer or the guilt of a greasy paper towel. They come together on a single sheet pan in under 30 minutes, making them perfect for busy weeknights.
- Prep Time: 10 minutes
- Cook Time: 15-17 minutes
- Total Time: 25-27 minutes
- Yield: 4 servings 1x
- Category: Main Course
- Cuisine: American
Ingredients
- 1 ½ pounds chicken breast tenders (or boneless, skinless chicken breasts cut into strips)
- 1 cup panko breadcrumbs
- ½ cup grated Parmesan cheese
- 1 teaspoon garlic powder
- 1 teaspoon onion powder
- ½ teaspoon smoked paprika
- ½ teaspoon salt
- ¼ teaspoon black pepper
- 2 large eggs
- 1 tablespoon Dijon mustard
- 2 tablespoons olive oil (for spraying or drizzling)
- Your favorite dipping sauces (optional, for serving)
- Lemon wedges (optional, for serving)
Instructions
- Preheat your oven to 425°F (220°C). Place your baking sheet (lined with parchment or foil) inside the oven while it preheats.
- In one shallow bowl, whisk together the eggs and Dijon mustard until smooth. In a second shallow bowl, combine the panko breadcrumbs, grated Parmesan, garlic powder, onion powder, smoked paprika, salt, and pepper.
- Pat the chicken tenders dry with paper towels. If your tenders are uneven in size, cut them so they are all about 1 inch thick.
- Working one piece at a time, dip a chicken tender into the egg mixture, letting any excess drip off. Then transfer it to the panko mixture and press gently so the breadcrumbs stick on all sides. Place the coated tender on a plate or cutting board while you finish the rest.
- Carefully remove the hot baking sheet from the oven. Lightly spray or brush the surface with olive oil. Place the breaded chicken tenders on the hot pan in a single layer, making sure they are not touching.
- Lightly spray the tops of the chicken tenders with olive oil.
- Bake for 10 minutes. Then, carefully flip each tender using tongs and bake for another 5-7 minutes, until the chicken is golden brown and cooked through (internal temperature should reach 165°F / 74°C).
- Remove the pan from the oven and let the chicken tenders rest for 2-3 minutes. Serve immediately with your favorite dipping sauces and a squeeze of lemon.
Notes
Preheating the baking sheet is crucial for crispy results. Do not overcrowd the pan—leave space between tenders. For extra crispy bottoms, use a wire rack set inside the baking sheet. Leftovers can be stored in the refrigerator for up to 3 days and reheated in the oven or air fryer.
Nutrition
- Serving Size: 4-5 tenders
- Calories: 350400
- Sugar: 12
- Sodium: 600700
- Fat: 1518
- Saturated Fat: 45
- Carbohydrates: 1520
- Fiber: 12
- Protein: 3540
Keywords: baked chicken tenders, crispy chicken tenders, sheet pan chicken, easy chicken recipe, weeknight dinner, panko chicken


