Love this? Save it for later!
Share the inspiration with your friends
I was standing in the kitchen, holding a wooden spoon like a weapon, while my kids stared at me with wide eyes from the living room. It was 5:45 PM on a Tuesday. The clock was ticking louder than the alarm. I had promised chicken. Not the sad, boiled kind. The good kind. The kind that smells like a restaurant and tastes like victory.
Let’s face it, most people burn garlic before they even finish chopping the onions. It’s a classic rookie move. I’ve done it. I’ve served bitter, acrid chicken to my family and pretended I didn’t notice the grimace on my husband’s face. But that night, I needed something different. I needed crispy baked chicken thighs with garlic herb butter to save the evening.
I didn’t have time to marinate for hours. I didn’t have time to tend a grill in the falling autumn chill. So I improvised. I took the butter, cooled it down slightly so the garlic wouldn’t die instantly, and whipped in a mountain of fresh parsley, thyme, and rosemary. The scent hit the air like a warm hug.
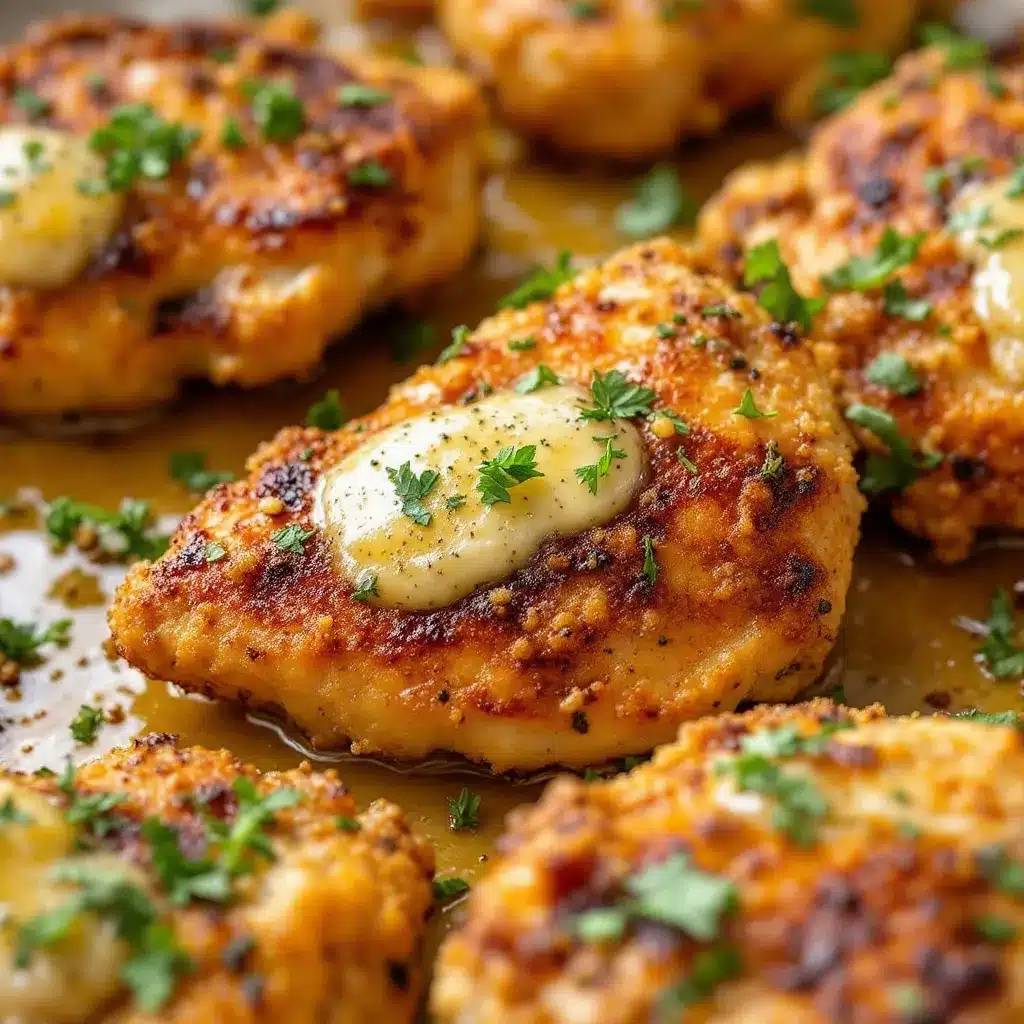
When the chicken came out of the oven, the skin wasn’t just cooked—it was shattering. Crispy, golden, and packed with flavor. My kids asked for seconds before I had even sat down. That moment stuck with me. It wasn’t about fancy techniques or expensive tools. It was about saving dinner with a little bit of fat and a lot of herbs.
Now, I make this recipe at least once a week. It’s reliable. It’s forgiving. And honestly? It’s the only way I know how to get crispy skin in the oven without deep frying. It turns a simple weeknight into something that feels special, even if it’s just us in our pajamas.
Why You’ll Love This Recipe
There is a specific magic that happens when you combine the right fats with the right heat. I’ve tested dozens of chicken recipes over the years. Some are too dry. Some are too greasy. This one hits that sweet spot that makes you close your eyes after the first bite. It’s not just good; it’s the kind of meal that makes you forget about the stress of the workday.
Here is why this recipe has earned a permanent spot in your weekly rotation:
- Quick & Easy: You can have this on the table in under 45 minutes. That includes prep and cook time. It is perfect for busy weeknights or when you are hungry and impatient.
- Simple Ingredients: You likely already have everything in your kitchen. Chicken thighs, butter, herbs, garlic, salt, and pepper. No fancy grocery trips needed. No obscure spices sitting in the back of your cabinet.
- Perfect for Meal Prep: These thighs hold up well. They don’t get soggy in the fridge like breast meat often does. They are great for lunch boxes or reheating for a quick dinner later in the week.
- Crowd-Pleaser: Kids love the crispy skin. Adults love the juicy meat. It always gets rave reviews. Even the picky eaters at the table will ask for more.
- Unbelievably Delicious: The texture and flavor combo is next-level comfort food. The garlic herb butter bastes the chicken as it cooks, keeping it moist while the skin crisps up.
What makes this different from other recipes? Most people rub dry spices on the chicken and call it a day. But adding that herb butter *under* and *over* the skin creates a flavor barrier. It locks in the juices and infuses the meat with garlic from the inside out. It’s a small step that makes a huge difference. It’s not just another version of baked chicken—it’s your best version.
I remember the first time I tried this technique. I was skeptical. Would the butter make the skin soggy? No. It rendered down, creating a crisp, savory crust. It’s comfort food reimagined—simple, fast, but with the same soul-soothing satisfaction as a slow-roasted meal.
What Ingredients You Will Need
This recipe uses simple, wholesome ingredients to deliver bold flavor and satisfying texture without the fuss. You don’t need a pantry full of specialty items. Just good quality basics and a willingness to use fresh herbs if you can find them. The key here is the quality of the butter and the freshness of the garlic.
For the Chicken:
- Chicken Thighs: Bone-in, skin-on thighs are non-negotiable for this recipe. They have more fat and flavor than breasts. Look for them at your local butcher or grocery store. I prefer smaller thighs as they cook more evenly. (Use boneless if you are in a huge rush, but adjust cooking time.)
- Neutral Oil: Olive oil or avocado oil helps the skin crisp up before the butter is added. Use about 2 tablespoons.
- Salt and Black Pepper: Season generously. You want to taste the seasoning on the skin. Use kosher salt for best results.
For the Garlic Herb Butter:
- Unsalted Butter: Softened, not melted. This allows you to mix the herbs in properly. I recommend European-style butter for a richer flavor, but regular salted butter works if you reduce the added salt.
- Garlic: Fresh cloves, minced finely. Do not use jarred garlic. It has a different texture and flavor profile that doesn’t work well here. Three to four cloves is the sweet spot.
- Fresh Herbs: A mix of parsley, thyme, and rosemary. Parsley adds freshness, thyme adds earthiness, and rosemary adds piney depth. Chop them finely so they distribute evenly.
- Garlic Powder: A teaspoon adds an extra layer of savory flavor that complements the fresh garlic.
- Lemon Zest: Optional, but a little zest cuts through the richness of the butter and chicken. It adds a bright note that balances the meal.
If you don’t have fresh herbs, you can use dried, but reduce the amount by half. Dried herbs are more potent. Also, if you are watching your sodium, use low-sodium butter and add salt to taste at the end. For a dairy-free option, you can substitute the butter with ghee or a high-quality plant-based butter, though the flavor will be slightly different.
Equipment Needed
You don’t need a lot of fancy gadgets to make this chicken perfect. A standard oven and a few basic pans will do the job.
- Rimmed Baking Sheet: This is the most important tool. The rim catches the rendered fat and butter juices, preventing them from burning on the oven floor. Line it with parchment paper for easy cleanup, or use a silicone baking mat if you prefer reusability.
- Small Mixing Bowl: For combining the butter and herbs. A small glass or ceramic bowl works best so you can see the mixture clearly.
- Pastry Brush or Your Hands: You can use a brush to apply the butter under the skin, but honestly, using your fingers is faster and ensures the butter gets right against the meat. Just wash your hands well afterward!
- Sharp Knife and Cutting Board: To mince the garlic and chop the herbs. A sharp knife makes quick work of the herbs.
If you don’t have a rimmed sheet, you can use a cake pan, but make sure it’s large enough so the chicken pieces aren’t touching too much. Crowding the pan steams the chicken instead of baking it, which ruins the crispiness. I’ve learned this the hard way with too many soggy thighs.
Preparation Method
Getting the skin crispy requires a bit of patience, but the steps are straightforward. Follow these instructions closely for the best results.
- Preheat the Oven: Set your oven to 425°F (220°C). High heat is crucial for rendering the fat and crisping the skin. Let the oven fully preheat for at least 10 minutes. (5 minutes)
- Prepare the Chicken: Pat the chicken thighs dry with paper towels. This is the most important step for crispiness. Moisture is the enemy of crisp. If the skin is wet, it will steam. Discard the paper towels. (5 minutes)
- Make the Herb Butter: In a small bowl, combine the softened butter, minced garlic, chopped herbs, garlic powder, lemon zest, salt, and pepper. Mix until well combined. It should look like a fragrant, green-flecked paste. (3 minutes)
- Loosen the Skin: Gently slide your fingers under the skin of each thigh to separate it from the meat. Be careful not to tear the skin. You want to create a pocket. (2 minutes)
- Apply the Butter: Take small amounts of the herb butter and push it under the skin, spreading it over the meat. Then, rub the remaining butter all over the outside of the skin. You want every part coated. (3 minutes)
- Arrange on Pan: Place the chicken skin-side up on the prepared baking sheet. Leave a little space between each piece so air can circulate. (1 minute)
- Bake: Place the sheet in the preheated oven. Bake for 35-40 minutes. You want the skin to be deep golden brown and the internal temperature to reach 165°F (74°C). Do not move the chicken around too much in the first 20 minutes. Let it sit and crisp up. (40 minutes)
- Rest: Remove from the oven and let the chicken rest for 5 minutes before serving. This allows the juices to redistribute. If you cut into it immediately, all the juice will run out. (5 minutes)
Watch the chicken closely in the last 5 minutes. If the skin is browning too fast, you can tent it loosely with foil. Every oven is different, so trust your eyes and your thermometer.
Cooking Tips & Techniques
I’ve made enough burnt garlic to fill a landfill, so here are some tips to keep your chicken perfect.
Don’t Skip the Drying: I know it’s tedious, but patting the chicken dry is non-negotiable. If the skin is damp, it won’t crisp. Use fresh paper towels. If they get soggy, switch to dry ones.
Garlic Management: Fresh garlic burns quickly at 425°F. That’s why mixing it into the butter helps. The fat protects the garlic from direct heat. Also, make sure your garlic is finely minced. Big chunks will burn and taste bitter. If you want extra protection, you can add a pinch of sugar to the butter, which helps with browning without burning the garlic as fast.
Space It Out: Never overcrowd the pan. If the pieces are touching, they will steam each other. Use two pans if necessary. It’s better to bake in batches than to have soggy chicken.
Temperature Check: Use a meat thermometer. Chicken thighs are forgiving and can go up to 175°F (80°C) for even more tenderness, but 165°F (74°C) is the safety standard. If you like your chicken very tender and falling off the bone, go for 175°F.
Resting is Key: Letting the chicken rest is not just a suggestion. It’s science. The muscles relax, and the juices stay inside. Skip this step, and you’ll have dry chicken.
Variations & Adaptations
This recipe is a great base for experimenting. Here are a few ways to change it up.
Spicy Kick: Add a teaspoon of cayenne pepper or red pepper flakes to the butter mixture. It adds a nice heat that balances the rich butter. I love this version with a cold beer.
Lemon Pepper: Skip the rosemary and thyme. Use extra lemon zest and plenty of cracked black pepper. It’s a lighter, brighter flavor profile.
Herb Garden: Use whatever herbs you have. Sage and thyme work well together. Or try tarragon for a slightly anise-like flavor that pairs beautifully with chicken.
Dairy-Free: Swap the butter for olive oil. You can still mix the herbs and garlic into the oil and rub it under the skin. It won’t have the same richness, but it will still be delicious.
Gluten-Free: This recipe is naturally gluten-free. Just make sure your spices and herbs are certified gluten-free if you have celiac disease.
I once made this with gremolata (parsley, lemon zest, and garlic) instead of the butter mix. It was lighter and fresher. I liked it, but I always come back to the butter version for Sunday dinners.
Serving & Storage Suggestions
These thighs are best served hot and crispy. They pair wonderfully with roasted vegetables, like the perfect roasted delicata squash or simple green beans. A side of mashed potatoes or crusty bread is great for soaking up the garlic herb butter juices.
Storage: Store leftovers in an airtight container in the refrigerator for up to 3 days. The skin will soften in the fridge, which is normal.
Reheating: To restore crispiness, reheat in the oven at 350°F (175°C) for 10-15 minutes. Avoid the microwave, as it will make the skin chewy and rubbery. You can also use an air fryer for 3-4 minutes at 375°F to get them crispy again quickly.
The flavors actually develop over time. The garlic infuses deeper into the meat as it sits. Leftover chicken thighs are fantastic in salads or wraps the next day.
Nutritional Information & Benefits
Chicken thighs are a good source of protein, iron, and zinc. They are generally higher in fat than breasts, but that fat keeps them juicy and flavorful. The skin contains the majority of the fat, so you can remove it if you are watching your calorie intake, though you will lose some flavor.
The herbs and garlic offer antioxidant properties. Garlic is known for its immune-boosting benefits. Parsley is rich in vitamins A and C. While this isn’t a diet food, it is a nutrient-dense meal that provides sustained energy.
One serving (one thigh) has approximately 300-350 calories, depending on the size of the thigh and the amount of butter used. It’s a hearty meal that keeps you full for hours.
Conclusion
This crispy baked chicken thighs with garlic herb butter recipe is a game-changer for weeknight dinners. It’s simple, flavorful, and reliable. You don’t need to be a chef to make it work. Just follow the steps, don’t rush the drying process, and enjoy the aroma filling your kitchen.
I encourage you to try it and customize the herbs to your liking. Maybe add some paprika for color. Maybe use more lemon. Make it your own. I love this recipe because it turns a basic ingredient into something special with just a few extra minutes of effort.
Give it a try this week. Let me know how it turns out in the comments below. Did you add extra garlic? Did you serve it with something specific? I’d love to hear about your adaptations. Happy cooking!
Frequently Asked Questions
Can I use chicken breasts instead of thighs?
You can, but the result will be different. Chicken breasts are leaner and can dry out easily. If you use breasts, reduce the cooking time to 20-25 minutes and check the temperature frequently. Thighs are juicier and more forgiving, which is why I recommend them.
Why is my chicken skin not crispy?
The most common reasons are wet skin or overcrowding the pan. Make sure you pat the chicken very dry with paper towels. Also, ensure there is space between each piece on the baking sheet so air can circulate. If your oven runs cool, you might need to increase the temperature slightly.
Can I make the herb butter ahead of time?
Yes! You can make the herb butter up to 3 days in advance. Store it in an airtight container in the refrigerator. It will firm up, which makes it easier to handle. You can also freeze it for up to 3 months.
What is the best way to reheat leftovers?
The oven or air fryer is best. Reheat at 350°F (175°C) for 10-15 minutes in the oven, or 3-4 minutes in the air fryer. This helps restore the crispiness of the skin. Avoid the microwave.
Can I use dried herbs instead of fresh?
Yes, but use half the amount. Dried herbs are more potent. For example, if the recipe calls for 1 tablespoon of fresh parsley, use 1/2 tablespoon of dried parsley. Fresh herbs provide a brighter flavor, but dried works in a pinch.
Pin This Recipe!

Crispy Baked Chicken Thighs: Best Garlic Herb Butter Recipe

Juicy, bone-in chicken thighs with shattering crispy skin, basted with a rich garlic herb butter. This quick and easy weeknight dinner is flavorful, forgiving, and perfect for meal prep.
- Prep Time: 15 minutes
- Cook Time: 40 minutes
- Total Time: 55 minutes
- Yield: 4 servings 1x
- Category: Main Course
- Cuisine: American
Ingredients
- 4–6 bone-in, skin-on chicken thighs
- 2 tablespoons neutral oil (olive or avocado oil)
- 1 teaspoon kosher salt
- 1/2 teaspoon black pepper
- 1/2 cup unsalted butter, softened
- 3–4 cloves fresh garlic, minced
- 1 tablespoon fresh parsley, chopped
- 1 tablespoon fresh thyme leaves
- 1 tablespoon fresh rosemary, chopped
- 1 teaspoon garlic powder
- 1/2 teaspoon lemon zest (optional)
Instructions
- Preheat oven to 425°F (220°C) and let it fully preheat for at least 10 minutes.
- Pat chicken thighs completely dry with paper towels to ensure crispy skin.
- In a small bowl, mix softened butter, minced garlic, chopped herbs, garlic powder, lemon zest, salt, and pepper until combined into a paste.
- Gently slide fingers under the skin of each thigh to create a pocket without tearing the skin.
- Push half of the herb butter under the skin, spreading it over the meat. Rub the remaining butter all over the outside of the skin.
- Arrange chicken skin-side up on a rimmed baking sheet, leaving space between pieces for air circulation.
- Bake for 35-40 minutes until skin is deep golden brown and internal temperature reaches 165°F (74°C). Do not move chicken for the first 20 minutes.
- Remove from oven and let rest for 5 minutes before serving to allow juices to redistribute.
Notes
Patting the chicken dry is crucial for crispiness. Do not overcrowd the pan or the chicken will steam. If using dried herbs, reduce the amount by half. For dairy-free, substitute butter with olive oil or ghee. Chicken thighs can be cooked to 175°F for extra tenderness.
Nutrition
- Serving Size: 1 thigh per serving
- Calories: 325
- Sodium: 450
- Fat: 24
- Saturated Fat: 10
- Carbohydrates: 1
- Protein: 28
Keywords: crispy baked chicken, garlic herb butter, chicken thighs, weeknight dinner, easy chicken recipe, gluten-free


