Love this? Save it for later!
Share the inspiration with your friends
Introduction
“Three summers ago, I found myself staring at a half-empty can of craft beer and a lonely whole chicken on the kitchen counter—an odd pairing, to say the least. I wasn’t planning a grand feast, just trying to fix a midweek dinner that turned unexpectedly fun. The sizzle from that beer can chicken hitting the grill was almost hypnotic, and the smell? Oh, the smell was something else entirely.
Honestly, the first time I tried this crispy beer can chicken with savory dry rub was a bit of a happy accident. I had forgotten to buy the marinade I originally planned, but a quick riff on a dry rub recipe I’d been tweaking turned the bird into this golden, flavorful masterpiece. I remember the moment I pulled it from the grill—skin crackling, juices bubbling—and thought, “Okay, this is definitely worth sharing.”
Maybe you’ve been there, too, standing over your grill or oven, wondering if experimenting with a can of beer is a culinary crime or genius. Let me tell you, this recipe stays with you because it’s not just about the crispy skin or the juicy meat; it’s about the fun, the smell that pulls neighbors to your fence, and the simple joy of a meal that feels like a weekend celebration—even if it’s just Tuesday night.
Why You’ll Love This Recipe
After testing and tweaking countless times, this crispy beer can chicken recipe is now a staple in my recipe arsenal. It’s not just about the flavor—it’s a whole experience, and here’s why you’ll love it as much as I do:
- Quick & Easy: Ready in under 90 minutes, it’s perfect for those evenings when you want something impressive but don’t want to fuss all day.
- Simple Ingredients: You don’t need a dozen exotic spices—just pantry basics and a can of your favorite beer.
- Perfect for Backyard Gatherings: Whether it’s a casual weekend BBQ or a last-minute get-together, this dish steals the show.
- Crowd-Pleaser: Kids and adults alike can’t get enough of the crunchy skin and juicy, tender meat beneath.
- Unique Flavor Profile: The savory dry rub, balanced just right with smoky and spicy notes, sets it apart from your average roast chicken.
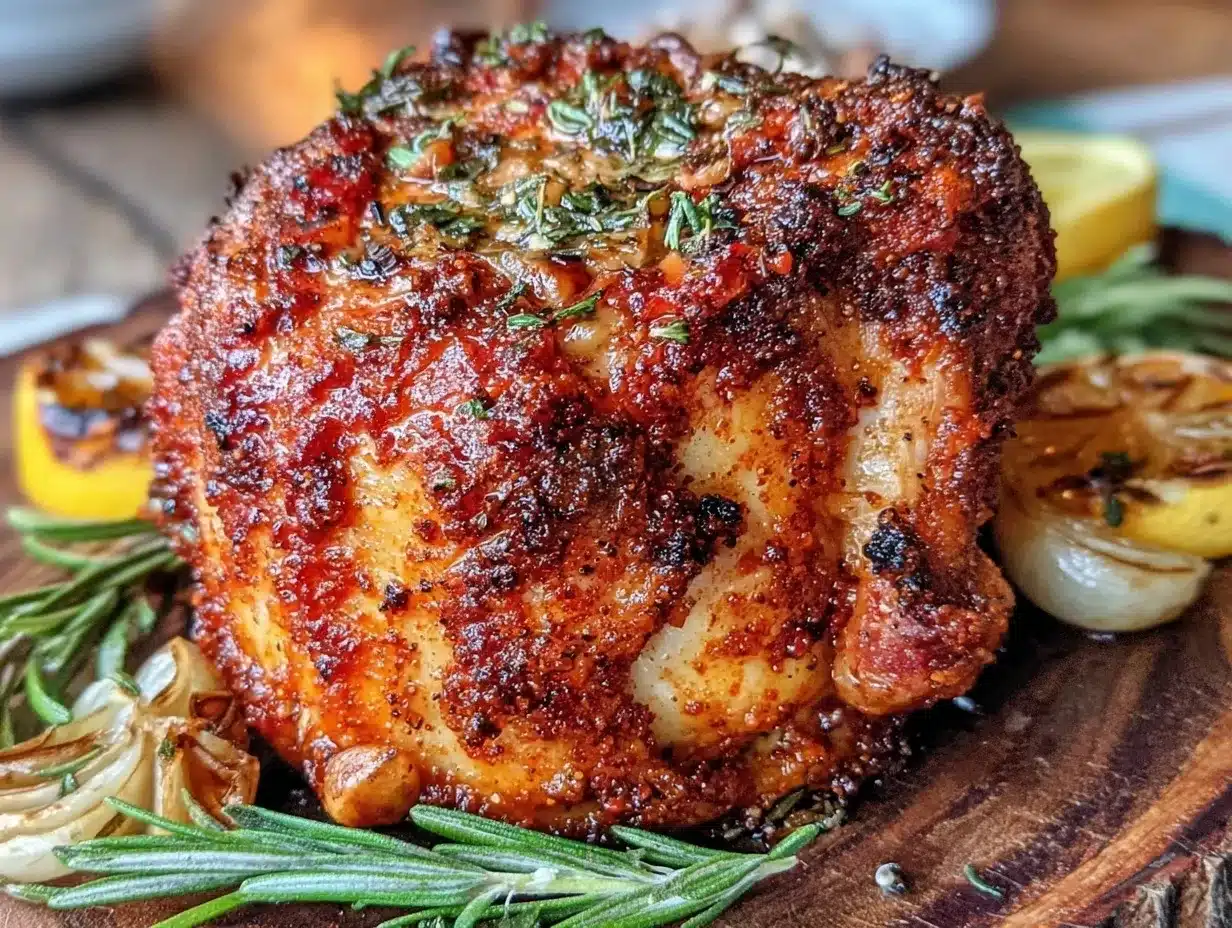
This isn’t just another roast chicken recipe. The technique of cooking the chicken upright on a beer can locks in moisture, while the dry rub adds layers of flavor that develop beautifully as it cooks. When you bite into that crispy skin, you’ll understand why this method keeps me coming back to the grill, rain or shine.
What Ingredients You Will Need
This recipe is all about using straightforward, easy-to-find ingredients that combine for bold flavor and irresistible texture. No need for complicated prep or hard-to-find seasonings; most of these are kitchen staples.
- Whole chicken (about 4-5 pounds / 1.8-2.3 kg) – fresh and preferably free-range for best flavor
- Beer can (12 oz / 355 ml) – use a beer you like drinking; a lager or pale ale works great
- For the savory dry rub:
- 2 tablespoons paprika (adds smoky warmth)
- 1 tablespoon garlic powder (for depth)
- 1 tablespoon onion powder
- 1 tablespoon brown sugar (balances spice with sweetness)
- 1 teaspoon salt (I prefer kosher salt for even seasoning)
- 1 teaspoon black pepper, freshly ground
- 1 teaspoon cayenne pepper (optional, for a subtle kick)
- 1 teaspoon dried thyme or oregano (adds herbaceous notes)
- Olive oil or vegetable oil – about 2 tablespoons to help the rub stick
Pro tip: I like to use New Belgium Fat Tire for the beer can—it lends a nice maltiness that complements the chicken without overpowering it. For a gluten-free version, try a gluten-free beer or even sparkling water with a squeeze of lemon for a twist.
Equipment Needed
- Grill or oven: A charcoal or gas grill is ideal for that smoky flavor, but you can use a conventional oven if needed.
- Beer can chicken holder (optional): It makes handling easier but you can improvise with a sturdy beer can and a roasting pan.
- Meat thermometer: A must-have to check internal temperature for juicy perfection.
- Basting brush: Handy for applying oil and rub evenly.
- Aluminum foil: For tenting the chicken if needed during resting.
I tried using a disposable aluminum roasting pan once, and honestly, it warped a bit under the heat, so I recommend a sturdy metal pan or cast iron skillet underneath to catch drippings. If you’re budget-conscious, a simple grill grate and a beer can work just fine—just be careful when moving the bird!
Preparation Method
- Prepare the chicken: Remove giblets and pat the chicken dry with paper towels. Let it sit at room temperature for about 20 minutes before cooking to ensure even cooking.
- Make the dry rub: In a small bowl, combine paprika, garlic powder, onion powder, brown sugar, salt, black pepper, cayenne, and dried herbs. Mix well.
- Apply oil and rub: Rub the chicken all over with olive oil, getting into every nook and cranny. Then generously coat the entire surface with the dry rub, pressing it in gently so it sticks well.
- Prepare the beer can: Open the beer and pour out (or drink!) about half the can. Using a can opener, carefully pierce a few extra holes on the top for steam to escape (this helps flavor the chicken better).
- Position the chicken: Place the beer can on a flat, stable surface. Carefully lower the chicken onto the can so it sits upright, with the legs acting as a tripod.
- Preheat grill or oven: For grill: set up indirect heat at medium-high (~375°F / 190°C). For oven: preheat to 375°F (190°C).
- Cook the chicken: Place the upright chicken on the grill or in a roasting pan in the oven. Close the lid and cook for about 60-75 minutes. Check internal temperature with a meat thermometer inserted into the thickest part of the thigh—not touching bone. It should reach 165°F (74°C).
- Watch for crispy skin: In the last 10 minutes, you can move the chicken over direct heat on the grill to crisp the skin, turning carefully. If in the oven, briefly broil (keep a close eye to avoid burning!)
- Rest the chicken: Carefully remove the chicken from the beer can (use tongs or oven mitts, it’s hot and steamy!). Tent loosely with foil and rest for 10-15 minutes to let juices redistribute.
- Carve and serve: Slice the chicken and serve with your favorite sides. The skin should be golden, and the meat juicy and flavorful.
If you notice the skin isn’t as crispy as you like, a quick spray of oil and a few extra minutes over direct heat usually does the trick. Also, don’t skip resting—the juices really settle and make the meat tender.
Cooking Tips & Techniques
Getting that perfect crispy beer can chicken isn’t rocket science, but a few tricks can make your life easier:
- Pat dry is key: Moisture is the enemy of crisp skin. I always pat the chicken down thoroughly before applying the rub.
- Don’t rush the resting: I’ve learned the hard way that slicing too soon leads to dry meat. Wait those 15 minutes—it’s worth it.
- Use indirect heat: Cooking the chicken upright over indirect heat lets the fat render slowly, crisping skin without burning.
- Thermometer is your best friend: No guesswork, just juicy, safe-to-eat chicken every time.
- Experiment with rubs: Play with the spice levels or add your favorite herbs. Just remember to keep the balance so the beer flavor isn’t overwhelmed.
I once got impatient and cranked the heat too high—ended up with burnt skin and raw meat inside. Lesson learned: slow and steady wins the race here.
Variations & Adaptations
- Herb-Infused Rub: Swap dried thyme for fresh rosemary and sage for an aromatic twist.
- Spicy Kick: Increase cayenne or add smoked chipotle powder for more heat.
- Gluten-Free: Ensure your dry rub spices are gluten-free and use a gluten-free beer or sparkling water for the can.
- Oven-Only Version: If you don’t have a grill, use a roasting pan and cook at 375°F (190°C) for about 75 minutes, then broil briefly to crisp skin.
- Personal Favorite: I once tried substituting half the brown sugar with maple sugar—wow, the subtle sweetness paired beautifully with the beer aroma.
Serving & Storage Suggestions
Serve your crispy beer can chicken warm, right after resting, to enjoy the full crunch of the skin. It pairs beautifully with grilled veggies, a crisp green salad, or even a classic potato salad for that perfect backyard vibe.
Leftovers? No problem. Store in an airtight container in the refrigerator for up to 3 days. Reheat gently in the oven at 300°F (150°C) to keep skin from getting soggy—avoid the microwave unless you don’t mind losing that crisp.
Fun fact: the flavors deepen overnight, so sometimes I actually prefer eating the leftover chicken cold or at room temp the next day. The dry rub notes become even more pronounced—great for sandwiches or salads.
Nutritional Information & Benefits
This crispy beer can chicken is a relatively lean protein dish, providing about 350 calories per serving (based on 6 servings from one whole chicken). It’s packed with protein, low in carbs, and free from added preservatives.
The paprika and herbs add antioxidants, while using olive oil contributes heart-healthy fats. Plus, cooking with beer adds moisture without extra fat, making this a flavorful but balanced meal option.
For those watching sodium, you can reduce the salt in the dry rub and still get plenty of flavor from the spices and herbs.
Conclusion
If you’re looking for a recipe that turns simple ingredients into a memorable meal, this crispy beer can chicken with savory dry rub fits the bill. It’s approachable, full of flavor, and has that special something that makes dinner feel like a treat. I love how it brings friends together, whether it’s a spontaneous weeknight or a planned weekend cookout.
Don’t be afraid to make it your own—try different rub combinations or beers to find your perfect match. And hey, when you nail that crispy skin and juicy meat, you’ll know why this recipe keeps showing up on my grill season after season.
If you give this recipe a try, I’d love to hear how it goes—drop a comment or share your favorite rub tweaks. Happy cooking!
FAQs About Crispy Beer Can Chicken
What type of beer works best for beer can chicken?
A light to medium-bodied beer like a lager or pale ale works best. Avoid strong stouts or heavily flavored beers as they can overpower the chicken.
Can I use soda or another beverage instead of beer?
Yes! Sparkling water, soda, or even broth can be used for a non-alcoholic version. The key is the steam inside the bird to keep it juicy.
How do I know when the chicken is fully cooked?
Use a meat thermometer to check the thickest part of the thigh; it should read 165°F (74°C) for safe eating.
Can I make this recipe indoors without a grill?
Absolutely. Roast the chicken upright in a roasting pan at 375°F (190°C), then broil at the end to crisp the skin.
Is beer can chicken really safe to cook?
Yes, as long as you use a clean can and avoid cans with plastic linings. The chicken doesn’t actually touch the beer, but the steam helps keep it moist and adds subtle flavor.
For a twist on this recipe, you might enjoy the rich flavors of crispy garlic chicken or the smoky depth in smoked pulled pork, which pairs excellently at any backyard feast.
Pin This Recipe!
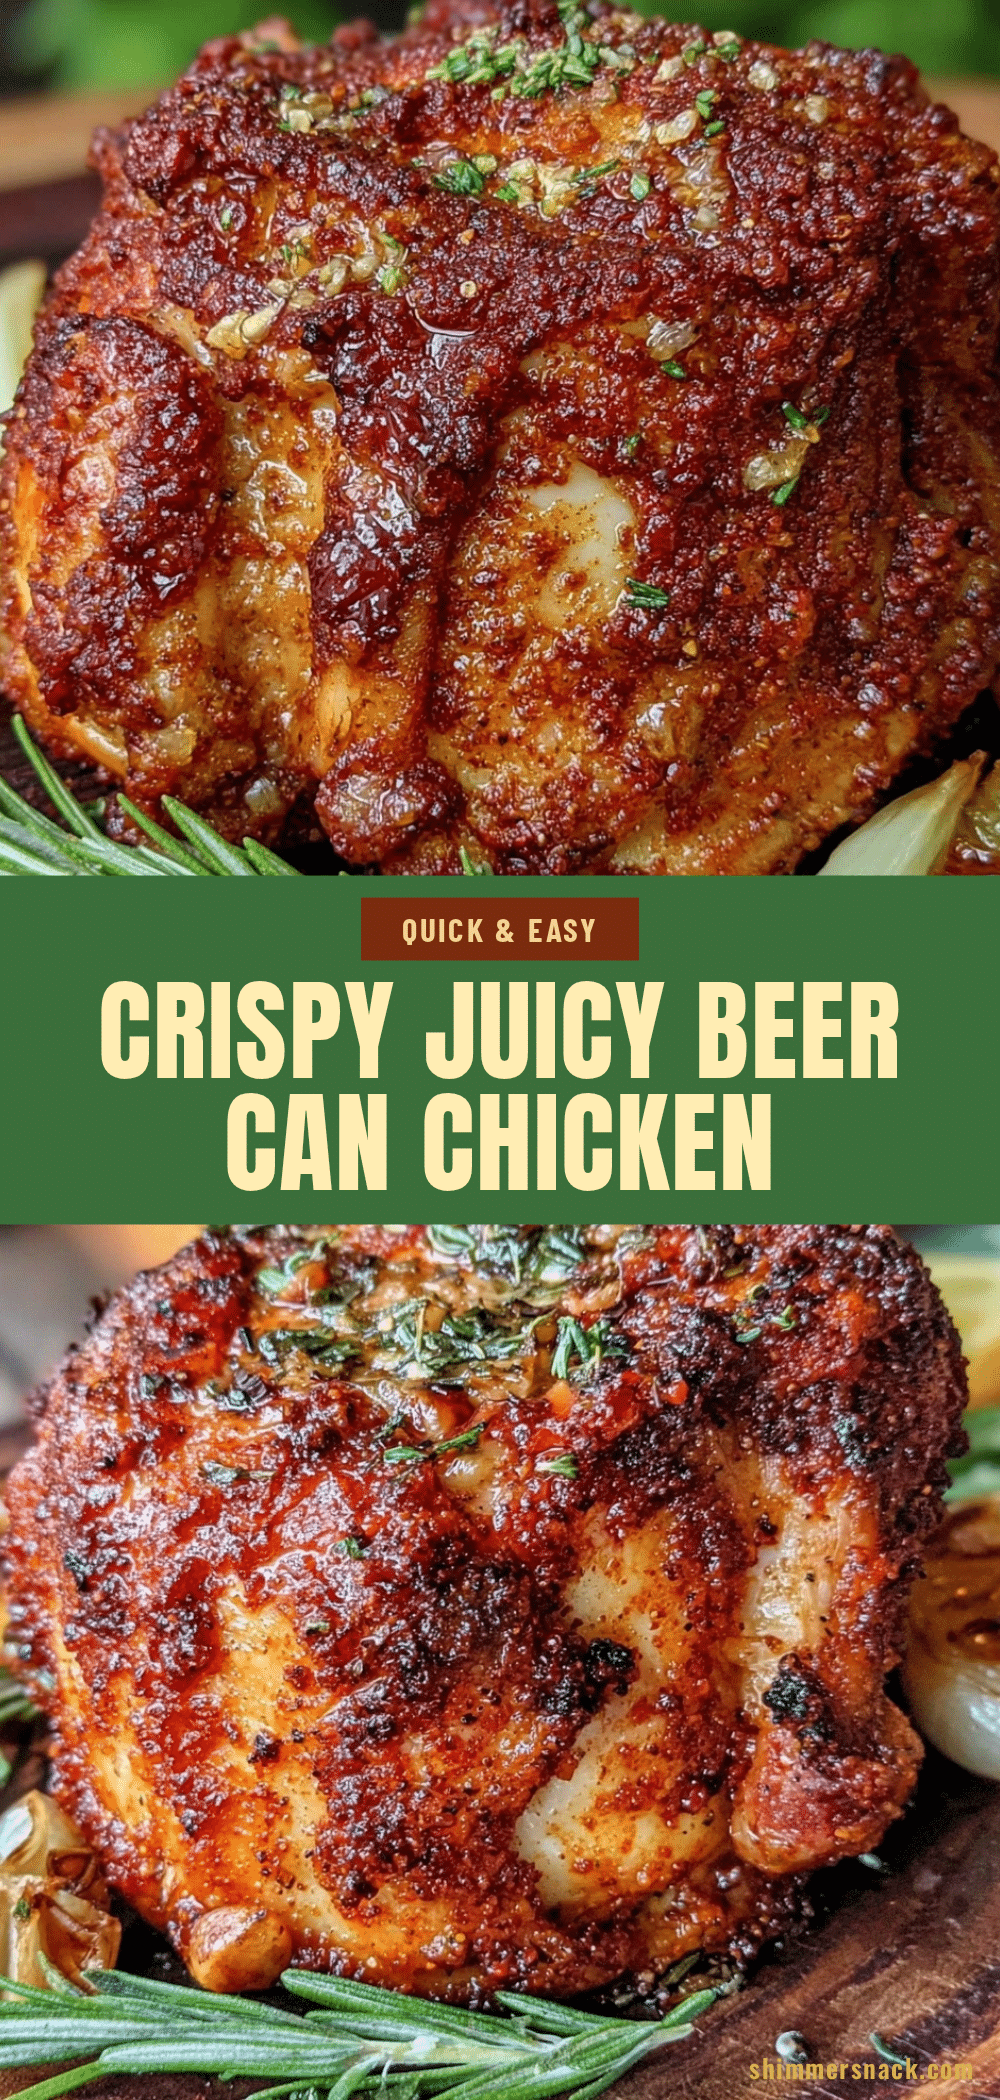
Crispy Beer Can Chicken Recipe Easy Savory Dry Rub for Perfect Flavor

A flavorful and crispy beer can chicken cooked upright with a savory dry rub, perfect for quick and easy backyard gatherings. This recipe locks in moisture and delivers golden, crackling skin with juicy meat.
- Prep Time: 20 minutes
- Cook Time: 60-75 minutes
- Total Time: 80-95 minutes
- Yield: 6 servings 1x
- Category: Main Course
- Cuisine: American
Ingredients
- 1 whole chicken (about 4–5 pounds / 1.8–2.3 kg), fresh and preferably free-range
- 1 beer can (12 oz / 355 ml), lager or pale ale recommended
- 2 tablespoons paprika
- 1 tablespoon garlic powder
- 1 tablespoon onion powder
- 1 tablespoon brown sugar
- 1 teaspoon salt (kosher salt preferred)
- 1 teaspoon freshly ground black pepper
- 1 teaspoon cayenne pepper (optional)
- 1 teaspoon dried thyme or oregano
- 2 tablespoons olive oil or vegetable oil
Instructions
- Remove giblets and pat the chicken dry with paper towels. Let it sit at room temperature for about 20 minutes before cooking.
- In a small bowl, combine paprika, garlic powder, onion powder, brown sugar, salt, black pepper, cayenne, and dried herbs. Mix well.
- Rub the chicken all over with olive oil, then generously coat the entire surface with the dry rub, pressing it in gently.
- Open the beer can and pour out or drink about half. Pierce a few extra holes on the top of the can for steam to escape.
- Place the beer can on a flat, stable surface. Carefully lower the chicken onto the can so it sits upright with the legs acting as a tripod.
- Preheat grill or oven to 375°F (190°C). For grill, set up indirect heat at medium-high.
- Place the upright chicken on the grill or in a roasting pan in the oven. Close the lid and cook for about 60-75 minutes. Check internal temperature with a meat thermometer inserted into the thickest part of the thigh; it should reach 165°F (74°C).
- In the last 10 minutes, move the chicken over direct heat on the grill to crisp the skin, turning carefully. If using oven, briefly broil to crisp skin, watching closely to avoid burning.
- Carefully remove the chicken from the beer can using tongs or oven mitts. Tent loosely with foil and rest for 10-15 minutes to let juices redistribute.
- Carve and serve with your favorite sides.
Notes
Pat the chicken dry thoroughly before applying rub for crisp skin. Use indirect heat to cook slowly and evenly. Rest the chicken for 10-15 minutes after cooking to keep meat juicy. For extra crispy skin, finish over direct heat or broil briefly. Use a clean beer can without plastic lining. For gluten-free, substitute beer with gluten-free beer or sparkling water with lemon.
Nutrition
- Serving Size: 1/6 of whole chicken
- Calories: 350
- Sugar: 3
- Sodium: 450
- Fat: 18
- Saturated Fat: 4
- Carbohydrates: 5
- Fiber: 1
- Protein: 40
Keywords: beer can chicken, crispy chicken, dry rub chicken, grilled chicken, backyard BBQ, easy chicken recipe, savory chicken