Love this? Save it for later!
Share the inspiration with your friends
My friend Sarah showed up at my door at 8:45 PM on a Tuesday and the only thing in the fridge was a half-empty carton of milk and a stick of butter that had seen better days. I wasn’t planning on cooking, but she had just finished a brutal shift at the hospital and looked like she needed comfort food, not a salad. Honestly, I panicked for a second because my pantry was basically just dust and a box of old baking soda. But then I remembered I had a bag of chocolate chips hiding behind the oats, and some flour that wasn’t expired yet.
I didn’t have a recipe in my head, so I just started throwing things into a bowl. You know how it goes when you’re improvising with stress on your mind. I melted that butter, and I swear I heard it crackle like tiny applause. It smelled nutty and rich, filling the small kitchen with this warm, toasty aroma that made me forget about the empty fridge for a minute. I mixed in the sugar, cracked in some eggs, and dumped in the chocolate chips without really measuring anything. I was just hoping it wouldn’t taste like raw flour.
When they came out of the oven, they were darker than I expected, with those beautiful golden-brown edges that only happen when you let the butter brown just right. Sarah took one bite and her eyes actually closed. She didn’t say anything for a long time, which is usually a bad sign, but then she just smiled and said, “This is the best thing I’ve eaten all week.” That quiet moment stuck with me more than any perfect dinner party ever could. It wasn’t fancy, and it wasn’t planned, but it was real. Now, I make these crispy brown butter chocolate chip cookies whenever I need a reminder that good things can come from messy, unplanned moments.
Why You’ll Love This Recipe
Let’s be honest, there are a thousand chocolate chip cookie recipes out there. But this one? It’s different. It’s the kind of cookie that makes you question every other version you’ve ever baked. I’ve tested this recipe so many times—burning batches of butter, over-mixing the dough until it turned into bricks, and under-baking them until they were just sad, doughy discs. Through all those failures, I finally nailed the balance between chewy centers and shatteringly crisp edges. This isn’t just another cookie; it’s a lesson in patience and flavor transformation.
Here is why this recipe earns a permanent spot in your rotation:
* **Quick & Easy:** Once you master the butter browning, the rest comes together in under 20 minutes. It’s perfect for those busy weeknights when you want something homemade but don’t have hours to spare.
* **Simple Ingredients:** You likely have everything in your kitchen right now. No fancy grocery trips needed. Just butter, sugar, eggs, flour, and chocolate.
* **Perfect for Gifting:** These cookies hold their shape beautifully and travel well. They are great for potlucks, holiday mornings, or just popping in the mail to a friend.
* **Crowd-Pleaser:** Always gets rave reviews from kids and adults alike. The nutty flavor of the brown butter is sophisticated enough for adults but sweet enough for kids.
* **Unbelievably Delicious:** The texture and flavor combo is next-level comfort food. The contrast between the crisp edge and the soft center is addictive.
What makes this recipe stand out is the technique. Most people skip browning their butter, missing out on that deep, toasted nut flavor that elevates a simple cookie into something gourmet. By taking the extra five minutes to watch the butter turn amber and smell like hazelnuts, you change the entire profile of the cookie. It’s not just about adding chocolate; it’s about building layers of flavor. I remember the first time I made these for a book club, and everyone asked if I bought them from a fancy bakery. I just smiled and kept my mouth shut about the empty fridge origin story. This recipe is the kind that makes you close your eyes after the first bite. It’s comfort food reimagined—richer, faster, but with the same soul-soothing satisfaction.
What Ingredients You Will Need
This recipe uses simple, wholesome ingredients to deliver bold flavor and satisfying texture without the fuss. The secret weapon here is the butter, which does double duty by providing fat and flavor. You don’t need anything exotic, just high-quality basics that you trust.
* **Unsalted Butter:** 1 cup (2 sticks). You need to brown this, so start with a good quality butter. I recommend brands like Kerrygold or Plugra because their higher fat content creates a richer flavor. Make sure it’s cut into cubes so it melts evenly.
* **All-Purpose Flour:** 2 ¼ cups. This is the structure of the cookie. Don’t skip measuring it correctly. Spoon it into the cup and level it off. If you scoop directly, you might pack too much flour and get dry cookies.
* **Baking Soda:** 1 teaspoon. This helps the cookies spread and brown. Make sure it’s fresh; old baking soda won’t give you that lift.
* **Salt:** 1 teaspoon. Flaky sea salt is great for topping, but use kosher salt in the dough to balance the sweetness.
* **Granulated Sugar:** ½ cup. This helps create the crisp edges.
* **Brown Sugar:** 1 ½ cups, packed. This adds moisture and chewiness. Dark brown sugar will give you a deeper molasses flavor.
* **Eggs:** 2 large eggs, room temperature. Cold eggs can seize the butter, so let them sit out for 30 minutes before you start.
* **Vanilla Extract:** 2 teaspoons. Use pure vanilla, not imitation. It makes a huge difference in the final aroma.
* **Chocolate Chips:** 2 cups. I like using a mix of semi-sweet and dark chocolate chunks. The chunks melt differently than chips, creating pools of chocolate in every bite.
If you want to get fancy, you can add a handful of toasted pecans or walnuts, but honestly, the brown butter and chocolate are enough. For a gluten-free option, you can swap the all-purpose flour for a 1:1 gluten-free baking blend, though the texture might be slightly more cake-like.
Equipment Needed
You don’t need a lot of fancy gadgets for this recipe, but having the right tools makes a huge difference.
* **Heavy-Bottomed Saucepan:** This is crucial for browning the butter. A thin pan will burn the butter quickly and unevenly. A stainless steel or enameled cast iron pan works best so you can see the color change clearly.
* **Mixing Bowls:** One large bowl for the wet ingredients and one medium for the dry.
* **Electric Mixer or Whisk:** An electric mixer makes creaming the butter and sugar easier, but a strong whisk works fine if you prefer hand-mixing.
* **Baking Sheets:** Use light-colored aluminum sheets. Dark sheets can cause the bottoms to burn too quickly.
* **Parchment Paper:** Always line your baking sheets. It prevents sticking and makes cleanup a breeze.
* **Cooling Rack:** Essential for stopping the cooking process once the cookies come out of the oven.
If you don’t have a heavy-bottomed pan, you can brown the butter in the microwave in 30-second intervals, stirring in between, but you lose some control over the process. I stick with the stovetop because I can smell exactly when it’s ready.
Preparation Method
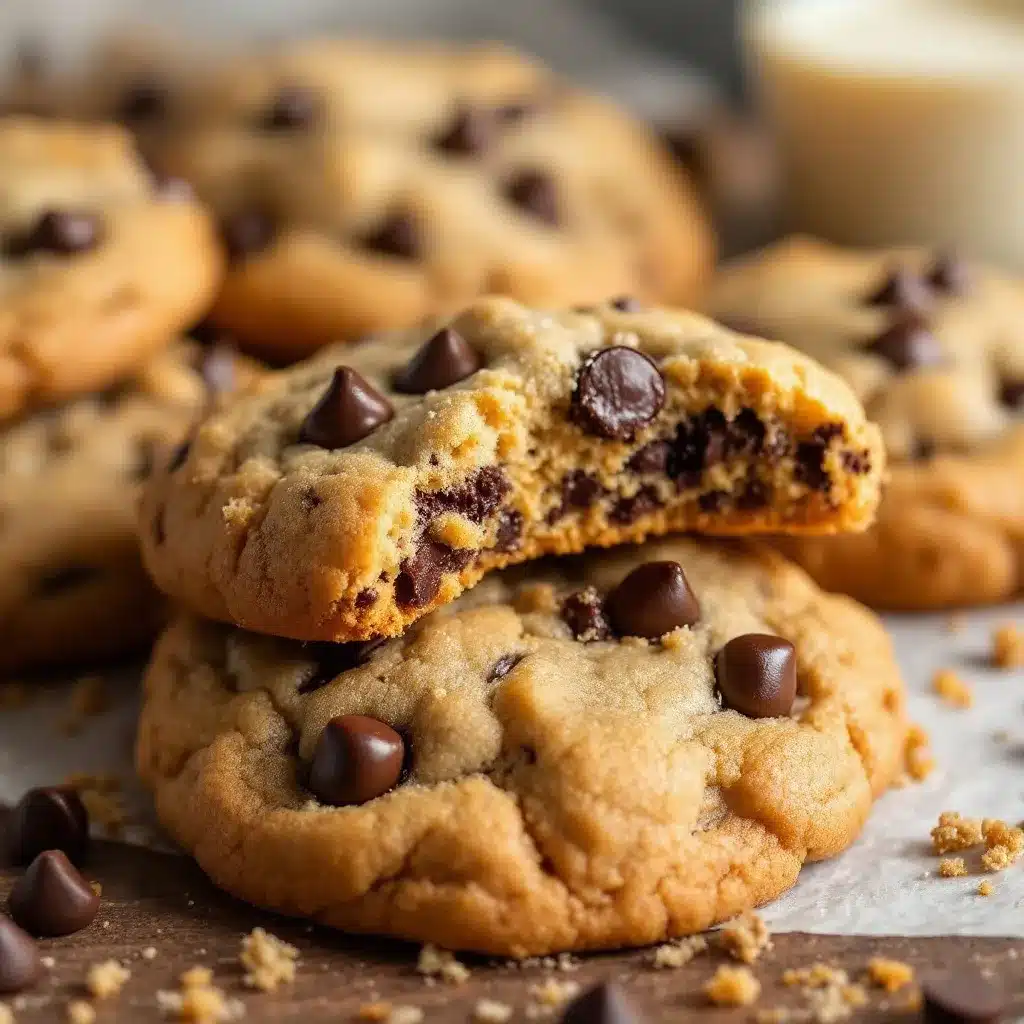
Let’s get into the nitty-gritty of making these cookies. It’s easier than you think, but you need to pay attention to a few key steps.
1. **Brown the Butter (10 minutes):** Place your butter in a heavy-bottomed saucepan over medium heat. Stir constantly with a wooden spoon. The butter will melt, then foam up, and then quiet down. Watch closely for the milk solids to turn golden brown at the bottom. It should smell nutty, like toasted hazelnuts. Immediately pour it into a heat-proof bowl to stop the cooking. Let it cool for 10-15 minutes until it’s warm but not hot.
2. **Mix Dry Ingredients (2 minutes):** In a medium bowl, whisk together the flour, baking soda, and salt. Set this aside. Whisking ensures the leavening agent is evenly distributed so you don’t get bitter spots of baking soda.
3. **Cream Butter and Sugars (3 minutes):** In a large bowl, combine the cooled brown butter, granulated sugar, and brown sugar. Use an electric mixer on medium speed to beat them together until the mixture is smooth and creamy. This step incorporates air, which helps with texture.
4. **Add Eggs and Vanilla (2 minutes):** Beat in the eggs one at a time, ensuring each is fully incorporated before adding the next. Mix in the vanilla extract. The mixture might look slightly curdled at first; don’t worry, it will come together with the flour.
5. **Combine Wet and Dry (2 minutes):** Gradually add the dry ingredients to the wet mixture. Mix on low speed just until the flour disappears. Over-mixing develops gluten, which leads to tough cookies. Stop as soon as there are no streaks of flour left.
6. **Fold in Chocolate (1 minute):** Use a spatula to gently fold in the chocolate chips. Be gentle to keep the cookies tender.
7. **Chill the Dough (30 minutes):** This step is non-negotiable if you want crisp edges. Chill the dough in the refrigerator for at least 30 minutes, or up to 48 hours. Chilling solidifies the fat, which prevents the cookies from spreading too thin and helps develop deeper flavors.
8. **Scoop and Bake:** Preheat your oven to 350°F (175°C). Scoop tablespoon-sized balls of dough onto parchment-lined baking sheets, spacing them 2 inches apart. Bake for 10-12 minutes, or until the edges are golden brown and the centers look slightly soft. They will firm up as they cool.
9. **Cool:** Let the cookies cool on the baking sheet for 5 minutes before transferring them to a wire rack. This allows them to set without breaking.
Cooking Tips & Techniques
Browning butter can be scary if you’ve never done it, but it’s really just watching and waiting. The biggest mistake people make is walking away. The butter goes from perfect to burnt in seconds. If you smell something acrid, you’ve gone too far, and you’ll need to start over. Trust your nose more than your eyes sometimes.
Another common error is using cold butter for the recipe after browning. If the brown butter is too hot when you add the sugar, it can cook the eggs or melt the chocolate prematurely. If it’s too cold, the dough might be greasy. Aim for warm, like baby bathwater temperature.
Also, don’t skip the chill. I know it’s tempting to bake them right away, but warm dough spreads too fast in the oven, resulting in flat, greasy cookies. Chilling gives the flour time to hydrate, leading to a better texture.
When baking, rotate your sheets halfway through for even browning. Oven temperatures can vary, so keep an eye on them. The cookies should look slightly underdone in the center when you take them out. They continue to cook on the hot pan after removal.
Variations & Adaptations
While the classic version is my favorite, there are plenty of ways to tweak this recipe to suit your taste or dietary needs.
* **Gluten-Free Option:** Swap the all-purpose flour for a high-quality gluten-free blend that includes xanthan gum. The texture will be slightly more delicate but still delicious.
* **Nutty Twist:** Add 1 cup of toasted pecans or walnuts to the dough. The nuts complement the brown butter flavor beautifully.
* **Sea Salt Finish:** Sprinkle flaky sea salt on top of the cookies immediately after they come out of the oven. The salt enhances the chocolate and balances the sweetness.
* **White Chocolate Chip:** Substitute half or all of the chocolate chips with white chocolate chips for a sweeter, milder cookie.
* **Add-Ins:** Try adding dried cranberries or orange zest for a festive twist.
I once tried adding a tablespoon of espresso powder to the dough to intensify the chocolate flavor. It worked surprisingly well, giving the cookies a deeper, more complex taste without tasting like coffee.
Serving & Storage Suggestions
These cookies are best served at room temperature, allowing the flavors to fully develop. Pair them with a cold glass of milk, a cup of coffee, or even a cozy apple cider margarita for a fun treat.
To store, keep them in an airtight container at room temperature for up to 5 days. If you want them to stay soft, add a slice of bread to the container; the cookies will absorb the moisture. For longer storage, freeze the dough balls on a baking sheet, then transfer them to a freezer bag. You can bake them straight from frozen, adding 1-2 minutes to the bake time.
Reheating is easy—just microwave a cookie for 10-15 seconds to soften it up. The flavors actually improve after a day or two as the ingredients meld together.
Nutritional Information & Benefits
While these are definitely a treat, understanding their nutritional profile helps you enjoy them mindfully. One cookie contains approximately 180 calories, with 10g of fat, 22g of carbohydrates, and 2g of protein. The brown butter adds conjugated linoleic acid (CLA), which some studies suggest may have health benefits, though we shouldn’t overstate it. Using dark chocolate chips can provide antioxidants. These cookies are not suitable for those with nut or dairy allergies due to the butter and potential nut add-ins. Moderation is key, but they make a wonderful occasional indulgence.
Conclusion
Making crispy brown butter chocolate chip cookies is more than just baking; it’s about embracing the process and enjoying the results. Whether you’re making them for a last-minute guest or just because you crave something sweet, this recipe delivers every time. I encourage you to try it and make it your own. Add your favorite nuts, swap the chocolate, or just enjoy the simple pleasure of a perfectly baked cookie.
If you try this recipe, I’d love to hear how it turned out. Leave a comment below with your thoughts or share a photo of your creations. Happy baking, and remember, the best recipes often come from the most unexpected moments.
Frequently Asked Questions
Can I use salted butter instead of unsalted?
Yes, but you should reduce the added salt in the recipe by half. Salted butter varies in salt content, so it’s safer to control the amount yourself.
Why did my cookies spread too much?
This usually happens if the butter was too warm when mixed with the sugar, or if the dough wasn’t chilled enough. Make sure your butter is cooled to warm, not hot, and chill the dough for at least 30 minutes.
Can I freeze the cookie dough?
Absolutely. Scoop the dough onto a baking sheet and freeze until solid, then transfer to a bag. You can bake them straight from frozen, adding a minute or two to the bake time.
How do I get crispy edges?
The key is the brown butter and the chilling step. Also, bake the cookies until the edges are golden brown. Letting them cool on the hot baking sheet helps them crisp up further.
What kind of chocolate chips work best?
I recommend using a mix of semi-sweet and dark chocolate chips or chunks. They provide a nice balance of sweetness and richness that complements the nutty butter.
Pin This Recipe!
Crispy Brown Butter Chocolate Chip Cookies

These crispy brown butter chocolate chip cookies feature a perfect balance of chewy centers and shatteringly crisp edges, elevated by the deep, nutty flavor of browned butter.
- Prep Time: 20 minutes
- Cook Time: 12 minutes
- Total Time: 52 minutes
- Yield: Approximately 24 cookies 1x
- Category: Dessert
- Cuisine: American
Ingredients
- 1 cup (2 sticks) unsalted butter, cut into cubes
- 2 ¼ cups all-purpose flour
- 1 teaspoon baking soda
- 1 teaspoon kosher salt
- ½ cup granulated sugar
- 1 ½ cups packed brown sugar
- 2 large eggs, room temperature
- 2 teaspoons pure vanilla extract
- 2 cups chocolate chips (semi-sweet and dark mix recommended)
Instructions
- Brown the butter: Place butter in a heavy-bottomed saucepan over medium heat. Stir constantly until milk solids turn golden brown and it smells nutty (about 10 minutes). Pour into a heat-proof bowl and cool for 10-15 minutes until warm.
- Mix dry ingredients: In a medium bowl, whisk together flour, baking soda, and salt. Set aside.
- Cream butter and sugars: In a large bowl, combine cooled brown butter, granulated sugar, and brown sugar. Beat with an electric mixer on medium speed until smooth and creamy.
- Add eggs and vanilla: Beat in eggs one at a time, ensuring each is fully incorporated. Mix in vanilla extract.
- Combine wet and dry: Gradually add dry ingredients to the wet mixture. Mix on low speed just until flour disappears. Do not over-mix.
- Fold in chocolate: Gently fold in chocolate chips using a spatula.
- Chill dough: Refrigerate dough for at least 30 minutes (or up to 48 hours) to solidify fat and prevent excessive spreading.
- Scoop and bake: Preheat oven to 350°F (175°C). Scoop tablespoon-sized dough balls onto parchment-lined baking sheets, spacing 2 inches apart. Bake for 10-12 minutes until edges are golden brown and centers look slightly soft.
- Cool: Let cookies cool on the baking sheet for 5 minutes before transferring to a wire rack.
Notes
Ensure butter is cooled to warm (not hot) before adding sugar to avoid cooking the eggs. Chilling the dough is essential for crisp edges. Rotate baking sheets halfway through for even browning. Cookies continue to cook on the hot pan after removal.
Nutrition
- Serving Size: 1 cookie
- Calories: 180
- Sugar: 14
- Sodium: 150
- Fat: 10
- Saturated Fat: 6
- Carbohydrates: 22
- Fiber: 1
- Protein: 2
Keywords: brown butter cookies, chocolate chip cookies, crispy cookies, homemade cookies, baking, dessert, comfort food


