Love this? Save it for later!
Share the inspiration with your friends
It is just past seven in the evening, and the only thing I want is crispy witch finger pretzel sticks with almond nails. The sky outside is that bruised purple color that signals the sun has finally given up for the day. Inside, the kitchen is quiet, save for the hum of the refrigerator and the occasional creak of the house settling into its nighttime routine. I don’t want to make a big production of it. I don’t want to invite neighbors over or set up a spooky tablecloth that looks like it was bought at a party store. I just want to make something that feels like Halloween in its purest, simplest form.
There is a specific kind of magic in working with dough when the air turns crisp. It slows you down. You have to pay attention to the temperature, the stretch, the rise. It is a ritual, really. A small, edible ritual that grounds you before the actual holiday chaos begins. I remember making these for the first time three years ago, not because I wanted to impress anyone, but because I was tired of store-bought cookies that tasted like cardboard and sugar. I wanted something savory. Something substantial. Something that felt like comfort food, but looked like a monster.
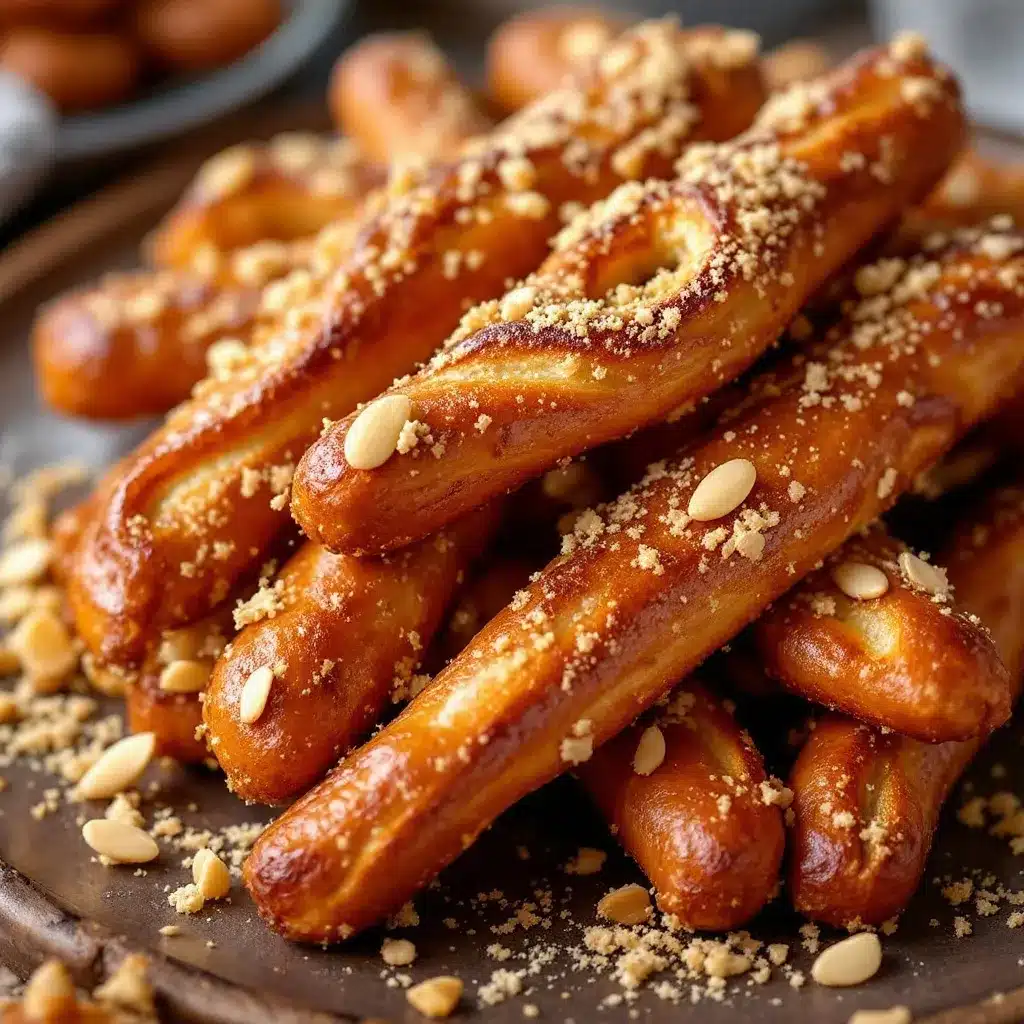
The smell of yeast blooming in warm water is the first clue that things are going right. It is an earthy, warm scent that fills the small apartment and makes the cold draft from the window feel less intrusive. You knead the dough until your arms ache, just a little. It is physical work, but it is good work. It clears your head. When you pull the sticks from the oven, they are golden brown and dusted with coarse salt. They look like fingers. They smell like bread. And when you press the almond nail into the end, the illusion is complete.
I sit at the counter with a cup of tea, watching the steam rise. I pick one up. It is warm, heavy in my hand. I take a bite. The crunch of the crust gives way to the soft, chewy interior. It is salty, yeasty, and slightly sweet from the glaze. It is not a dessert. It is not a main course. It is just a snack, a moment of pause. And in that pause, I feel a strange sense of peace. The witches are out, but they are friendly. They are just pretzels. And for tonight, that is enough.
Why You’ll Love This Recipe
Let’s be honest, most Halloween treats are just sugar bombs in disguise. They look cute, sure, but they leave you feeling sluggish and overly sweet by noon. These crispy witch finger pretzel sticks are different. They hit that perfect spot between savory snack and spooky fun. I have tested dozens of pretzel dough recipes over the years, trying to get the chew right without it turning into a brick or a pancake. This one? It is the gold standard. The dough is pillowy soft on the inside and shatteringly crisp on the outside, just like the best soft pretzels you get at a fair, but made right in your own kitchen.
Here is why this recipe earns its spot on your holiday table:
- Quick & Easy: You do not need a stand mixer. You do not need hours of rising time if you are in a rush. With a little warm water and a quick proof, you can have these out of the oven in under an hour. It is perfect for last-minute party prep or a quick Tuesday night treat.
- Simple Ingredients: You likely have everything you need already. Flour, yeast, sugar, salt, butter, water, and an egg wash. The “fingernails” are just sliced almonds. No food coloring gels, no expensive fondant. Just real, wholesome food that looks scary.
- Perfect for Game Day: Halloween often overlaps with football season. These are sturdy enough to hold up next to a bowl of dip. They are handheld, mess-free (mostly), and savory enough to balance out the heavier foods like crispy oven baked parmesan garlic chicken wings or loaded nachos.
- Crowd-Pleaser: Kids love the spooky look. Adults love the taste. It is a rare win-win. I have served these at office parties, neighborhood gatherings, and quiet dinners with friends. They always disappear first, usually before the actual dinner is even served.
- Unbelievably Delicious: The texture combo is next-level. The coarse salt on top contrasts with the soft dough, and the almond adds a nice nutty crunch. It is comfort food reimagined for the season. It tastes like home, but looks like it came from a haunted house.
What makes this recipe stand out from the rest is the attention to detail in the dough hydration. Many recipes fail because the dough is too dry, resulting in a hard pretzel that breaks your teeth. This recipe uses a slightly higher hydration level, which creates those beautiful air pockets inside. Plus, the baking soda bath is non-negotiable. It gives that distinct pretzel flavor and color that you cannot fake with food dye. This isn’t just another cookie recipe with a twist. It is a bread recipe that happens to look like a monster. And that is why it works.
What Ingredients You Will Need
This recipe relies on simple, high-quality ingredients to deliver bold flavor and satisfying texture. You do not need fancy flours or exotic spices. The magic is in the technique and the balance of salt and yeast. Most of these items are pantry staples, but I recommend picking up a good brand of active dry yeast if yours is a few months old, as older yeast can sometimes be finicky.
- All-Purpose Flour: You will need about 4 to 4.5 cups. I prefer Bob’s Red Mill for its consistent protein content, which helps with that chewy texture. Avoid self-rising flour, as the leavening agents will throw off the balance.
- Active Dry Yeast: One packet (2 ¼ teaspoons). Make sure it is fresh. If it doesn’t foam up in warm water after 5 minutes, toss it and get a new packet.
- Warm Water: About 1 ½ cups. It should be around 110°F (43°C). Too hot, and you kill the yeast. Too cold, and it won’t activate. If you don’t have a thermometer, it should feel like a warm bath.
- Sugar: 2 tablespoons. This feeds the yeast and adds a hint of sweetness to balance the salt. Granulated white sugar works best here.
- Unsalted Butter: 3 tablespoons, melted. This adds richness and helps create a tender crumb. You can substitute with olive oil if you need a dairy-free option, but butter tastes best.
- Salt: 1 ½ teaspoons for the dough, plus extra for the topping. Kosher salt is ideal for the dough because it dissolves evenly. Use coarse sea salt for the topping to get that nice crunch.
- Egg: One large egg, beaten with 1 tablespoon of water. This is your egg wash. It gives the pretzels that shiny, golden-brown finish.
- Baking Soda: ⅔ cup for the baking bath. This is crucial. It creates the alkaline environment that gives pretzels their unique flavor and dark brown color.
- Sliced Almonds: About 10-12 slivered almonds for the “nails.” You can use whole slivered almonds or slice them in half. They add a nice nutty flavor and visual detail.
- Optional: Cream Cheese or Dip: While not in the dough, these are great for dipping. A simple cream cheese dip or spicy mustard works wonderfully.
If you are looking to substitute, you can use bread flour for an even chewier texture, though all-purpose is fine. For the almonds, you can skip them if you are allergic, but they really complete the look. I always keep a bag of slivered almonds in my pantry specifically for this recipe. It is a small cost for the big visual impact.
Equipment Needed
You do not need a lot of fancy gear to make these, but having the right tools makes the process smoother.
- Baking Sheets: Two large sheet pans. I use rimless baking sheets because they heat more evenly, but any sturdy pan will work. Line them with parchment paper for easy cleanup.
- Large Pot: A wide, deep pot for the baking soda bath. You need enough surface area to submerge the pretzels without them touching too much.
- Slotted Spoon or Spider Strainer: To lift the pretzels out of the hot water. A slotted spoon works, but a spider strainer is easier because it drains quickly.
- Pastry Brush: For applying the egg wash. Silicone brushes are great because they don’t hold onto the egg as much.
- Kitchen Scale (Optional): If you want precise results, a scale is helpful for weighing the flour. However, measuring cups work fine if you spoon and level the flour.
- Oven Thermometer: Ovens can be inaccurate. An inexpensive thermometer ensures your oven is actually at 400°F (200°C).
I used to use a large skillet for the baking soda bath, but I found it was too shallow. A 12-inch pot is much better. If you don’t have a large pot, you can do it in two batches. The equipment list is minimal, which is part of the appeal. You can get started with what you already have.
Preparation Method
Making these pretzels is straightforward, but it requires patience. Here is how to do it step-by-step.
- Activate the Yeast (5 minutes): In a large bowl, combine the warm water and sugar. Sprinkle the yeast over the top and stir gently. Let it sit for 5-10 minutes until it becomes foamy and bubbly. If it doesn’t foam, your yeast is dead. Start over.
- Mix the Dough (2 minutes): Add the melted butter and salt to the yeast mixture. Stir to combine. Gradually add the flour, one cup at a time, stirring with a wooden spoon or dough hook until the dough becomes too thick to stir.
- Knead the Dough (8-10 minutes): Turn the dough out onto a lightly floured surface. Knead by hand for 8-10 minutes, adding flour as needed to prevent sticking. The dough should be smooth, elastic, and slightly tacky, but not sticky. If it sticks to your hands, add a sprinkle of flour. If it feels like rubber, it’s too dry. Add a teaspoon of water.
- First Rise (1 hour): Place the dough in a lightly oiled bowl, turning once to coat. Cover with plastic wrap or a damp towel. Let it rise in a warm, draft-free area for about 1 hour, or until doubled in size. This is a good time to preheat your oven to 400°F (200°C).
- Shape the Fingers (15 minutes): Punch down the risen dough. Divide it into 10-12 equal pieces. Roll each piece into a long, tapered log. Shape one end to look like a fingertip and the other to look like a knuckle. Place them on the parchment-lined baking sheets. Leave space between them for expansion.
- Second Rise (15 minutes): Cover the shaped pretzels loosely with a towel and let them rise again for 15 minutes. This helps them stay soft.
- Prepare the Bath (5 minutes): Bring a large pot of water to a boil. Carefully stir in the baking soda. It will foam up vigorously. Be careful not to burn yourself.
- Boil the Pretzels (30 seconds each): Working in batches, carefully lower 2-3 pretzels into the boiling baking soda water. Boil for 30 seconds, flipping them once. Remove with a slotted spoon and place back on the baking sheet.
- Egg Wash and Nails (5 minutes): Brush the boiled pretzels with the egg wash. Press a sliced almond onto the “fingertip” end of each pretzel. Sprinkle with coarse salt.
- Bake (12-15 minutes): Bake in the preheated oven for 12-15 minutes, or until deep golden brown. Rotate the pans halfway through for even browning.
- Cool and Serve: Let them cool on the pan for 5 minutes before eating. They are best served warm.
Cooking Tips & Techniques
The secret to great pretzels is the dough consistency. It should be slightly tacky to the touch. If you add too much flour during kneading, your pretzels will be dense and hard. I learned this the hard way with my first batch. They were edible, but they tasted like bricks. Now, I trust my hands more than the recipe measurements.
Another common mistake is skipping the second rise. It is tempting to boil them immediately, but that extra 15 minutes makes a huge difference in the texture. The dough relaxes and expands, resulting in a lighter pretzel.
When boiling, do not overcrowd the pot. The water temperature will drop too much, and the pretzels will not set properly. Boil them in small batches. Also, be gentle when handling them after the boil. They are fragile. Use a wide spatula or the spider strainer to move them.
For the egg wash, make sure you whisk it well. Lumps of egg white will create uneven spots on the finished pretzel. If you want a darker color, you can add a teaspoon of brown sugar to the egg wash.
Variations & Adaptations
You can customize these to fit your dietary needs or flavor preferences.
- Gluten-Free: Use a 1:1 gluten-free flour blend. Note that GF dough is stickier and harder to shape. You may need to chill the dough before shaping.
- Vegan: Substitute the butter with coconut oil or olive oil. Use a flax egg (1 tablespoon ground flaxseed mixed with 3 tablespoons water) instead of the regular egg wash. Skip the almonds if you are allergic, or use sunflower seeds.
- Spicy: Add red pepper flakes to the dough. Or, dip them in a spicy buffalo sauce after baking.
- Cheesy: Sprinkle shredded cheddar or parmesan cheese over the pretzels before baking. This pairs well with the almond nails.
I once tried making these with whole wheat flour. They were healthier, but lacked that classic chew. I stuck with white flour for the authentic taste. If you want a sweeter version, you can skip the salt and add cinnamon sugar to the egg wash.
Serving & Storage Suggestions
Serve these warm with a side of spicy mustard, beer cheese dip, or a tangy apple butter. They pair wonderfully with a cold beer or a glass of cider. For a party, arrange them on a platter with some “blood” (strawberry jam or ranch) for dipping.
To store, keep them in an airtight container at room temperature for up to 2 days. They will lose some crispness, but they are still good. To reheat, warm them in a 350°F (175°C) oven for 5-10 minutes. You can also freeze them after baking. Thaw and reheat when needed.
The flavors develop over time, becoming more savory as the salt permeates the dough. They are best fresh, but they hold up well for meal prep.
Nutritional Information & Benefits
Each pretzel stick (approx. 100g) contains roughly 250 calories, 5g protein, 45g carbs, and 5g fat. They are a source of carbohydrates for energy and contain some fiber from the flour. The almonds add healthy fats and vitamin E.
These are not a health food, but they are made with real ingredients. Unlike processed snacks, you know exactly what is in them. They are a better alternative to chips or cookies for a Halloween treat. If you are watching sodium, reduce the salt in the dough and skip the coarse salt topping.
Conclusion
These crispy witch finger pretzel sticks are more than just a snack. They are a fun, easy way to get into the Halloween spirit without spending hours in the kitchen. They are savory, satisfying, and surprisingly delicious. I hope you try this recipe and enjoy the process as much as I do.
Feel free to experiment with different dips or shapes. Share your creations with me in the comments. I love seeing how you customize these little monsters. Happy Halloween, and happy baking.
FAQs
Can I use instant yeast instead of active dry yeast?
Yes, you can. You do not need to proof it in water first. Just mix it directly with the flour. The results will be the same.
Why did my pretzels turn out flat?
This usually happens if the yeast is dead or if the dough was over-kneaded. Make sure your water is warm, not hot, and check the expiration date on your yeast.
Can I make these ahead of time?
Yes. You can shape them and freeze them on the baking sheet. Once frozen, transfer them to a bag. Bake them directly from the freezer, adding a few extra minutes to the baking time.
What if I don’t have a baking soda bath?
You can skip the bath, but the pretzels will not have the classic pretzel flavor or color. They will taste more like breadsticks. The bath is essential for authenticity.
Can I use whole almonds instead of slivered?
You can, but they are harder to press into the dough. Slivered almonds are easier to work with and look more like fingernails.
Pin This Recipe!
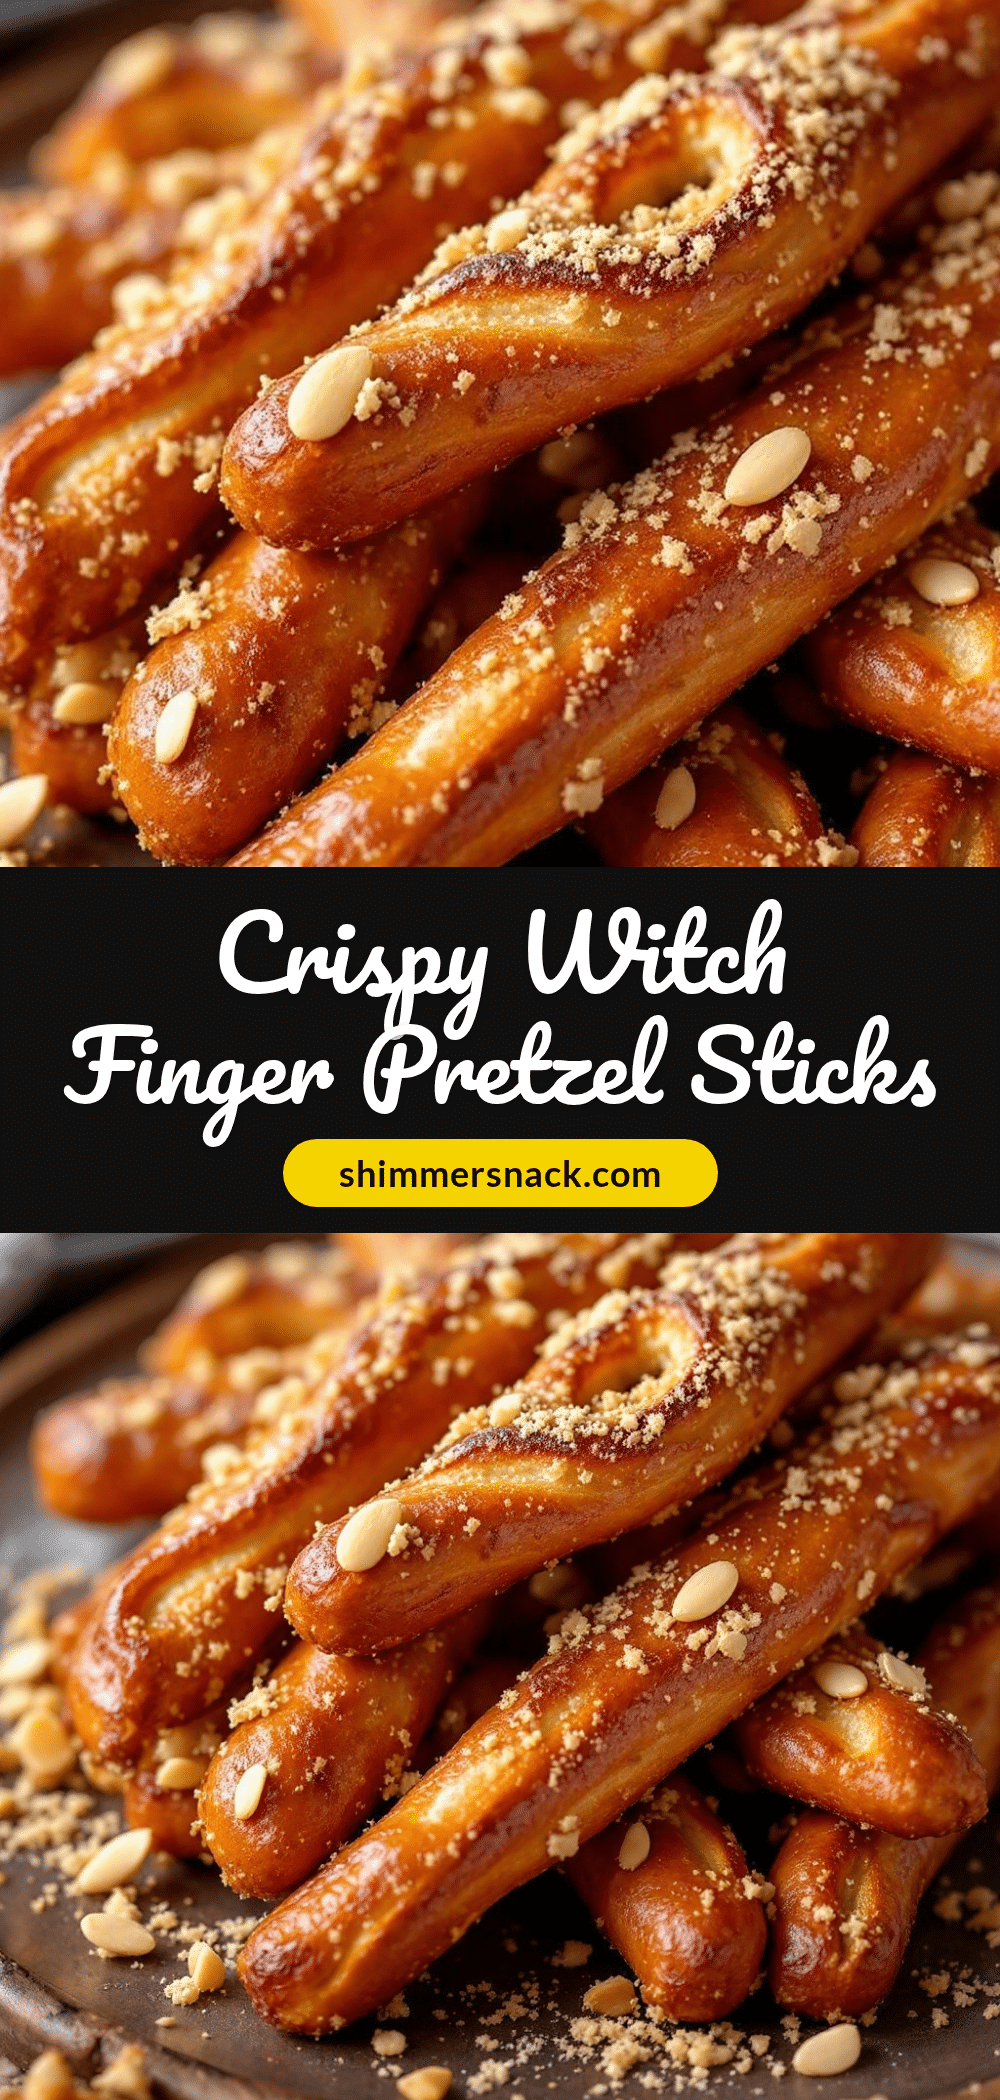
Crispy Witch Finger Pretzel Sticks: Easy Halloween Snack
A savory, spooky Halloween snack featuring pillowy soft pretzel dough shaped like witch fingers, boiled in a baking soda bath for authentic flavor, and topped with almond nails and coarse salt.
- Prep Time: 30 minutes
- Cook Time: 30 minutes
- Total Time: 1 hour 15 minutes
- Yield: 10-12 servings 1x
- Category: Snack
- Cuisine: American
Ingredients
- 4 to 4.5 cups All-Purpose Flour
- 1 packet (2 ¼ teaspoons) Active Dry Yeast
- 1 ½ cups Warm Water (110°F/43°C)
- 2 tablespoons Granulated White Sugar
- 3 tablespoons Unsalted Butter, melted
- 1 ½ teaspoons Salt (for dough)
- 1 large Egg, beaten with 1 tablespoon water (for egg wash)
- ⅔ cup Baking Soda (for boiling bath)
- 10–12 Sliced Almonds (for nails)
- Coarse Sea Salt (for topping)
Instructions
- In a large bowl, combine warm water and sugar. Sprinkle yeast over the top and stir gently. Let sit for 5-10 minutes until foamy.
- Add melted butter and salt to the yeast mixture. Stir to combine.
- Gradually add flour, one cup at a time, stirring until the dough becomes too thick to stir.
- Turn dough onto a lightly floured surface and knead by hand for 8-10 minutes until smooth, elastic, and slightly tacky.
- Place dough in a lightly oiled bowl, cover, and let rise in a warm area for about 1 hour or until doubled in size.
- Preheat oven to 400°F (200°C).
- Punch down risen dough and divide into 10-12 equal pieces.
- Roll each piece into a long, tapered log, shaping one end like a fingertip and the other like a knuckle. Place on parchment-lined baking sheets.
- Cover shaped pretzels loosely and let rise again for 15 minutes.
- Bring a large pot of water to a boil and carefully stir in baking soda.
- Working in batches, boil pretzels for 30 seconds, flipping once. Remove with a slotted spoon and place back on baking sheets.
- Brush boiled pretzels with egg wash. Press a sliced almond onto the fingertip end of each pretzel and sprinkle with coarse salt.
- Bake for 12-15 minutes until deep golden brown, rotating pans halfway through.
- Cool on the pan for 5 minutes before serving warm.
Notes
Ensure yeast is fresh by checking for foam in warm water. Do not overcrowd the boiling pot. The baking soda bath is essential for authentic pretzel flavor and color. For gluten-free, use a 1:1 GF flour blend. For vegan, substitute butter with oil and egg with a flax egg.
Nutrition
- Serving Size: 1 pretzel stick (app
- Calories: 250
- Sugar: 4
- Sodium: 400
- Fat: 5
- Saturated Fat: 2
- Carbohydrates: 45
- Fiber: 2
- Protein: 5
Keywords: Halloween snack, pretzel sticks, witch fingers, easy pretzel recipe, savory snack, holiday appetizer, gluten-free option, vegan option