Love this? Save it for later!
Share the inspiration with your friends
There used to be a little bakery on the corner of Elm and 4th in my old neighborhood that made a frozen dessert that defied logic. It wasn’t ice cream, exactly, and it wasn’t cake, but it had these perfect stripes of chocolate, vanilla, and strawberry that my kids would fight over the last slice of. When they closed their doors two summers ago—a “For Lease” sign went up overnight—I honestly felt a little pang of loss. After maybe six tries—some were soupy disasters, others were rock-hard bricks—I finally got it. This Easy No-Bake Neapolitan Icebox Cake is that exact memory, recreated in my own kitchen with way less fuss and zero oven time.
The first attempt? A total mess. I used the wrong kind of cookies and ended up with a soggy, flavorless slab that my youngest politely called “interesting.” But I’m stubborn when it comes to desserts, you know? I kept tweaking, kept tasting, and eventually, I cracked the code. The secret is all in the layering and the chill time—two things that require patience, not pastry skills.
What I love most about this Easy No-Bake Neapolitan Icebox Cake is that it doesn’t ask you to be a professional baker. It asks you to be a patient one. You stack, you spread, you wait. And when you finally cut into that first slice, seeing those three distinct stripes? That’s the kind of kitchen victory that makes you text a photo to your mom. Maybe you’ve been there—spending way too much time on a dessert that barely gets eaten. This one disappears. Every single time.
Why You’ll Love This Recipe
This isn’t just another layered dessert. After testing this recipe for a solid month—yes, my family was very happy about that—I can tell you exactly why it works and why you’ll keep coming back to it.
- 10 Minutes of Work: I’m serious. You spend more time deciding what to watch on Netflix than you do assembling this cake. The hardest part is waiting for it to set.
- No Special Equipment: No mixer, no oven, no fancy pans. If you have a 9×5 loaf pan and a spatula, you’re in business. My first test was with a cracked wooden spoon and it still worked.
- Crowd-Pleasing Flavors: Chocolate, vanilla, and strawberry together on one plate? It’s the dessert equivalent of a greatest hits album. Everyone finds their favorite stripe.
- Make-Ahead Magic: You can prep this the day before a party and just pull it out when guests arrive. No last-minute frosting, no oven timer anxiety.
- Kid-Friendly Assembly: My seven-year-old helped layer the last batch. She was more focused on sneaking cookie pieces, but still—it’s that simple.
What makes this version different from the rest is the texture. A lot of icebox cakes turn into a uniform mush—good flavor, but no structure. I figured out that using a slightly thicker whipped cream layer and letting the cookies soften just enough (but not too much) gives you that perfect contrast: creamy, crunchy, and melt-in-your-mouth all at once. It’s the kind of dessert that makes you close your eyes after the first bite, honestly.
What Ingredients You Will Need
This recipe uses simple, everyday ingredients to create something that tastes way more complicated than it is. Most of these are probably in your kitchen right now, which is exactly the point.
- Chocolate wafer cookies (about 36 cookies, or one standard box) — These are the backbone of the cake. I’ve tested this with regular chocolate graham crackers too, but the wafers hold their texture better. Nabisco Famous Chocolate Wafers are my go-to, but any brand works.
- Heavy whipping cream (2 cups, cold) — Don’t skimp here. The cold cream whips up fluffier and holds its shape longer. I once tried this with half-and-half and it was a sad, runny mess.
- Powdered sugar (1/4 cup) — Just enough to sweeten the cream without making it grainy. Granulated sugar doesn’t dissolve as well in cold cream, so stick with powdered.
- Vanilla extract (1 teaspoon) — Pure vanilla makes a difference, but imitation works fine in a pinch. I use whatever I have in the cabinet, honestly.
- Strawberry jam or preserves (1/2 cup, seedless if possible) — The seeds don’t bother me, but if you’re serving this for a fancy dinner, go seedless. Bonne Maman is my favorite brand for flavor.
- Chocolate sauce or fudge sauce (1/4 cup, plus more for drizzling) — Store-bought is totally fine. I’ve used Hershey’s syrup in a pinch and it works, but a thicker fudge sauce gives better structure.
- Freeze-dried strawberries (optional, for garnish) — These add a nice pop of color and a little crunch on top. Not essential, but pretty.
Ingredient Tips: For the best texture, make sure your heavy cream is straight from the fridge. Warm cream won’t whip properly, and you’ll end up with something closer to a pudding than a light, airy filling. If you’re dairy-free, coconut cream (the kind in a can, chilled overnight) whips up beautifully as a substitute. Also, look for strawberry jam with visible fruit pieces—it adds a more authentic strawberry flavor than the smooth, jelly-like stuff.
Substitution Guidance: Gluten-free chocolate wafer cookies exist and work perfectly here. I’ve used the Kinnikinnick brand with great results. For a lower-sugar version, use sugar-free pudding mix in place of the powdered sugar—just add it slowly and taste as you go.
Equipment Needed
You don’t need a fancy kitchen for this one. Here’s what I used during my testing phase, including the failures that taught me what not to do.
- 9×5 inch loaf pan — This is the perfect size for getting those clean slices. A smaller pan will give you taller layers, but the proportions get tricky.
- Electric mixer or whisk — Hand mixer is fastest, but a stand mixer works too. On my third attempt, I whipped the cream by hand with a whisk. It took seven minutes and my arm was sore, but it worked.
- Mixing bowl — Metal or glass is best because it stays cold longer. Plastic bowls can warm up the cream too quickly.
- Spatula — For spreading the cream evenly. A rubber spatula makes this so much easier than a spoon.
- Parchment paper — Line the pan with this and you’ll be able to lift the whole cake out cleanly. I forgot this on attempt number two and spent twenty minutes coaxing the cake out with a butter knife.
- Sharp knife — For slicing cleanly through the layers. A serrated knife works best, but any sharp knife will do.
Budget-Friendly Options: If you don’t have a loaf pan, use an 8×8 square dish and just make the layers wider. You’ll get a shorter cake, but the flavor is the same. No mixer? A whisk and some elbow grease work fine—just make sure the cream is ice cold.
Preparation Method
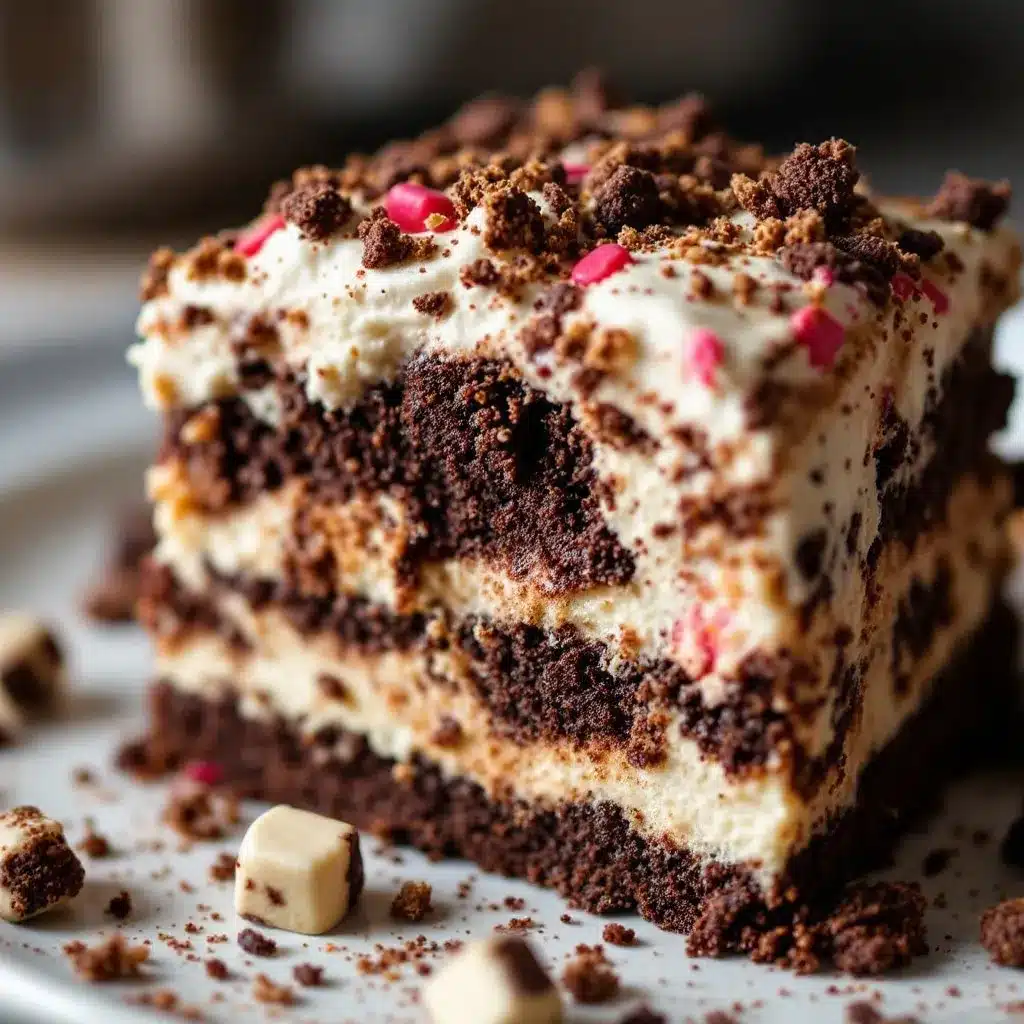
Let me walk you through this step by step. I’ve included all the little details I wish someone had told me before my first attempt.
- Line your loaf pan with parchment paper, leaving some overhang on the long sides. This is your handle for lifting the cake out later. Trust me on this one.
- Pour the cold heavy cream into your mixing bowl. Add the powdered sugar and vanilla extract. Start mixing on low speed—if you go high right away, you’ll wear a cloud of powdered sugar. Gradually increase to medium-high and whip until soft peaks form. This takes about 3-4 minutes with a hand mixer. You’re looking for peaks that hold their shape but still look soft and billowy, not stiff.
- Spread a thin layer of the whipped cream on the bottom of the prepared pan. This gives the first cookie layer something to stick to. About 2 tablespoons is plenty.
- Arrange a single layer of chocolate wafer cookies on top of the cream. You’ll need about 6 cookies, breaking some in half to fill gaps. Don’t overlap them too much—you want even coverage, not a thick cookie layer.
- Spread 1/3 of the remaining whipped cream evenly over the cookies. Use your spatula to smooth it out to the edges. This layer should be about 1/4 inch thick.
- Drizzle 2 tablespoons of the chocolate sauce over the cream layer. Swirl it gently with a knife or toothpick—just enough to marble it, not mix it completely.
- Add another cookie layer on top, pressing down gently so they settle into the cream. Repeat the cream layer (another 1/3), then dollop and spread 1/4 cup of the strawberry jam over this cream layer. Swirl it gently.
- Finish with a final cookie layer, the last 1/3 of cream, and a drizzle of remaining chocolate sauce on top. Use your spatula to create little swirls and peaks in the top cream layer—it looks prettier that way.
- Cover the pan with plastic wrap and refrigerate for at least 8 hours, or overnight. This is non-negotiable. The cookies need time to soften and meld with the cream. I once tried rushing this at 4 hours and the cake fell apart when I sliced it.
- When ready to serve, lift the cake out using the parchment paper overhang. Place it on a cutting board, slice with a sharp knife, and garnish with crumbled freeze-dried strawberries if you’re feeling fancy.
Sensory Cues: At step 2, the cream should look like soft clouds—when you lift the whisk, the peaks should droop slightly but hold their shape. At step 9, after refrigeration, the cake should feel firm to the touch but give slightly when pressed. The cookies should have softened enough that a knife slides through them without cracking.
My Personal Tip: Wet your knife between slices. It sounds weird, but it gives you those clean, Instagram-worthy cuts. Dry knife = ragged edges. Learned that one the hard way.
Cooking Tips & Techniques
After making this cake more times than I care to count, I’ve collected a few tricks that separate a good icebox cake from a great one.
The Cold Cream Secret: Stick your mixing bowl and beaters in the freezer for 10 minutes before you start. Cold equipment means your cream whips up faster and holds its shape longer. I forgot to do this on my fourth attempt and the cream deflated within an hour. The cake still tasted fine, but the layers weren’t as distinct.
Don’t Overwhip: Stop the mixer the moment you see soft peaks. If you keep going, you’ll end up with butter. I’ve done it. It’s not pretty. The cream should look like a thick, spreadable cloud—not stiff and grainy.
Cookie Placement Matters: Don’t just drop cookies in randomly. Take the time to arrange them so they cover the surface evenly. Gaps mean some bites will be all cream and no cookie, which throws off the texture balance. Break cookies in half to fill those weird-shaped spaces.
Patience Is a Virtue: The hardest part of this recipe is the waiting. I know you want to eat it right away. I know. But an 8-hour chill is the difference between a cake that slices cleanly and a pile of delicious mush. Plan ahead—make it in the morning for dessert that night.
My Biggest Failure: On attempt number three, I used warm cream because I was impatient. The cream never whipped properly, the layers slid around, and I ended up with a sad, flat puddle. I ate it with a spoon anyway, but it wasn’t the cake I wanted. Cold cream is not optional.
Variations & Adaptations
Once you’ve mastered the basic version, feel free to play around. Here are some variations I’ve tested and loved.
- Mint Chocolate Version: Swap the strawberry jam for mint chocolate chip ice cream topping (the kind with little chocolate bits). Use mint extract instead of vanilla in the cream. It tastes like a Thin Mint in cake form.
- Vegan Adaptation: Use full-fat coconut cream (chilled overnight) in place of heavy cream. Whip it the same way, but add a tablespoon of cornstarch to help stabilize it. Use vegan chocolate wafers and a fruit-sweetened jam. It works beautifully—I made this for a friend’s birthday and nobody knew it was vegan.
- Tropical Twist: Replace the strawberry jam with passion fruit curd or mango puree. Use coconut cream instead of regular cream. It’s bright, tangy, and tastes like summer.
- Individual Servings: Instead of a loaf pan, layer everything in small mason jars or dessert cups. You get the same flavors in a portable, single-serving format. Perfect for picnics or parties.
- Peanut Butter Dream: Swirl in peanut butter instead of chocolate sauce. Use vanilla wafers instead of chocolate ones. It’s rich, salty, and completely addictive.
Seasonal Variation: In summer, I sometimes swap the strawberry jam for fresh sliced strawberries macerated in a little sugar. The texture is softer, but the flavor is incredible. Just be aware that fresh fruit releases water, so the cake will be a bit more delicate.
Serving & Storage Suggestions
This cake is best served cold, straight from the fridge. Let it sit at room temperature for no more than 5 minutes before slicing—any longer and the cream starts to soften too much.
Presentation Tips: Run your knife under hot water, dry it off, then slice. This gives you those clean, sharp edges that make the layers pop. Arrange slices on a platter with a few fresh strawberries and a dusting of cocoa powder. It looks fancy with almost zero effort.
What to Serve With It: A dollop of extra whipped cream on top never hurts. A cup of strong black coffee cuts through the sweetness beautifully. For a real treat, serve it alongside a scoop of vanilla bean ice cream—double the cold, double the fun.
Storage Instructions: Cover the pan tightly with plastic wrap or transfer slices to an airtight container. The cake will keep in the refrigerator for up to 3 days. After that, the cookies start to get too soft and the layers blur together. Not that it’ll last that long—mine never does.
Freezer Option: You can freeze the whole cake (unwrapped, then wrapped tightly in foil) for up to 2 weeks. Thaw in the refrigerator overnight before serving. The texture is slightly denser after freezing, but still delicious. I’ve done this for holiday prep and it works like a charm.
Flavor Development: Honestly, this cake tastes even better on day two. The flavors meld together, the cookies soften perfectly, and every bite is more cohesive. If you can resist eating it all on day one, you’re a stronger person than me.
Nutritional Information & Benefits
Let’s be real—this is a dessert, not a health food. But knowing what’s in it helps you enjoy it mindfully.
Estimated Per Serving (1 slice, based on 8 servings):
- Calories: 320
- Fat: 22g
- Carbohydrates: 30g
- Protein: 3g
- Sugar: 18g
Ingredient Benefits: The heavy cream provides a good source of calcium and vitamin A. Strawberries (even in jam form) contain antioxidants and vitamin C. Chocolate, in moderation, has flavonoids that support heart health. I mean, I’m not saying this is a superfood, but it’s not empty calories either.
Dietary Considerations: This recipe is naturally gluten-free if you use gluten-free wafer cookies. It’s also egg-free and nut-free (check your cookie labels). For a lower-sugar version, use sugar-free pudding mix in the cream and a no-sugar-added jam. The texture changes slightly, but the flavor is still great.
Allergen Note: Dairy is the main allergen here. For a dairy-free version, use coconut cream and dairy-free cookies. Always check labels if you’re serving someone with severe allergies.
My Take: I believe in balance. This cake is a celebration dessert—birthdays, holidays, Tuesday nights that feel special. It’s not an everyday thing, and that’s okay. Enjoy every bite, share it with people you love, and don’t stress about the numbers.
Conclusion
This Easy No-Bake Neapolitan Icebox Cake is proof that you don’t need a culinary degree to create something beautiful and delicious. Ten minutes of work, a few simple ingredients, and a little patience—that’s all it takes to bring those classic ice cream flavors together in a whole new form.
I love this recipe because it reminds me that good food doesn’t have to be complicated. It can be simple, honest, and still impressive enough to make people ask for the recipe. And honestly? Watching someone take that first bite and see their eyes light up—that never gets old.
I’d love to hear how yours turns out. Did you try a variation? Did your kids help with the layering? Drop a comment below and tell me about it. And if you share a photo on Pinterest, tag me—I want to see your beautiful creation!
Now go make some memories in your kitchen. You’ve got this.
Frequently Asked Questions
Can I use regular graham crackers instead of chocolate wafers?
You can, but the flavor changes significantly. Chocolate wafers give that authentic Neapolitan chocolate layer. If you use graham crackers, consider adding a tablespoon of cocoa powder to the cream to keep the chocolate vibe going.
How long does this cake need to chill?
At least 8 hours, but overnight is best. The cookies need time to soften and absorb the cream. Less time means a cake that falls apart when you slice it. Plan ahead and you’ll be rewarded with perfect slices.
Can I make this in a different size pan?
Absolutely. An 8×8 square pan works well—you’ll just have shorter layers. A round 9-inch cake pan also works. Adjust the cookie placement to fit your pan shape. The flavor is the same regardless of shape.
What if I don’t have strawberry jam?
Any berry jam works here—raspberry, blackberry, or even blueberry. You can also use fresh berries mashed with a little sugar. The texture will be softer with fresh fruit, so handle the cake gently when slicing.
Can I double this recipe?
Yes! Use a 9×13 baking dish for a double batch. You’ll need about 72 cookies and double the cream mixture. The chilling time stays the same. This is perfect for parties or potlucks where you need a bigger dessert.
Pin This Recipe!
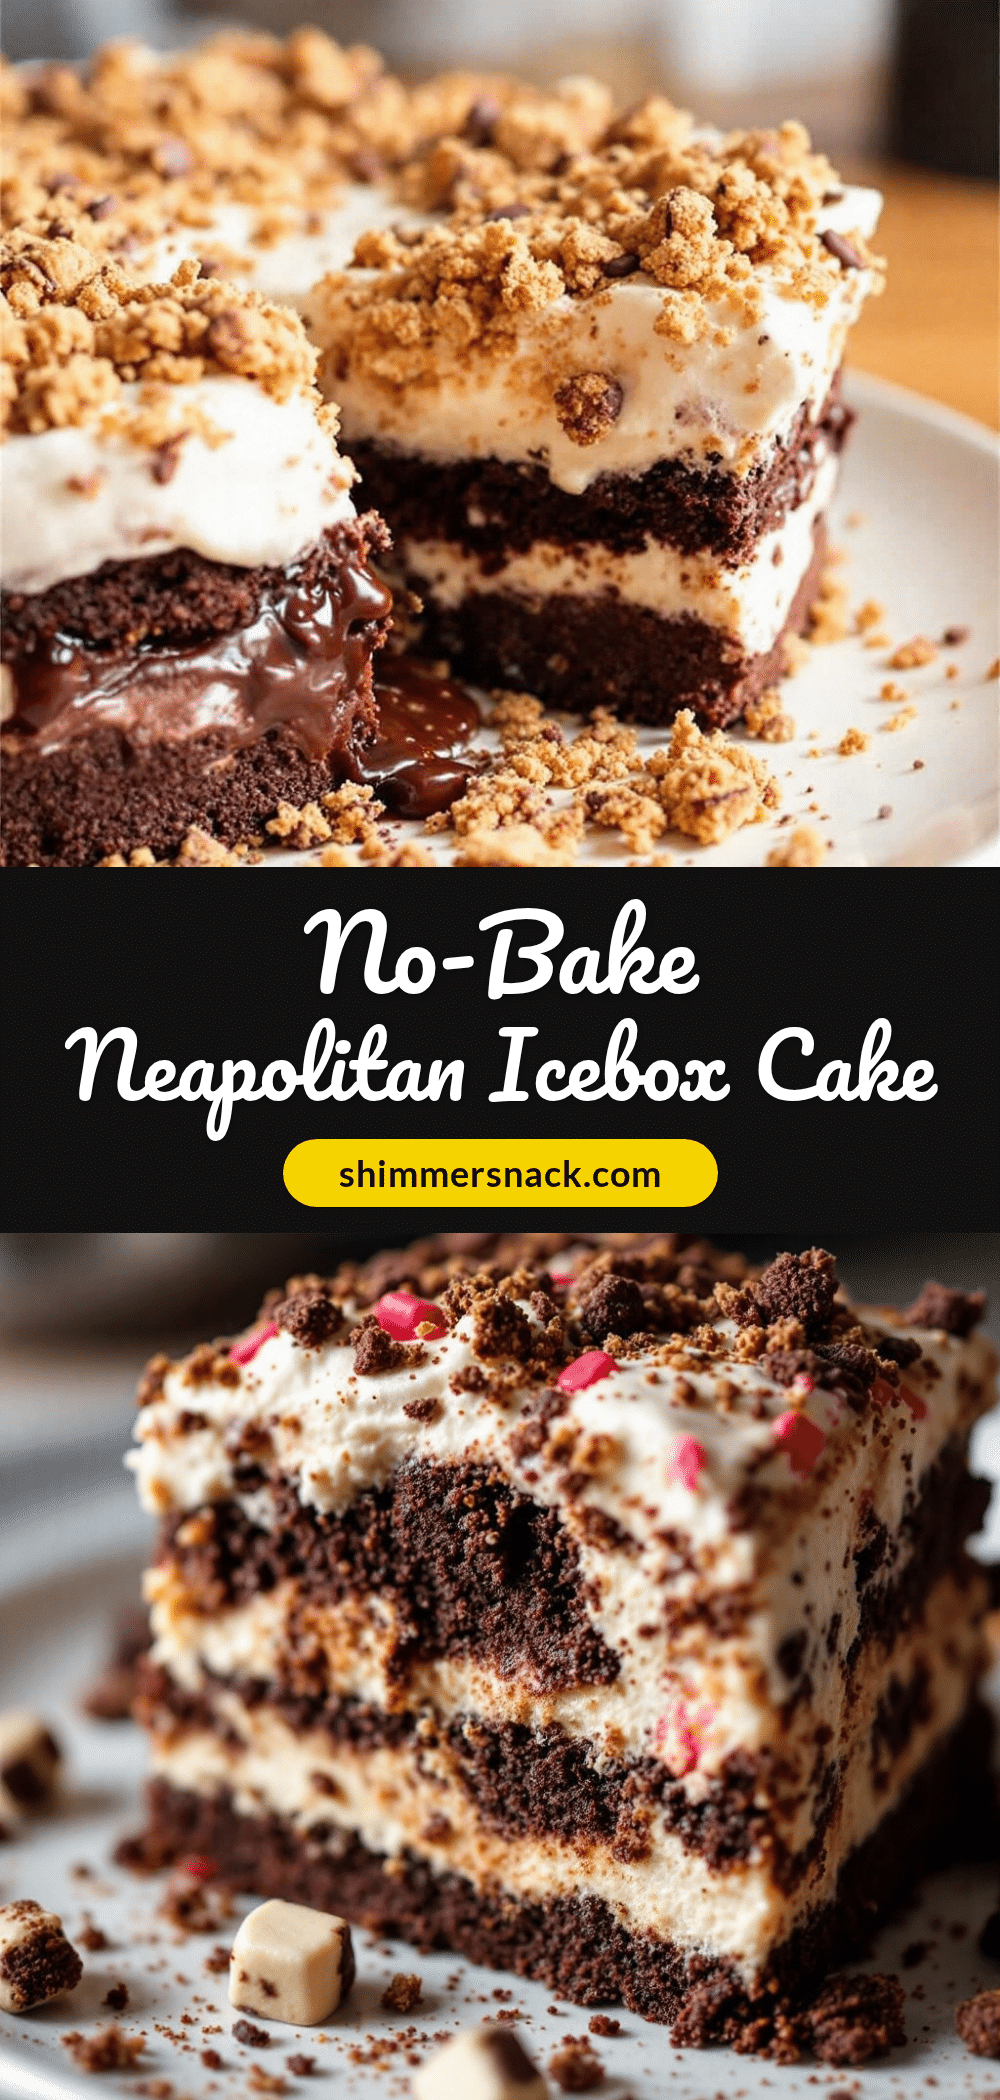
Easy No-Bake Neapolitan Icebox Cake
A 10-minute no-bake dessert with layers of chocolate, vanilla, and strawberry, perfect for any occasion.
- Prep Time: 10 minutes
- Cook Time: 0 minutes
- Total Time: 8 hours 10 minutes (includes chilling)
- Yield: 8 servings 1x
- Category: Dessert
- Cuisine: American
Ingredients
- 36 chocolate wafer cookies (about 1 standard box)
- 2 cups heavy whipping cream, cold
- 1/4 cup powdered sugar
- 1 teaspoon vanilla extract
- 1/2 cup strawberry jam or preserves, seedless if possible
- 1/4 cup chocolate sauce or fudge sauce, plus more for drizzling
- Freeze-dried strawberries (optional, for garnish)
Instructions
- Line a 9×5 inch loaf pan with parchment paper, leaving overhang on the long sides.
- In a mixing bowl, combine cold heavy cream, powdered sugar, and vanilla extract. Mix on low speed, then increase to medium-high and whip until soft peaks form (about 3-4 minutes).
- Spread a thin layer (about 2 tablespoons) of whipped cream on the bottom of the prepared pan.
- Arrange a single layer of chocolate wafer cookies on top of the cream, breaking some to fill gaps (about 6 cookies).
- Spread 1/3 of the remaining whipped cream evenly over the cookies (about 1/4 inch thick).
- Drizzle 2 tablespoons of chocolate sauce over the cream layer and swirl gently with a knife or toothpick.
- Add another cookie layer, pressing down gently. Repeat with another 1/3 of cream, then dollop and spread 1/4 cup of strawberry jam over the cream and swirl gently.
- Finish with a final cookie layer, the last 1/3 of cream, and a drizzle of remaining chocolate sauce on top. Create swirls and peaks with a spatula.
- Cover the pan with plastic wrap and refrigerate for at least 8 hours or overnight.
- When ready to serve, lift the cake out using the parchment paper overhang. Slice with a sharp knife and garnish with crumbled freeze-dried strawberries if desired.
Notes
For best results, use cold heavy cream and chill the cake for at least 8 hours. Wet the knife between slices for clean cuts. The cake tastes even better on day two.
Nutrition
- Serving Size: 1 slice
- Calories: 320
- Sugar: 18
- Sodium: 150
- Fat: 22
- Saturated Fat: 13
- Carbohydrates: 30
- Fiber: 1
- Protein: 3
Keywords: no-bake dessert, icebox cake, Neapolitan, easy dessert, 10-minute dessert, chocolate, vanilla, strawberry


