Love this? Save it for later!
Share the inspiration with your friends
There used to be a tiny Italian place tucked behind a laundromat on 7th Street that made this garlic butter chicken that I still dream about. When they closed suddenly after a kitchen fire back in 2019, I honestly felt a little lost. That chicken and rice combo was my go-to comfort meal after long days, and suddenly it was just gone.
After seventeen tries — seventeen, let me tell you — I finally got it. And honestly? This version might even be better than the original. Not because I’m some culinary genius, but because I stripped away all the fussy restaurant techniques and focused on what really mattered: that rich, garlicky butter sauce soaking into every single grain of rice.
I remember standing in my kitchen at 11 PM on a Tuesday, spatula in hand, rice slightly burned on the bottom, thinking “maybe I should just order takeout.” But something kept me going. Maybe it was stubbornness. Maybe it was the memory of that first bite at that little restaurant, the way the garlic butter coated everything in pure comfort.
You know that feeling when you’re chasing a flavor memory and nothing quite hits the mark? That was me for about three months straight. I tried different rice-to-liquid ratios, different garlic amounts, different cooking methods. My neighbors probably thought I was running a small restaurant out of my apartment with all the garlic smells wafting through the hallway.
But here’s the thing — this one-pan garlic butter chicken and rice skillet is the recipe that finally made me stop searching. It’s the one I keep coming back to, the one that tastes like home even when you’re cooking it for the first time. And honestly, that’s the best compliment I can give any dish.
Why You’ll Love This Recipe
Let me be real with you — I’ve tested this recipe more times than I care to admit. Burned rice, undercooked chicken, sauce that was way too thin. But all that trial and error led to something pretty special. Here’s what makes this version different from all the other garlic butter chicken recipes floating around out there:
- One Pan, Minimal Mess : Everything cooks in a single skillet. No transferring, no extra pots, no sink full of dishes. Perfect for those nights when you want something amazing without the cleanup.
- Pantry-Friendly Ingredients : You probably already have most of these items in your kitchen. No fancy trips to specialty stores needed.
- Ready in Under 45 Minutes : From start to finish, this comes together quickly enough for a weeknight dinner but feels special enough for company.
- Perfect for Meal Prep : The flavors actually get better overnight, making this ideal for lunch leftovers throughout the week.
- Kid-Approved Comfort : My picky-eating nephew actually asked for seconds. That never happens.
- Foolproof Technique : The secret is in how we layer the flavors — browning the chicken first, then building the sauce right in the same pan. Every step adds depth without extra work.
This isn’t just another chicken and rice recipe. It’s the one that makes you close your eyes after that first bite. The kind of meal that turns a regular Tuesday into something worth remembering. And honestly? It’s comfort food at its finest — rich, satisfying, and made with love in a single pan.
What Ingredients You Will Need
This recipe uses simple, wholesome ingredients that work together to create something genuinely special. Most of these are pantry staples, which makes this dish perfect for those “I need dinner now” moments.
For the Chicken
- 4 boneless, skinless chicken thighs (about 1.5 pounds) — I prefer thighs for their juiciness and flavor, but chicken breasts work too if you prefer white meat
- 1 teaspoon salt — kosher salt is best for even seasoning
- 1/2 teaspoon black pepper — freshly ground if possible
- 1/2 teaspoon paprika — adds a subtle warmth and beautiful color
- 1/2 teaspoon garlic powder — because you can never have too much garlic
- 2 tablespoons olive oil — for searing the chicken to golden perfection
For the Garlic Butter Rice
- 4 tablespoons unsalted butter — the star of the show, use good quality butter here
- 6 cloves garlic, minced — fresh garlic makes all the difference, don’t use the jarred stuff
- 1 cup long-grain white rice — basmati or jasmine work beautifully, rinsed well
- 2 cups chicken broth — low-sodium so you can control the salt level
- 1/2 cup water — helps the rice cook evenly without getting too salty
- 1/2 teaspoon dried thyme — adds an earthy note that complements the garlic
- 1/4 teaspoon red pepper flakes — optional, but I love the tiny kick
- Fresh parsley, chopped — for garnish and a pop of freshness
- Juice of half a lemon — brightens everything up at the end
I recommend using Kirkland Signature chicken broth for its clean flavor, and Kerrygold butter for that rich, creamy taste. If you’re looking for a gluten-free option, just double-check your chicken broth label — most are naturally gluten-free, but some brands add questionable ingredients.
For the rice, rinsing it until the water runs clear is crucial. This removes excess starch and prevents that gummy texture nobody wants. I learned this the hard way after my first few attempts turned out more like risotto than fluffy rice.
You can swap the chicken thighs for drumsticks if you prefer dark meat on the bone, just increase the cooking time by about 10 minutes. And if you’re dairy-free, use a good quality vegan butter — just know the flavor will be slightly different.
Equipment Needed
The beauty of this recipe is that you don’t need much. Here’s what you’ll want to have on hand:
- A large skillet with a lid — 12-inch is ideal, cast iron or stainless steel both work great. I use my trusty Lodge cast iron skillet that I’ve had for years. The even heat distribution makes a real difference.
- Sharp chef’s knife — for mincing garlic and chopping parsley. A dull knife makes everything harder.
- Cutting board — I prefer wood, but plastic works fine too
- Measuring cups and spoons — accuracy matters here, especially with the rice-to-liquid ratio
- Wooden spoon or spatula — for stirring without scratching your pan
- Tongs — for flipping the chicken easily
- Fine-mesh strainer — for rinsing the rice (or just use a bowl and your hand)
If you don’t have a lid for your skillet, a piece of aluminum foil works perfectly as a makeshift cover. I’ve done this more times than I’d like to admit, and it works like a charm. Just make sure it’s tightly sealed so the steam doesn’t escape.
One tip — if you’re using a non-stick skillet, be careful with high heat. You want a good sear on the chicken, but non-stick pans can’t handle the same temperatures as cast iron or stainless steel.
Preparation Method
Alright, let’s get cooking! This comes together in about 40 minutes, and I promise you can handle every step.
- Prep your ingredients first. Mince the garlic, chop the parsley, rinse the rice until the water runs clear, and pat the chicken dry with paper towels. Drying the chicken is crucial — wet chicken won’t sear properly, and you’ll miss out on that golden crust. Season the chicken on both sides with salt, pepper, paprika, and garlic powder.
- Heat your skillet over medium-high heat. Add the olive oil and let it shimmer — about 2 minutes. You want it hot enough that the chicken sizzles immediately when it hits the pan. Carefully place the chicken thighs in the skillet, skin side down if using skin-on. Let them cook undisturbed for 5-6 minutes until deeply golden brown. Flip and cook another 4-5 minutes. The internal temperature should reach 165°F. Remove the chicken to a plate and set aside. Don’t worry if it’s not fully cooked through — it will finish cooking with the rice.
- Reduce the heat to medium. In the same skillet (all those browned bits are flavor gold), add the butter. Let it melt completely, then add the minced garlic. Stir constantly for about 30 seconds until fragrant — you’ll smell it immediately. Be careful not to burn the garlic, or it will turn bitter. I learned this the hard way when I got distracted by my phone and ended up with acrid, blackened garlic. Not my finest moment.
- Add the rinsed rice to the skillet. Stir it around in the garlic butter for about 2 minutes until the grains are well coated and starting to turn slightly translucent at the edges. This toasting step is what gives the rice that nutty, delicious flavor. It’s worth the extra minute, I promise.
- Pour in the chicken broth and water. Add the dried thyme and red pepper flakes if using. Stir everything together, scraping up any browned bits from the bottom of the pan. Bring the liquid to a gentle boil, then reduce the heat to low.
- Nestle the chicken thighs back into the rice. Place them on top, pushing them down slightly so they’re partially submerged. Any juices that accumulated on the plate go into the pan too — that’s pure flavor. Cover the skillet with the lid and let it simmer gently for 18-20 minutes. Don’t lift the lid during this time — the steam needs to stay trapped to cook the rice properly.
- After 18 minutes, turn off the heat. Let the skillet sit covered for another 5 minutes. This resting period allows the rice to finish absorbing any remaining liquid and become perfectly fluffy. Remove the lid carefully (steam is hot!) and fluff the rice with a fork. Squeeze the lemon juice over everything and sprinkle with fresh parsley.
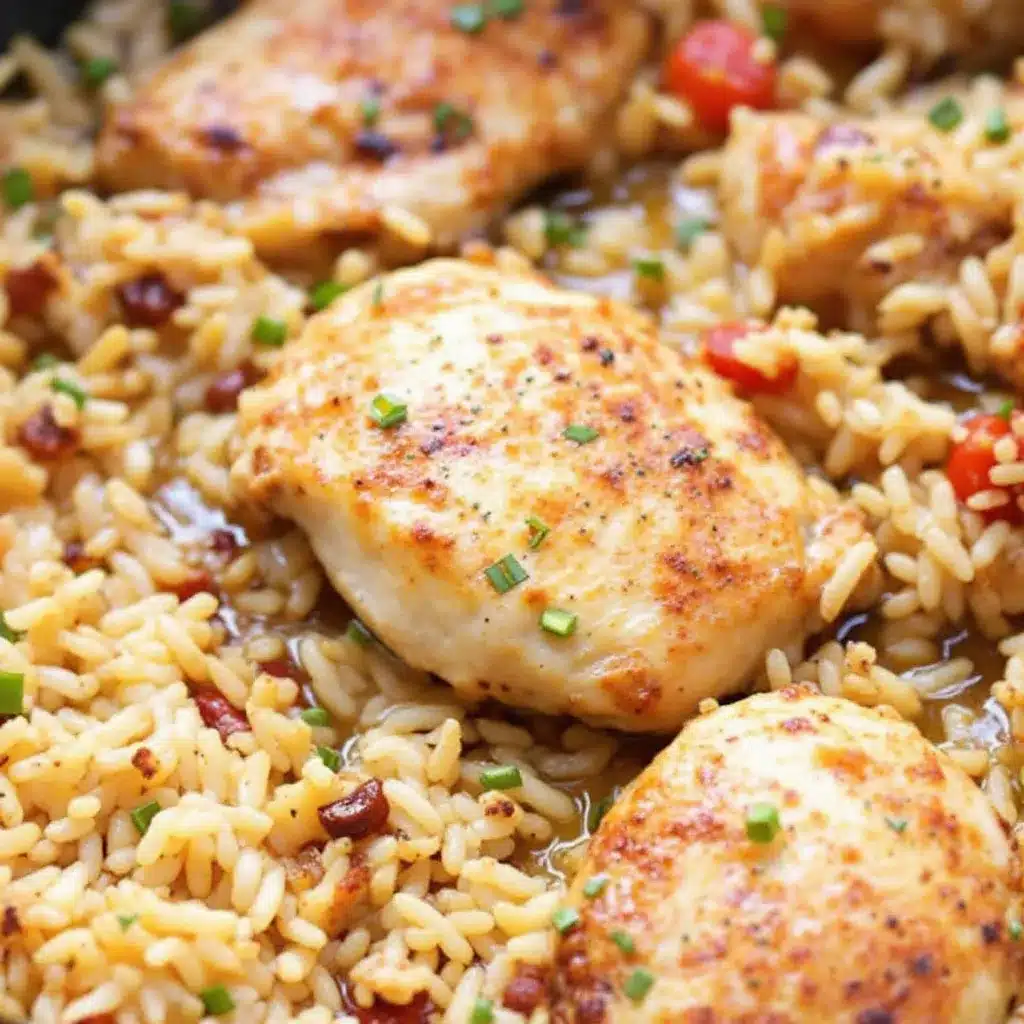
- Serve immediately. Spoon the garlic butter rice onto plates, top with a chicken thigh, and watch everyone’s eyes light up. The rice should be tender but not mushy, the chicken juicy and flavorful, and the whole thing coated in that gorgeous garlic butter goodness.
One thing I want to mention — if your rice seems a bit undercooked after 18 minutes, don’t panic. Just add a couple tablespoons of water, cover, and cook for another 3-4 minutes. Every stovetop runs a little differently, so adjust as needed.
Cooking Tips & Techniques
After making this recipe more times than I can count, I’ve picked up a few tricks that make a real difference. Here’s what I wish someone had told me from the start:
Don’t skip the rice rinsing. I know it seems like an extra step, but unrinsed rice releases too much starch and turns your beautiful garlic butter rice into a sticky, gloppy mess. Rinse until the water runs clear — usually about 3-4 changes of water. Your future self will thank you.
Patience with the sear is everything. That golden crust on the chicken isn’t just for looks — it’s where so much flavor lives. Let the chicken cook undisturbed for a full 5-6 minutes before trying to flip it. If it sticks, it’s not ready yet. It will release naturally when it’s properly browned. I ruined so many chicken dinners by flipping too early and tearing the skin.
Toast the rice properly. That 2-minute window where you stir the rice in the garlic butter is non-negotiable. You want the grains to look slightly opaque and smell nutty. This step prevents mushy rice and adds depth you can’t get any other way.
Use low sodium broth. Regular broth can make the dish overwhelmingly salty, especially as it reduces. Low sodium gives you control over the seasoning. You can always add more salt at the end, but you can’t take it out.
Let it rest. Those 5 minutes after cooking are crucial. The rice continues to steam and absorb any remaining liquid. I know it’s tempting to dig in right away, but patience pays off here.
One mistake I still make sometimes? Using too much heat during the simmer. Keep it on low — a gentle bubble, not a rolling boil. High heat will evaporate the liquid too quickly and leave you with undercooked rice. Slow and steady wins this race.
Variations & Adaptations
This recipe is wonderfully flexible. Here are some ways I’ve adapted it over the years:
Vegetable-Packed Version : Add a cup of frozen peas and carrots during the last 5 minutes of cooking. Or throw in some chopped spinach right at the end — it wilts beautifully into the rice. I’ve also added diced bell peppers along with the garlic for extra color and crunch.
Creamy Garlic Butter Chicken : For an extra-indulgent version, stir in 1/4 cup of heavy cream or half-and-half after the rice is cooked. It transforms the dish into something almost risotto-like. My husband requests this version every time.
Spicy Kick : Double the red pepper flakes, or add a finely chopped jalapeño along with the garlic. For even more heat, drizzle with sriracha or chili crisp before serving. The garlic butter handles the spice beautifully.
Herb Garden Variation : Swap the dried thyme for fresh rosemary or sage. Add a sprig of fresh rosemary to the rice while it cooks, then remove it before serving. The aroma is absolutely heavenly.
Dairy-Free Option : Use vegan butter and make sure your chicken broth is dairy-free. The flavor will be slightly different, but still delicious. I’ve used Miyoko’s vegan butter with great results.
Rice Alternatives : Brown rice works but requires more liquid and longer cooking time — about 45 minutes with 2 1/2 cups of liquid. Cauliflower rice is a great low-carb option, but cook it separately and stir in at the end to avoid mushiness.
I once tried making this with quinoa instead of rice, and honestly? It was pretty good. The nutty flavor of quinoa actually complements the garlic butter nicely. Just use the same liquid ratio and cooking time as you would for rice.
Serving & Storage Suggestions
This dish is pretty complete on its own, but here’s how I like to serve it:
Serve it hot right out of the skillet — the rice should be steaming and the chicken warm all the way through. A generous sprinkle of fresh parsley and a lemon wedge on the side make it look restaurant-worthy. I love serving this with a simple green salad dressed with lemon vinaigrette to balance the richness.
Perfect pairings : Roasted asparagus, steamed broccoli, or a crisp cucumber salad all work beautifully. If you want something carb-on-carb (no judgment here), crusty bread to soak up any extra garlic butter sauce is absolutely divine.
For leftovers, let the skillet cool completely, then transfer everything to an airtight container. It will keep in the refrigerator for up to 4 days. The flavors actually meld together overnight, making day-two leftovers even better than the first serving.
To reheat, add a splash of chicken broth or water to a skillet over medium-low heat. Add the leftover chicken and rice, cover, and warm gently for 5-7 minutes, stirring occasionally. The extra liquid helps rehydrate the rice without drying it out. Microwave works in a pinch, but the stovetop method is superior.
Freezer instructions : This freezes well for up to 3 months. Portion into freezer-safe containers, leaving a little room for expansion. Thaw overnight in the refrigerator before reheating. I’ve pulled these out on busy nights and been so grateful for the convenience.
One thing to note — the rice will soften slightly upon reheating, but the flavor remains fantastic. If you’re meal prepping for the week, consider undercooking the rice just slightly so it holds up better.
Nutritional Information & Benefits
Here’s a rough nutritional breakdown per serving (based on 4 servings):
| Nutrient | Amount Per Serving |
|---|---|
| Calories | 485 |
| Protein | 32g |
| Fat | 22g |
| Saturated Fat | 10g |
| Carbohydrates | 38g |
| Fiber | 1g |
| Sugar | 2g |
| Sodium | 680mg |
This dish is packed with protein from the chicken, which helps keep you full and satisfied. Garlic isn’t just for flavor — it’s known for its immune-boosting properties and anti-inflammatory benefits. The butter provides fat-soluble vitamins like A, D, and E, while the rice offers quick energy in the form of complex carbohydrates.
If you’re watching your sodium, using low-sodium broth and reducing the added salt can bring the numbers down significantly. For a lighter version, swap half the butter for olive oil and use brown rice for extra fiber.
This meal is naturally gluten-free (just double-check your broth) and can be made dairy-free with a few simple swaps. It’s also relatively low in added sugars, making it a balanced option for most dietary patterns.
Frequently Asked Questions
Can I use chicken breasts instead of thighs?
Absolutely! Chicken breasts work well, but they cook faster and can dry out more easily. Reduce the initial searing time to 4 minutes per side, and check the internal temperature early. You may need to reduce the covered cooking time by about 5 minutes.
Why is my rice mushy?
Mushy rice usually means too much liquid or not enough rinsing. Make sure you rinse the rice until the water runs clear, and use exactly 2 1/2 cups of liquid for 1 cup of rice. Also, keep the heat low during simmering — high heat evaporates liquid too quickly and leaves you with overcooked, mushy rice.
Can I make this in a slow cooker or Instant Pot?
I haven’t tested this in a slow cooker, but for an Instant Pot, use the sauté function to brown the chicken and toast the rice, then pressure cook on high for 5 minutes with a natural release. Use the same liquid ratio. The texture will be slightly different, but still delicious.
How do I prevent the bottom from burning?
This happens when the heat is too high or the pan isn’t heavy enough. Use a heavy-bottomed skillet and keep the heat on low during the simmering phase. If you notice the rice starting to stick, add a couple tablespoons of water immediately.
Can I add vegetables to this dish?
Definitely! Frozen peas, carrots, or green beans work great. Add them during the last 5 minutes of cooking so they warm through without turning to mush. Fresh spinach can be stirred in right at the end — it wilts beautifully.
Conclusion
This one-pan garlic butter chicken and rice skillet is the kind of recipe that becomes a regular in your rotation. It’s simple enough for a busy Tuesday but impressive enough to serve to guests. The garlic butter sauce seeps into every grain of rice, the chicken stays juicy and tender, and the whole thing comes together in one pan with minimal fuss.
I still think about that little restaurant on 7th Street sometimes, but honestly? This recipe has become its own thing. It’s not a copy — it’s a recreation built on memory, trial and error, and a whole lot of garlic. And that’s what makes it special.
I’d love to hear how yours turns out! Did you add any twists? Did your family love it as much as mine does? Drop a comment below and let me know. And if you’re looking for more one-pan dinners, you might enjoy my creamy mushroom chicken skillet or this lemon herb salmon and rice — both are just as easy and delicious.
Happy cooking, friends. Go make something delicious tonight.
Pin This Recipe!
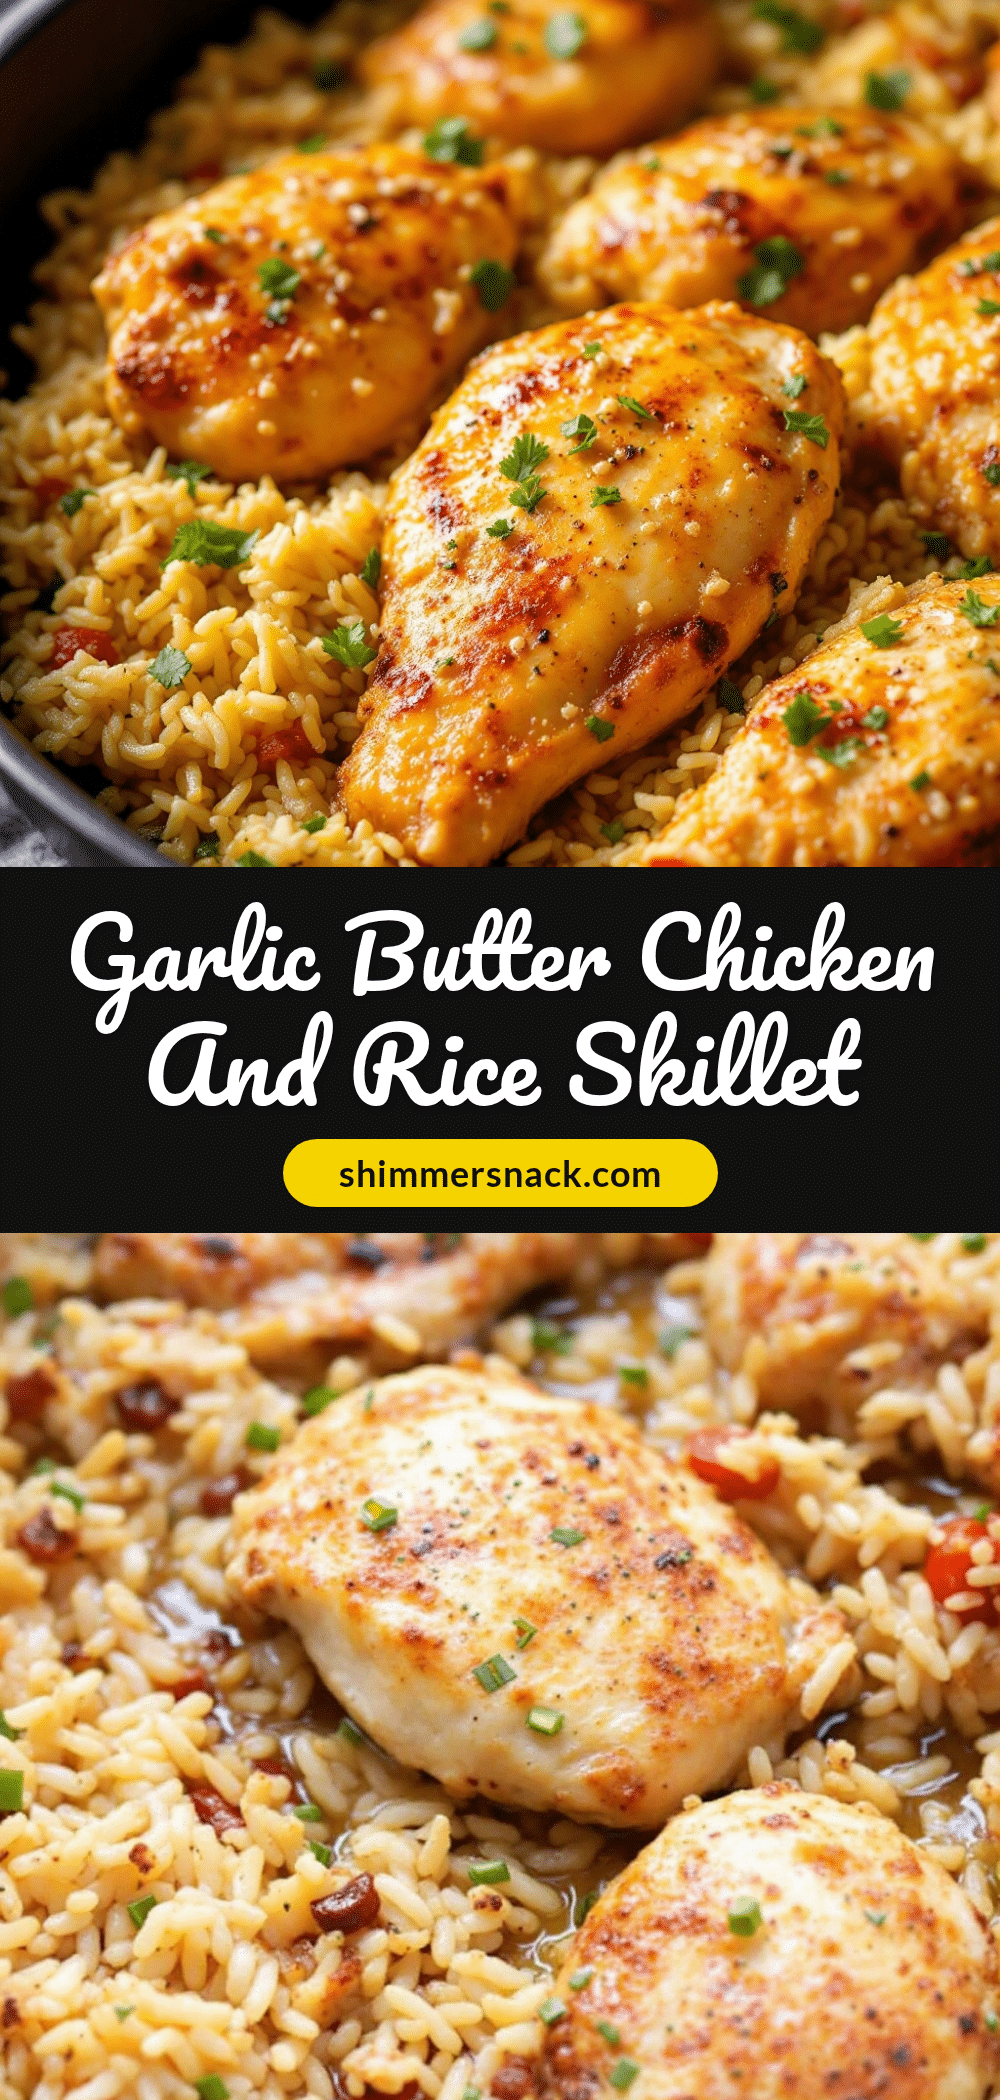
Easy One-Pan Garlic Butter Chicken and Rice Skillet

A rich, garlicky butter sauce soaks into every grain of rice in this one-pan chicken and rice skillet. Ready in under 45 minutes, it’s the perfect weeknight comfort meal that tastes like home.
- Prep Time: 10 minutes
- Cook Time: 30 minutes
- Total Time: 40 minutes
- Yield: 4 servings 1x
- Category: Main Course
- Cuisine: American
Ingredients
- 4 boneless, skinless chicken thighs (about 1.5 pounds)
- 1 teaspoon salt
- 1/2 teaspoon black pepper
- 1/2 teaspoon paprika
- 1/2 teaspoon garlic powder
- 2 tablespoons olive oil
- 4 tablespoons unsalted butter
- 6 cloves garlic, minced
- 1 cup long-grain white rice, rinsed
- 2 cups low-sodium chicken broth
- 1/2 cup water
- 1/2 teaspoon dried thyme
- 1/4 teaspoon red pepper flakes (optional)
- Fresh parsley, chopped (for garnish)
- Juice of half a lemon
Instructions
- Prep your ingredients first. Mince the garlic, chop the parsley, rinse the rice until the water runs clear, and pat the chicken dry with paper towels. Season the chicken on both sides with salt, pepper, paprika, and garlic powder.
- Heat your skillet over medium-high heat. Add the olive oil and let it shimmer for about 2 minutes. Carefully place the chicken thighs in the skillet. Cook undisturbed for 5-6 minutes until deeply golden brown. Flip and cook another 4-5 minutes. The internal temperature should reach 165°F. Remove the chicken to a plate and set aside.
- Reduce the heat to medium. In the same skillet, add the butter. Let it melt completely, then add the minced garlic. Stir constantly for about 30 seconds until fragrant.
- Add the rinsed rice to the skillet. Stir it around in the garlic butter for about 2 minutes until the grains are well coated and starting to turn slightly translucent at the edges.
- Pour in the chicken broth and water. Add the dried thyme and red pepper flakes if using. Stir everything together, scraping up any browned bits from the bottom of the pan. Bring the liquid to a gentle boil, then reduce the heat to low.
- Nestle the chicken thighs back into the rice. Place them on top, pushing them down slightly so they’re partially submerged. Pour any accumulated juices from the plate into the pan. Cover the skillet with the lid and let it simmer gently for 18-20 minutes. Do not lift the lid during this time.
- After 18 minutes, turn off the heat. Let the skillet sit covered for another 5 minutes. Remove the lid carefully and fluff the rice with a fork. Squeeze the lemon juice over everything and sprinkle with fresh parsley.
- Serve immediately. Spoon the garlic butter rice onto plates, top with a chicken thigh, and enjoy.
Notes
For best results, rinse the rice until the water runs clear to prevent gumminess. Pat the chicken dry before seasoning to ensure a good sear. If the rice seems undercooked after 18 minutes, add a couple tablespoons of water, cover, and cook for another 3-4 minutes. Leftovers keep in the refrigerator for up to 4 days and reheat well with a splash of broth.
Nutrition
- Serving Size: 1 serving (1 chicken
- Calories: 485
- Sugar: 2
- Sodium: 680
- Fat: 22
- Saturated Fat: 10
- Carbohydrates: 38
- Fiber: 1
- Protein: 32
Keywords: garlic butter chicken, one-pan chicken and rice, chicken skillet, easy weeknight dinner, comfort food, one-pot meal


