Love this? Save it for later!
Share the inspiration with your friends
Last fall, I was trying to keep my niece entertained during one of those long, rainy weekends. She was flipping through a colorful ABC book, pointing at the letters and chattering about animals and objects, when I realized that baking could turn this quiet moment into something a bit more magical. I was fumbling with some cookie dough, attempting to shape letters freehand, when my neighbor, Mrs. Lopez, quietly pulled up a chair beside me. She didn’t say much at first—just watched as I struggled to get the icing right. Then, with a small smile, she handed me a simple tip about royal icing consistency that changed everything.
Those Perfect ABC Book Cookies with Royal Icing Letters weren’t born from a cookbook or a formal lesson; they came from a shared kitchen moment, a natural exchange between two people who love food and fun baking projects. Honestly, making these cookies felt less like following a recipe and more like continuing a conversation that started with a little girl’s curiosity and grew into something sweet and memorable. Maybe you’ve been there—trying to make something special for a kid’s party or a classroom treat, hoping it’s as charming and tasty as it looks in your head. That’s why this recipe stuck with me, and why I keep coming back to it whenever I want to add a bit of personal warmth to any occasion.
Why You’ll Love This Recipe
Having made these Perfect ABC Book Cookies with Royal Icing Letters many times, I can honestly say they’re a keeper for all kinds of celebrations or just a cozy afternoon project. Here’s why they stand out:
- Quick & Easy: Ready to bake and decorate in about 1.5 hours—perfect for last-minute parties or creative weekend baking.
- Simple Ingredients: No need for specialty stores; most of what you need is probably already in your pantry or fridge.
- Perfect for Any Occasion: Whether it’s a birthday, baby shower, classroom party, or just a fun afternoon, these cookies fit right in.
- Crowd-Pleaser: Kids love the colorful letters, and adults appreciate the buttery, soft cookie base.
- Unbelievably Delicious: The balance of tender cookie texture with smooth royal icing creates a delightful treat that’s as fun to eat as it is to make.
What makes this recipe different? Well, it’s the way the royal icing is whipped to the perfect consistency—thick enough to hold sharp, clean letters, yet smooth enough to flood the cookie surface flawlessly. Plus, the cookie dough is buttery but sturdy, so the cookies keep their shape without cracking. I’ve swapped out the usual rolling techniques for a gentle pressing method that keeps the edges crisp but the inside tender. Honestly, once you’ve made these, you’ll see why they’re my go-to for making something that feels both homemade and special.
This isn’t just cookie decorating; it’s a little celebration of learning, sharing, and making memories through food. I hope you feel that magic too when you bake these Perfect ABC Book Cookies with Royal Icing Letters.
What Ingredients You Will Need
This recipe uses simple, wholesome ingredients to deliver bold flavor and satisfying texture without the fuss. Below, I’ve grouped the ingredients by their role in the recipe so you can prep easily.
For the Cookie Dough
- 2 ½ cups (312 g) all-purpose flour – I prefer King Arthur for consistent results.
- 1 cup (227 g) unsalted butter, softened – room temperature is best for smooth dough.
- ¾ cup (150 g) granulated sugar
- 1 large egg, room temperature
- 1 tsp vanilla extract – adds subtle warmth.
- ½ tsp salt
- 1 tsp baking powder – for just a touch of lift.
For the Royal Icing
- 3 cups (360 g) powdered sugar, sifted
- 2 large egg whites or 4 tbsp meringue powder + 6 tbsp water for a safer alternative
- ¼ tsp cream of tartar – stabilizes the icing
- 1 tsp vanilla extract or almond extract for a twist
- Food coloring gels or powders in your choice of colors (I like AmeriColor gels for vibrant hues)
You’ll notice these ingredients are all pantry staples or easy to find at any grocery store. If you want to swap for a gluten-free option, almond flour can replace the all-purpose flour, but keep in mind the texture will be a bit different—softer and more delicate. For dairy-free baking, use vegan butter instead of unsalted butter, and the cookies will still hold up nicely. Freshly sifted powdered sugar is important here to avoid lumps in the royal icing.
Equipment Needed
- Mixing bowls – preferably glass or metal for easy cleanup
- Electric mixer or stand mixer – hand mixers work fine, but a stand mixer speeds things up
- Rolling pin – a medium-sized one with adjustable rings can help keep dough thickness even
- Alphabet cookie cutters – I recommend a set with clean, sharp edges for crisp letters
- Baking sheets lined with parchment paper or silicone mats
- Piping bags – disposable or reusable, plus small round tips (size #1 or #2) for lettering
- Sifter for powdered sugar
- Spatula for mixing and spreading
If you don’t have alphabet cookie cutters, you can carefully cut letters freehand with a small knife, but that takes patience. For budget-friendly piping bags, zip-top bags with a tiny corner snipped off work well. I’ve also found that keeping your royal icing covered with a damp towel while working prevents it from drying out too quickly. Having a steady hand and patience definitely pays off here!
Preparation Method
- Mix the cookie dough: In a large bowl, cream 1 cup (227 g) softened unsalted butter with ¾ cup (150 g) granulated sugar until light and fluffy (about 3-4 minutes). Add 1 large egg and 1 tsp vanilla extract, mixing until combined.
- Combine dry ingredients: In a separate bowl, whisk together 2 ½ cups (312 g) all-purpose flour, 1 tsp baking powder, and ½ tsp salt. Gradually add the dry mix to the wet ingredients, mixing on low speed until the dough just comes together. Avoid overmixing to keep cookies tender.
- Chill the dough: Shape the dough into a disk, wrap it tightly in plastic wrap, and chill in the fridge for at least 1 hour (or overnight). This step prevents spreading and makes rolling easier.
- Preheat oven and prepare baking sheets: Preheat your oven to 350°F (175°C). Line baking sheets with parchment paper or silicone mats.
- Roll and cut cookies: On a lightly floured surface, roll out the chilled dough to about ⅛ inch (3 mm) thickness. Use alphabet cookie cutters to cut letters, transferring them carefully to the baking sheets. Keep the cookies about 1 inch apart to avoid sticking.
- Bake the cookies: Bake for 8-10 minutes, until the edges just begin to turn golden. The cookies will still be soft but firm up as they cool. Let them cool on the baking sheet for 5 minutes before moving to a wire rack to cool completely.
- Prepare the royal icing: In a clean bowl, beat 3 cups (360 g) sifted powdered sugar with 2 large egg whites (or the meringue powder substitute), ¼ tsp cream of tartar, and 1 tsp vanilla extract. Beat on high speed until stiff, glossy peaks form (about 7-10 minutes). Divide icing into smaller bowls to tint with your chosen food colors.
- Outline and flood the cookies: Use a piping bag fitted with a small round tip to outline each letter on the cookie. Let the outline dry for about 10 minutes, then flood the inside area with thinner icing (thin with a few drops of water until it flows smoothly but still holds shape). Use a toothpick to spread icing evenly.
- Pipe the letter details: After the flood layer sets slightly (about 15-20 minutes), pipe the royal icing letters neatly on top using a piping bag with a fine tip. Keep your hand steady and work slowly for clean lines.
- Let cookies dry: Allow the cookies to dry completely at room temperature for at least 4 hours, preferably overnight, before stacking or packaging.
If your icing is too runny, add more powdered sugar a tablespoon at a time. If it’s too thick, add water sparingly. I once ruined a batch by rushing the drying step—trust me, patience is key here. Also, if the dough feels sticky when rolling, lightly flour your surface and rolling pin, but don’t overdo it or the cookies get dry.
Cooking Tips & Techniques
When making these Perfect ABC Book Cookies with Royal Icing Letters, a few tricks can make all the difference:
- Consistent dough thickness: Use rolling pin rings or a ruler to keep the dough thickness even. Uneven dough leads to cookies that bake unevenly—some crisp, some doughy.
- Chilling the dough: Don’t skip chilling! It helps the cookies hold their shape and makes cutting smoother.
- Royal icing texture: Getting the right consistency for both outlining and flooding is crucial. Test the icing by dragging a knife through it – it should smooth out in 10 seconds for flooding, but hold a peak for outlining.
- Steady piping: Rest your elbow on the table and use your whole arm for better control while piping letters.
- Drying time: Rushing the drying will cause smudges or cracks. Plan ahead to let the icing set fully.
I once underestimated the drying time and ended up with a smudged ‘Q’ that looked more like a ‘G’ (oops!). Now, I always bake these cookies a day ahead of the event. Also, multitasking by preparing the icing while the cookies chill makes the process smoother.
Variations & Adaptations
Here are some ways to customize these ABC book cookies for different needs or occasions:
- Dietary adaptations: Use gluten-free flour blends for gluten-free cookies, and swap butter for coconut oil or vegan butter for dairy-free versions. Use meringue powder instead of raw egg whites for a safer royal icing option.
- Seasonal flavors: Add a pinch of cinnamon or cardamom to the cookie dough for a warm spice twist during fall or winter. In summer, try swapping classic vanilla for lemon zest or lavender extract.
- Flavorful icing twists: Mix a little cocoa powder into the icing for chocolate letters or add peppermint extract for holiday-themed cookies.
- Alternative decorations: Instead of royal icing letters, use edible markers for a quicker, less fussy option, or top with colored sugar crystals for simple sparkle.
- Personal variation: I once made a batch with pastel colors and added tiny edible pearls for a baby shower—those were a hit and made the cookies look like little keepsakes.
Serving & Storage Suggestions
These cookies are best served at room temperature to enjoy the full flavor and texture. They make charming gifts or table decorations, especially when arranged in alphabetical order or spelling out names and messages.
Pair them with a cozy cup of milk, herbal tea, or a mild coffee for a delightful snack. For party platters, they complement fruit platters or simple finger sandwiches beautifully.
Store the cookies in an airtight container at room temperature for up to 5 days. If you need longer storage, place them in a single layer in a sealed container and freeze for up to 3 months. Thaw overnight in the fridge to prevent condensation from softening the icing.
Reheating isn’t necessary—these cookies are best enjoyed as-is. Over time, the icing hardens slightly, which some folks love for that satisfying snap. Just be mindful that humid environments can soften the royal icing, so keep them dry.
Nutritional Information & Benefits
Each Perfect ABC Book Cookie with Royal Icing Letters contains approximately 120 calories, 5 grams of fat, 18 grams of carbohydrates, and 1 gram of protein. These values will vary slightly based on icing thickness and cookie size.
The ingredients are simple and mostly pantry staples, so you know exactly what’s going into your treats. The cookies provide quick energy from sugar and carbs, making them a fun, occasional indulgence.
For dietary considerations, this recipe can easily be adapted to gluten-free or dairy-free versions. Be aware that royal icing contains egg whites or meringue powder, so it’s not suitable for those with egg allergies unless alternative frostings are used.
From a wellness perspective, making these cookies at home allows you to skip preservatives and artificial colors found in many store-bought decorated cookies. Plus, baking with kids or friends is a great way to foster connection and joyful experiences.
Conclusion
These Perfect ABC Book Cookies with Royal Icing Letters are more than just sweet treats—they’re a way to bring a little joy and creativity to any occasion. Whether you’re baking for a birthday, holiday, classroom, or just because, this recipe offers a reliable, fun, and delicious way to celebrate letters and learning.
Don’t hesitate to play around with colors, flavors, and decorations to make them truly yours. I love these cookies because they remind me of simple moments shared in the kitchen, where a little patience and a lot of love transform basic ingredients into something memorable.
If you try this recipe, please leave a comment with how it went or any fun twists you’ve discovered. Sharing those stories is what makes baking so rewarding. Happy baking and happy lettering!
FAQs
Can I use powdered sugar instead of granulated sugar in the cookie dough?
Powdered sugar will change the texture and may make the cookies softer and more delicate. Granulated sugar is recommended for the best structure and slight crispness.
What if I don’t have alphabet cookie cutters?
You can carefully cut letters freehand with a sharp knife or use a stencil to trace letters onto rolled dough before cutting. It takes more time but works well with practice.
How do I prevent royal icing from cracking?
Make sure the icing is not too thick or dry, and allow it to dry slowly at room temperature away from drafts. Adding a tiny bit of lemon juice can help keep it flexible as it dries.
Is it safe to use raw egg whites in royal icing?
Raw egg whites carry a small risk of salmonella. Using pasteurized egg whites or meringue powder is a safer alternative, especially when baking for children or large groups.
Can I make these cookies ahead of time?
Yes! The cookies can be baked and iced several days in advance. Store them in an airtight container at room temperature to keep them fresh and beautiful.
Pin This Recipe!
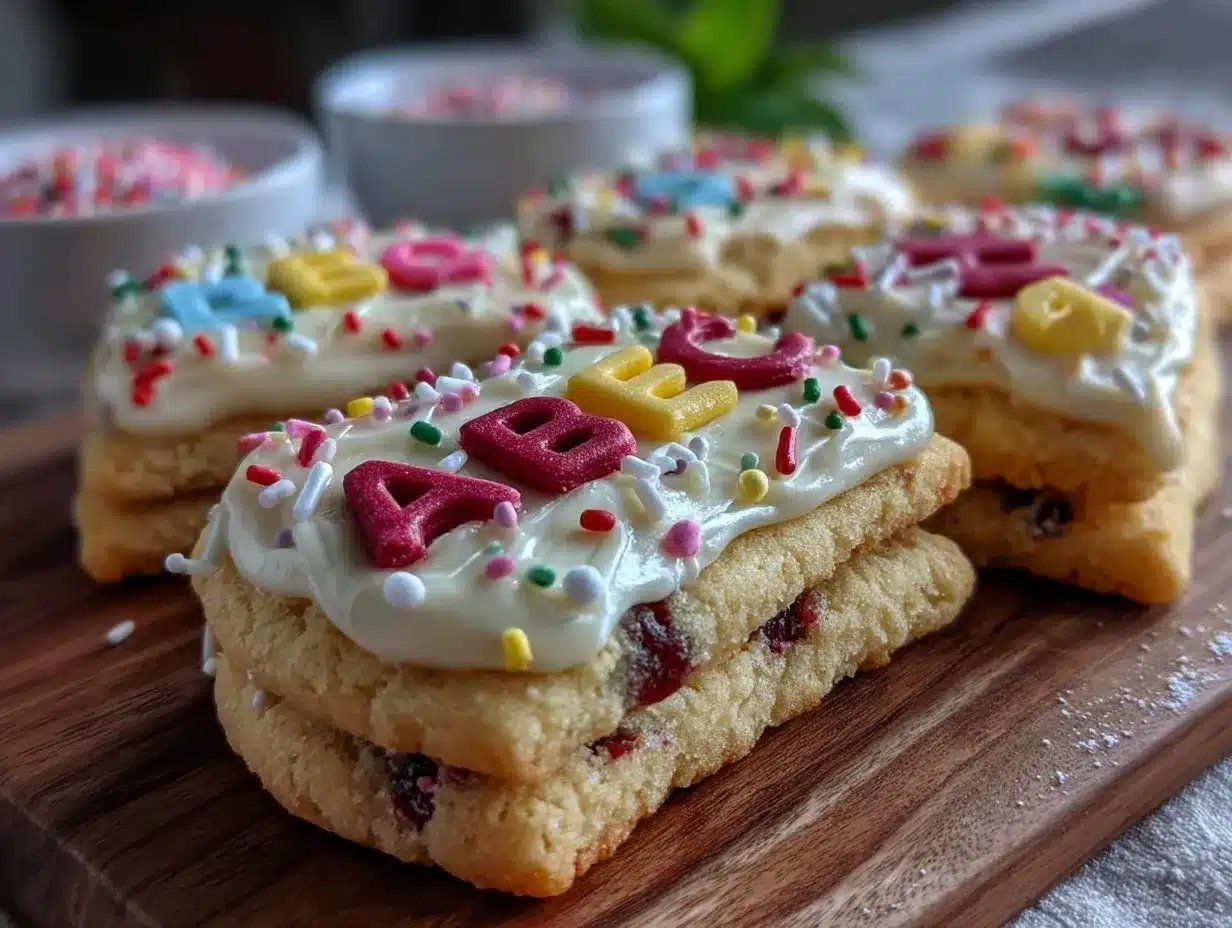
Perfect ABC Book Cookies with Royal Icing Letters
These charming ABC book cookies feature a buttery, soft cookie base decorated with smooth royal icing letters, perfect for celebrations or fun baking projects.
- Prep Time: 20 minutes
- Cook Time: 10 minutes
- Total Time: 1 hour 30 minutes
- Yield: About 24 cookies 1x
- Category: Dessert
- Cuisine: American
Ingredients
- 2 ½ cups (312 g) all-purpose flour
- 1 cup (227 g) unsalted butter, softened
- ¾ cup (150 g) granulated sugar
- 1 large egg, room temperature
- 1 tsp vanilla extract
- ½ tsp salt
- 1 tsp baking powder
- 3 cups (360 g) powdered sugar, sifted
- 2 large egg whites or 4 tbsp meringue powder + 6 tbsp water
- ¼ tsp cream of tartar
- 1 tsp vanilla extract or almond extract
- Food coloring gels or powders
Instructions
- Mix the cookie dough: In a large bowl, cream 1 cup (227 g) softened unsalted butter with ¾ cup (150 g) granulated sugar until light and fluffy (about 3-4 minutes). Add 1 large egg and 1 tsp vanilla extract, mixing until combined.
- Combine dry ingredients: In a separate bowl, whisk together 2 ½ cups (312 g) all-purpose flour, 1 tsp baking powder, and ½ tsp salt. Gradually add the dry mix to the wet ingredients, mixing on low speed until the dough just comes together. Avoid overmixing to keep cookies tender.
- Chill the dough: Shape the dough into a disk, wrap it tightly in plastic wrap, and chill in the fridge for at least 1 hour (or overnight).
- Preheat oven and prepare baking sheets: Preheat your oven to 350°F (175°C). Line baking sheets with parchment paper or silicone mats.
- Roll and cut cookies: On a lightly floured surface, roll out the chilled dough to about ⅛ inch (3 mm) thickness. Use alphabet cookie cutters to cut letters, transferring them carefully to the baking sheets. Keep the cookies about 1 inch apart.
- Bake the cookies: Bake for 8-10 minutes, until edges just begin to turn golden. Let cool on baking sheet for 5 minutes, then transfer to wire rack to cool completely.
- Prepare the royal icing: Beat 3 cups (360 g) sifted powdered sugar with 2 large egg whites (or meringue powder substitute), ¼ tsp cream of tartar, and 1 tsp vanilla extract on high speed until stiff, glossy peaks form (7-10 minutes). Divide and tint with food colors.
- Outline and flood the cookies: Use a piping bag with a small round tip to outline each letter. Let dry 10 minutes, then flood inside with thinner icing. Use a toothpick to spread evenly.
- Pipe letter details: After flood layer sets slightly (15-20 minutes), pipe royal icing letters neatly on top with a fine tip.
- Let cookies dry: Allow to dry completely at room temperature for at least 4 hours or overnight before stacking or packaging.
Notes
Keep royal icing covered with a damp towel to prevent drying. Use rolling pin rings or a ruler for consistent dough thickness. Chill dough to prevent spreading. Allow icing to dry fully to avoid smudges. Use meringue powder for safer royal icing. If dough is sticky, lightly flour surface but avoid over-flouring.
Nutrition
- Serving Size: 1 cookie
- Calories: 120
- Fat: 5
- Carbohydrates: 18
- Protein: 1
Keywords: ABC cookies, royal icing, alphabet cookies, decorated cookies, kids party cookies, baking with kids, easy cookie recipe


