Love this? Save it for later!
Share the inspiration with your friends
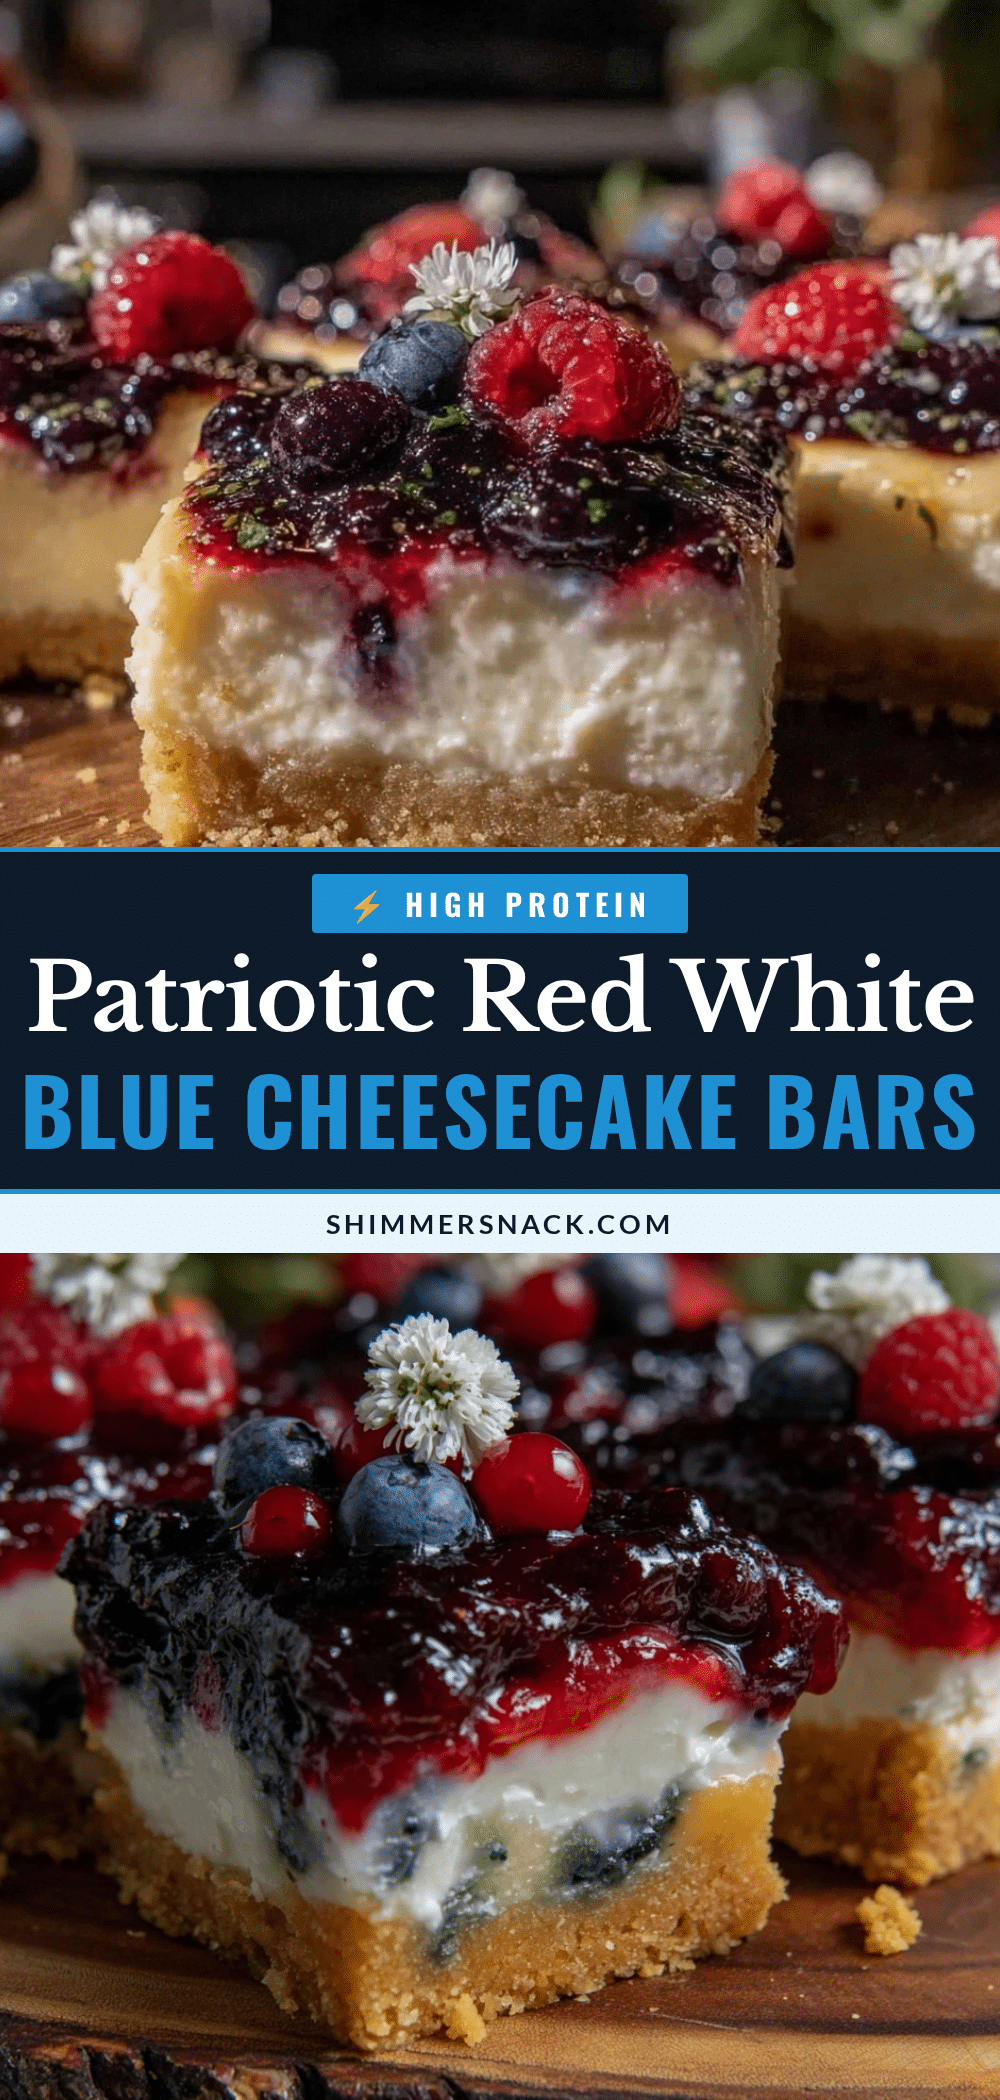
“I wasn’t planning on making dessert that Fourth of July,” I admit. It was a hot Sunday afternoon, and the power flickered off just as I was about to start baking. With no oven and a handful of ingredients on the counter, I figured I’d just wing it with something simple. That’s when the idea of these Perfect Red, White, and Blue Cheesecake Bars hit me. Honestly, the bars weren’t supposed to be a star of the party, but somehow, the combination of creamy cheesecake, vibrant berries, and a buttery crust stole the show.
You know that feeling when a recipe surprises you? The way the sweet tang of cream cheese melds with the fresh strawberries and blueberries, all nestled on a crumbly base, makes these cheesecake bars irresistible. I still remember the moment my neighbor, who’s usually a tough critic, sneaked back for thirds while chatting about her own picnic mishaps. Maybe you’ve been there—scrambling last minute, but ending up with something unexpectedly unforgettable. That day, these bars became my go-to for any patriotic celebration, and I’m betting they’ll become yours too.
Let me tell you, these cheesecake bars bring more than just festive colors to the table—they bring memories, smiles, and a little bit of magic to any occasion. Whether you’re hosting a backyard barbecue or looking for a no-fuss dessert to share, this recipe is a winner. And yes, they’re as easy as they are delicious, with a few tricks I picked up after that power outage fiasco (trust me, the cheesecake layer’s texture is everything!). So, ready to make a dessert that’s both eye-catching and crowd-pleasing? Let’s get started on these Perfect Red, White, and Blue Cheesecake Bars for your next patriotic celebration.
Why You’ll Love This Recipe
After countless trials and a few happy accidents, I can confidently say these Perfect Red, White, and Blue Cheesecake Bars are a celebration essential. They’re not just about the colors, but the texture and flavor balance that make them stand out from the usual dessert lineup.
- Quick & Easy: Ready in under an hour, these bars are perfect for last-minute holiday plans or unexpected guests.
- Simple Ingredients: No need for specialty stores—most are pantry staples or fresh produce you can find anywhere.
- Perfect for Patriotic Celebrations: From Memorial Day to Labor Day, these bars bring the festive spirit with every bite.
- Crowd-Pleaser: Kids love the bright berry topping, and adults appreciate the creamy cheesecake base.
- Unbelievably Delicious: The buttery crust, silky cheesecake, and juicy berries create a dessert that’s both refreshing and indulgent.
What makes this recipe different? The cheesecake layer is whipped just enough to be smooth but still dense, so it holds up well as bars (no messy slices here). The crust uses finely crushed graham crackers with a touch of cinnamon, adding a subtle warmth that balances the tart berries. I’ve also learned that layering the berries carefully—not just tossing them on top—makes the colors pop beautifully, which is great for presentation and Pinterest-worthy photos!
Honestly, this isn’t just another red, white, and blue dessert—it’s the kind that makes you close your eyes and smile after that first bite. Whether you’re impressing guests or just treating yourself, these cheesecake bars bring comfort and celebration in one perfect package.
What Ingredients You Will Need
This recipe keeps things straightforward, using simple, wholesome ingredients to deliver bold flavor and a satisfying texture without much fuss. Most of these items are pantry or fridge staples, with fresh berries bringing the festive flair.
- For the crust:
- 1 ½ cups graham cracker crumbs (about 10 full sheets) – I like Kraft for a consistent crumb size
- 2 tablespoons granulated sugar
- ½ teaspoon ground cinnamon (optional, adds warmth)
- 6 tablespoons unsalted butter, melted (room temperature)
- For the cheesecake filling:
- 16 oz (450 g) cream cheese, softened (Philadelphia brand works great)
- ⅔ cup granulated sugar
- 2 large eggs, room temperature
- 1 teaspoon pure vanilla extract
- ½ cup sour cream (adds creaminess and slight tang)
- For the topping:
- 1 cup fresh strawberries, hulled and sliced (in summer, swap for fresh if frozen is not available)
- 1 cup fresh blueberries
- 1 tablespoon lemon juice (brightens the berry flavors)
- 2 tablespoons powdered sugar (optional, dust on top for a pretty finish)
Substitution tips: Use almond flour with a touch more butter for a gluten-free crust. Swap sour cream with plain Greek yogurt if you want a lighter option. For dairy-free, try a vegan cream cheese and coconut-based sour cream alternative—though texture will vary slightly.
Equipment Needed
- 9×9-inch (23×23 cm) baking pan – Glass or metal works fine; glass helps monitor browning better.
- Mixing bowls – One large for the filling, one for the crust.
- Electric mixer or stand mixer – For smooth, lump-free cheesecake batter. Hand mixers work but take longer.
- Measuring cups and spoons – Precision matters for baking!
- Rubber spatula – To scrape the bowl clean and fold ingredients gently.
- Cooling rack – To cool bars evenly after baking.
If you don’t have a mixer, whisk vigorously by hand, but expect it to take a few extra minutes to get the batter silky smooth. For budget-friendly pans, I recommend checking local kitchen stores or online marketplaces—just avoid dark non-stick pans for cheesecake, as they can overheat the crust.
Preparation Method

- Preheat your oven to 325°F (163°C). Line the 9×9-inch pan with parchment paper, leaving an overhang to lift the bars out later. This little step saves a lot of mess!
- Prepare the crust: In a medium bowl, combine graham cracker crumbs, sugar, and cinnamon. Pour in melted butter and stir until the mixture looks like wet sand.
- Press the crust mixture evenly into the bottom of the prepared pan. Use the bottom of a glass or measuring cup to firmly pack it down. Bake for 10 minutes to set. Let it cool slightly while you prepare the filling.
- Make the cheesecake filling: In a large mixing bowl, beat the softened cream cheese and sugar together on medium speed until smooth and creamy, about 2-3 minutes. Scrape the sides to avoid lumps.
- Add eggs one at a time, beating well after each addition. Mix in vanilla extract and sour cream until just combined. Don’t overmix—stop as soon as it’s smooth.
- Pour the cheesecake batter over the warm crust, spreading gently with a spatula. Tap the pan lightly on the counter to release any air bubbles.
- Bake for 35-40 minutes, or until the edges are set but the center still jiggles slightly when you shake the pan. Overbaking can crack the cheesecake and dry it out.
- Cool to room temperature on a wire rack. Then refrigerate for at least 3 hours or overnight. This step is key for a firm, sliceable bar.
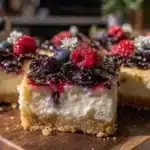
- Prepare the berry topping: Toss sliced strawberries and blueberries with lemon juice in a bowl. Just before serving, spoon the berries evenly over the chilled cheesecake.
- Optional: Dust with powdered sugar for a pretty, festive finish.
Heads up: If your cream cheese isn’t soft enough, you’ll end up with lumps. I learned this the hard way—softening it on the counter for at least an hour or microwaving in short bursts helps. Also, using room temp eggs makes mixing smoother. The visual cue when baking is subtle—the cheesecake should look set but not dry. That jiggle? That’s your green light!
Cooking Tips & Techniques
Here are a few tricks I picked up after several batches, some better than others:
- Softening cream cheese: Always let it warm up at room temperature or microwave for 10-second intervals. This prevents lumps and ensures a creamy texture.
- Don’t overmix: Once eggs go in, mix just until combined. Overbeating introduces air that causes cracks.
- Use parchment paper: It makes removing the bars easy and protects the crust from sticking.
- Chill adequately: Patience here pays off. Without enough refrigeration, the bars won’t slice cleanly and will be messy to serve.
- Berry prep: Toss berries with lemon juice just before serving to keep them fresh and vibrant, avoiding sogginess.
- Multitasking tip: While the crust bakes, prep your cream cheese and berries—this saves time and keeps everything moving smoothly.
One time, I baked these bars without chilling overnight and ended up with a gooey mess. Lesson learned: cheesecake needs its beauty sleep! Also, cracked crust? Try pressing the crust firmly and evenly before baking. It makes a huge difference.
Variations & Adaptations
Want to switch things up? Here are some fun ways to make these cheesecake bars your own:
- Dietary: Use gluten-free graham crackers or almond flour crust. For dairy-free, swap cream cheese and sour cream with plant-based alternatives like cashew cream cheese.
- Seasonal twist: Swap strawberries and blueberries for fresh peaches and raspberries in late summer or pomegranate seeds in winter.
- Flavor boost: Add a tablespoon of lemon zest to the cheesecake filling for a citrusy zing or swirl in some raspberry jam before baking for a fruity surprise.
- Cooking method: Make mini cheesecake bars in a muffin tin for portable party treats. Just reduce baking time to 20-25 minutes.
- Personal favorite: I once added a thin layer of crushed peppermint candies on top for a festive winter holiday version—it was a hit!
Serving & Storage Suggestions
These cheesecake bars are best served chilled, straight from the fridge. The firm texture and fresh berries make for a refreshing bite on a warm day. For presentation, I like to garnish with a few extra whole blueberries and a sprig of fresh mint—simple but elegant.
Pair these bars with a light sparkling lemonade or iced tea to balance the richness. They also complement a savory menu featuring grilled chicken or even crispy garlic chicken if you’re planning a full meal.
Store leftovers in an airtight container in the refrigerator for up to 4 days. They freeze well too—wrap bars individually in plastic wrap and place in a freezer bag for up to 2 months. To reheat, thaw overnight in the fridge and let sit at room temperature for 15 minutes. Flavors actually deepen after sitting a day, so making these a day ahead is a smart move.
Nutritional Information & Benefits
Each serving of these cheesecake bars (about 2-inch square) contains roughly 290 calories, with 18 grams of fat, 25 grams of carbohydrates, and 5 grams of protein. The fresh berries add antioxidants and vitamin C, while cream cheese provides calcium and vitamin A.
This recipe is naturally gluten-containing but easily adaptable to gluten-free. It’s not low-carb, but swapping crust ingredients can help. The use of real fruit and minimal added sugar keeps it balanced, and the portion size lends itself well to mindful indulgence.
From a wellness perspective, I appreciate how this dessert brings joy without complicated ingredients or additives. It’s a reminder that simple, fresh food can nourish both body and soul, especially during celebrations.
Conclusion
These Perfect Red, White, and Blue Cheesecake Bars aren’t just dessert; they’re a festive experience that’s easy to make and hard to forget. Whether you’re a seasoned baker or a kitchen newbie, the straightforward steps and approachable ingredients make this recipe a winner for any patriotic occasion.
Feel free to customize the berries, crust, or even the topping to fit your taste or dietary needs. Personally, I keep coming back to this recipe because it brings a little sparkle to every celebration—plus, it’s pretty much foolproof (even during power outages!).
If you give this recipe a try, I’d love to hear about your variations or how it turned out for your party. Share your stories or questions in the comments below—let’s keep the celebration going!
Here’s to sweet moments and colorful memories with every bite!
Frequently Asked Questions
Can I use frozen berries instead of fresh?
Yes, but thaw and drain them well to avoid excess moisture that can sog the crust. Fresh berries give the best texture and color.
How do I prevent cracks in the cheesecake layer?
Don’t overmix the batter and avoid overbaking. The center should jiggle slightly when done. Also, cool the bars gradually and refrigerate thoroughly before slicing.
Can these cheesecake bars be made ahead of time?
Absolutely! They taste even better after chilling overnight, which helps the flavors meld and the bars set properly.
Is there a way to make these bars vegan?
Swap cream cheese and sour cream with vegan alternatives, and use a dairy-free butter substitute for the crust. Baking time and texture may vary slightly.
What’s the best way to cut the bars cleanly?
Use a sharp knife warmed with hot water and wiped dry before slicing. Cut slowly and wipe the knife between cuts for neat edges.
Pin This Recipe!
Perfect Red White and Blue Cheesecake Bars
These cheesecake bars combine a buttery graham cracker crust, creamy cheesecake filling, and fresh strawberries and blueberries for a festive and crowd-pleasing patriotic dessert.
- Prep Time: 15 minutes
- Cook Time: 45 minutes
- Total Time: 4 hours (including chilling time)
- Yield: 16 bars (about 9x9-inch pan, 2-inch squares) 1x
- Category: Dessert
- Cuisine: American
Ingredients
- 1 ½ cups graham cracker crumbs (about 10 full sheets)
- 2 tablespoons granulated sugar
- ½ teaspoon ground cinnamon (optional)
- 6 tablespoons unsalted butter, melted (room temperature)
- 16 oz (450 g) cream cheese, softened
- ⅔ cup granulated sugar
- 2 large eggs, room temperature
- 1 teaspoon pure vanilla extract
- ½ cup sour cream
- 1 cup fresh strawberries, hulled and sliced
- 1 cup fresh blueberries
- 1 tablespoon lemon juice
- 2 tablespoons powdered sugar (optional)
Instructions
- Preheat your oven to 325°F (163°C). Line a 9×9-inch pan with parchment paper, leaving an overhang to lift the bars out later.
- In a medium bowl, combine graham cracker crumbs, sugar, and cinnamon. Pour in melted butter and stir until the mixture looks like wet sand.
- Press the crust mixture evenly into the bottom of the prepared pan using the bottom of a glass or measuring cup to firmly pack it down. Bake for 10 minutes to set. Let it cool slightly.
- In a large mixing bowl, beat the softened cream cheese and sugar together on medium speed until smooth and creamy, about 2-3 minutes. Scrape the sides to avoid lumps.
- Add eggs one at a time, beating well after each addition. Mix in vanilla extract and sour cream until just combined. Do not overmix.
- Pour the cheesecake batter over the warm crust, spreading gently with a spatula. Tap the pan lightly on the counter to release any air bubbles.
- Bake for 35-40 minutes, or until the edges are set but the center still jiggles slightly when you shake the pan.
- Cool to room temperature on a wire rack. Then refrigerate for at least 3 hours or overnight.
- Toss sliced strawberries and blueberries with lemon juice in a bowl. Just before serving, spoon the berries evenly over the chilled cheesecake.
- Optional: Dust with powdered sugar for a festive finish.
Notes
Softening cream cheese properly is key to avoid lumps. Do not overmix after adding eggs to prevent cracks. Use parchment paper for easy removal. Chill bars thoroughly for firm slices. Toss berries with lemon juice just before serving to keep them fresh. Use a sharp knife warmed with hot water for clean cuts.
Nutrition
- Serving Size: 1 bar (2-inch square
- Calories: 290
- Fat: 18
- Carbohydrates: 25
- Protein: 5
Keywords: cheesecake bars, patriotic dessert, red white and blue dessert, Fourth of July dessert, easy cheesecake bars, berry cheesecake


