Love this? Save it for later!
Share the inspiration with your friends
“You know, it was an ordinary Thursday afternoon when I accidentally stumbled upon the magic of a retro ice cream float bar,” I began telling my friend while we sipped on our fizzy concoctions. It all started at a little corner diner that my coworker raved about, tucked away on a quiet street I barely noticed before. The place wasn’t flashy—just an old-fashioned soda fountain with a jukebox humming softly in the background and shelves lined with glass bottles of syrup in every color imaginable.
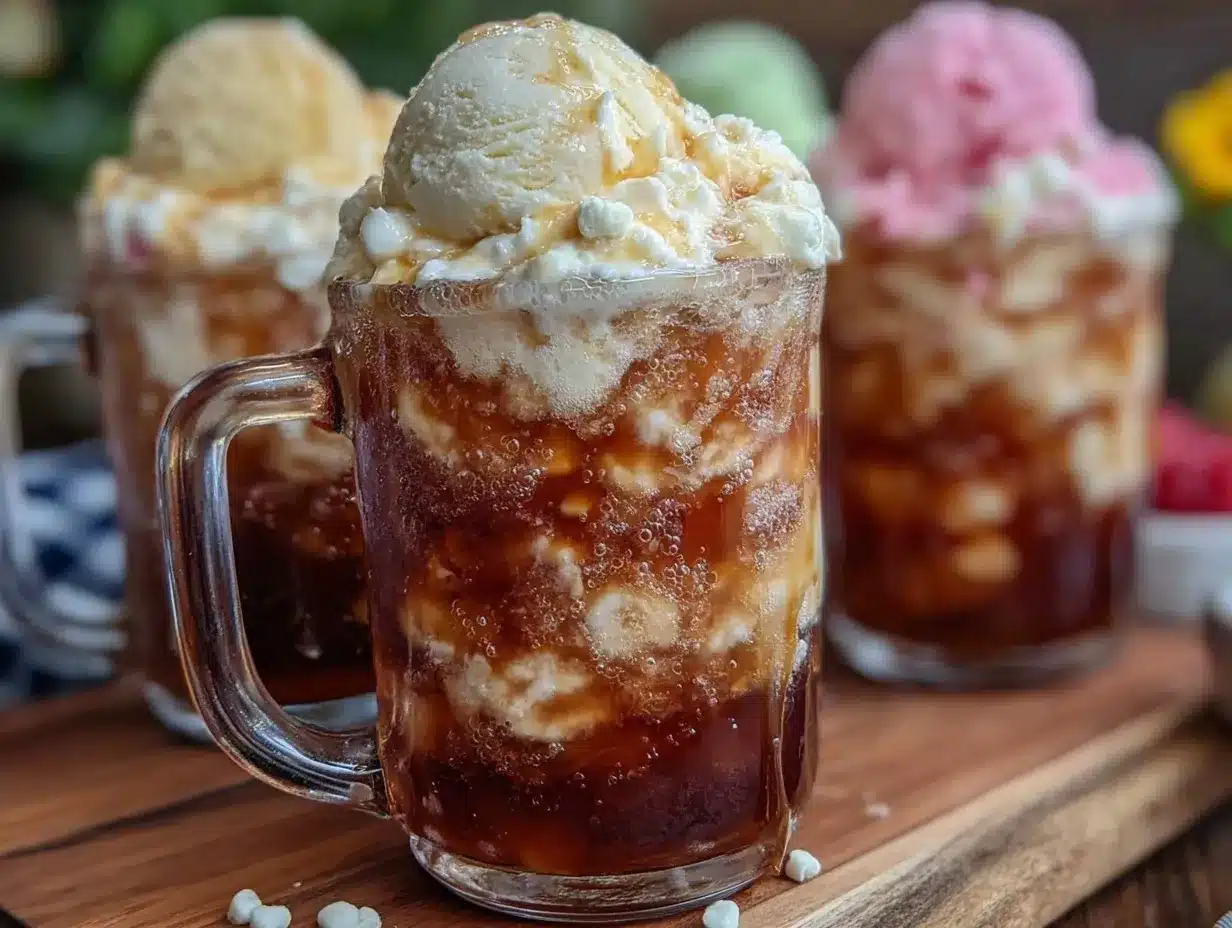
That day, I watched the server expertly craft ice cream floats—layers of creamy vanilla ice cream, bubbly root beer, and a cherry on top, served in tall glasses that sparkled in the afternoon sun. The simplicity and nostalgia hit me like a sweet summer breeze. Honestly, I forgot to take notes at first because I was too busy making a sticky mess attempting my own float right there at the counter. Maybe you’ve been there when excitement meets kitchen chaos?
Since that afternoon, I’ve been obsessed with creating the perfect retro ice cream float bar for summer gatherings. The charm isn’t just in the flavors but in how it brings people together—it’s playful, interactive, and a total crowd-pleaser. Whether you’re hosting a backyard BBQ or a casual get-together, this ice cream float bar idea brings that old-school charm with a modern twist that keeps everyone smiling and sipping.
Let me tell you, it’s not just about nostalgia—it’s about making moments sweeter and cooler when the sun is blazing outside. And yes, I might have spilled some soda on my favorite recipe notebook during my first try, but that’s part of the fun, right? This recipe stays with me because it’s a simple joy that anyone can recreate and customize, and I’m excited to share it with you.
Why You’ll Love This Recipe
After testing countless combinations and gathering feedback from family, friends, and even a few skeptical teenagers, I can confidently say this ice cream float bar is a summer winner. Here’s why you’ll want to make it your go-to for gatherings:
- Quick & Easy: Set up takes less than 20 minutes, perfect for last-minute plans or when you’re juggling a million things.
- Simple Ingredients: All the components are easy to find at your local grocery store—no fancy or exotic items needed.
- Perfect for Summer Parties: Whether it’s a casual pool day or an evening porch hangout, the float bar adds a fun, nostalgic vibe.
- Crowd-Pleaser: Kids, teens, and adults alike love mixing their own flavors and toppings, making it interactive and exciting.
- Unbelievably Delicious: The creamy ice cream melting into fizzy soda creates a texture and flavor combo that’s pure comfort and refreshment.
What makes this ice cream float bar stand out? It’s the variety and customization. I recommend blending classic vanilla bean ice cream with a mix of nostalgic soda flavors like cola, root beer, and even a cherry soda option. Adding creative toppings like rainbow sprinkles or crushed candy can turn an ordinary float into a festive treat. This isn’t just another dessert; it’s an experience that sparks conversations and laughter.
Honestly, this recipe isn’t just about food—it’s a little party starter in a glass. It’s the kind of recipe that makes you close your eyes after the first sip and smile because it brings back memories and creates new ones all at once.
What Ingredients You Will Need
This recipe uses simple, wholesome ingredients to deliver bold flavor and satisfying texture without the fuss. Most are pantry staples or easy to grab at any supermarket, which means you can throw this together anytime the craving hits.
- Ice Cream: Classic vanilla bean ice cream is the star here (I prefer Ben & Jerry’s for its creamy texture, but any quality brand works).
- Soda Varieties:
- Root Beer (try Barq’s for authentic flavor)
- Cola (a good classic like Coca-Cola or Pepsi)
- Cherry Soda (optional, for a fruity twist)
- Lemon-Lime Soda (for a lighter, citrusy option)
- Toppings:
- Maraschino cherries (adds that iconic retro look)
- Rainbow sprinkles (for a pop of color)
- Crushed nuts (like peanuts or almonds for texture)
- Whipped cream (store-bought or homemade, your choice)
- Mini chocolate chips or shaved chocolate (because why not?)
- Optional Extras:
- Waffle cones or cookie straws (fun for dipping or decoration)
- Fresh mint leaves (for a subtle refreshing note)
- Flavored syrups (vanilla, caramel, or even coffee syrup for grown-up floats)
Feel free to swap vanilla ice cream with dairy-free coconut or almond milk-based ice cream to keep things allergy-friendly. For a seasonal touch, summer berries can be stirred in or served alongside for extra freshness. This flexibility makes the recipe great year-round.
Equipment Needed
- Tall clear glasses or mason jars – these show off the colorful layers and bubbles beautifully
- Ice cream scoop – a sturdy one makes portioning easy and neat
- Long spoons or straw stirrers – ideal for mixing and sipping
- Small bowls or ramekins – to arrange toppings and syrups for easy access
- Serving tray or table space – to create the “float bar” station
If you don’t have tall glasses, clear tumblers work fine too. For scooping, I often use an old-fashioned metal scoop because it doesn’t get sticky like plastic ones. And trust me, setting up a simple bar on a kitchen cart or folding table makes cleanup a breeze. No fancy equipment needed, which is honestly the best part.
Preparation Method
- Chill the Glasses: Place your glasses or jars in the fridge or freezer for about 10 minutes before serving. This keeps your ice cream float colder, longer. (If you skip this, the soda might get warm too fast.)
- Scoop the Ice Cream: Using your ice cream scoop, place 2-3 generous scoops (about 1 cup or 240 ml) of vanilla ice cream into each chilled glass. This forms the creamy base of your float.
- Add the Soda: Slowly pour 1 cup (240 ml) of your chosen soda over the ice cream. Pour gently down the side of the glass to minimize foam overflow. You’ll get that delightful fizz and frothiness that makes floats so fun.
- Top It Off: Add a dollop of whipped cream, then sprinkle your choice of toppings—maraschino cherries, rainbow sprinkles, crushed nuts, or mini chocolate chips. This final touch adds texture and color.
- Serve Immediately: Insert a long spoon or straw, and serve right away. The mix of cold ice cream melting into bubbly soda is best enjoyed fresh before it becomes too liquidy.
Quick tip: If the soda foams over, just grab a napkin and keep going—these little kitchen “oops” moments are part of the charm. Also, don’t hesitate to try layering different sodas and ice cream flavors in one glass for an unexpected taste surprise. I once tried cola with chocolate ice cream, and it was a total hit at a friend’s potluck.
Cooking Tips & Techniques
Making an ice cream float bar sounds simple, but a few insider tips make all the difference:
- Slow Soda Pour: Pour soda slowly over the ice cream’s edge to reduce foam overflow. I learned this the hard way when my first float turned into a sticky mess!
- Ice Cream Choice Matters: Use high-quality ice cream with a creamy texture rather than overly icy varieties. It melts better and blends beautifully with soda.
- Keep Everything Cold: Chill your glasses and soda beforehand. It keeps floats refreshing longer, especially on hot summer days.
- Set Up a Toppings Station: Arrange toppings in small bowls so guests can customize their floats easily. It’s fun and reduces mess.
- Timing: Prepare your float bar just before guests arrive to avoid melted ice cream and flat soda. You can prep toppings and chill glasses earlier to save time.
Pro tip: When I hosted my last summer BBQ, I noticed folks loved combining unexpected flavors like lemon-lime soda with a scoop of raspberry sorbet instead of vanilla. Don’t be afraid to experiment!
Variations & Adaptations
This retro ice cream float bar can be tweaked to suit all kinds of tastes and dietary needs:
- Dairy-Free Version: Use coconut or almond milk-based ice cream and pair with natural sodas or sparkling water flavored with fruit syrups.
- Adult Twist: Add a splash of coffee liqueur or amaretto to your soda for a spirited version perfect for evening gatherings.
- Seasonal Flavors: Swap vanilla ice cream for pumpkin spice in fall or fresh berry sorbet in summer for a fruity twist.
- Low-Sugar Option: Use diet or naturally sweetened sodas and sugar-free ice cream to keep it lighter but still tasty.
- Personal Favorite Variation: I once created a ‘chocolate cherry float’ using chocolate ice cream, cherry soda, and a sprinkle of mini chocolate chips. It was a total crowd-pleaser at a kid’s birthday party!
Serving & Storage Suggestions
Serve your ice cream floats immediately after assembling to enjoy the perfect bubbly creaminess. Presenting in tall clear glasses makes the layers and toppings pop visually, adding to the retro vibe.
Complement your float bar with simple snacks like popcorn, pretzels, or classic diner-style sliders to keep the party casual and fun. For beverages, iced coffee or lemonade pair well for guests not in the mood for soda.
If you have leftover ice cream or soda, store them separately in airtight containers in the refrigerator or freezer. Avoid pre-mixing floats as they lose their fizz and texture quickly. To reheat or refresh a float, add fresh soda and a scoop of ice cream just before serving.
Flavors tend to deepen slightly if toppings like nuts or syrups are added in advance, so prepare the float bar just before guests arrive for the best experience.
Nutritional Information & Benefits
Estimated per serving (1 float): approximately 250-300 calories, depending on soda and ice cream choices. This treat provides a sweet boost of energy and calcium from the ice cream.
Using real vanilla bean ice cream adds antioxidants, and opting for natural sodas reduces artificial additives. Dairy-free options can accommodate lactose intolerance, and low-sugar substitutes help with calorie control.
While this recipe is an indulgence, it’s perfect for summer celebrations when you want to enjoy something fun without fuss. I always remind myself it’s the joy and connection around the float bar that counts most.
Conclusion
To sum it up, the perfect retro ice cream float bar for summer gatherings is an easy, fun, and flexible way to bring people together over a timeless treat. Whether you stick with classic root beer and vanilla or mix in your own creative spins, it’s a recipe that invites smiles and conversation.
Personally, I love how this float bar turns any ordinary day into a mini celebration. It’s a simple pleasure that reminds me to slow down, make a little mess, and savor the small moments. I hope you’ll try it at your next get-together and maybe even add your own twists.
If you give this recipe a shot, I’d love to hear how it went! Share your favorite soda combinations or topping ideas in the comments. Here’s to sunny days, fizzy drinks, and sweet memories made one float at a time.
FAQs About the Perfect Retro Ice Cream Float Bar
Can I prepare the ice cream floats ahead of time?
It’s best to assemble the floats right before serving to keep the soda fizzy and ice cream from melting. You can prep toppings and chill glasses earlier.
What’s the best ice cream for floats?
Choose a creamy, high-quality vanilla bean ice cream for the classic taste. Dairy-free or sorbet options work well too if you want alternatives.
Can I use diet soda or sparkling water instead of regular soda?
Absolutely! Diet sodas or flavored sparkling waters are great for a lighter version and still provide the bubbly fun.
How do I keep the float bar area from getting sticky?
Set up a napkin station nearby and use a tray or washable tablecloth to catch drips. Pour sodas slowly to minimize spills.
What are some fun topping ideas besides sprinkles and cherries?
Try crushed nuts, mini chocolate chips, whipped cream, fresh berries, or even crushed candy bars for extra texture and flavor.
Pin This Recipe!
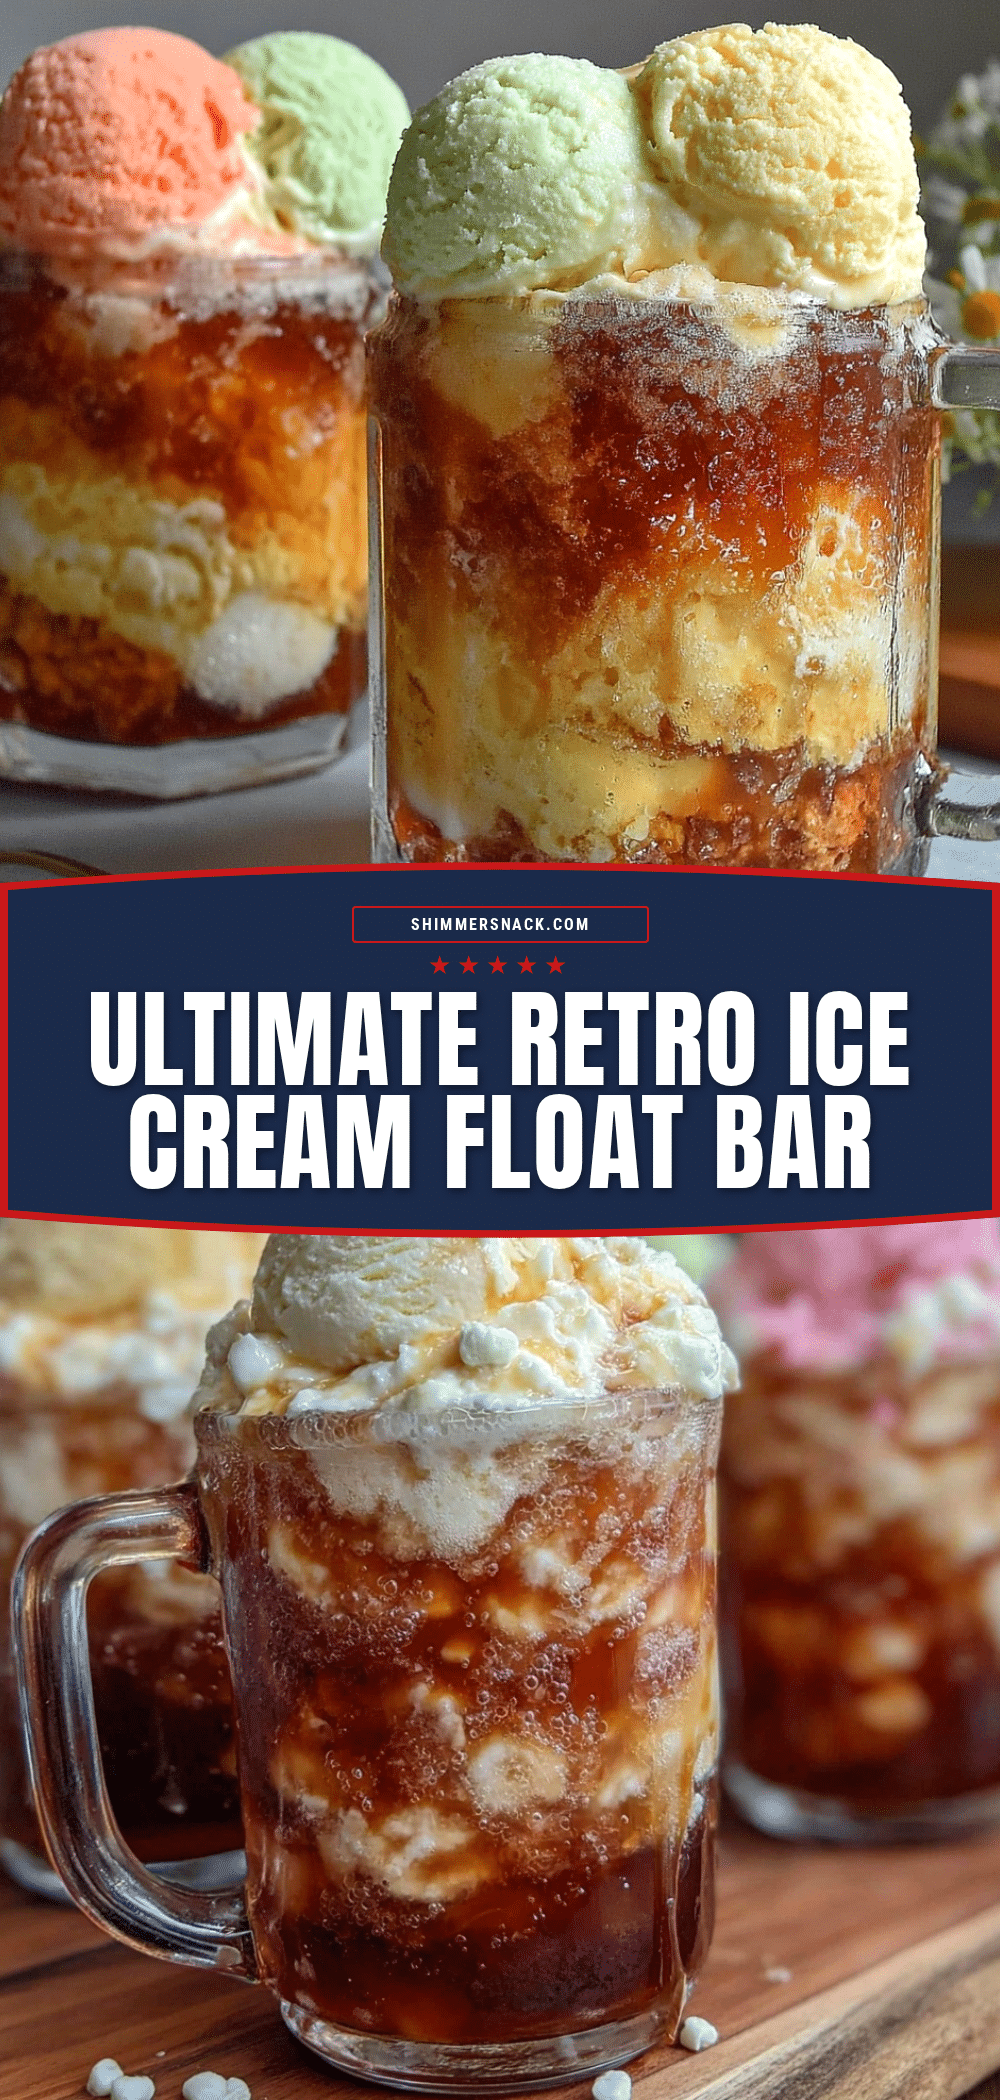
Perfect Retro Ice Cream Float Bar Ideas for Easy Summer Gatherings
Create a nostalgic and fun ice cream float bar perfect for summer parties, featuring classic vanilla ice cream, a variety of sodas, and customizable toppings for a crowd-pleasing treat.
- Prep Time: 10 minutes
- Cook Time: 0 minutes
- Total Time: 10 minutes
- Yield: 1 float per serving
- Category: Dessert
- Cuisine: American
Ingredients
- Vanilla bean ice cream (about 2-3 scoops or 1 cup per float)
- Root Beer (e.g., Barq’s)
- Cola (e.g., Coca-Cola or Pepsi)
- Cherry soda (optional)
- Lemon-lime soda
- Maraschino cherries
- Rainbow sprinkles
- Crushed nuts (peanuts or almonds)
- Whipped cream (store-bought or homemade)
- Mini chocolate chips or shaved chocolate
- Optional extras: waffle cones or cookie straws, fresh mint leaves, flavored syrups (vanilla, caramel, coffee syrup)
Instructions
- Chill the glasses or jars in the fridge or freezer for about 10 minutes before serving.
- Using an ice cream scoop, place 2-3 generous scoops (about 1 cup or 240 ml) of vanilla ice cream into each chilled glass.
- Slowly pour 1 cup (240 ml) of your chosen soda over the ice cream, pouring gently down the side of the glass to minimize foam overflow.
- Add a dollop of whipped cream, then sprinkle your choice of toppings such as maraschino cherries, rainbow sprinkles, crushed nuts, or mini chocolate chips.
- Insert a long spoon or straw and serve immediately to enjoy the best bubbly creaminess.
Notes
Pour soda slowly over the ice cream to reduce foam overflow. Chill glasses and soda beforehand to keep floats refreshing longer. Set up a toppings station for easy customization. Prepare floats just before serving to maintain fizz and texture. Dairy-free ice cream and natural sodas can be used for allergy-friendly or lighter versions.
Nutrition
- Serving Size: 1 ice cream float (a
- Calories: 250300
- Sugar: 2535
- Sodium: 100150
- Fat: 1015
- Saturated Fat: 69
- Carbohydrates: 3040
- Fiber: 1
- Protein: 35
Keywords: ice cream float, retro float bar, summer dessert, root beer float, vanilla ice cream, soda float, party dessert, nostalgic treats