Love this? Save it for later!
Share the inspiration with your friends
“You can’t just make one banana’s worth of bread.” That’s what my neighbor said when I told her I was testing a recipe for a single loaf. And honestly, she had a point. But here’s the thing—I live alone, and the last time I made a full-sized banana bread, I was eating it for breakfast, lunch, and what I called “afternoon snack” for a solid week. By day four, even the dog started giving me side-eye when I pulled out the loaf pan.
So I got stubborn about it. I wanted a loaf that was small enough to finish before it went stale, but big enough to feel like a real treat. Not a muffin, not a mini loaf that bakes up dry in twenty minutes—a real, honest-to-goodness loaf of banana bread, just scaled down. The kind with a crackly top, a tender crumb, and that deep, caramelized banana flavor that makes you close your eyes on the first bite.
This Perfect Small-Batch Banana Bread took more tries than I’d like to admit. Some batches came out too dense. A few were so moist they basically qualified as pudding. But this version? It’s the one. It’s exactly what I wanted—a single, perfect loaf that uses up those spotty bananas without committing you to a week of banana bread. It’s simple, it’s satisfying, and it might just change how you think about baking for one.
Why You’ll Love This Recipe
I’ve tested this recipe more times than I care to count, and every single time, I’ve learned something new about getting that perfect texture. This isn’t just another banana bread recipe scaled down—it’s been rebuilt from the ground up for a smaller pan.
- Perfectly Sized: Uses just one or two bananas and fits a standard 8×4-inch loaf pan. No more half-eaten loaves sitting on your counter.
- Incredibly Moist: The combination of melted butter and a touch of yogurt keeps this bread tender for days—if it lasts that long.
- Simple Ingredients: You probably have everything in your pantry right now. No weird extracts or specialty flours required.
- Quick to Make: From start to oven in about 15 minutes. No stand mixer needed, no complicated techniques.
- Freezes Beautifully: Wrap it up and stash it in the freezer for those sudden banana bread cravings.
- Foolproof: I’ve made this with overripe bananas, barely ripe bananas, and everything in between. It works.
What makes this recipe different from the dozens of banana breads I’ve made over the years is the technique. Instead of creaming butter and sugar, we melt the butter and let it cool slightly. This creates a denser, more fudgy texture that’s absolutely perfect for a smaller loaf. It’s the same approach I use in my Ultra-Moist Brown Butter Banana Bread, just scaled down and simplified.
This is the kind of recipe that makes you feel like you’ve got your life together, even on a Tuesday night when you’re just trying to use up bananas before they attract fruit flies. It’s comfort food, pure and simple—no stress, no fuss, just a warm slice of something good.
What Ingredients You Will Need
This recipe uses simple, everyday ingredients to create something special. The magic is in how they come together, not in fancy additions. Here’s what you’ll need:
- 1 ½ cups all-purpose flour (190g) — Spoon and level it, don’t scoop. Too much flour makes dry bread.
- ½ cup granulated sugar (100g) — Regular white sugar works perfectly. You could swap in brown sugar for a deeper flavor.
- 1 teaspoon baking soda — Make sure it’s fresh. Test it by dropping a bit in vinegar—it should fizz.
- ½ teaspoon salt — Fine sea salt or table salt. Don’t skip it—it balances the sweetness.
- 1 large egg — Room temperature if you remember, but cold works too. I’ve done both.
- ⅓ cup melted unsalted butter (75g) — Let it cool for a minute after melting so it doesn’t cook the egg.
- 2 tablespoons plain yogurt or sour cream — This is the secret to a tender crumb. Greek yogurt works great too.
- 1 teaspoon vanilla extract — Pure vanilla if you have it, but imitation works fine in a pinch.
- 1 cup mashed ripe bananas (about 2 medium or 1 very large) — The spottier, the better. Seriously, the blacker the better.
- ½ cup mix-ins of choice (optional) — Chopped walnuts, chocolate chips, or both. I’m partial to dark chocolate chips myself.
A quick note on bananas: I’ve made this with bananas that were practically liquid inside, and it worked beautifully. If your bananas aren’t quite ripe enough, you can speed things up by roasting them in a 300°F oven for 15-20 minutes until the skins turn black. Let them cool, then proceed with the recipe. For a similar approach using seasonal produce, check out my Best Fudgy Double Chocolate Zucchini Muffins—it uses the same principle of adding moisture through fruit and vegetables.
As for brands, I typically use King Arthur Flour for consistent results, and Land O’Lakes butter, but honestly, any brand works. The yogurt can be any plain variety—I’ve used Fage, Chobani, and store-brand with equal success. The key is just having that little bit of acidity to react with the baking soda.
Equipment Needed
You don’t need much for this recipe, which is part of its charm. Here’s what you’ll want to have on hand:
- 8×4-inch loaf pan — This is the perfect size for this recipe. A 9×5-inch pan will work, but your loaf will be shorter and bake faster.
- Mixing bowls — One large, one medium. Nothing fancy needed.
- Whisk — For combining dry ingredients smoothly.
- Rubber spatula — For folding everything together without overmixing.
- Measuring cups and spoons — Or a kitchen scale if you want to be precise. I use both.
- Parchment paper — Makes lifting the loaf out so much easier. I leave an overhang on the long sides.
- Cooling rack — Essential for even cooling. A wire rack lets air circulate so the bottom doesn’t get soggy.
If you don’t have an 8×4-inch pan, you can bake this in a 9×5-inch pan, but start checking for doneness at 35 minutes instead of 45. I’ve also made these as muffins—they bake in about 18-20 minutes at the same temperature. The texture is slightly different, but still delicious.
I picked up my favorite loaf pan at a thrift store for three dollars, and it’s my most-used baking pan. You really don’t need expensive equipment to make great banana bread.
Preparation Method
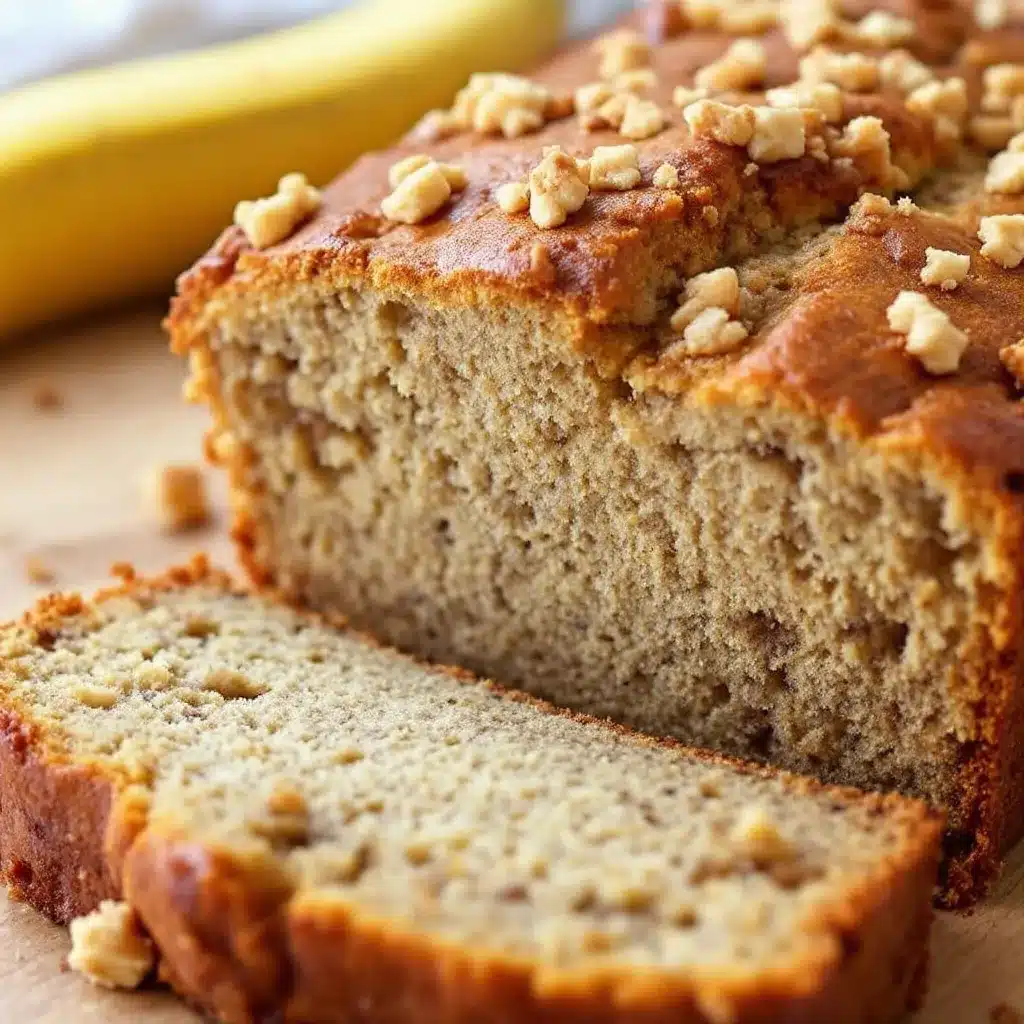
Let me walk you through this step by step. I’ve included all the little details I wish someone had told me when I started baking.
- Preheat your oven to 350°F (175°C). Position the rack in the center of the oven. Grease your 8×4-inch loaf pan with butter or cooking spray, then line it with parchment paper, leaving an overhang on the two long sides. This makes lifting the finished loaf out a breeze.
- Mash your bananas. In a medium bowl, mash those spotty bananas with a fork until mostly smooth. A few small lumps are fine—they add texture. You want exactly 1 cup of mashed banana. If you have a little extra, great. If you’re short, add a splash of milk to make up the difference.
- Melt your butter. In a small saucepan or microwave-safe bowl, melt ⅓ cup of butter. Let it cool for a couple of minutes while you measure out the rest of your ingredients. You don’t want it hot enough to cook the egg, but warm is fine.
- Whisk the dry ingredients. In a large bowl, whisk together the flour, baking soda, and salt. Make sure the baking soda is evenly distributed—nobody wants a pocket of baking soda in their slice.
- Mix the wet ingredients. In the bowl with your mashed bananas, add the melted butter, sugar, egg, yogurt, and vanilla extract. Whisk until everything is smooth and well combined. The mixture should look glossy and smell amazing.
- Combine wet and dry. Pour the wet ingredients into the dry ingredients. Use your rubber spatula to fold everything together gently. Here’s the most important part: stop mixing as soon as you no longer see streaks of flour. A few lumps are totally fine. Overmixing develops gluten and makes your bread tough.
- Fold in your mix-ins. If you’re using chocolate chips, walnuts, or anything else, gently fold them in at the very end. I use about ½ cup total. Don’t overmix here either—just a few folds until they’re distributed.
- Pour into the pan. Scrape the batter into your prepared loaf pan and spread it into an even layer. The batter will be thick—that’s normal. Smooth the top gently with your spatula.
- Bake for 45-55 minutes. Place the pan in the preheated oven and bake until a toothpick inserted in the center comes out clean or with just a few moist crumbs. The top should be golden brown and cracked. If the top is browning too quickly (around 35-40 minutes), tent the pan loosely with aluminum foil.
- Cool in the pan. Let the loaf cool in the pan on a wire rack for 15 minutes. Then use the parchment paper overhang to lift it out and transfer it to the rack to cool completely. I know it’s tempting, but slicing it while it’s warm will make it crumble. Patience, friend.
A few sensory cues to watch for: The batter should be thick but scoopable, like a very thick muffin batter. When it’s done, the loaf will pull away slightly from the edges of the pan, and the crack down the center should look dry and set. The kitchen will smell like heaven—that’s how you know it’s working.
Cooking Tips & Techniques
After making this recipe more times than I can count, I’ve picked up a few tricks that make a real difference. Here’s what I’ve learned:
The banana ripeness rule. I cannot stress this enough—your bananas need to be spotty. Like, embarrassingly spotty. The kind of bananas you’d be embarrassed to put in your grocery cart. Those are perfect. The starches have converted to sugar, which means more flavor and natural sweetness. If your bananas aren’t ripe enough, your bread will be bland and dense.
Don’t overmix. This is the number one mistake I see in banana bread recipes. Mix until the flour just disappears. A few streaks of flour are fine. Overmixing develops gluten, and gluten makes bread tough. We want tender, not tough.
Check your oven temperature. Ovens run hot or cold. I learned this the hard way when my first few loaves came out burnt on the outside and raw in the middle. An oven thermometer costs about ten dollars and will save you a lot of disappointment.
The toothpick test. Insert a toothpick into the center of the loaf. If it comes out clean, it’s done. If it comes out with wet batter, give it another 5 minutes. If it comes out with moist crumbs, it’s perfect—take it out immediately.
Let it cool completely. I know, I know. The smell is intoxicating. But slicing into warm banana bread is a recipe for crumbs and sadness. The structure needs time to set. Give it at least an hour on the cooling rack. Trust me on this.
One of my biggest failures? I once forgot the baking soda entirely. The loaf came out flat, dense, and about an inch tall. It was still edible, but it was sad. So double-check your ingredients before you start mixing. It’s a small step that saves a lot of heartache.
Variations & Adaptations
This recipe is wonderfully adaptable. Here are some of my favorite variations:
- Chocolate Chip Banana Bread: Fold in ½ cup of semi-sweet or dark chocolate chips. I like to reserve a handful to press into the top of the batter before baking—it makes for a pretty presentation.
- Nutty Banana Bread: Toast ½ cup of chopped walnuts or pecans in a dry skillet for 3-4 minutes until fragrant, then fold them into the batter. Toasting brings out their flavor and keeps them crunchy.
- Gluten-Free Version: Substitute the all-purpose flour with a 1:1 gluten-free baking flour blend. I’ve used Bob’s Red Mill and King Arthur with good results. The texture will be slightly more delicate, so handle the loaf gently.
- Vegan Adaptation: Replace the egg with a flax egg (1 tablespoon ground flaxseed mixed with 3 tablespoons water, let sit for 5 minutes) and use a plant-based yogurt. Coconut yogurt works beautifully. The texture will be a bit denser but still delicious.
- Spiced Banana Bread: Add 1 teaspoon of cinnamon, ½ teaspoon of nutmeg, and ¼ teaspoon of ground ginger to the dry ingredients. It gives the bread a warm, cozy flavor that’s perfect for fall mornings.
I once made a version with shredded coconut and macadamia nuts that was absolutely divine. It felt like a tropical vacation in loaf form. Don’t be afraid to experiment—banana bread is forgiving that way.
Serving & Storage Suggestions
This banana bread is wonderful on its own, but here are a few ways to make it even more special:
Serving: Slice it thick and serve at room temperature. For an extra treat, toast a slice and spread it with salted butter. The warmth brings out the banana flavor and makes the edges slightly crisp. It’s also incredible with a dollop of Greek yogurt and a drizzle of honey for breakfast.
Storage: Store the loaf wrapped tightly in plastic wrap or in an airtight container at room temperature for up to 3 days. I find it actually gets better on day two—the flavors meld and the texture becomes even more moist.
Freezing: This bread freezes beautifully. Wrap the cooled loaf tightly in plastic wrap, then in aluminum foil, and freeze for up to 3 months. To thaw, leave it at room temperature for a few hours, or unwrap and microwave individual slices for 20-30 seconds.
Reheating: For that fresh-baked taste, reheat slices in a 300°F oven for 5-7 minutes, or pop them in the toaster. Just watch closely so they don’t burn.
I’ve also been known to crumble leftover slices over vanilla ice cream for an impromptu banana bread sundae. Don’t judge until you try it.
Nutritional Information & Benefits
Here’s the approximate nutritional breakdown for one slice (assuming 8 slices per loaf):
- Calories: 220
- Total Fat: 9g
- Saturated Fat: 5g
- Carbohydrates: 32g
- Fiber: 1g
- Sugar: 16g
- Protein: 4g
Bananas are a great source of potassium, vitamin B6, and vitamin C. They also contain resistant starch, which is good for gut health. The yogurt adds a bit of calcium and protein, and if you use whole wheat pastry flour instead of all-purpose, you’ll get a little extra fiber.
This recipe is vegetarian and can easily be made gluten-free or vegan with the substitutions mentioned above. It does contain dairy and gluten in its standard form, so keep that in mind for any dietary restrictions.
I’m not a nutritionist, but I believe in balance. A slice of banana bread with your morning coffee is a perfectly reasonable way to start the day. It’s comfort food, not health food—and that’s okay.
Conclusion
This Perfect Small-Batch Banana Bread has become my go-to for those days when I need something warm and comforting but don’t want to commit to a full-sized loaf. It’s the recipe I turn to when I’m feeling a little lonely, when I want to impress a neighbor, or when I just need to use up those bananas that have been sitting on the counter a little too long.
What I love most about this recipe is how forgiving it is. You can swap ingredients, adjust the sweetness, throw in whatever mix-ins you have on hand, and it still comes out delicious. It’s not fancy—it’s just good. And sometimes, that’s exactly what you need.
I’d love to hear how yours turns out. Did you add chocolate chips? Walnuts? Did you try the gluten-free version? Drop a comment below and let me know. And if you make this for someone you love, send them a slice—it’s the best kind of gift.
Happy baking, friends.
Frequently Asked Questions
Can I use frozen bananas for this recipe?
Absolutely! Thaw them completely, then drain off any excess liquid before mashing. Frozen bananas are actually more flavorful because the freezing process breaks down the cell walls and concentrates the sugar.
Why did my banana bread sink in the middle?
This usually happens when the bread is underbaked or when you open the oven door too early. Resist the urge to peek until at least 35 minutes have passed. A sudden temperature drop can cause the center to collapse.
Can I make this recipe without eggs?
Yes! Use a flax egg (1 tablespoon ground flaxseed mixed with 3 tablespoons water, let sit for 5 minutes) or a commercial egg replacer. The texture will be slightly denser, but still delicious.
How do I know when my banana bread is done?
Insert a toothpick into the center. If it comes out clean or with just a few moist crumbs, it’s done. If it comes out with wet batter, give it another 5-10 minutes. The top should also be golden brown and cracked.
Can I double this recipe?
Absolutely! Double all the ingredients and bake in a 9×5-inch loaf pan for 55-65 minutes, or in two 8×4-inch pans for 45-55 minutes. Just make sure not to overmix the doubled batch.
Pin This Recipe!
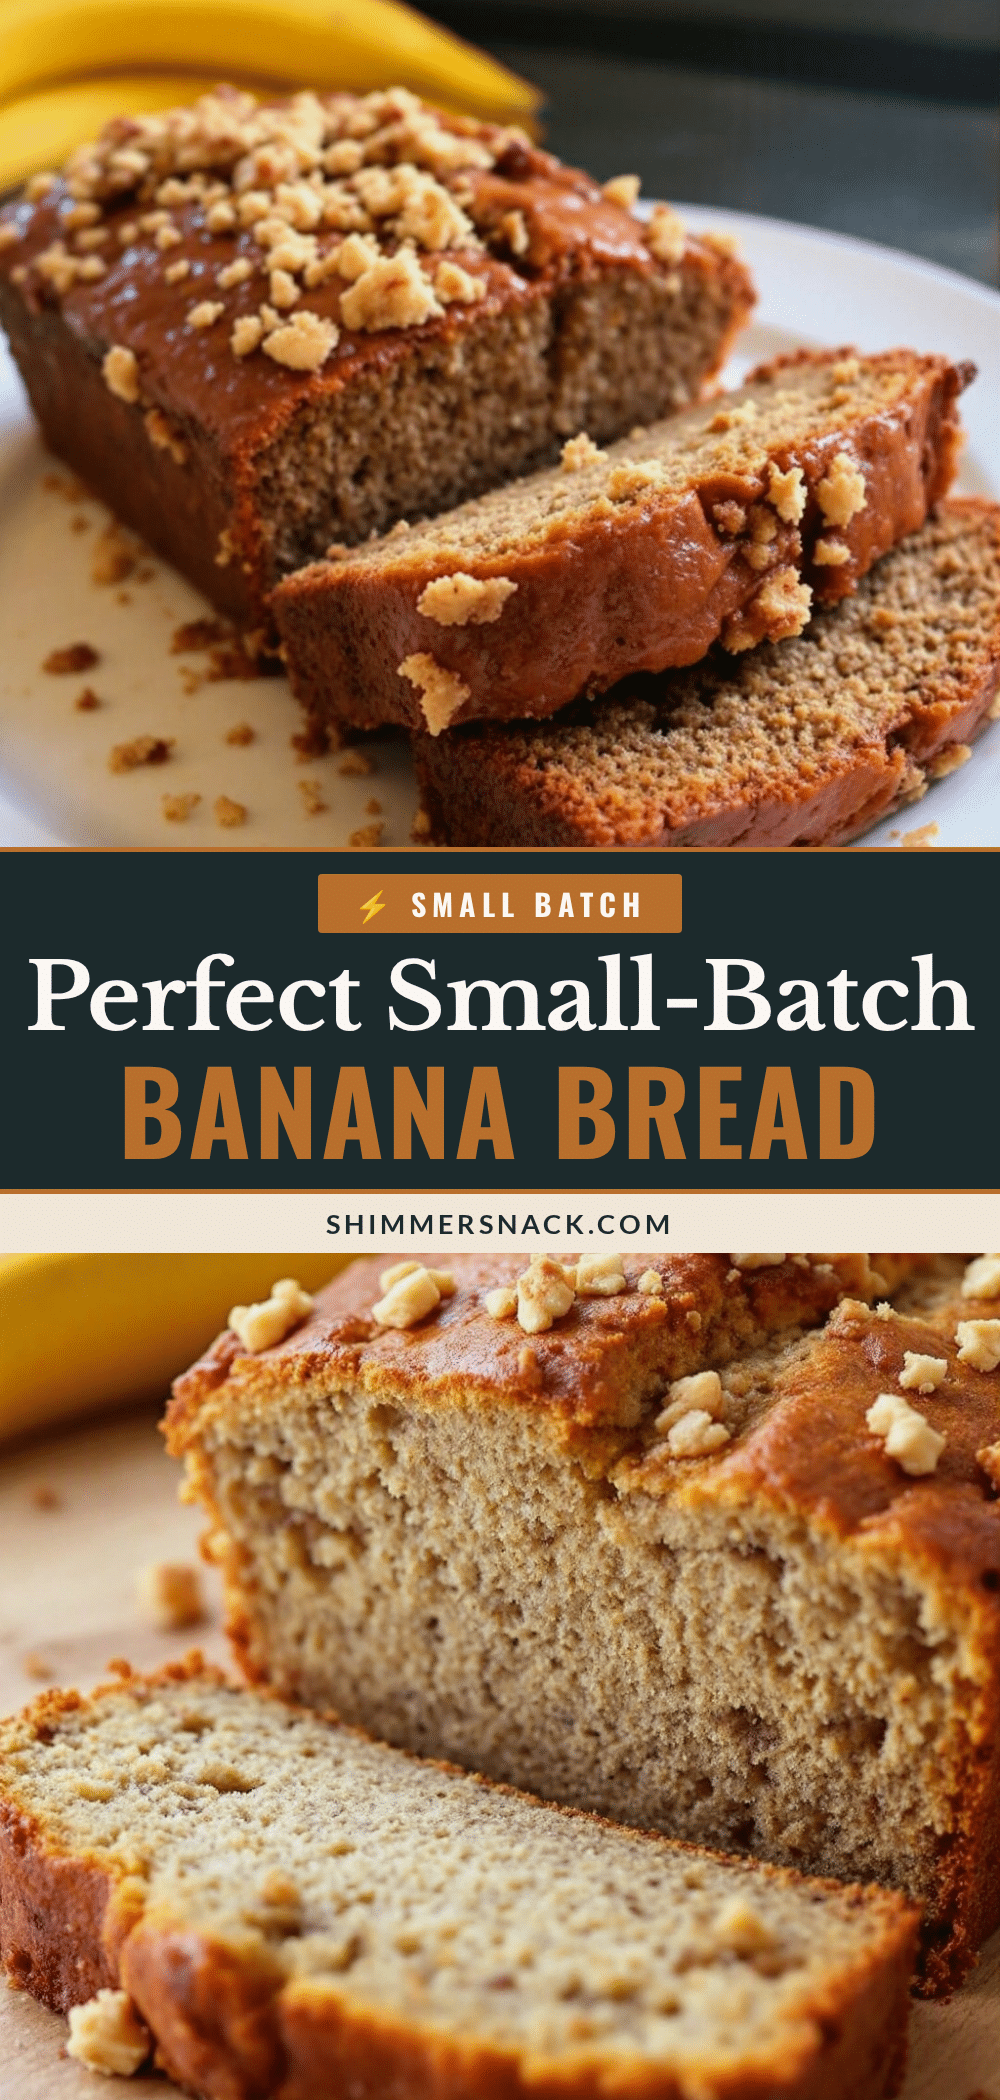
Perfect Small-Batch Banana Bread: Easy & Moist Recipe
A perfectly sized banana bread that uses just one or two bananas and fits a standard 8×4-inch loaf pan. It’s incredibly moist, simple to make, and freezes beautifully.
- Prep Time: 15 minutes
- Cook Time: 45-55 minutes
- Total Time: 1 hour 10 minutes
- Yield: 8 servings 1x
- Category: Dessert
- Cuisine: American
Ingredients
- 1 ½ cups all-purpose flour (190g)
- ½ cup granulated sugar (100g)
- 1 teaspoon baking soda
- ½ teaspoon salt
- 1 large egg
- ⅓ cup melted unsalted butter (75g)
- 2 tablespoons plain yogurt or sour cream
- 1 teaspoon vanilla extract
- 1 cup mashed ripe bananas (about 2 medium or 1 very large)
- ½ cup mix-ins of choice (optional, e.g., chopped walnuts, chocolate chips)
Instructions
- Preheat your oven to 350°F (175°C). Position the rack in the center of the oven. Grease your 8×4-inch loaf pan with butter or cooking spray, then line it with parchment paper, leaving an overhang on the two long sides.
- Mash your bananas in a medium bowl with a fork until mostly smooth. You want exactly 1 cup of mashed banana.
- Melt ⅓ cup of butter in a small saucepan or microwave-safe bowl. Let it cool for a couple of minutes.
- In a large bowl, whisk together the flour, baking soda, and salt.
- In the bowl with your mashed bananas, add the melted butter, sugar, egg, yogurt, and vanilla extract. Whisk until smooth and well combined.
- Pour the wet ingredients into the dry ingredients. Use a rubber spatula to fold together gently until no streaks of flour remain. Do not overmix.
- If using mix-ins, gently fold them in at the very end.
- Pour the batter into the prepared loaf pan and spread into an even layer.
- Bake for 45-55 minutes, until a toothpick inserted in the center comes out clean or with a few moist crumbs. If the top browns too quickly, tent loosely with aluminum foil.
- Let the loaf cool in the pan on a wire rack for 15 minutes. Then use the parchment paper overhang to lift it out and transfer to the rack to cool completely.
Notes
For best results, use very ripe (spotty) bananas. Do not overmix the batter. Let the loaf cool completely before slicing to prevent crumbling. The bread can be stored at room temperature for up to 3 days or frozen for up to 3 months.
Nutrition
- Serving Size: 1 slice
- Calories: 220
- Sugar: 16
- Sodium: 250
- Fat: 9
- Saturated Fat: 5
- Carbohydrates: 32
- Fiber: 1
- Protein: 4
Keywords: small-batch banana bread, easy banana bread, moist banana bread, single loaf banana bread, banana bread for one


