Love this? Save it for later!
Share the inspiration with your friends
The fog machine had been sputtering for ten minutes, and I was elbow-deep in a cooler of ice, trying to figure out how to make a drink look like something a coven would serve at midnight. It was the week before Halloween, and my living room looked like a prop shop had exploded—fake cobwebs everywhere, a skeleton propped against the bookshelf, and a cauldron I’d bought on a whim sitting empty on the table. That cauldron was the problem. Every Halloween punch I’d ever made was either too sweet, too complicated, or just looked like regular juice with some floating eyeballs. I wanted something that felt like magic. Something that actually smoked.
So I did what any reasonable person does when faced with a party dilemma: I called my sister, who is the kind of person who throws themed parties just because it’s Tuesday. “You need dry ice,” she said, like it was the most obvious thing in the world. “And it needs to be green. That’s the whole trick.” I hung up, ordered a block of dry ice from the grocery store, and started experimenting. Three batches later—one that was too watery, one that was too neon, and one that tasted like a melted popsicle—I landed on this Spooky Witches’ Brew Green Punch with Dry Ice. It was the one that made my friends stop mid-conversation and just stare at the table.
The first time I served it, someone actually asked if I’d hired a special effects person. Nope. Just a punch bowl, some lime sherbet, and a block of frozen carbon dioxide. Honestly, the whole thing felt like a secret I’d stumbled into—this drink looks like it took hours of witchcraft, but it comes together in about ten minutes. And that’s the kind of Halloween magic I can get behind.
Why You’ll Love This Recipe
This isn’t just another Halloween punch that looks good for five minutes and then turns into a sad, watery mess. I’ve tested this recipe at three different parties now, and every single time, people gather around the bowl like it’s a campfire. Here’s why this one works:
- Looks Like a Science Experiment (In a Good Way) : The dry ice creates a low, rolling fog that spills over the edges of the bowl. It’s dramatic without being cheesy. Kids love it, adults love it, and it makes for incredible photos.
- Actually Tastes Good : So many themed punches rely on artificial flavors and way too much sugar. This one balances tart lemonade, sweet pineapple, and creamy lime sherbet in a way that feels refreshing, not cloying.
- Comes Together in 10 Minutes : No elaborate layering, no complicated syrups. You mix, you add the dry ice, and you’re done. I’ve made this while simultaneously trying to get a toddler into a dinosaur costume, so trust me on the ease factor.
- Perfect for Any Spooky Gathering : Whether you’re hosting a full-on costume party, a family-friendly Halloween movie night, or just want to surprise your coworkers at the office potluck, this punch fits the vibe. It’s also fantastic for a grazing board setup—the fog rolling over cheese and fruit is honestly mesmerizing.
- Crowd-Pleaser Across Ages : I’ve served this to kids who thought they were drinking a potion and to adults who appreciated that it wasn’t overly sweet. The sherbet gives it a creamy texture that makes everyone go back for seconds.
This is the kind of recipe that makes you look like you put in way more effort than you actually did. And honestly? That’s my favorite kind of recipe.
What Ingredients You Will Need
This recipe uses simple, grocery-store ingredients that come together to create something that looks and tastes far more complex than it is. Most of these are probably already in your kitchen or easy to grab on a quick run. Here’s what you’ll need:
- 1 (64-ounce) bottle of lemonade – Go for a good-quality lemonade here, not the super watery stuff. I prefer Simply Lemonade or a store brand with real lemon juice. The tartness is what balances the sweetness of the other ingredients.
- 1 (46-ounce) can of pineapple juice – Unsweetened is best. You don’t need the extra sugar, and the natural sweetness of the pineapple is plenty. Look for a brand that lists pineapple juice as the only ingredient.
- 1 (2-liter) bottle of lemon-lime soda – Sprite, 7UP, or a generic brand all work. This adds the fizz and helps carry the fog effect from the dry ice. Make sure it’s cold before you start.
- 1 quart of lime sherbet – This is the secret weapon. It adds creaminess, a beautiful green color, and a tangy lime flavor that ties everything together. I’ve tried this with sorbet, and it’s not the same—you need the creamy texture of sherbet.
- Green food coloring (optional) – Depending on how green your sherbet is, you might want a drop or two of gel food coloring to really get that witchy, neon-green look. I use Wilton’s “Leaf Green” because it doesn’t turn the punch muddy.
- 1 block of food-grade dry ice – This is non-negotiable for the fog effect. You can find it at most grocery stores or specialty ice shops. You’ll need about 2-3 pounds for a standard punch bowl. Handle it with gloves and tongs—never touch dry ice directly with your skin.
- Ice cubes – Regular ice cubes help keep everything cold without diluting the punch too much. I like to make a batch of ice cubes using extra lemonade or pineapple juice so they add flavor as they melt.
That’s it. Seven ingredients, and most of them are just bottles and cartons. The dry ice is the only thing that might require a special trip, but honestly, it’s worth the effort. You can also find dry ice at some warehouse stores or order it online if you plan ahead.
Equipment Needed
You don’t need a chemistry lab to make this punch, but a few specific tools will make the process smoother and safer. Here’s what I use:
- A large punch bowl or cauldron – Glass, plastic, or ceramic all work. Avoid metal bowls if you’re using dry ice, as the extreme cold can cause condensation issues. I use a plastic cauldron I found at a party supply store, and it’s perfect.
- Long-handled ladle – You want something that reaches the bottom of the bowl without you having to stick your hand in. A plastic or wooden ladle is fine.
- Kitchen tongs – For handling the dry ice. Never use your bare hands. Metal tongs work best because they give you a good grip.
- Thick gloves or oven mitts – Safety first. Dry ice can cause frostbite on contact. I keep a pair of heavy-duty rubber gloves in my party supplies just for this.
- A small hammer or mallet – The dry ice block will likely need to be broken into smaller chunks. Wrap it in a clean kitchen towel and tap it gently with a hammer to break it apart.
- A large pitcher – For mixing the liquids before pouring them into the punch bowl. This helps you control the color and taste before you add the dry ice.
If you don’t have a punch bowl, a large glass trifle dish or even a clean plastic storage bin works in a pinch. I’ve used a stockpot before (not pretty, but functional). For budget-friendly options, check thrift stores around Halloween—they always have weird, fun bowls that are perfect for this.
Preparation Method
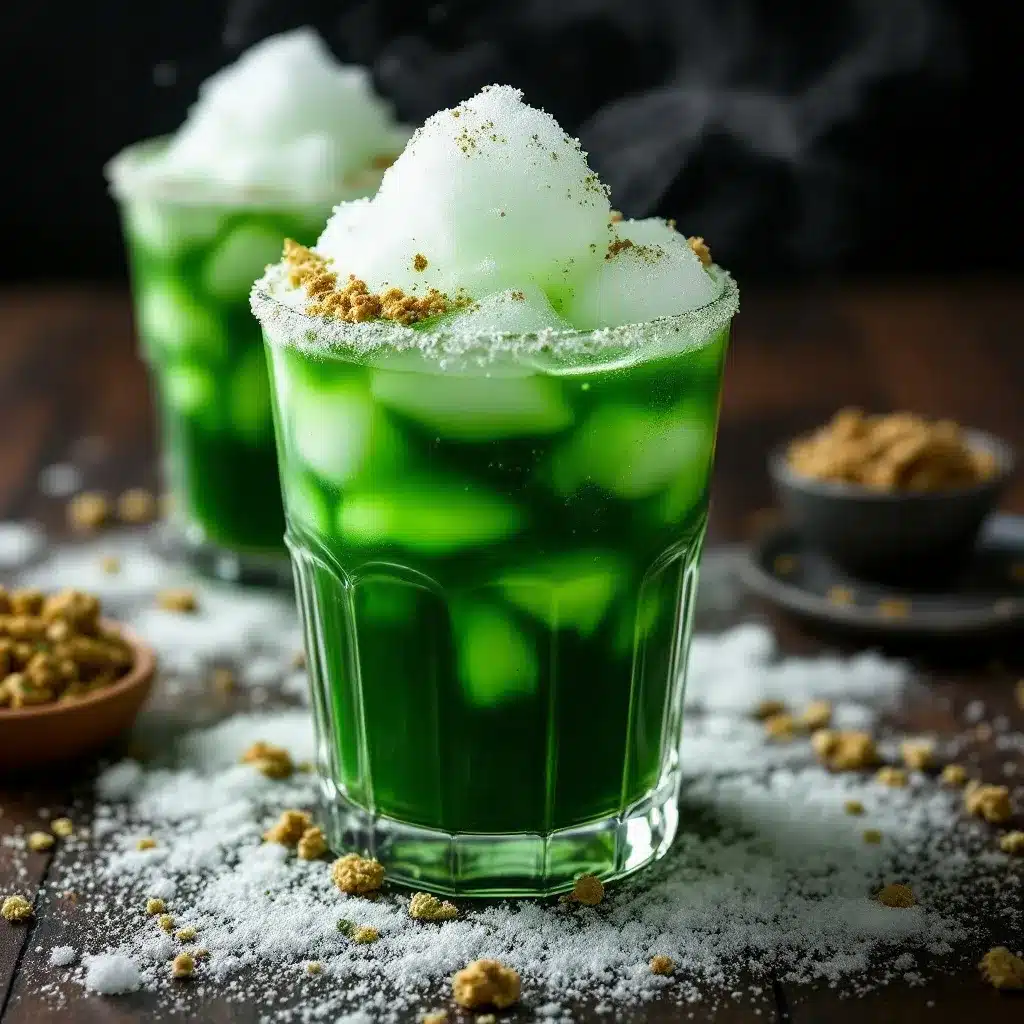
Making this punch is almost too easy, but I’ll walk you through every step so you don’t miss anything. The key is to have your dry ice ready to go right before your guests arrive, since the fog effect is most dramatic in the first hour.
- Chill everything in advance. At least two hours before you plan to serve, put your lemonade, pineapple juice, lemon-lime soda, and lime sherbet in the refrigerator. Everything needs to be very cold. Warm liquids will make the dry ice sublimate too quickly, and you’ll lose the fog effect before anyone even sees it.
- Prepare your dry ice. About 30 minutes before serving, take your dry ice block out of its packaging. Wrap it in a clean kitchen towel and place it on a cutting board. Using a small hammer or mallet, gently tap the block to break it into chunks about the size of golf balls. You want pieces that will fit easily into the punch bowl without sticking out of the liquid. Set the chunks aside in a bowl or on a plate. Do not put them in the freezer—dry ice needs to stay in a well-ventilated cooler or cardboard box.
- Mix the liquid base. In a large pitcher, combine the entire bottle of lemonade and the entire can of pineapple juice. Stir gently to combine. If you’re using green food coloring, add one drop at a time and stir until you reach your desired shade. Remember that the lime sherbet will also add color, so you don’t need it to be super dark at this stage.
- Add the soda and sherbet. Pour the lemonade and pineapple mixture into your punch bowl. Slowly pour in the entire 2-liter bottle of lemon-lime soda. Stir gently to combine—you want to keep as much carbonation as possible. Using a large spoon or ice cream scoop, add scoops of lime sherbet to the punch. I usually use about three-quarters of the quart container, saving the rest for topping off later. The sherbet will float and start to melt, creating a creamy, cloudy effect.
- Add regular ice. Toss in a handful of regular ice cubes. This helps keep everything cold without relying entirely on the dry ice. If you made flavored ice cubes with extra juice, now’s the time to add them.
- Add the dry ice. This is the moment. Using your tongs, carefully drop a few chunks of dry ice into the punch bowl. Do not touch the dry ice with your hands. Start with 3-4 chunks and watch the fog roll out. The dry ice will sink to the bottom and create a low, creeping fog that spills over the edges of the bowl. Add more chunks as the fog starts to dissipate—usually every 15-20 minutes during serving.
- Serve immediately. Ladle the punch into cups, being careful not to scoop up any pieces of dry ice. The dry ice should remain in the punch bowl at all times. Warn your guests not to eat or drink the dry ice pieces. A simple sign next to the bowl is a good idea, especially if kids are around.
A quick note on timing: the dry ice fog is most impressive for the first 30-45 minutes. After that, you’ll need to add more chunks to keep the effect going. I usually keep a small bowl of dry ice chunks on the side and refresh the bowl every time I walk past.
Cooking Tips & Techniques
I’ve made this punch enough times to know where things can go wrong. Here are the lessons I learned the hard way so you don’t have to:
Don’t overdo the food coloring. The first time I made this, I went heavy on the green gel, and the punch looked like antifreeze. One or two drops is plenty, especially if your lime sherbet is already a vibrant green. The color should look magical, not radioactive.
Keep the dry ice covered until the last minute. Dry ice sublimates (turns from solid to gas) constantly, even in the freezer. Store it in a cooler with the lid slightly cracked—never seal it airtight, as the pressure can cause an explosion. I learned this when I found a block of dry ice in my freezer that had completely disappeared overnight.
Temperature matters more than you think. If your liquids aren’t cold enough, the dry ice will sublimate too fast, creating a huge burst of fog that disappears quickly. You want a slow, steady release. I’ve started chilling my liquids a full 24 hours ahead of time, and the difference is noticeable.
Don’t skip the regular ice. I tried making this with only dry ice once, thinking it would be more dramatic. The punch ended up lukewarm within 20 minutes because dry ice doesn’t actually cool the liquid—it just creates fog. Regular ice keeps the punch cold and refreshing.
Ladle from the bottom. The best part of the punch is the creamy, sherbet-infused liquid that settles at the bottom. Make sure you stir occasionally and ladle from the bottom so everyone gets some of that goodness. I’ve had guests complain that their first cup was too watery because I only scooped from the top.
And here’s a tip I picked up from a friend who works at a haunted house: if you want extra-dramatic fog, add a chunk of dry ice to the punch bowl and then pour a cup of warm water over it. The temperature difference creates a huge burst of fog that looks incredible. Just don’t do this too often, or you’ll run out of dry ice too quickly.
Variations & Adaptations
This recipe is flexible, and I’ve tried several variations depending on the occasion and who’s drinking it. Here are a few of my favorites:
Adult Version (Spiked Witches’ Brew) – Replace the lemon-lime soda with a bottle of sparkling wine or add 1-2 cups of vodka or white rum to the liquid base. The dry ice effect works just as well with alcohol, and the flavors of lemon and pineapple pair beautifully with spirits. Just make sure to label the bowl clearly so kids don’t accidentally grab the spiked version. I made this for a Halloween party last year, and it was gone within an hour.
Dairy-Free Version – If you’re avoiding dairy, swap the lime sherbet for a dairy-free lime sorbet. The texture will be slightly less creamy, but the flavor is still bright and fresh. You might need to add an extra drop of green food coloring since sorbet is usually paler than sherbet.
Blood Orange Variation – For a different color palette, replace the pineapple juice with blood orange juice and use orange sherbet instead of lime. The result is a deep, reddish-orange punch that looks like a bubbling cauldron of lava. I’ve served this for a “Fire & Ice” themed party, and it was a hit.
Kid-Friendly (No Dry Ice) – If you’re serving this at a school party or somewhere dry ice isn’t practical, you can still get a spooky effect by adding a handful of gummy worms or plastic spider rings to the punch bowl. The flavor is still fantastic, and kids love fishing out the “creatures” from their cups.
Concentrated Base for Parties – I’ve started making a concentrated version of the liquid base (lemonade and pineapple juice only) and freezing it in ice cube trays. When I’m ready to serve, I drop the cubes into the bowl and add the soda and sherbet. This keeps the punch cold without diluting it, and it’s perfect for large gatherings where you don’t want to keep refreshing the bowl.
Serving & Storage Suggestions
This punch is best served immediately after adding the dry ice, but there are a few tricks to keep it going strong throughout your party.
Serving Temperature: Serve the punch as cold as possible. I recommend keeping the punch bowl on a bed of ice or using a chilled bowl insert if you have one. The colder the liquid, the slower the dry ice sublimates, and the longer your fog effect lasts.
Presentation Tips: For maximum visual impact, place the punch bowl on a table with a dark or black tablecloth. The white fog shows up beautifully against a dark background. Add a few battery-operated tea lights around the base of the bowl for an eerie glow. I also like to float a few plastic spiders or eyeballs on the surface—they move around as the dry ice bubbles, which adds a creepy touch.
Complementary Dishes: This punch pairs perfectly with savory snacks that balance its sweetness. I love serving it alongside a buffalo chicken dip or a grazing board with cheese, crackers, and cured meats. The spicy, salty flavors contrast beautifully with the bright, sweet punch. For dessert, pumpkin snickerdoodle cookies are a natural pairing—the warm spices and soft texture are perfect for a fall gathering.
Storage: This punch does not store well once the dry ice has been added. The dry ice will sublimate completely within a few hours, and the punch will lose its fizz and fog. If you have leftover liquid base (without dry ice), you can store it in a sealed pitcher in the refrigerator for up to 2 days. Just add fresh dry ice and soda when you’re ready to serve again.
Reheating (Not Applicable): This is a cold punch, so reheating isn’t a thing. But if your punch gets too warm, you can drop in a few extra ice cubes or a scoop of sherbet to bring the temperature back down.
Flavor Development: Interestingly, the punch actually tastes better after it’s been sitting for about 30 minutes. The sherbet has time to fully incorporate, and the flavors of lemon and pineapple meld together. If you’re making this ahead of time, mix the liquid base and sherbet, but wait to add the soda and dry ice until just before serving.
Nutritional Information & Benefits
Let’s be real—this is a party punch, not a health drink. But here’s what you’re looking at per 8-ounce serving (approximate, based on the full recipe making about 20 servings):
Estimated Nutritional Values (per serving):
- Calories: 180-220
- Carbohydrates: 45-55g
- Sugar: 40-50g
- Fat: 1-2g
- Protein: 0-1g
- Sodium: 20-30mg
Health Highlights: On the plus side, pineapple juice contains bromelain, an enzyme that can aid digestion. Lemonade provides a decent dose of vitamin C, which is always welcome during cold and flu season. The lime sherbet adds a small amount of calcium from the dairy. But honestly, this is a treat—something fun and festive for a special occasion.
Dietary Considerations: This recipe is vegetarian and can be made dairy-free with a sorbet swap. It contains dairy in the sherbet, so if you’re lactose intolerant, opt for a dairy-free sorbet. The punch is not gluten-free certified unless you check your specific brands, but most lemonade, pineapple juice, and lemon-lime soda are naturally gluten-free. Always verify labels if you’re serving guests with celiac disease.
Potential Allergens: The main allergen is dairy from the sherbet. Some commercial lemonades may contain preservatives or additives that could be problematic for sensitive individuals, but this is rare.
From a wellness perspective, I think it’s important to enjoy treats like this in moderation. Halloween is one night a year, and this punch is part of the fun. I don’t stress about the sugar content when I’m serving it—I just make sure there are plenty of water and savory snacks available too.
Conclusion
This Spooky Witches’ Brew Green Punch with Dry Ice is one of those recipes that makes you feel like a party wizard. It looks complicated, it sounds impressive, and it delivers every single time. But the best part? It’s so simple that you can actually enjoy your own party instead of being stuck in the kitchen.
I love that this punch brings people together. Every time I serve it, someone asks how I made it, and I get to watch their face light up when I say “dry ice.” It’s a conversation starter, a photo opportunity, and a genuinely delicious drink all in one. And honestly, that’s the kind of recipe I live for—something that makes the ordinary feel extraordinary.
I’d love to hear how yours turns out. Did you add your own twist? Did the kids go crazy for the fog? Drop a comment below and let me know. And if you try the spiked version, well, I won’t tell anyone. Happy Halloween, and may your punch bowl always be full of fog!
Frequently Asked Questions
Is dry ice safe to use in a drink?
Yes, as long as you handle it properly. Never touch dry ice with bare skin—use tongs or thick gloves. Only add dry ice to the punch bowl, never to individual cups. The dry ice will sink to the bottom and sublimate into carbon dioxide gas, which is harmless in small amounts. Make sure the punch bowl is in a well-ventilated area, and warn guests not to eat or drink the dry ice pieces.
Where can I buy dry ice for this recipe?
Most major grocery stores carry dry ice, especially around Halloween. You can also find it at specialty ice shops, warehouse stores like Costco, or some gas stations. Call ahead to check availability and ask about food-grade dry ice specifically. A 2-3 pound block is usually enough for one punch bowl.
Can I make this punch without dry ice?
Absolutely. The punch tastes just as good without the dry ice. To keep the spooky vibe, you can add gummy worms, plastic spiders, or floating eyeballs to the bowl. The lime sherbet and green food coloring still give it that witchy green color, so it will look the part even without the fog.
How long does the dry ice fog effect last?
The fog is most dramatic for the first 30-45 minutes after adding the dry ice. After that, you’ll need to add more chunks to refresh the effect. Plan to have extra dry ice on hand if you’re hosting a long party. Store the extra dry ice in a cooler with the lid slightly cracked, and add new chunks every 15-20 minutes as needed.
Can I use this recipe for a non-Halloween party?
Definitely! The green color and fog effect work great for any themed party. Try it for a St. Patrick’s Day celebration, a “Mad Scientist” birthday party, or a glow-in-the-dark event. For a different color scheme, swap the lime sherbet for orange or raspberry sherbet and adjust the food coloring accordingly.
PrintSpooky Witches Brew Punch: Easy Green Dry Ice Recipe

This Spooky Witches’ Brew Green Punch with Dry Ice looks like it took hours of witchcraft but comes together in about ten minutes. It balances tart lemonade, sweet pineapple, and creamy lime sherbet for a refreshing Halloween drink that creates dramatic rolling fog.
- Prep Time: 10 minutes
- Cook Time: 0 minutes
- Total Time: 10 minutes (plus chilling time)
- Yield: 20 servings 1x
- Category: Beverage
- Cuisine: American
Ingredients
- 1 (64-ounce) bottle of lemonade
- 1 (46-ounce) can of unsweetened pineapple juice
- 1 (2-liter) bottle of lemon-lime soda (Sprite, 7UP, or generic)
- 1 quart of lime sherbet
- Green food coloring (optional, e.g., Wilton’s Leaf Green)
- 1 block of food-grade dry ice (2–3 pounds)
- Ice cubes (regular or flavored with extra juice)
Instructions
- Chill everything in advance: At least two hours before serving, refrigerate the lemonade, pineapple juice, lemon-lime soda, and lime sherbet until very cold.
- Prepare the dry ice: About 30 minutes before serving, wrap the dry ice block in a clean kitchen towel and place on a cutting board. Using a small hammer or mallet, gently tap to break into golf ball-sized chunks. Set aside in a bowl or on a plate. Do not put in the freezer; store in a well-ventilated cooler or cardboard box.
- Mix the liquid base: In a large pitcher, combine the entire bottle of lemonade and the entire can of pineapple juice. Stir gently. If using green food coloring, add one drop at a time and stir until desired shade is reached.
- Add the soda and sherbet: Pour the lemonade and pineapple mixture into a large punch bowl. Slowly pour in the entire 2-liter bottle of lemon-lime soda and stir gently to combine, preserving carbonation. Using a large spoon or ice cream scoop, add about three-quarters of the lime sherbet (saving the rest for topping off later).
- Add regular ice: Toss in a handful of regular ice cubes (or flavored ice cubes if using).
- Add the dry ice: Using tongs, carefully drop 3-4 chunks of dry ice into the punch bowl. Do not touch dry ice with bare hands. The dry ice will sink and create a low, creeping fog. Add more chunks every 15-20 minutes as the fog dissipates.
- Serve immediately: Ladle the punch into cups, being careful not to scoop up any pieces of dry ice. Warn guests not to eat or drink the dry ice pieces. Place a sign near the bowl if children are present.
Notes
The dry ice fog is most dramatic for the first 30-45 minutes. Refresh with more chunks every 15-20 minutes. Keep extra dry ice in a cooler with the lid slightly cracked. For extra-dramatic fog, add a chunk of dry ice and pour a cup of warm water over it. The punch tastes better after sitting for about 30 minutes as the sherbet fully incorporates. Leftover liquid base (without dry ice) can be stored in a sealed pitcher in the refrigerator for up to 2 days.
Nutrition
- Serving Size: 8 ounces
- Calories: 200
- Sugar: 45
- Sodium: 25
- Fat: 1.5
- Saturated Fat: 0.5
- Carbohydrates: 50
- Protein: 0.5
Keywords: Halloween punch, witches brew, dry ice punch, green punch, spooky drink, party punch, lime sherbet punch, Halloween beverage


