Love this? Save it for later!
Share the inspiration with your friends
“You won’t believe this was my first attempt,” my friend Jenna said, flashing a grin as we stood around her kitchen island draped in summer sunlight. It was a late Saturday morning, and she was prepping for her sister’s baby shower the next day. Honestly, I wasn’t expecting much beyond the usual fruit platter, but then she pulled out this huge watermelon and started carving it right there. The sound of the knife tapping against the rind was oddly satisfying, and the way she shaped the watermelon into a giant baby carriage was nothing short of mesmerizing.
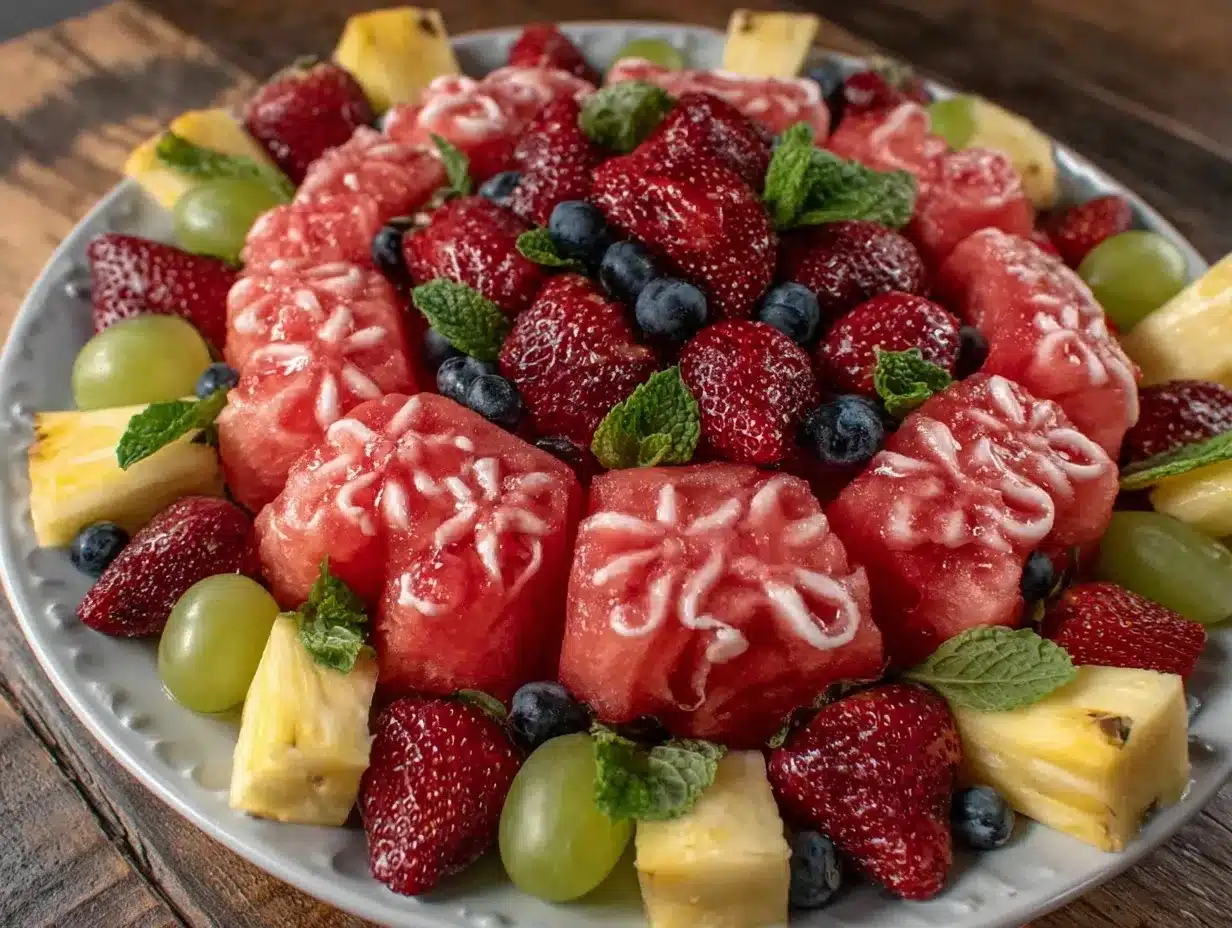
Three hours later, we had assembled what I can only describe as the most stunning summer baby shower fruit display I’ve ever seen. Colorful berries, juicy pineapple chunks, and crisp melon balls surrounded that carved centerpiece like jewels. Honestly, it looked like something straight out of a fancy catering catalog. The best part? Jenna made it all look easy, even though I know she was juggling a million other things that day (including a fire alarm mishap when the oven decided to throw a tantrum).
Maybe you’ve been there too — wanting to wow guests without the stress or spending a fortune. This summer baby shower fruit display with watermelon carving is exactly that kind of recipe. It brings fresh, vibrant flavors and a touch of artistry that turns a simple fruit tray into a conversation starter. Let me tell you, since that day, I’ve made this display more times than I can count for birthdays, picnics, and yes, even another baby shower. It’s friendly on the eyes, the palate, and your schedule. So, if you’re planning a summer gathering and want to impress without the fuss, stick around. I promise you’ll find a few ideas here that’ll make you feel like a fruit artist too.
Why You’ll Love This Recipe
After helping Jenna pull off that beautiful baby shower spread, I’ve come to appreciate just how special this summer baby shower fruit display with watermelon carving really is. It’s more than just a pretty platter — it’s a way to bring fresh, seasonal fruit front and center while adding a playful, elegant touch that guests remember.
- Quick & Easy: The entire display comes together in about 1.5 hours, which is perfect if you’re juggling other party prep.
- Simple Ingredients: You don’t need any exotic fruits or fancy items — just a watermelon, berries, melons, and a few basics you probably already have.
- Perfect for Summer Celebrations: Whether it’s a baby shower, bridal party, or backyard BBQ, this display screams sunshine and good vibes.
- Crowd-Pleaser: Kids love the fun shapes, and adults appreciate the fresh flavors and eye-catching presentation.
- Uniquely Yours: The watermelon carving centerpiece is the star — it’s customizable and can fit any theme, from baby carriages to flowers or even cute animals.
This isn’t just another fruit platter — the carving technique adds a personal, creative touch that shows you cared enough to try something special. Plus, the balance of juicy watermelon with the sweet tartness of berries and crisp pineapple is honestly the kind of combo that has people coming back for more. It’s fresh, fun, and just the right mix of fancy and laid-back.
What Ingredients You Will Need
This summer baby shower fruit display revolves around fresh, vibrant fruit that’s easy to find and tastes incredible when served chilled. The ingredients play off one another — the juicy watermelon carving acts as both centerpiece and edible art, while the surrounding fruit adds pops of color and texture. Here’s what you’ll want to gather:
- Watermelon: One large, seedless watermelon (about 10-12 lbs) — I prefer smaller, round ones for easier carving.
- Strawberries: 1 pint, hulled and halved (use fresh, firm berries for best texture).
- Blueberries: 1 cup, washed and dried.
- Pineapple: 1 medium, peeled, cored, and cut into bite-sized chunks (fresh is best, but canned works if drained well).
- Cantaloupe: 1 small, peeled and balled or cubed.
- Honeydew melon: 1 small, peeled and balled or cubed.
- Green grapes: 1 cup, washed and halved if large.
- Mint leaves: A handful of fresh leaves for garnish (adds a lovely pop of green and fresh aroma).
- Optional decorative touches: Edible flowers (like pansies or nasturtiums), or small wooden skewers to create little fruit kabobs.
For carving, you’ll need a sharp paring knife and a melon baller. When picking your watermelon, look for one that feels heavy for its size and has a uniform shape — this will make carving easier and the display sturdier. I usually grab mine from the local farmer’s market when they’re at their sweetest peak.
Equipment Needed
- Sharp paring knife: Essential for detailed carving and shaping the watermelon centerpiece. A serrated knife won’t do the trick here.
- Melon baller: Helps scoop out perfectly round melon balls from cantaloupe, honeydew, and watermelon scraps.
- Large cutting board: Choose one with a groove to catch juice — trust me, watermelon juice can get messy.
- Serving platter or tray: Big enough to hold the carved watermelon and surrounding fruit. A wooden or bamboo tray adds a nice rustic vibe.
- Small bowls or ramekins: For holding berries or grapes before arranging.
- Optional: Kitchen towel or paper towels for quick cleanup and wiping your hands between steps.
If you don’t have a melon baller, a small spoon works in a pinch, though it won’t give you the perfect spheres. For the knife, a budget-friendly option like a Victorinox paring knife is sharp and reliable. Keep your knife clean and dry between cuts to avoid slipping — I learned that the hard way the first time I carved watermelon!
Preparation Method
- Prep your workspace (10 minutes): Lay down paper towels or a silicone mat to catch drips. Wash all fruit and dry thoroughly. Set aside your knife, melon baller, and cutting board within easy reach.
- Carve the watermelon centerpiece (30-40 minutes): Start by cutting a flat slice from the bottom of the watermelon so it sits steady. Then, slice off a thin layer of rind on one side to create a flat surface for carving details. Use your paring knife to carefully carve a baby carriage shape or another summer-themed design. Remove the rind from inside the carriage shape to reveal the bright red flesh. Scoop out melon balls from the removed rind and flesh using the melon baller — these will be part of your display. (Tip: Don’t rush! This step takes patience, and it’s okay if it’s not perfect.)
- Scoop and ball the remaining melons (15 minutes): Use your melon baller to create cantaloupe and honeydew balls. If you prefer, you can cut them into bite-sized cubes instead. Place these in small bowls or directly onto your serving tray.
- Prepare the berries and grapes (10 minutes): Hull and halve the strawberries, wash and dry blueberries, and halve grapes if they’re large. Keep these ready to arrange around the centerpiece.
- Assemble the display (15-20 minutes): Place the carved watermelon centerpiece on your serving tray. Surround it with mixed melon balls, pineapple chunks, berries, and grapes. Scatter fresh mint leaves and edible flowers for a splash of green and color. You can skewer some fruit balls onto small wooden sticks for added dimension. Step back and adjust until it looks balanced and inviting.
- Chill and serve: Cover loosely with plastic wrap and refrigerate until ready to serve, ideally within 2 hours to keep fruit fresh and juicy.
One time, I forgot to dry the watermelon rind before carving and my knife slipped — not fun! So, keep your tools dry and your hands steady. And if you mess up a bit, that’s okay — the charm is in the handmade look.
Cooking Tips & Techniques
Carving watermelon might sound intimidating, but with a few pointers, anyone can create a stunning display without hassle. Here’s what I’ve learned after a handful of fruit displays and a few minor mishaps:
- Choose the right watermelon: A smaller, round watermelon is easier to maneuver than a giant oblong one. Look for firm, evenly colored skin.
- Keep your knife sharp: A dull knife makes carving frustrating and dangerous. Take a moment to sharpen your paring knife before starting.
- Work slowly and patiently: It’s tempting to rush, especially when you’re excited or pressed for time, but slow cuts prevent slips and jagged edges.
- Use the melon baller with a gentle twisting motion: This helps create smooth, round balls without tearing the fruit.
- Wipe your knife and hands often: Watermelon juice can make surfaces slippery — keep everything dry to maintain control.
- Chill your fruit before assembling: Cold fruit tastes fresher and holds shape better on the platter.
- Don’t overthink the design: Imperfections add character and show off your personal touch.
Once, I tried to carve freehand without sketching first — ended up with a lopsided carriage! Now, I lightly sketch my shapes on the rind with a toothpick before cutting. It’s a small trick that makes a big difference. Also, multitasking by prepping berries while carving helps save time and keeps you organized.
Variations & Adaptations
This fruit display is a blank canvas perfect for tailoring to your event, dietary needs, or taste preferences. Here are a few ideas to make it your own:
- Seasonal Swaps: Use fresh peaches, nectarines, or cherries in place of pineapple or berries during late summer for a local flair.
- Allergen-Friendly: For nut allergies or sensitivities, keep the display purely fruit-based. If you want to add crunch, consider seeds like pumpkin or sunflower instead of nuts.
- Flavor Twists: Sprinkle a little chili powder and lime zest on watermelon balls for a zesty kick — perfect if you like a sweet-spicy combo.
- Alternate Carving Themes: Instead of a baby carriage, try a flower bouquet, a butterfly, or a baby animal shape like a duck or teddy bear.
- Mini Displays: For smaller gatherings, carve mini watermelons or even cantaloupe halves to create personalized individual displays.
One summer, I swapped the pineapple for mango chunks and added a drizzle of honey and lime over the fruit. It turned out so good that a few guests asked for the recipe! Feel free to experiment — this display is all about creativity and fresh flavors.
Serving & Storage Suggestions
Serve your summer baby shower fruit display chilled, ideally within a couple of hours of assembling. The cold brings out the juicy sweetness of the fruit and keeps everything fresh-looking.
Presentation-wise, a large wooden or white ceramic platter really makes the colors pop. If you want to add a bit more flair, scatter some edible flowers or fresh mint sprigs around the edges.
If you need to store leftovers, cover the display tightly with plastic wrap and refrigerate. The carved watermelon centerpiece is best enjoyed within 24 hours to avoid sogginess or drying out. Fruit balls and chunks can last up to 3 days refrigerated. When reheating (if you want to serve fruit warm, say for a cozy brunch), bring to room temperature and serve immediately — fruit can lose texture if microwaved.
Interestingly, the flavors tend to meld and deepen if the fruit sits together for a few hours, so if you have time, prepare the display a bit ahead and let it rest in the fridge. Just be sure to keep it covered well to prevent drying.
Nutritional Information & Benefits
This summer baby shower fruit display is not only beautiful but packed with nutrients. Here’s a quick look at what you’re getting per serving (approximate values for 1 cup mixed fruit):
- Calories: 70-90
- Carbohydrates: 18-22 grams (natural sugars)
- Fiber: 2-3 grams
- Vitamin C: 40-60% of daily value
- Potassium: 5-7% of daily value
Watermelon and melons are hydrating and rich in antioxidants like lycopene and beta-carotene. Berries bring additional vitamins, fiber, and anti-inflammatory benefits. This display fits nicely into gluten-free, dairy-free, and vegan diets. Just watch for any added toppings if you include extras like honey or skewered treats.
From my experience, serving fresh fruit like this elevates the mood of any gathering — it’s light, refreshing, and feels like a little wellness boost in every bite.
Conclusion
This summer baby shower fruit display with watermelon carving is one of those recipes that’s as rewarding as it is delicious. It turns everyday fruit into a centerpiece that sparks smiles and compliments. Whether you’re a seasoned host or a first-time party planner, this DIY idea brings fun, fresh flavors, and a touch of artistry to your table.
Give yourself permission to play with the design and ingredients — customize it to fit your theme, your taste, and your schedule. I love this recipe because it’s approachable yet impressive, and honestly, it’s become my go-to for any summer celebration. So why not try it out for your next get-together? I’d love to hear how your display turns out — don’t hesitate to share your own carving stories or twists in the comments!
Remember, the best party recipes are the ones you enjoy making as much as eating. Happy carving and happy celebrating!
FAQs
What is the easiest shape to carve on a watermelon for beginners?
Start with simple shapes like a baby carriage silhouette or a flower outline. Lightly sketch your design on the rind with a toothpick before cutting to guide your knife.
Can I prepare the fruit display a day in advance?
It’s best to carve and assemble the display the same day or the morning of your event to keep fruit fresh. You can prep and store fruit balls and chunks a day ahead, covered tightly in the fridge.
How do I keep the watermelon from drying out after carving?
Cover the carved watermelon loosely with plastic wrap and refrigerate. Avoid airtight wrapping directly on the carved surface to prevent sogginess.
Can I make this fruit display gluten-free and vegan?
Absolutely! All the ingredients are naturally gluten-free and vegan-friendly. Just avoid adding any non-vegan toppings like honey if strict vegan.
What can I use if I don’t have a melon baller?
A small spoon can work to scoop melon chunks, but the balls won’t be perfectly round. A melon baller is inexpensive and worth having if you plan to make fruit displays regularly.
Pin This Recipe!

Summer Baby Shower Fruit Display with Watermelon Carving
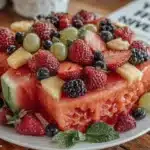
A stunning and easy-to-make summer fruit display featuring a carved watermelon centerpiece surrounded by fresh berries, melons, and pineapple. Perfect for baby showers and summer celebrations.
- Prep Time: 25 minutes
- Cook Time: 40 minutes
- Total Time: 1 hour 5 minutes
- Yield: 8-10 servings 1x
- Category: Appetizer / Party Platter
- Cuisine: American
Ingredients
- 1 large seedless watermelon (about 10–12 lbs), preferably smaller and round
- 1 pint strawberries, hulled and halved
- 1 cup blueberries, washed and dried
- 1 medium pineapple, peeled, cored, and cut into bite-sized chunks
- 1 small cantaloupe, peeled and balled or cubed
- 1 small honeydew melon, peeled and balled or cubed
- 1 cup green grapes, washed and halved if large
- A handful of fresh mint leaves for garnish
- Optional: edible flowers (like pansies or nasturtiums)
- Optional: small wooden skewers for fruit kabobs
Instructions
- Prep your workspace (10 minutes): Lay down paper towels or a silicone mat to catch drips. Wash all fruit and dry thoroughly. Set aside your knife, melon baller, and cutting board within easy reach.
- Carve the watermelon centerpiece (30-40 minutes): Cut a flat slice from the bottom of the watermelon so it sits steady. Slice off a thin layer of rind on one side to create a flat surface for carving details. Use a sharp paring knife to carefully carve a baby carriage shape or another summer-themed design. Remove the rind from inside the carriage shape to reveal the bright red flesh. Scoop out melon balls from the removed rind and flesh using the melon baller to use in the display.
- Scoop and ball the remaining melons (15 minutes): Use a melon baller to create cantaloupe and honeydew balls, or cut into bite-sized cubes. Place these in small bowls or directly onto your serving tray.
- Prepare the berries and grapes (10 minutes): Hull and halve the strawberries, wash and dry blueberries, and halve grapes if large. Keep ready for arranging.
- Assemble the display (15-20 minutes): Place the carved watermelon centerpiece on your serving tray. Surround it with mixed melon balls, pineapple chunks, berries, and grapes. Scatter fresh mint leaves and edible flowers for color. Optionally skewer some fruit balls onto small wooden sticks for dimension. Adjust until balanced and inviting.
- Chill and serve: Cover loosely with plastic wrap and refrigerate until ready to serve, ideally within 2 hours to keep fruit fresh and juicy.
Notes
Choose a smaller, round watermelon for easier carving. Keep your knife sharp and dry your hands and tools often to avoid slipping. Work slowly and patiently. Chill fruit before assembling for best freshness. Imperfections add character to the carving. You can customize the carving theme and fruit selection to suit your event.
Nutrition
- Serving Size: Approximately 1 cup
- Calories: 80
- Sugar: 16
- Sodium: 2
- Fat: 0.2
- Carbohydrates: 20
- Fiber: 2.5
- Protein: 1
Keywords: summer fruit display, watermelon carving, baby shower fruit platter, easy fruit tray, party fruit ideas, melon balls, fresh berries, summer celebration