Love this? Save it for later!
Share the inspiration with your friends
I burned the first batch of these witch finger cookies so badly they looked like I was trying to make actual fossilized witch hands. The almonds turned black, the dough cracked in ways that were more disturbing than spooky, and my kitchen smelled like a campfire. But here’s the thing — I kept trying because the idea was just too good to give up. Halloween treats should be fun, not fussy, and these spooky witch finger sugar cookies with almond nails are exactly that.
It took me four attempts to get them right. The first batch? Burnt. The second? Too puffy — they looked like chubby sausage fingers instead of creepy witch digits. The third batch finally got the texture right, but the almond nails kept falling off. I was ready to throw in the towel, honestly. But then I figured out the trick: you have to press the almond in while the dough is still warm, right out of the oven, and then let them cool completely. That simple change made all the difference.
Now these cookies are my go-to for Halloween parties, school events, and any time I want to see people’s faces go from “eww” to “yum” in two seconds flat. They’re creepy enough to impress, but they taste like a classic sugar cookie — buttery, slightly crisp on the edges, soft in the middle. And those almond nails? They add the perfect crunch. I’ve learned to love the process of making them, even the messy parts. It’s become a tradition that actually feels real, not forced.
These cookies have a way of bringing people together. I’ve made them with my niece who giggled at every “gross” finger, and I’ve brought them to parties where grown adults acted like kids again. That’s the magic of a good Halloween recipe — it gives you permission to be silly. And honestly, we all need more of that.
Why You’ll Love This Recipe
Let me tell you why these witch finger cookies have become my most-requested Halloween recipe. I’ve tested them more times than I can count, and I’ve learned every trick to make them work perfectly the first time. Here’s what makes them special:
- Quick & Easy: These come together in under 45 minutes, and most of that is chilling and baking time. The actual hands-on work is maybe 15 minutes.
- Simple Ingredients: No weird specialty items here. Butter, sugar, flour, eggs, vanilla, and almonds — that’s it. You probably have everything already.
- Perfect for Halloween: They’re the star of any Halloween party, trunk-or-treat event, or spooky movie night. Kids and adults go nuts for them.
- Crowd-Pleaser: I’ve brought these to three different Halloween gatherings now, and they’re always the first thing to disappear. People love the shock value.
- Unbelievably Delicious: Underneath the creepy exterior is a genuinely good sugar cookie. Buttery, not too sweet, with that satisfying almond crunch.
What makes this recipe different from all the other witch finger cookie recipes out there? It’s the texture. I spent way too long figuring out how to get them firm enough to look like fingers but soft enough to be enjoyable to eat. Most recipes end up either too cakey (which makes them look like weird breadsticks) or too hard (which makes them unpleasant to bite into). These are just right — crisp on the outside, tender on the inside.
This is the kind of recipe that makes you close your eyes after the first bite. It’s comfort food with a Halloween twist — familiar enough to feel safe, but creepy enough to be fun. Perfect for impressing guests without spending hours in the kitchen, or turning a simple dessert into something memorable. Trust me, once you make these once, they’ll become your new Halloween tradition.
What Ingredients You Will Need
This recipe uses simple, everyday ingredients to create something that looks complicated but really isn’t. Here’s what you’ll need to gather before you start:
For the Cookie Dough:
- 1 cup (2 sticks) unsalted butter, softened to room temperature (I prefer Land O’Lakes for consistent results)
- 1 cup granulated sugar
- 1 large egg, room temperature
- 1 teaspoon pure vanilla extract (use the real stuff — it makes a difference in flavor)
- 1/2 teaspoon almond extract (this is the secret ingredient that makes them taste like a bakery cookie)
- 2 1/2 cups all-purpose flour
- 1/2 teaspoon baking powder
- 1/4 teaspoon salt
For the Witch Fingers:
- 1/2 cup whole blanched almonds, one for each cookie (get the ones that are already peeled — it saves a step)
- Red food coloring gel (not liquid — gel gives you that deep, bloody color without thinning the dough)
- Green food coloring gel (optional, for a more “witchy” skin tone)
Ingredient Tips from My Kitchen:
I’ve tried this recipe with salted butter and just reduced the added salt, but honestly, unsalted gives you more control. For the almonds, look for the ones that are uniform in shape — you want them to look like actual fingernails, not weird little pebbles. I’ve also used sliced almonds in a pinch, but whole almonds look way more realistic.
The almond extract is non-negotiable here. I know some people don’t love it, but it adds that bakery-quality flavor that makes these cookies taste as good as they look. If you’re really opposed, you can use more vanilla, but you’ll lose some of that magic.
For the food coloring, I’ve learned that gel is the way to go. Liquid food coloring will make your dough too wet and throw off the texture. I like the Wilton brand — a tiny dab goes a long way. You can also skip the green if you want a more “human skin” tone, but green makes them read as witch fingers immediately.
Equipment Needed
You don’t need anything fancy for these cookies, which is part of why I love them. Here’s what you’ll want to have on hand:
- Mixing bowls — one large, one medium
- Electric hand mixer or stand mixer (I’ve made these with both, and either works fine)
- Baking sheets — two standard-sized ones, lined with parchment paper
- Parchment paper (non-negotiable — these cookies can stick without it)
- Sharp knife or bench scraper for shaping the fingers
- Small paring knife for scoring knuckle lines
- Cooling rack
- Plastic wrap for chilling the dough
If you don’t have a stand mixer, don’t worry. A hand mixer works perfectly, or you can even mix by hand with a wooden spoon. It takes a little more elbow grease, but it’s totally doable. For the parchment paper, I’ve tried reusable silicone mats and they work great too — just make sure they’re the right size for your baking sheets.
One thing I learned the hard way: use a good-quality baking sheet. Cheap ones can warp in the oven and cause uneven baking, which is a disaster when you’re trying to get uniform cookies. I use Nordic Ware sheets and they’ve held up for years.
Preparation Method

Alright, let’s get into the actual process. I’m going to walk you through every step, including the little tricks I’ve learned from all those failed batches.
- Cream the butter and sugar. In a large mixing bowl, beat the softened butter and granulated sugar together until light and fluffy — about 2-3 minutes with a hand mixer on medium speed. You want it to look pale yellow and almost doubled in volume. Don’t rush this step; proper creaming is what gives the cookies their tender texture.
- Add the wet ingredients. Beat in the egg, vanilla extract, and almond extract until fully combined. The mixture might look a little curdled at this point — that’s totally normal. Just keep mixing until it comes back together smooth.
- Mix the dry ingredients separately. In a medium bowl, whisk together the flour, baking powder, and salt. This ensures everything is evenly distributed before you add it to the wet mixture.
- Combine wet and dry. Gradually add the dry ingredients to the wet mixture, mixing on low speed until just combined. You don’t want to overmix here — stop as soon as you don’t see any more streaks of flour. The dough will be soft but not sticky.
- Add the food coloring. If you’re using green food coloring, add a small dab now and mix until you get a uniform color. I usually aim for a pale, sickly green — think “witch skin” not “Shrek.” For the red, you’ll use that later.
- Chill the dough. Wrap the dough in plastic wrap and refrigerate for at least 30 minutes. This is crucial. Chilled dough is much easier to shape into fingers, and it helps the cookies hold their shape while baking. I’ve skipped this step out of impatience before, and I regretted it — the fingers spread into weird blobs.
- Preheat the oven. While the dough chills, preheat your oven to 350°F (175°C) and line your baking sheets with parchment paper.
- Shape the fingers. Take a small piece of dough — about a tablespoon’s worth — and roll it into a log shape about 3-4 inches long. One end should be slightly thicker (the base of the finger) and the other end tapered (the fingertip). Place on the prepared baking sheet. Repeat with the remaining dough, spacing the fingers about 2 inches apart.
- Create the knuckles. Using a small paring knife or the back of a butter knife, gently press lines into each finger to create knuckle marks. You want about 2-3 lines per finger, depending on how long they are. Don’t cut too deep — just enough to leave an impression.
- Press in the almond nails. Take a whole blanched almond and press it firmly into the tapered end of each finger. The almond should sit at an angle, like a real fingernail. Press it in enough that it stays put, but not so deep that it disappears into the dough.
- Add the “blood” details. Using a toothpick or small brush, dab a tiny bit of red food coloring gel around the base of the almond nail and along the knuckle lines. This creates that creepy, bloody effect. A little goes a long way — you can always add more, but you can’t take it away.
- Bake. Place the baking sheets in the preheated oven and bake for 10-12 minutes, or until the edges are just barely golden brown. The centers will still look slightly soft — that’s okay. They’ll continue to set as they cool.
- Cool completely. Let the cookies cool on the baking sheet for 5 minutes, then transfer them to a wire rack to cool completely. Don’t try to move them too soon — they’re delicate when warm and will fall apart.
My Pro Tip: If any almond nails fall off during baking, don’t panic. While the cookies are still warm, gently press the almond back into place. The residual heat will help it stick. I’ve saved many a cookie this way.
Cooking Tips & Techniques
I’ve made enough mistakes with these cookies to fill a small book. Here are the most important things I’ve learned so you don’t have to repeat my errors:
Don’t skip the chilling step. I know it’s tempting to rush, especially when you’re excited about Halloween baking. But chilled dough is the difference between cookies that look like fingers and cookies that look like sad, puffy slugs. Trust me on this one.
Watch the oven temperature. Every oven runs differently. My first batch burned because my oven runs hot. I now use an oven thermometer to make sure the temperature is accurate. If your cookies are browning too fast on the bottom, try baking on the middle rack or reducing the temperature by 25 degrees.
Keep the dough cold while shaping. When you’re shaping the fingers, work with a small portion of dough at a time and keep the rest in the fridge. Warm dough is sticky and impossible to shape properly. If the dough starts to feel greasy, pop it back in the fridge for 10 minutes.
Size matters. Try to make each finger roughly the same size so they bake evenly. I use a small cookie scoop to portion the dough, then roll it into logs. It takes a little extra time, but the results are worth it.
The almond nail trick. If your almonds keep falling off during baking, try pressing them in a little deeper next time. I’ve also had luck using a tiny dab of water as “glue” to help them stay in place. Just dip the almond in water before pressing it into the dough.
Multitasking strategy. Make the dough the night before and let it chill overnight. Then on baking day, all you have to do is shape and bake. This makes the whole process feel much less overwhelming, especially if you’re making multiple batches for a party.
Variations & Adaptations
One of the best things about this recipe is how easy it is to customize. Here are some variations I’ve tried and loved:
Gluten-Free Version: Substitute the all-purpose flour with a 1:1 gluten-free baking flour blend. I’ve had good results with Bob’s Red Mill. The texture will be slightly more crumbly, but they still taste great. Just be extra gentle when shaping them.
Vegan Adaptation: Use vegan butter sticks (not tub butter) and a flax egg (1 tablespoon ground flaxseed mixed with 3 tablespoons water, let sit for 5 minutes). The flavor will be slightly different, but they’ll still look spooky. I’ve made these for vegan friends and they were a hit.
Chocolate Witch Fingers: Replace 1/4 cup of the flour with unsweetened cocoa powder for a chocolate version. These look especially creepy with the red “blood” details against the dark cookie. My nephew said they looked like “chocolate zombie fingers.”
Spice It Up: Add 1/2 teaspoon of cinnamon and a pinch of nutmeg to the dough for a fall-spiced version. This pairs beautifully with the almond flavor and makes the cookies smell amazing while baking.
Different Nail Colors: Instead of almonds, try using pistachios for green nails or peanuts for a more rustic look. You can also leave the almonds unpeeled for a more textured appearance. I’ve seen people use candy corn for a super sweet version, but I think it’s too much sugar.
Extra Creepy: For a truly disturbing effect, add a few drops of red food coloring to a small amount of corn syrup and paint it around the “cut” ends of the fingers. It looks like fresh blood and always gets a reaction.
Serving & Storage Suggestions
These cookies are best served at room temperature, and they’re perfect for Halloween parties, trunk-or-treat events, or spooky movie nights. Here’s how to serve and store them:
Serving: Arrange the cookies on a platter in a way that looks like a hand reaching out of the ground. I like to pile them up with the “fingertips” pointing in different directions. For extra effect, serve them on a black or dark purple platter. If you’re feeling really ambitious, arrange them around a bowl of red punch for a truly gruesome display.
Pairing Suggestions: These cookies pair beautifully with a creamy black velvet Halloween latte for a spooky afternoon treat. They’re also great alongside a glass of cold milk or a warm mug of apple cider. For a full Halloween dessert spread, serve them with Halloween Oreo spider web cheesecake bars for a killer combination.
Storage: Store the cookies in an airtight container at room temperature for up to 5 days. Layer them between sheets of parchment paper to prevent them from sticking together. Do not refrigerate them — the moisture will make them soft and ruin the texture.
Freezing: You can freeze the unbaked shaped cookies for up to 3 months. Place them on a baking sheet in the freezer until solid, then transfer to a freezer bag. When you’re ready to bake, add 2-3 minutes to the baking time. You can also freeze the baked cookies for up to 2 months — just thaw at room temperature before serving.
Reheating: If you want to restore some of the crispness, pop the cookies in a 300°F oven for 3-5 minutes. Let them cool completely before serving. The almond nails might get a little darker, but they’ll still taste great.
Flavor Development: These cookies actually taste better the next day. The flavors have time to meld together, and the texture becomes perfectly balanced. So if you’re making them for a party, bake them a day ahead — your future self will thank you.
Nutritional Information & Benefits
Let’s be real — these are cookies, not health food. But here’s the nutritional breakdown for one cookie (assuming you get about 24 cookies from the batch):
- Calories: Approximately 150-170 per cookie
- Fat: 8-10g (mostly from butter and almonds)
- Carbohydrates: 18-20g
- Protein: 2-3g
- Sugar: 8-10g
- Fiber: 0.5-1g
Health Benefits (such as they are): The almonds in these cookies provide healthy monounsaturated fats, vitamin E, and a small amount of protein. Almonds are also a good source of magnesium, which is important for muscle function and sleep quality. So while these aren’t exactly a health food, they’re not the worst thing you could eat either.
Dietary Considerations: These cookies contain gluten, dairy, eggs, and nuts (almonds). For a gluten-free version, see the variations section above. For a dairy-free version, use vegan butter. For an egg-free version, use a flax egg. The almond nails can be replaced with other nuts or omitted entirely for a nut-free version.
My Wellness Perspective: I believe in balance. These cookies are a treat, meant to be enjoyed in moderation as part of a Halloween celebration. I make them once a year, and I don’t stress about the nutritional content. Life is too short to worry about the calories in a cookie that looks like a witch’s finger. Enjoy the moment, share them with people you love, and move on.
Conclusion
These witch finger cookies have become more than just a Halloween recipe for me — they’re a tradition. Every year, I look forward to making them, even the messy parts. There’s something deeply satisfying about creating something that looks so creepy but tastes so good. It’s like a magic trick you can eat.
I hope you give these a try, whether it’s for a Halloween party, a school event, or just for fun with your kids. Don’t be afraid to make them your own — add more red food coloring, experiment with different nail shapes, or try the chocolate version. The best recipes are the ones that evolve with the cook.
If you make these, I’d love to hear how they turned out. Drop a comment below and let me know if your family screamed (in a good way) or laughed at the results. And if you have any tips or variations I haven’t tried, please share them — I’m always looking to improve this recipe. Happy Halloween, and happy baking!
Frequently Asked Questions
Can I make these cookies ahead of time?
Absolutely! You can make the dough up to 3 days in advance and keep it refrigerated. You can also freeze the shaped unbaked cookies for up to 3 months. Just bake them straight from frozen, adding a few extra minutes to the baking time.
Why did my cookies spread too much?
This usually happens when the dough isn’t chilled enough. Make sure you chill the dough for at least 30 minutes before shaping, and work with small portions at a time. If your kitchen is warm, pop the shaped cookies in the fridge for 10 minutes before baking.
Can I use almond extract instead of vanilla?
I actually use both! The vanilla adds warmth and depth, while the almond extract gives that bakery-quality flavor. If you only have almond extract, you can use 1 1/2 teaspoons of it and skip the vanilla. But I really recommend using both for the best flavor.
How do I make the “blood” look more realistic?
Mix a drop of red food coloring gel with a tiny bit of corn syrup to create a thicker, glossier “blood.” Paint it around the nail beds and knuckle lines after baking. It gives a much more realistic, gory effect than just using food coloring alone.
Can I use different nuts for the nails?
Yes! Pistachios give a green nail effect, peanuts work well for a more rustic look, and pecan halves can create a wider, more dramatic nail shape. Just make sure whatever nut you use is raw or dry-roasted — salted nuts will affect the flavor of the cookies.
Pin This Recipe!
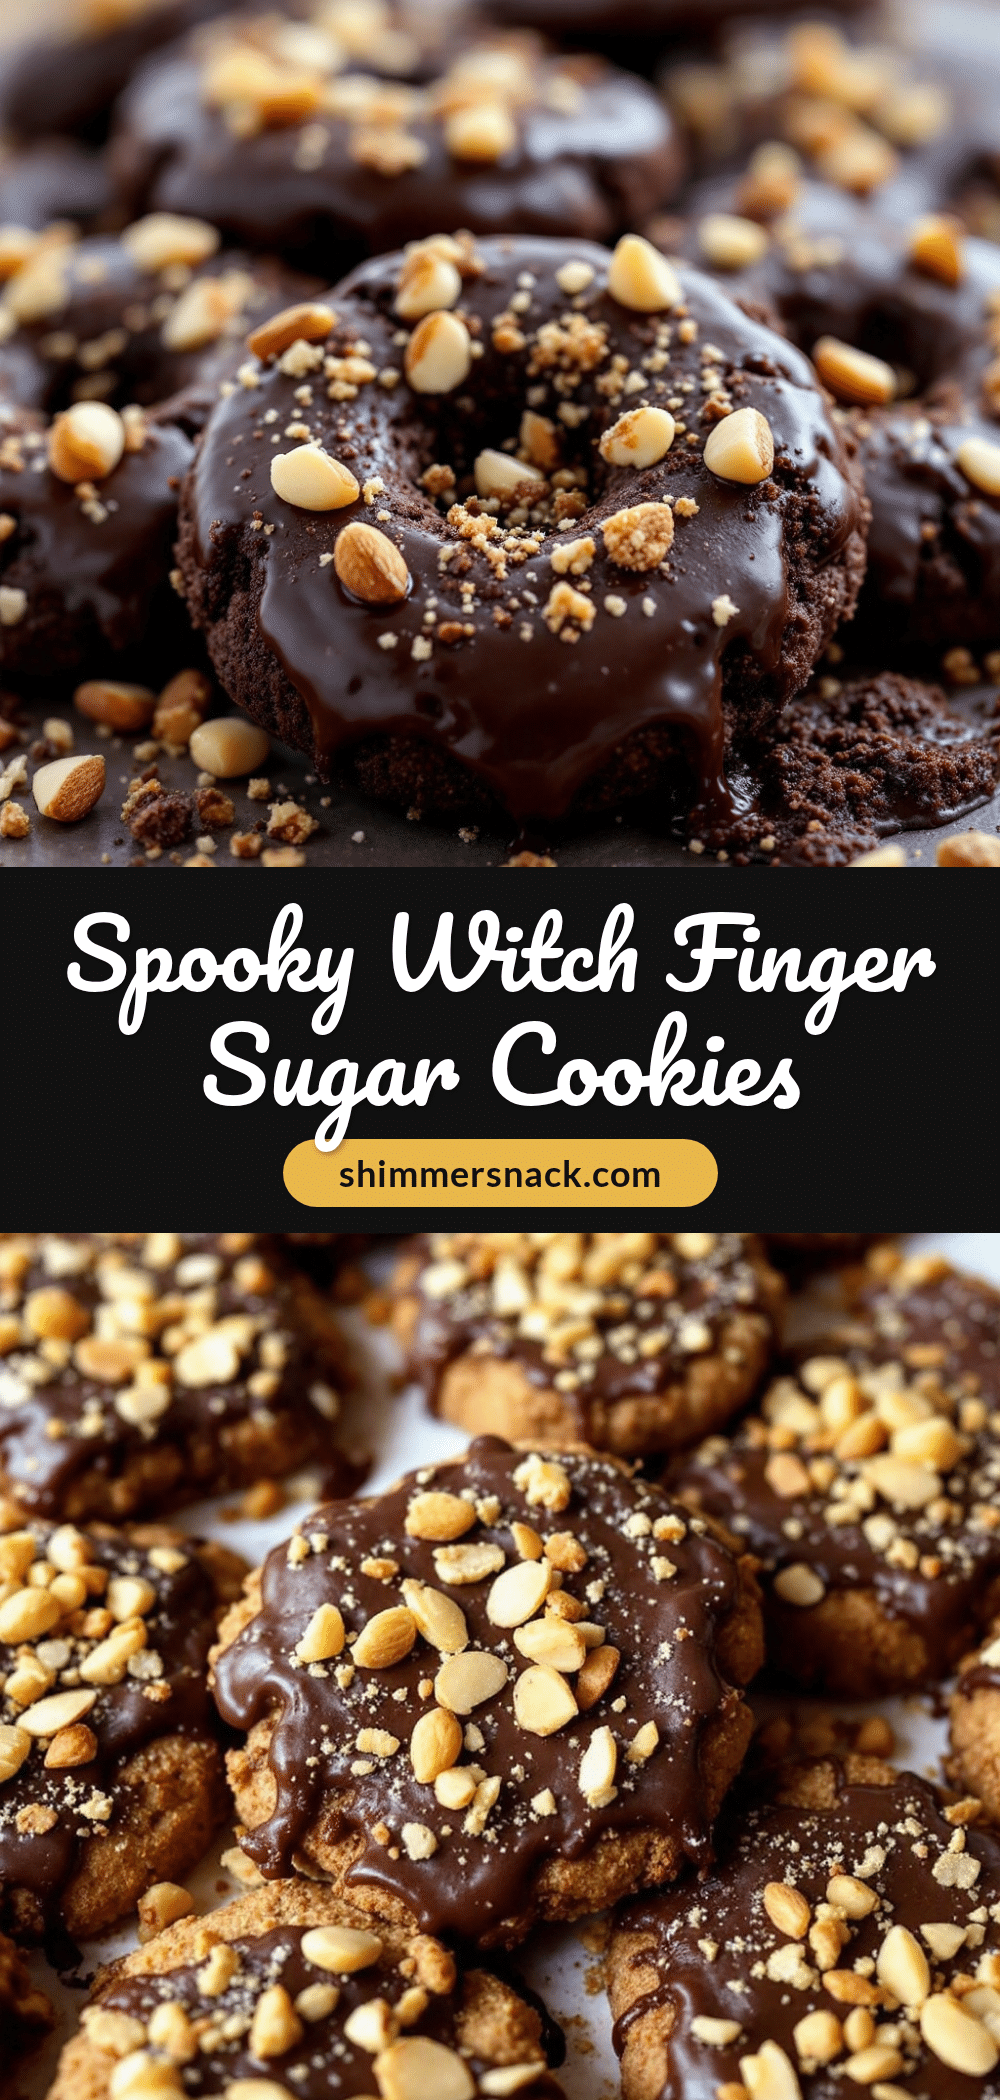
40 Easy Witch Finger Cookies – Perfect for Halloween
These spooky witch finger sugar cookies with almond nails are the perfect Halloween treat. They’re creepy enough to impress, but taste like a classic sugar cookie—buttery, slightly crisp on the edges, soft in the middle.
- Prep Time: 15 minutes
- Cook Time: 12 minutes
- Total Time: 45 minutes
- Yield: 24 servings 1x
- Category: Dessert
- Cuisine: American
Ingredients
- 1 cup (2 sticks) unsalted butter, softened to room temperature
- 1 cup granulated sugar
- 1 large egg, room temperature
- 1 teaspoon pure vanilla extract
- 1/2 teaspoon almond extract
- 2 1/2 cups all-purpose flour
- 1/2 teaspoon baking powder
- 1/4 teaspoon salt
- 1/2 cup whole blanched almonds
- Red food coloring gel
- Green food coloring gel (optional)
Instructions
- Cream the butter and sugar. In a large mixing bowl, beat the softened butter and granulated sugar together until light and fluffy — about 2-3 minutes with a hand mixer on medium speed.
- Add the wet ingredients. Beat in the egg, vanilla extract, and almond extract until fully combined.
- Mix the dry ingredients separately. In a medium bowl, whisk together the flour, baking powder, and salt.
- Combine wet and dry. Gradually add the dry ingredients to the wet mixture, mixing on low speed until just combined.
- Add the food coloring. If using green food coloring, add a small dab now and mix until uniform color is achieved.
- Chill the dough. Wrap the dough in plastic wrap and refrigerate for at least 30 minutes.
- Preheat the oven to 350°F (175°C) and line baking sheets with parchment paper.
- Shape the fingers. Take about a tablespoon of dough, roll into a log 3-4 inches long, with one end thicker and the other tapered. Place on prepared baking sheet, spacing 2 inches apart.
- Create the knuckles. Using a small paring knife, gently press 2-3 lines into each finger to create knuckle marks.
- Press in the almond nails. Press a whole blanched almond firmly into the tapered end of each finger at an angle.
- Add the ‘blood’ details. Using a toothpick or small brush, dab red food coloring gel around the base of the almond nail and along the knuckle lines.
- Bake for 10-12 minutes, until edges are just barely golden brown.
- Cool completely. Let cookies cool on baking sheet for 5 minutes, then transfer to a wire rack to cool completely.
Notes
Don’t skip the chilling step—it prevents spreading. If almond nails fall off during baking, gently press them back into place while cookies are still warm. For best results, use gel food coloring, not liquid. Cookies taste even better the next day.
Nutrition
- Serving Size: 1 cookie
- Calories: 160
- Sugar: 9
- Sodium: 55
- Fat: 9
- Saturated Fat: 5
- Carbohydrates: 19
- Fiber: 0.5
- Protein: 2.5
Keywords: witch finger cookies, Halloween cookies, sugar cookies, almond cookies, spooky treats, Halloween dessert


