Love this? Save it for later!
Share the inspiration with your friends
It was 1:15 AM on a Wednesday, and honestly, all I could think about was something rich, creamy, and chocolatey. I didn’t have the patience or the energy to fire up the oven, and my fridge was a bit of a sad scene. But then, I spotted a pack of Oreos tucked behind some leftovers, and an idea sparked. I grabbed a mixing bowl, half a tub of cream cheese left over from the weekend, and somehow, in the quiet hum of my kitchen, this creamy no-bake Oreo cheesecake delight was born.
You know that feeling when you’re craving dessert but don’t want to deal with the fuss? This recipe is exactly that kind of magic. I didn’t expect it to turn out so smooth and luscious, honestly — it was supposed to be a quick fix to a midnight craving. But that first bite? Oh, the perfect balance of sweet cream cheese and crunchy Oreo crumbs, all wrapped up in a silky, no-bake cheesecake that’s as easy as it is irresistible.
I remember almost dropping the bowl (classic me) and thinking, “Well, this might be a total mess or a total win.” Thankfully, it was the latter. Maybe you’ve been there — that scramble for something sweet, the kitchen half-lit, and the clock ticking too fast. This cheesecake stayed with me because it’s simple, fuss-free, and seriously crowd-pleasing. It’s the kind of dessert that feels fancy but is surprisingly chill to whip up whenever the mood strikes.
Why You’ll Love This Recipe
Having made this creamy no-bake Oreo cheesecake delight more times than I can count, I can confidently say it’s a keeper. Whether you’re a busy parent, a college student, or just someone who loves a quick dessert win, this recipe ticks so many boxes:
- Quick & Easy: Comes together in under 20 minutes, no oven needed — perfect for those spontaneous sweet tooth moments.
- Simple Ingredients: Uses common pantry staples and that classic Oreo crunch everyone loves.
- Perfect for Any Occasion: From casual family dinners to potlucks, this cheesecake always impresses without stress.
- Crowd-Pleaser: Kids, adults, picky eaters — they all ask for seconds (and sometimes thirds!).
- Unbelievably Delicious: The creamy texture combined with crunchy bits is next-level comfort food.
What sets this recipe apart? Well, I blend the cream cheese until it’s ultra-smooth before folding in whipped cream — that extra step makes it silky without heaviness. Also, the crust is a simple Oreo crumb base pressed firmly, no baking required, which saves so much time and effort. This isn’t just another cheesecake; it’s a fuss-free, delicious treat that feels like a celebration every single time.
Honestly, it’s that kind of dessert that makes you close your eyes after the first bite and think, “Yep, this is worth it.” It’s comforting, indulgent, and somehow light enough to enjoy any day of the week.
What Ingredients You Will Need
This creamy no-bake Oreo cheesecake delight uses simple, wholesome ingredients that work together to create that perfect balance of creamy and crunchy without the fuss. Most of these are pantry staples, and you can tweak a few depending on what you have on hand.
- Oreo Cookies: About 24 cookies, crushed into crumbs (reserve a few for garnish) — the star of the show for crust and topping.
- Unsalted Butter: 6 tablespoons (85g), melted — binds the crust together nicely.
- Cream Cheese: 16 ounces (450g), softened to room temperature — for a smooth, velvety filling. I prefer Philadelphia brand for consistent creaminess.
- Granulated Sugar: ¾ cup (150g) — adds sweetness, but feel free to adjust to taste.
- Vanilla Extract: 1 teaspoon — enhances the flavors with a warm, sweet note.
- Heavy Whipping Cream: 1 cup (240ml), chilled — whipped until stiff peaks form, making the filling light and airy.
- Optional: Sour Cream: ½ cup (120g) — adds a slight tang and extra creaminess, but you can skip it if you prefer.
If you’re looking to swap ingredients, almond flour can replace Oreo crumbs for a gluten-free crust, though it won’t have that iconic crunch. For a dairy-free twist, try coconut cream instead of heavy cream and a vegan cream cheese alternative — I once tried that, and it was surprisingly close, though a bit less rich.
Equipment Needed
- Mixing Bowls: At least two — one for the crust and another for the filling. I use glass or stainless steel because they’re easy to clean.
- Electric Hand Mixer or Stand Mixer: Essential for whipping cream to stiff peaks and blending the cream cheese smoothly. I’ve tried hand whisking, but honestly, it’s a workout and not as consistent.
- Food Processor or Blender: For crushing Oreo cookies finely. If you don’t have one, place cookies in a sealed bag and crush them with a rolling pin — works just fine!
- Springform Pan: 9-inch (23 cm) size is perfect for this cheesecake. If you don’t have one, a regular pie dish lined with parchment paper can work, but the springform makes serving easier.
- Spatula and Spoon: For folding and spreading the filling evenly.
For budget-friendly options, hand crushers and manual mixers do the job but expect a little extra elbow grease. Also, keeping your cream cheese at room temp is key — I usually leave it out about 30 minutes before starting, which helps everything blend smoothly.
Preparation Method
- Prepare the Crust (10 minutes): Crush 24 Oreo cookies into fine crumbs using a food processor or by placing them in a sealed bag and crushing with a rolling pin. Mix the crumbs with 6 tablespoons (85g) of melted unsalted butter until the mixture resembles wet sand. Press this mixture firmly into the bottom of a 9-inch (23 cm) springform pan. Use the bottom of a glass to compact it evenly. Place the crust in the fridge to chill while you prepare the filling.
- Whip the Cream (5 minutes): In a chilled mixing bowl, whip 1 cup (240ml) heavy whipping cream using an electric mixer until stiff peaks form. It should hold its shape when you lift the beaters. Set aside in the fridge to keep cold.
- Make the Filling (10 minutes): In a large mixing bowl, beat 16 ounces (450g) of softened cream cheese with ¾ cup (150g) granulated sugar and 1 teaspoon vanilla extract until smooth and creamy. If using, fold in ½ cup (120g) sour cream for extra tang and creaminess. The mixture should be lump-free and silky.
- Combine Whipped Cream and Cream Cheese (5 minutes): Gently fold the whipped cream into the cream cheese mixture using a spatula. Fold carefully to keep the airy texture — you want a light, fluffy filling, not a dense one.
- Add Oreo Chunks (2 minutes): Chop 6 Oreo cookies roughly and fold them into the filling. This adds that delightful crunch and bursts of chocolate in every bite.
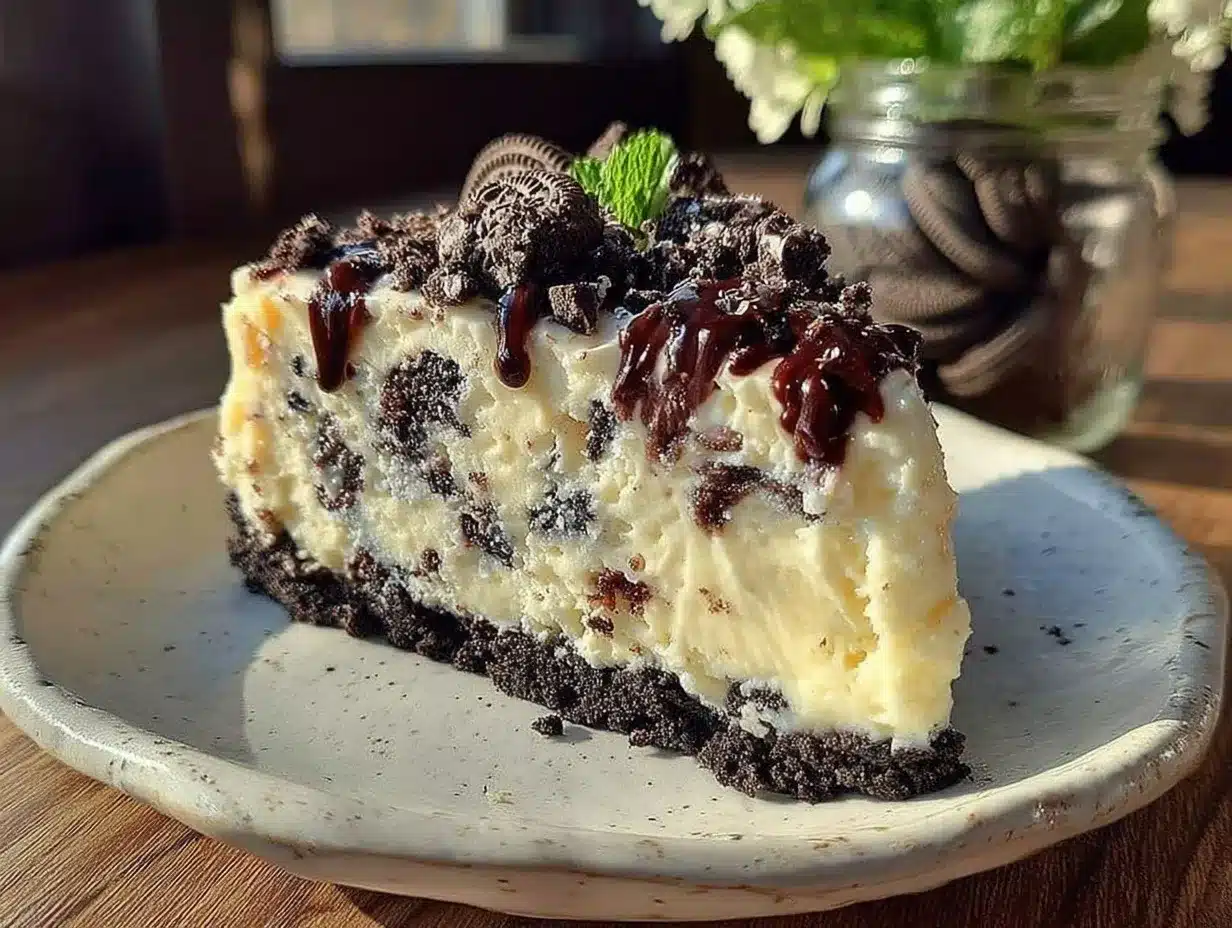
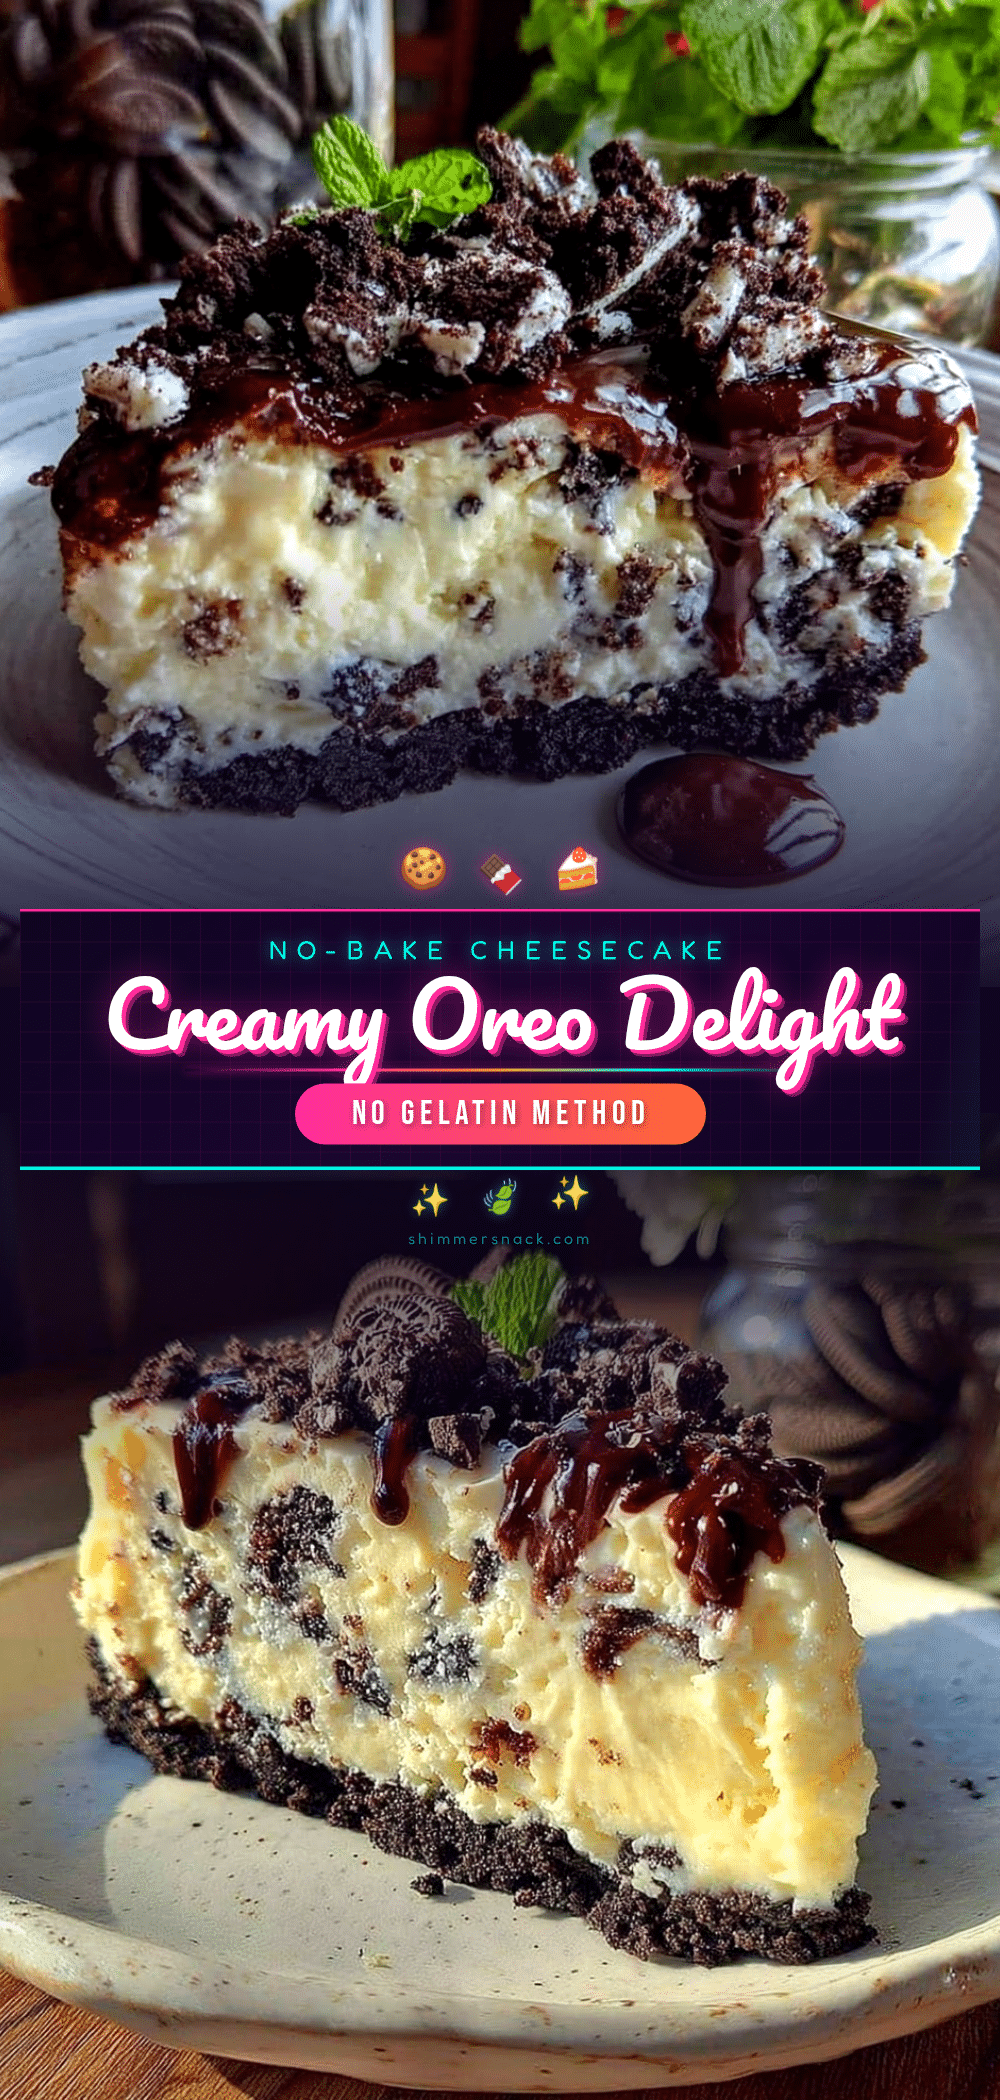
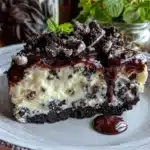
- Assemble and Chill (at least 4 hours): Pour the filling over the chilled crust, smoothing the top with a spatula. Garnish with reserved Oreo crumbs or whole cookies on top for presentation. Cover with plastic wrap and refrigerate for a minimum of 4 hours, or overnight for best results. The longer it chills, the firmer and more flavorful it becomes.
Tip: If you notice the filling separating or looking watery at any point, it’s usually because the cream cheese wasn’t fully softened or the whipped cream wasn’t stiff enough. Let the cream cheese sit out longer next time, and make sure the cream holds stiff peaks before folding.
Cooking Tips & Techniques
Getting this creamy no-bake Oreo cheesecake delight just right is mostly about technique rather than complicated steps. Here’s what I’ve learned from making it countless times:
- Room Temperature Ingredients: Always have your cream cheese and sour cream at room temp. Cold cream cheese leads to lumps and a less smooth filling.
- Whip Cream Properly: Don’t over-whip or under-whip your cream. Under-whipped cream won’t hold the filling together, and over-whipped cream can turn grainy or curdled. Stop whipping as soon as stiff peaks form.
- Folding Technique: Fold the whipped cream into the cream cheese mixture gently. Using a spatula, cut down through the center, scoop under, and fold over. Repeat until combined. This keeps the texture light and airy.
- Press Crust Firmly: Don’t skimp on compacting the Oreo crumb crust. A firmly pressed crust holds up better against the creamy filling and prevents crumbling when you slice.
- Chill Time is Key: Patience pays here. The cheesecake needs several hours to set properly. Overnight chilling is even better for flavor melding and a firmer texture.
One time, I forgot to chill the crust before adding the filling and the layers mixed a bit — lesson learned! Also, if you’re in a hurry, you can freeze the cheesecake for 1-2 hours to speed up setting, but thaw it slightly before serving to keep the creamy texture.
Variations & Adaptations
This creamy no-bake Oreo cheesecake delight is pretty flexible, and you can tweak it to suit your taste, dietary needs, or what’s in your pantry:
- Gluten-Free Version: Use gluten-free chocolate sandwich cookies instead of Oreos. Make sure your butter is also gluten-free.
- Chocolate Lover’s Twist: Add ½ cup (90g) mini chocolate chips into the filling or swirl in some melted dark chocolate before chilling.
- Fruit Boost: Mix in fresh raspberries or strawberries with the filling for a fruity contrast. In summer, this is especially refreshing!
- Dairy-Free Option: Substitute cream cheese with a vegan alternative and use coconut cream whipped until stiff instead of heavy cream. It changes the flavor slightly but still creamy and delightful.
- Crunchy Nut Addition: For a nutty crunch, sprinkle chopped toasted pecans or almonds on top before serving.
Personally, I once swapped half the Oreos for peanut butter sandwich cookies and it was an unexpected hit — a fun variation if you want to surprise your guests!
Serving & Storage Suggestions
This cheesecake is best served chilled, right out of the fridge. The creamy texture and crunchy Oreo bits are most delightful when cold but not frozen solid. Slice with a sharp knife dipped in warm water to get clean cuts — trust me, it makes a difference!
Pair it with a cup of strong coffee or a cold glass of milk for that classic dessert combo. It’s also fantastic alongside fresh berries or a drizzle of chocolate or caramel sauce for extra indulgence.
Store leftovers in an airtight container in the refrigerator for up to 4 days. The flavors actually meld and improve after a day, so it’s perfect for making ahead. You can also freeze slices wrapped tightly in plastic wrap and foil for up to 2 months. Thaw in the fridge overnight before serving.
Over time, the crust may soften a bit, but the cheesecake will remain creamy and just as satisfying.
Nutritional Information & Benefits
This creamy no-bake Oreo cheesecake delight is a treat to enjoy in moderation. Here’s an approximate nutritional snapshot per serving (based on 12 servings):
| Calories | 320 |
|---|---|
| Fat | 22g |
| Carbohydrates | 30g |
| Protein | 4g |
| Sugar | 22g |
The cream cheese provides calcium and some protein, while the Oreos offer a bit of iron. Using real cream cheese and heavy cream adds richness but also saturated fat, so balance this dessert with lighter meals. For a slightly healthier spin, you can reduce sugar or use low-fat cream cheese, though it may affect texture.
From a wellness perspective, sharing a homemade dessert like this often brings joy and connection — and that’s just as important as any nutrient!
Conclusion
This creamy no-bake Oreo cheesecake delight is proof that sometimes the best recipes are born out of late-night cravings and a little kitchen improvisation. It’s simple, fast, and downright delicious — a sweet treat that doesn’t demand hours or fancy ingredients. Whether you’re an Oreo fan or just looking for a fuss-free cheesecake recipe, this one’s ready to become a staple in your dessert lineup.
Feel free to make it your own — add a personal twist, swap ingredients, or top it with your favorite goodies. I love this recipe because it reminds me that great desserts don’t need to be complicated, and honestly, it’s become my go-to when I want to impress without the stress.
If you try this recipe, I’d love to hear how it turns out or what variations you came up with. Drop a comment below and share your experience — let’s keep the sweet conversation going!
Happy cheesecake making!
FAQs about Creamy No-Bake Oreo Cheesecake Delight
Can I make this cheesecake ahead of time?
Absolutely! It tastes even better after chilling overnight. Just cover it tightly and keep refrigerated until serving.
Do I have to use Oreos, or can I substitute other cookies?
You can use other sandwich cookies or gluten-free options. Just make sure they’re sturdy enough for the crust and add good flavor.
What if I don’t have a springform pan?
A regular pie dish or cake pan lined with parchment paper works fine. Just be careful when slicing and serving.
Can I freeze this cheesecake?
Yes, wrap slices tightly and freeze for up to 2 months. Thaw in the fridge overnight before enjoying.
Is there a way to make this recipe lower in sugar?
You can reduce the sugar to ½ cup or use a sugar substitute, but it might change the texture slightly. Adjust to your taste preferences.
Pin This Recipe!
Creamy No-Bake Oreo Cheesecake Delight
A quick and easy no-bake Oreo cheesecake with a creamy, luscious filling and crunchy Oreo crust, perfect for any occasion and crowd-pleasing.
- Prep Time: 20 minutes
- Cook Time: 0 minutes
- Total Time: 4 hours 20 minutes
- Yield: 12 servings 1x
- Category: Dessert
- Cuisine: American
Ingredients
- 24 Oreo cookies, crushed into crumbs (reserve a few for garnish)
- 6 tablespoons (85g) unsalted butter, melted
- 16 ounces (450g) cream cheese, softened to room temperature
- 3/4 cup (150g) granulated sugar
- 1 teaspoon vanilla extract
- 1 cup (240ml) heavy whipping cream, chilled
- Optional: 1/2 cup (120g) sour cream
Instructions
- Prepare the crust: Crush 24 Oreo cookies into fine crumbs using a food processor or by placing them in a sealed bag and crushing with a rolling pin.
- Mix the crumbs with 6 tablespoons (85g) of melted unsalted butter until the mixture resembles wet sand.
- Press this mixture firmly into the bottom of a 9-inch (23 cm) springform pan. Use the bottom of a glass to compact it evenly.
- Place the crust in the fridge to chill while you prepare the filling.
- Whip the cream: In a chilled mixing bowl, whip 1 cup (240ml) heavy whipping cream using an electric mixer until stiff peaks form. Set aside in the fridge to keep cold.
- Make the filling: In a large mixing bowl, beat 16 ounces (450g) of softened cream cheese with 3/4 cup (150g) granulated sugar and 1 teaspoon vanilla extract until smooth and creamy.
- If using, fold in 1/2 cup (120g) sour cream for extra tang and creaminess.
- Gently fold the whipped cream into the cream cheese mixture using a spatula, keeping the texture light and airy.
- Chop 6 Oreo cookies roughly and fold them into the filling.
- Pour the filling over the chilled crust, smoothing the top with a spatula.
- Garnish with reserved Oreo crumbs or whole cookies on top.
- Cover with plastic wrap and refrigerate for a minimum of 4 hours or overnight for best results.
Notes
Use room temperature cream cheese for a smooth filling. Whip cream to stiff peaks but do not overwhip. Press crust firmly to prevent crumbling. Chill cheesecake at least 4 hours or overnight for best texture. For gluten-free, substitute Oreo cookies with gluten-free sandwich cookies. For dairy-free, use vegan cream cheese and coconut cream.
Nutrition
- Serving Size: 1 slice (1/12th of c
- Calories: 320
- Sugar: 22
- Fat: 22
- Carbohydrates: 30
- Protein: 4
Keywords: no-bake cheesecake, Oreo cheesecake, easy dessert, quick dessert, creamy cheesecake, Oreo dessert, no oven dessert