Love this? Save it for later!
Share the inspiration with your friends
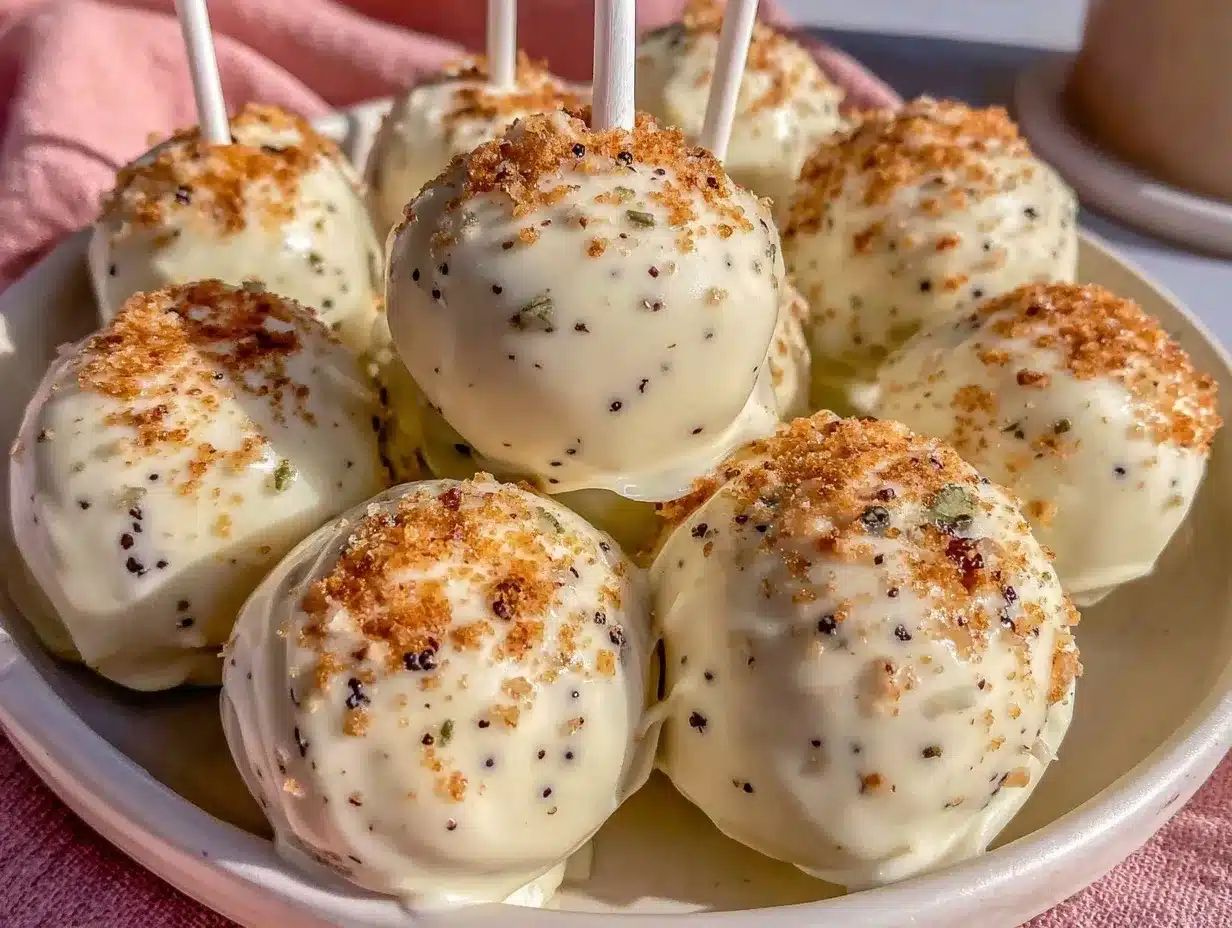
It was 10:47 PM on a random Wednesday, and the craving hit like a lightning bolt — vanilla bean cake pops, the kind you get at Starbucks. I didn’t have the fancy cake mix or that perfect vanilla bean paste everyone raves about, but I had a lonely box of vanilla cake mix and a jar of honey vanilla yogurt sitting in the fridge. Honestly, the late-night kitchen silence always seems to unlock these wild recipe experiments. So, with nothing but a half-empty bag of powdered sugar and some leftover white chocolate chips, I decided to whip up my own version of Starbucks vanilla bean cake pops for my kid’s school treat the next day.
Let me tell you — I forgot to grease my hands before rolling (classic me), and the batter stuck everywhere but the cake pop sticks. But somehow, those little imperfections made the cake pops feel homemade and special. Maybe you’ve been there, scrambling to put together a school snack that feels just a little bit fancy without requiring a pastry degree. This recipe stuck with me because it’s so forgiving and genuinely tastes like the real deal. It’s perfect when you want to impress teachers and classmates without turning your kitchen into a disaster zone.
So if you’re looking for an easy copycat Starbucks vanilla bean cake pops recipe for school treats, you’re in the right place. Let me walk you through how I turned a late-night impulse into a crowd-pleasing, bite-sized wonder.
Why You’ll Love This Recipe
After testing this recipe more times than I can count (including a few “oops” moments), I’ve nailed down why these cake pops always win hearts:
- Quick & Easy: Comes together in under 45 minutes, perfect for last-minute school treat emergencies or casual family snacks.
- Simple Ingredients: No need to hunt down specialty stores — everything’s likely already in your pantry or fridge.
- Perfect for School Treats: Bite-sized, mess-free, and easy for kids to handle during snack time or classroom parties.
- Crowd-Pleaser: I mean, even picky eaters and grown-ups can’t resist these sweet little bites.
- Unbelievably Delicious: The creamy vanilla bean flavor pairs with a moist cake texture that’s next-level comfort food.
What sets this recipe apart is the simple trick of mixing vanilla yogurt into the cake crumbs to get that melt-in-your-mouth texture — no heavy frosting needed. Plus, melting white chocolate for the coating (instead of candy melts) gives it a smooth, glossy finish that feels so indulgent. Honestly, it’s the kind of recipe that makes you close your eyes at that first bite and think, “Yep, that’s the one.”
What Ingredients You Will Need
This recipe uses straightforward, wholesome ingredients to create moist, flavorful cake pops without the fuss. Most are pantry staples, and where substitutions work, I’ll mention them.
- For the Cake Pops:
- 1 box vanilla cake mix (around 15.25 oz / 432 g) — I recommend Betty Crocker for consistent results
- 1 cup water (240 ml)
- 1/3 cup vegetable oil (80 ml)
- 3 large eggs (room temperature)
- 1/2 cup honey vanilla Greek yogurt (120 g) — adds moisture and subtle vanilla notes
- For the Coating & Decoration:
- 12 oz white chocolate chips or white chocolate bark (340 g) — Ghirardelli melts smoothly
- Sprinkles or vanilla bean seeds (optional, for garnish)
- Wax paper or parchment paper (for drying)
- 20-25 cake pop sticks or sturdy lollipop sticks
If you want a gluten-free option, swap the cake mix for a gluten-free vanilla cake mix. For dairy-free, use coconut or almond yogurt and dairy-free white chocolate. In summer, fresh vanilla beans or vanilla bean paste can boost the flavor, but vanilla yogurt does the trick year-round.
Equipment Needed
- Mixing bowls — a medium and a large one
- Electric mixer or sturdy whisk — I use a hand mixer for quick blending
- Baking pan (9×13 inches / 23×33 cm) — for baking the cake
- Cooling rack — to cool the cake evenly
- Food processor or fork — to crumble the cake finely
- Microwave-safe bowl or double boiler — for melting the white chocolate
- Cake pop sticks — you can find these online or at craft stores
- Styrofoam block or cake pop stand — for drying your cake pops upright
If you don’t have a food processor, just use your hands or a fork to crumble the cake — it takes a bit longer but works fine. For melting chocolate, a double boiler prevents scorching if you don’t trust the microwave. I’ve tried plastic sticks before, and they tend to bend; wooden sticks hold up better and feel sturdier.
Preparation Method
- Bake the Cake: Preheat your oven to 350°F (175°C). Prepare a 9×13-inch (23×33 cm) baking pan by greasing it or lining it with parchment paper. In a large bowl, combine the cake mix, water (240 ml), vegetable oil (80 ml), eggs, and honey vanilla Greek yogurt (120 g). Use an electric mixer to blend on medium speed for 2 minutes until smooth. Pour the batter into the pan and bake for 30-35 minutes. Check doneness by inserting a toothpick in the center — it should come out clean. Let the cake cool completely on a wire rack (about 1 hour).
- Crumble the Cake: Once cooled, crumble the cake into fine crumbs using a food processor or your hands. I usually let a few crumbs stay chunkier for texture — it’s a personal quirk. Transfer the crumbs to a large mixing bowl.
- Form the Cake Pop Mixture: Add about 1/2 cup (120 g) of honey vanilla Greek yogurt to the cake crumbs. Mix gently with a spoon or your hands until the mixture holds together when squeezed. If it feels too dry, add a teaspoon more yogurt at a time. Too wet? Add a few more cake crumbs. The goal is a moldable dough-like consistency.
- Shape the Cake Pops: Scoop about 2 tablespoons (30 g) of the mixture and roll into balls, roughly 1-inch (2.5 cm) in diameter. Place on a baking sheet lined with parchment paper. Refrigerate the cake balls for at least 30 minutes to firm up — this step helps with dipping later.
- Prepare the Coating: Melt the white chocolate chips gently in a microwave-safe bowl in 30-second bursts, stirring every time, or use a double boiler. The chocolate should be smooth and slightly runny but not hot — cool for a few minutes before dipping.
- Assemble the Cake Pops: Dip the tip of each cake pop stick into the melted white chocolate, then insert it halfway into a cake ball. This “glue” helps secure the stick. Dip the entire cake pop into the melted chocolate, allowing excess to drip off. Place the dipped pop upright in a Styrofoam block or cake pop stand to dry. Sprinkle with vanilla bean seeds or sprinkles while the chocolate is still wet if desired.
- Let Them Set: Allow the cake pops to set completely at room temperature or refrigerate for 10-15 minutes. Store in an airtight container in the refrigerator until ready to serve (up to 3 days).
Pro tip: If the chocolate thickens while dipping, gently reheat it in short bursts. Also, a quick dip in warm water can help smooth out rough edges after coating.
Cooking Tips & Techniques
Making cake pops can seem tricky, but these tips helped me avoid common pitfalls:
- Use room temperature ingredients: Eggs and yogurt blend better and keep the cake moist.
- Don’t overmix the cake batter: It keeps the crumb tender instead of dense.
- Chill the cake balls: This step is crucial. Without chilling, the cake balls can fall apart or crumble when dipped.
- Use good quality white chocolate: Candy melts are convenient but often too thick; white chocolate chips give a smoother finish.
- Dip with care: Hold the cake pop close to the bowl’s edge to swirl the chocolate evenly and avoid breaks.
- Keep the chocolate warm: Reheat gently to maintain a fluid consistency for easier coating.
I learned the hard way not to skip chilling after trying to dip warm cake balls — they just didn’t hold up. Also, patience is key. Letting the cake pops set upright prevents smudges and keeps the coating shiny. Multitasking while baking, like prepping sticks and parchment paper ahead, saves last-minute panic.
Variations & Adaptations
You can easily customize these cake pops to suit different tastes or dietary needs:
- Chocolate Lover’s Version: Swap vanilla cake mix for chocolate and use semi-sweet chocolate for coating.
- Vegan Adaptation: Use vegan cake mix, substitute eggs with flax eggs (1 tablespoon ground flaxseed + 3 tablespoons water per egg), and dairy-free yogurt and chocolate.
- Seasonal Twist: Add a teaspoon of pumpkin spice or cinnamon to the batter in fall, or fold in finely chopped fresh strawberries in summer.
- Nut-Free Option: Make sure to use nut-free cake mix and chocolate, and skip yogurt if sensitive — instead, use a little applesauce to bind crumbs.
- Personal Favorite: I love rolling the finished cake pops in crushed freeze-dried raspberries instead of sprinkles — adds a tart crunch that’s unexpected but amazing.
For a different cooking method, you can freeze the cake balls before dipping to reduce crumbling. If you want to skip the baking altogether, try using store-bought pound cake crumbled and mixed with cream cheese as a shortcut.
Serving & Storage Suggestions
Serve these cake pops chilled or at room temperature — both ways taste great, but I prefer room temp for that soft, melt-in-your-mouth texture. They look adorable arranged in a colorful mug or a decorated box, perfect for school parties or gifting.
Pair them with a cold glass of milk, vanilla iced coffee, or a fruity punch for a festive touch. If you’re bringing them to a potluck, transport in a cake pop stand or securely in a container lined with parchment to avoid smudging.
Store them in an airtight container in the fridge for up to 3 days. You can freeze cake pops for up to a month; just thaw in the fridge before serving. Reheat by letting them sit at room temperature for 30 minutes — avoid microwave reheating to keep the coating intact.
Interestingly, the flavors actually deepen after a day, making them taste even better the next day — if they last that long!
Nutritional Information & Benefits
These cake pops are a treat, so enjoy them in moderation, but here’s a rough idea of what you’re getting per pop (assuming 20 cake pops from the recipe):
| Nutrient | Amount per Cake Pop |
|---|---|
| Calories | 130 kcal |
| Fat | 6 g |
| Sugar | 15 g |
| Protein | 1 g |
| Carbohydrates | 18 g |
Using honey vanilla Greek yogurt adds a slight protein boost and some probiotics, making these treats just a tiny bit more wholesome than your average cake pop. For those watching gluten or dairy, swapping in alternatives keeps the recipe accessible without sacrificing taste. Just watch out for allergens like eggs and dairy in the standard version.
Conclusion
So, there you have it — an easy copycat Starbucks vanilla bean cake pops recipe that’s perfect for school treats, made with simple ingredients and zero stress. This recipe has become my go-to when I want that sweet, nostalgic treat without the Starbucks price tag or complicated ingredients. Feel free to tweak the flavors and decorations to match your kid’s favorite colors or tastes — that’s half the fun!
If you try this recipe, please drop a comment below sharing your experience or any fun variations you came up with. I love hearing how these little cake pops brighten up your snack time or classroom parties. You know, sometimes it’s the simple things — a late-night kitchen adventure and a handful of cake pops — that make the best memories.
Happy baking, and here’s to sweet moments for you and your little ones!
FAQs
Can I make these cake pops ahead of time?
Yes! You can prepare the cake balls and even dip them a day in advance. Store them in an airtight container in the refrigerator until serving.
What if I don’t have cake pop sticks?
You can use sturdy wooden skewers or even sturdy toothpicks as a substitute, though cake pop sticks provide the best support.
How do I prevent the cake pops from falling off the sticks?
Dip the stick tip in melted chocolate before inserting it into the cake ball. This acts like glue and helps secure the pop.
Can I use homemade cake instead of boxed cake mix?
Absolutely! Just make sure your homemade vanilla cake is moist and crumbly for best results.
How long do cake pops stay fresh?
They are best eaten within 3 days when stored in the fridge. You can freeze them for up to a month if wrapped well.
Pin This Recipe!
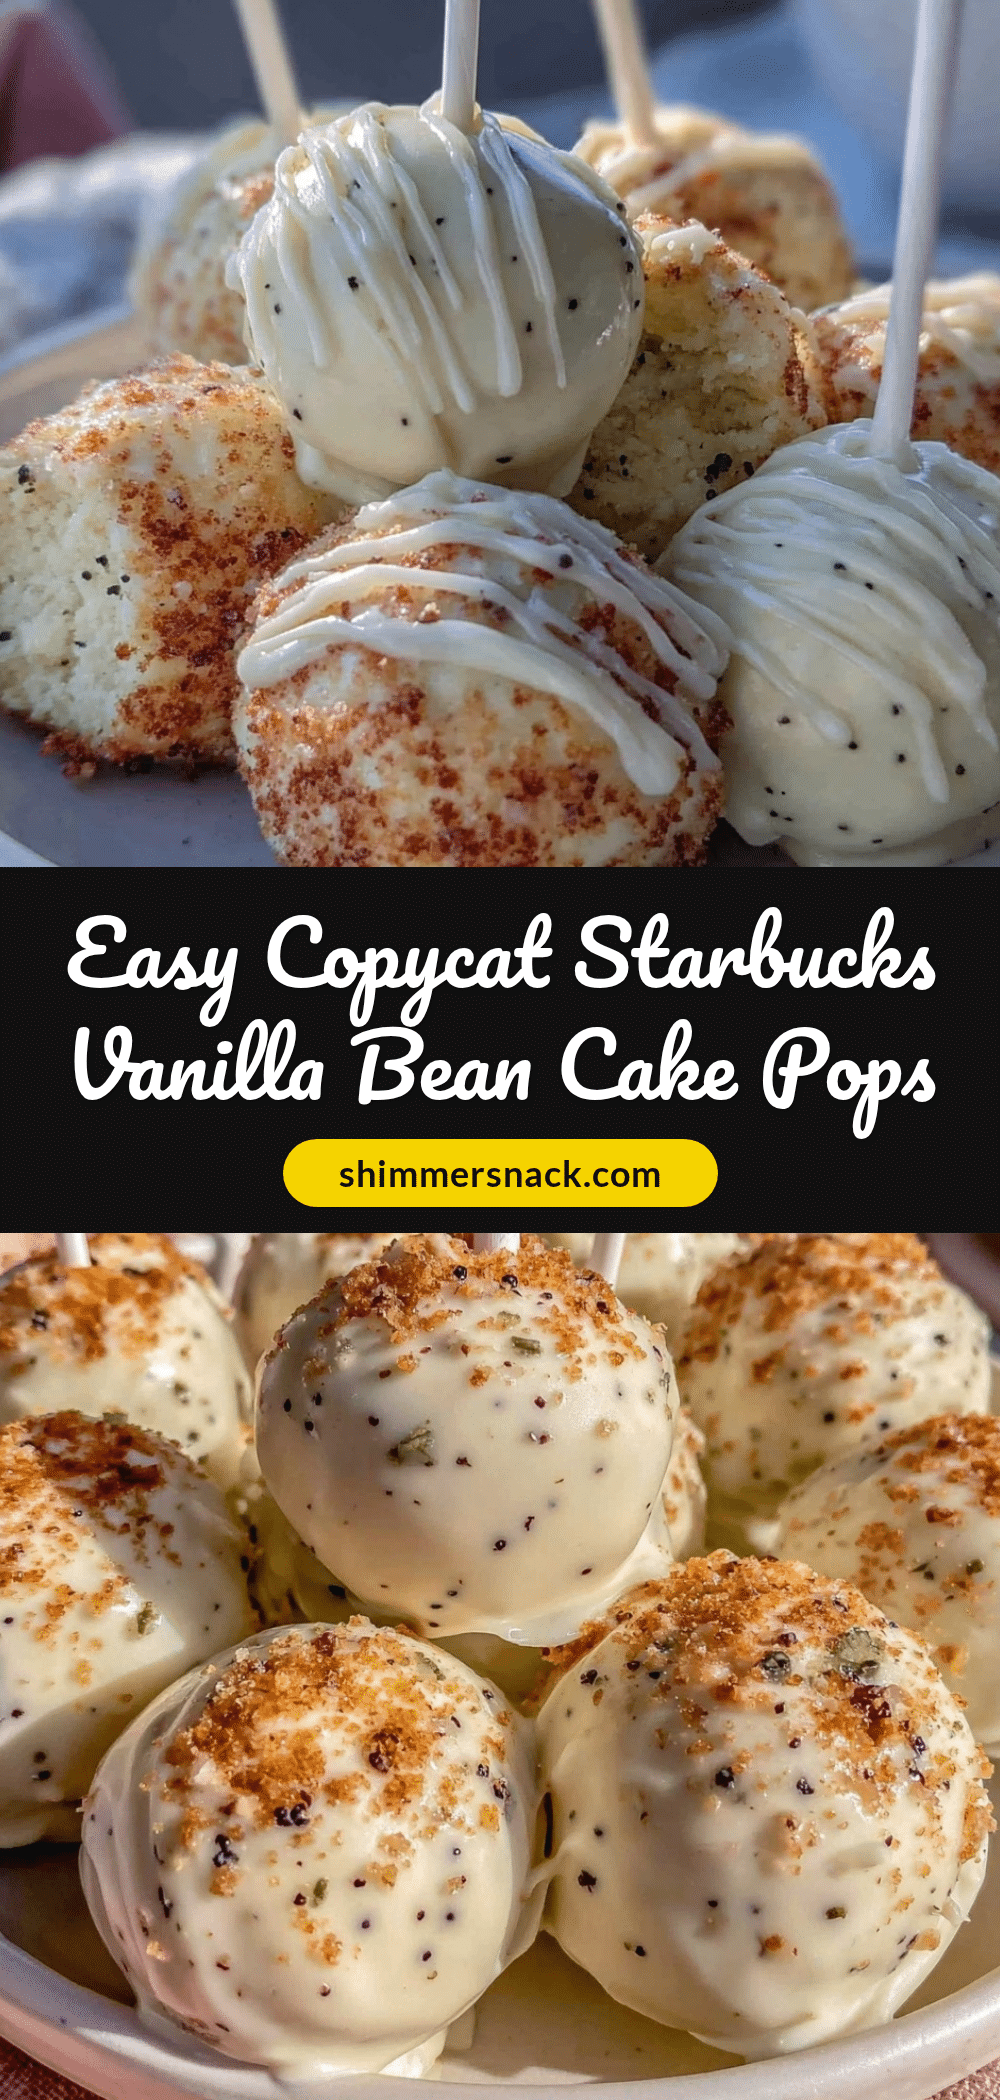
Easy Copycat Starbucks Vanilla Bean Cake Pops Recipe for Perfect School Treats

A quick and easy recipe to make moist and delicious vanilla bean cake pops that mimic Starbucks, perfect for school treats and family snacks.
- Prep Time: 15 minutes
- Cook Time: 35 minutes
- Total Time: 1 hour 50 minutes
- Yield: 20-25 cake pops 1x
- Category: Dessert
- Cuisine: American
Ingredients
- 1 box vanilla cake mix (around 15.25 oz / 432 g) – Betty Crocker recommended
- 1 cup water (240 ml)
- 1/3 cup vegetable oil (80 ml)
- 3 large eggs (room temperature)
- 1/2 cup honey vanilla Greek yogurt (120 g)
- 12 oz white chocolate chips or white chocolate bark (340 g)
- Sprinkles or vanilla bean seeds (optional, for garnish)
- Wax paper or parchment paper (for drying)
- 20–25 cake pop sticks or sturdy lollipop sticks
Instructions
- Preheat oven to 350°F (175°C). Grease or line a 9×13-inch baking pan with parchment paper.
- In a large bowl, combine cake mix, water, vegetable oil, eggs, and honey vanilla Greek yogurt. Mix on medium speed for 2 minutes until smooth.
- Pour batter into the pan and bake for 30-35 minutes. Check doneness with a toothpick; it should come out clean.
- Cool cake completely on a wire rack (about 1 hour).
- Crumble the cooled cake into fine crumbs using a food processor or hands, leaving some chunks for texture.
- Add 1/2 cup honey vanilla Greek yogurt to the crumbs and mix until the mixture holds together when squeezed. Adjust with more yogurt or crumbs as needed.
- Scoop about 2 tablespoons of mixture and roll into 1-inch balls. Place on parchment-lined baking sheet and refrigerate for at least 30 minutes.
- Melt white chocolate chips gently in microwave or double boiler until smooth and slightly runny. Cool slightly before dipping.
- Dip tip of each cake pop stick into melted chocolate, then insert halfway into a cake ball to secure.
- Dip entire cake pop into melted chocolate, letting excess drip off. Place upright in Styrofoam block or cake pop stand to dry.
- Sprinkle with vanilla bean seeds or sprinkles while chocolate is wet if desired.
- Allow cake pops to set completely at room temperature or refrigerate for 10-15 minutes.
- Store in an airtight container in the refrigerator for up to 3 days.
Notes
Use room temperature eggs and yogurt for best texture. Chill cake balls before dipping to prevent crumbling. Use good quality white chocolate for smooth coating. Reheat chocolate gently if it thickens. Wooden sticks are sturdier than plastic. Cake pops can be stored in the fridge up to 3 days or frozen up to a month.
Nutrition
- Serving Size: 1 cake pop
- Calories: 130
- Sugar: 15
- Fat: 6
- Carbohydrates: 18
- Protein: 1
Keywords: vanilla bean cake pops, Starbucks copycat, school treats, easy cake pops, white chocolate coating, vanilla yogurt cake pops